


peggyb
-
Posts
864 -
Joined
-
Last visited
-
Days Won
7
Content Type
Forums
Events
3D Prints
Posts posted by peggyb
-
-
@peggyB - I have the tab in 13.06. There are 4 tabs. You have to do "tools" "switch to full settings...".
it is not there,
thats why I am asking....
-
Since 13.05 and 13.06 I am still missing the plug-ins tab (mac)
Did I overlook something to get it back?
-
look in the 'preferences' if you selected the right name/path for the sd card.
-
or maybe this, from the laywood, bricklay family: bendlay
BendLay
- clear like Polycarbonate
- bendable and resilent
- high-impact resistant and unbreakable
- no stress whitening by bending
http://www.orbi-tech.de/shop/3D-Filamente/BendLay:::72_121.html
- clear like Polycarbonate
-
nice video!
I was wondering about the tie rips on your extruder.....
check this out: http://umforum.ultimaker.com/index.php?/topic/2169-material-feeder-not-grabbing-filament/
the black lever should slide to the bottom of the slot, than you won't need the tie rips any more
-
he,
nice to hear there is an Ultimaker in Zoetermeer!
I use the Ultimaker at the CKC to teach about 3d printing
check:
http://www.ckc-zoetermeer.nl/cursus/beeldende-kunst/3d-printen/3d-printen
http://www.ckc-zoetermeer.nl/cursus/beeldende-kunst/3d-printen/3d-printen-introductie
I guess you know your way around already :-))
but is is always nice to speak another ultimaker...
-
is it more flexible than normal pla?
it sure feels like it...

-
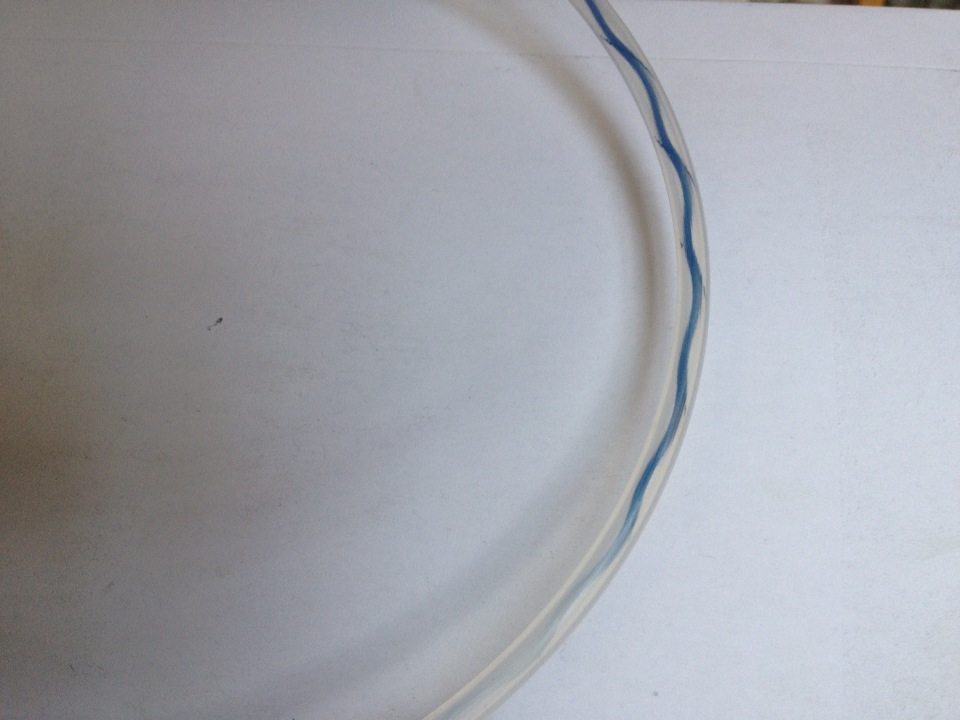
really nice material, prints smooth,
and the colors are great!
I want them all....


-
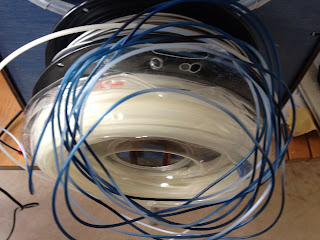
I don't have a tube that size..
and wanted to try it out anyway
first test was OK
0.2 layerheight
speed in Cura 25mm/sec, upped to 135%
temp: started with 245, the colors faded to brown
lowered to 240, the blue came out better
lowered to 236, but that part delaminated later
upped to 240 again
during printing you could see the filament curling up in the bowden, so once in a while I released the extruder closure to get the tension out.

-
i tried a little easy print .....and it works......so far.......
adjusted the filament diameter to 1.75
layer thickness: 0.1
temp. 245
slow, 25 mm/sec
the only thing I had to change was the part that pushes the filament to the bolt,
the old part (v1) had the best pressure, the new spring part did not get far enough
-
would it be possible to use the 1.75 nylon instead of the 3.0?
The 3.0 has thicker parts, up to 3.17 mm, getting stuck into the bowden.
(and of course always at the end of a project, destroying the whole thing)
I tried to run it through a 2.9 mm hole, but it just flexes back, it doesn't stretch.
when using a continuous design, like a vase or bracelet "joris style' with no retraction,
would it be possible to use 1.75 mm, so just pushing.....
would the filament drive have enough pressure to push it through?
it might flex a bit inside the bowden, but this stuff is slippery enough to slide through, I guess...
are there more settings to adjust than the filament diameter?
-
thank you,
that worked.
I slowed down the print on resume to get rid of the extra extruded pla,
and I think it was better for bonding to the layer underneath
-
hai Daid,
is it possible to use more then 1 'pause at height' in a model?
after slicing in Cura, only the first pause shows up, moving to the upper right corner,
then to return at the height of the complete model.
When printing: it moves to the upper right corner, adds a little height and pauses,
when resuming: it moves up the the complete height, spits out a lot of plastic and pauses,
resume again and it moves back to the model, again extruding a lot of plastic and continues.
The other pause is neglected....
-
maybe you can try to rotate the model 90 degrees and see if it happens on the same side or rotates along with the model.
you can determine if it is a machine/design/slice failure
-
or, is all the abs well removed before you started with pla,
if there is some left and doesn't melt at pla temp. it will block the flow...
-
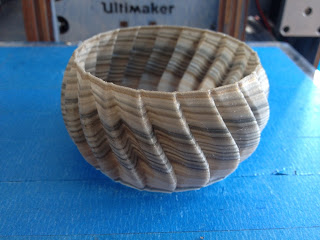
 I have a lot of the same experiences, the clogging of the nozzle, flexibility, temp.
before I start I clean the nozzle with a acupuncture needle, thin enough pierce through the lump in the opening to get the material to flow.
the material is more flexible than pla, I had to adjust the screw of the filament feeder (v1) a lot more, the failure on the photo was because it did not have the right tension. Hopefully that will be solved with extruder drive v2....
the second failure became loose from the tape..
it is very nice that the layers almost disappear, compared to the same settings with pla, see photo
-
you placed your fan inside the fan duct. The white plastic part should be underneath the fan (black part). In the instruction page it is hard to see because the fan duct is made of black plastic....
-
-
I presume oiling all the rods occasionally can't hurt - what about the bearings at each end of the rods?
Ultimaker (Erik) told me that for the new Ultimakers (2012) it is not neccesary to oil the rods, it could even get worse...
The bronze bushings don't need oiling. Just keep them dry and clean, oil could just gather dust
-
you can also separate the tube and cables to loose some weight.
-
this might be interesting to watch:
he has some nice advise on designing against warping (if your design allows that of course)
he makes big pieces of abs..
-
https://shop.grrf.de/plastik-kunststoff ... 2_100.html
this is in Germany, with lots of colors,
do you know this one?
-
Printing directly from Netfabb is still a problem.
You can slice your models and save the gcode, then print it with Pronterface/Printrun/...
-
@italinanmaxx:
it is not necessary to power the motors of, just 'force' it, the guys from Ultimaker do it also like this...
@thereza: trial and error, like you lost your material settings...
there are a lot of mistakes lying around and it is hard to know afterwards what belongs to what, and it is stupid to save settings that don't work.
All the silver is printed with duplicates of the standard style (with the standard material).
Go to the style tab and select 'manage build styles' at the bottom.
pick one from the list of build styles, and it asks you to make a duplicate (and rename it)
i didn't change anything in the first frame,
select 'region definitions' and select the normal (there is only one in the first place)
than you can select outer-inner1-filling-upskin-downskin-suppoert to make your changes in the profile
to deselect: layer type: and set it to 'disabled'
the graphic shows you what is going to happen: disable filling and the green crosshatch disappears...
I hope your nozzle is OK now?


Looking for beta testers.
in UltiMaker Cura
Posted
I noticed that the plug-in folder is not present in 13.05 and 13.06.
In 13.04 it was located in Contents --> Resources --> Cura --> resources --> plugins
Copying the one from 13.04 to the Resources folder didn't help.
Is there a right place to put it in, or does it need something extra?