


rx2mazda
-
Posts
29 -
Joined
-
Last visited
Content Type
Forums
Events
3D Prints
Posts posted by rx2mazda
-
-
Our latest print project took 92 hours! Designed by Braddock, such a cool model! It was printed on a Delta Tower, 0.2mm layer height, 16% infill and 210C, 50mm/s speed. Total weight of the print is 2kg! However the model was scaled slightly to big so the antenna isn't completely finished!
This beauty is going with us to Fabcon - Messe Erfurt 15 - 17 May.
But we've also been printing with our Ultimaker 2's a lot lately! One of the Ultimakers had some extrusion issues, but after replacing the nozzle and the teflon bit it printed really well again.
We've 3d printed our logo for the front desk of our new office, if you look closely you can still see the previous company its logo
 The letters are pretty much the maximum build size of UM2.

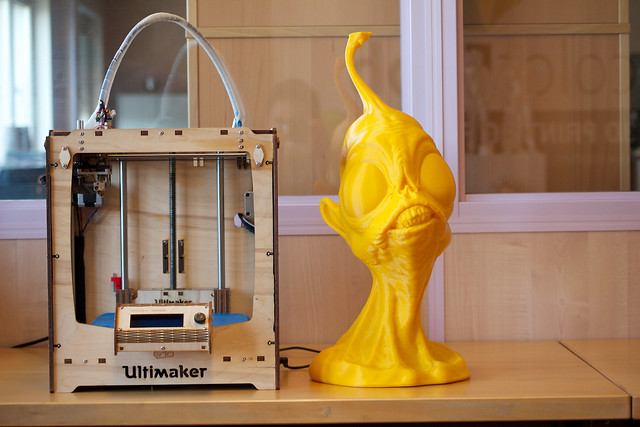
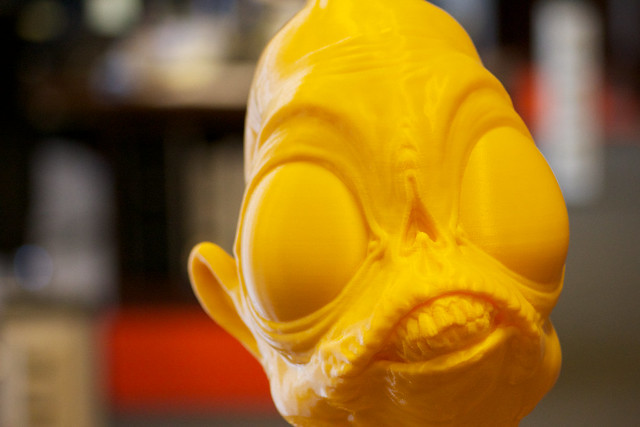
ACHFOS - designed by Ola Sundberg. Printed on the Ultimaker 2, at 0.12mm layer height, 210C, 50mm/s, 16% infill.

Printed on the Ultimaker 2, at 0.12mm layer height, 210C, 50mm/s, 20% infill.

Printed on the Ultimaker 2, at 0.12mm layer height, 210C, 50mm/s, 16% infill, with support.

Hanging from a very thin fishline looking badass in our print lab.
Stop printing so much and stock your suppliers, mainly PrintedSolid.com so I can keep my business running!

-
came downstairs to this...........
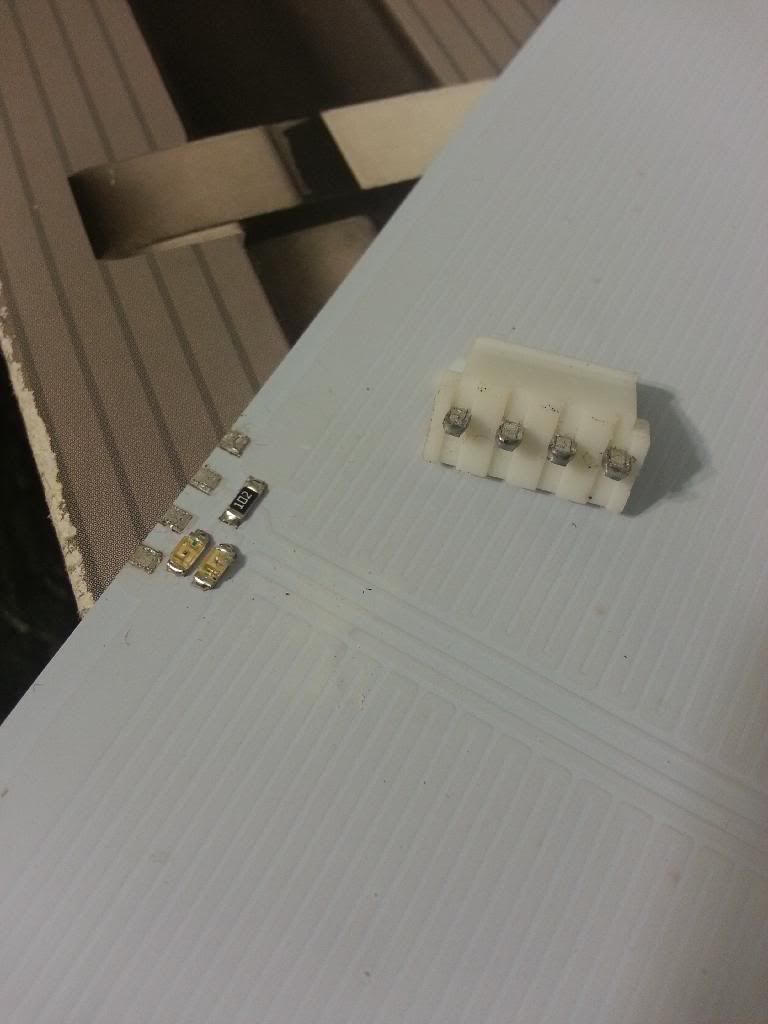
whats the best way to fix this? I'm scared of melting the plastic. Take the contacts out of the connector and solder?? Thanks.
-
+1 to the twister blocks not playing nice with gt2 belts.
I love the reptars, they are by far the easiest and work beautifully with the 303Gt2 belts. Ordered the hardware for a few dollars.
-
I too tried the Twister Blocks and then took them out. I switched to the Reptar V2 "blocks" with GT2 belts and pulleys.
-
I will have to second hreedijk, I'm very happy with my UBIS. So much in fact that I bought spares! I also printed my Mount in XT and its holding up great. I kept cracking Nick's original design when trying to push the bearings in, luckily hreedijk had the same problem and modified Nick's design a bit to make them fit better.
Here are the Molex part numbers for the UBIS connectors. They are Micro-fit 3.0...
Connectors #43645-0200 & 43640-0201
Pins #43031-0007 & 43030-0007
I got mine from Allied Electronics, their part numbers are..
Connectors #70190832 & 70190902
Pins #70190633 & 70190802
I hope that info helps someone. I have quite a few left from my order so If you need the connectors/pins just shoot me a PM. Here is a print I have going on right now....so clean
-
Funny, no more "end of life" and also $5 more expensive......
It still says "retiring". I call BS though. Either way, I'm happy with mine
-
All UBIS hotends are back in stock!
-
As for my part - I won't be buying something that has such an uncertain availability. What if I need a spare part or replacement next month?
Either they'll continue producing the 3mm versions, or not. But what they do atm is just BS...
While I totally agree with you on the BS of the current "a la Apple" practice. They do have a replacement program where you pay $10 and they replace your hotend.....https://printrbot.com/shop/10-hot-end-replacement-program/
I purchased this hotend 2 weeks ago and it is by far the best thing I did. Heats up super fast and stays at the set temp, no hunting, no questions asked, doesn't matter if a fan is on or not! The second print I did was by far the best print to come off my machine. If I didn't know what I know now, I would be with you on staying away. Now, I don't see myself going back to the stock V2 hotend unless its out of necessity.
-
Built a custom firmware http://marlinbuilder.robotfuzz.com/. Choose the Basic Ultimaker + Heated Bed(100k,Relay) + Ulticontroller
template. and loaded it through Cura to my Ultimaker.
Bed runs Bang-bang off the supplied switching relay.
I do have a IR temp reader but I didn't check the bed with it. I did check the temp on my UBIS Hotend and it was correct within a degree or two and the Bed is showing the same temp at room temperature as the UBIS so I called it good.
I bought the PSU that they sell on the eBay page. That PSU is only 24v,10A 240watt so it can't power both. In the future I'll probably switch to a power supply that has enough power for both so I can keep my minimalist taste happy. Like this one http://www.ebay.com/itm/24V-Regulated-Switching-Power-Supply-15A-360W-AC-DC-PSU-/350845354968?pt=LH_DefaultDomain_0&hash=item51b00343d8
Good luck. Let me know if I can help anymore.
gr5: edit - fixed link
-
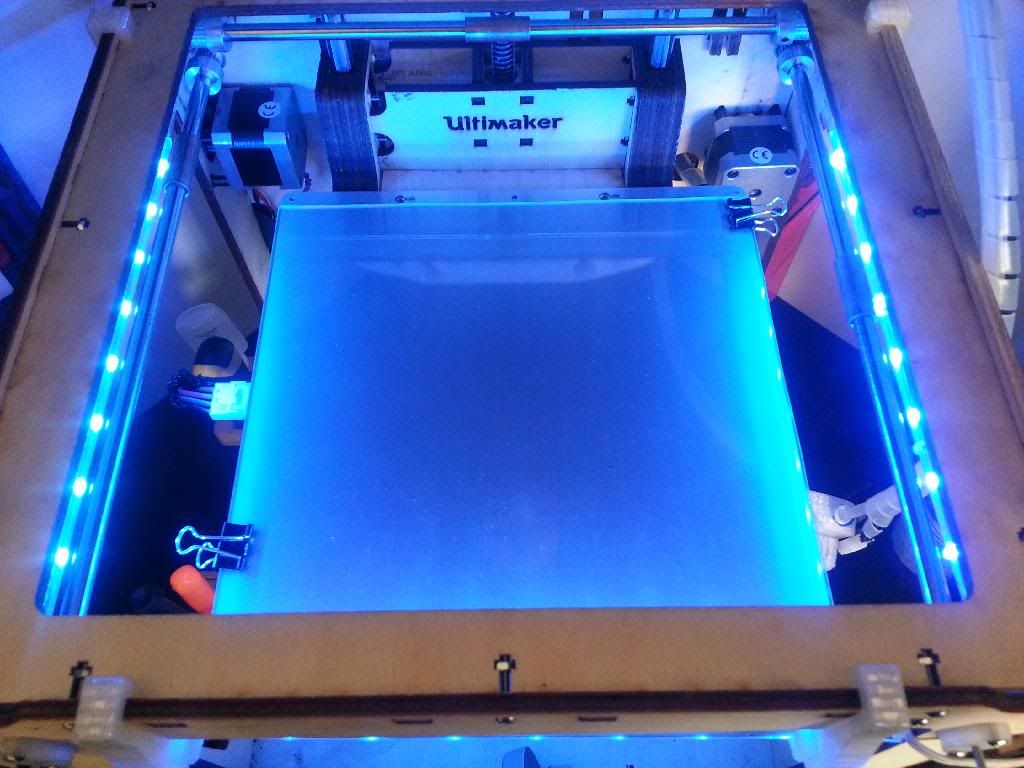
I just installed this Heated Bed Kit on my Ultimaker. I was originally planning to wait for Ultimaker to release a Heated Bed Kit but seeing this Kit and this price swayed me. Took me about 2 hours with all the soldering to the board and lengthening wires. Here are my thoughts:
1. This is the best "Heated Bed Kit" for the Ultimaker that I've seen. Mine didn't come with the 4.7k Ohm resistor for the board so it wasn't a complete kit but, the new ones include the resistor. To make this a complete kit I think that the supplied wires on the pigtail should be longer so you have enough wire to run to your power supply and relay. Even still, I'm very Happy with the purchase!
2. I had to debur the holes for the leveling screws so that the Bed would work nicely with the springs.
3. I'm using the 24V power supply that is linked on the Ebay Page. Works really good! Bed heated up to 60 in about a minute.
4. I really love how low profile this whole package is. I've seen some Heated beds that add a lot of bulk and weight to the platform. I am a minimalist when it comes to design so this Kit fits right in.
5. Shipping and packaging was fast and great.
I'll be printing on glass until my Kapton sheets get here and then I'll probably print right on the aluminum and Kapton. Here are some pics.
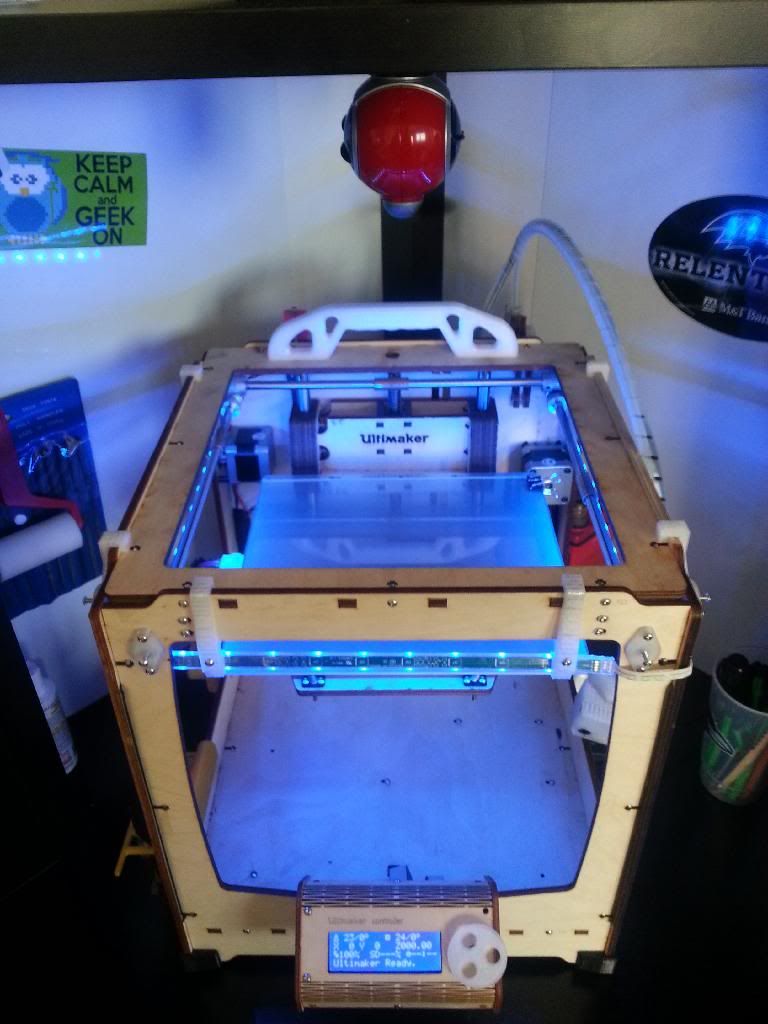
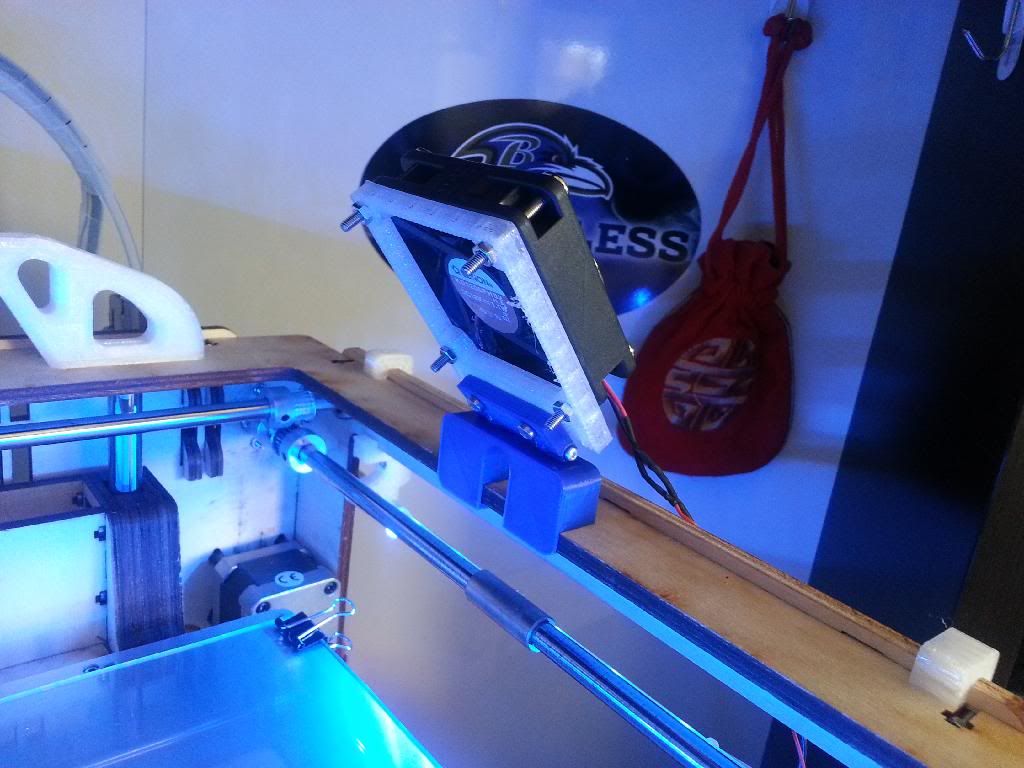
This was my attempt at a temporary fan solution. I Frankened some file together really quick in tinkercad to make this fan mount for a 60mm fan I had laying around. works great! I also have a suction cup fan that you can see above the printer in the first pic...that little thing blows strong.
-
I'm getting ready to try out my new hot end and have some wiring questions.
Will 22 gauge stranded wire be good for the heater and 24 gauge for the thermistor?
Thanks. Electrical is not my strong suit.
Best,
Chris
I used 18 for the heater and 22 for the thermistor.
-
I just ordered mine from here...
They are 8mm longer than stock bearing. I also just upgraded to the twister blocks but I'm going to switch Nick's ReptarV2 blocks instead.
-
If you change it after you've loaded the files it usually won't "take" until you move one the objects, which triggers the refresh.
-
-
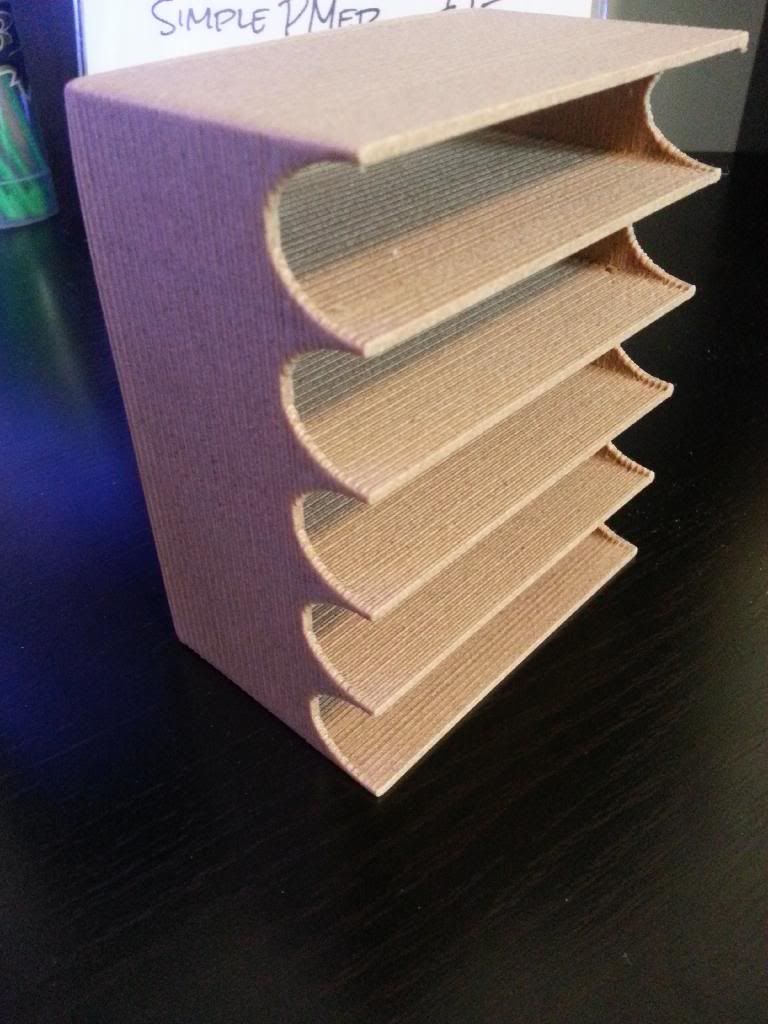
My first Woodfill Print. A Altoids tin holder finished with a little Danish Oil. I printed this on my Ultimaker Original with a .8 nozzle and chunky .5mm layers @ 50mm/s
-
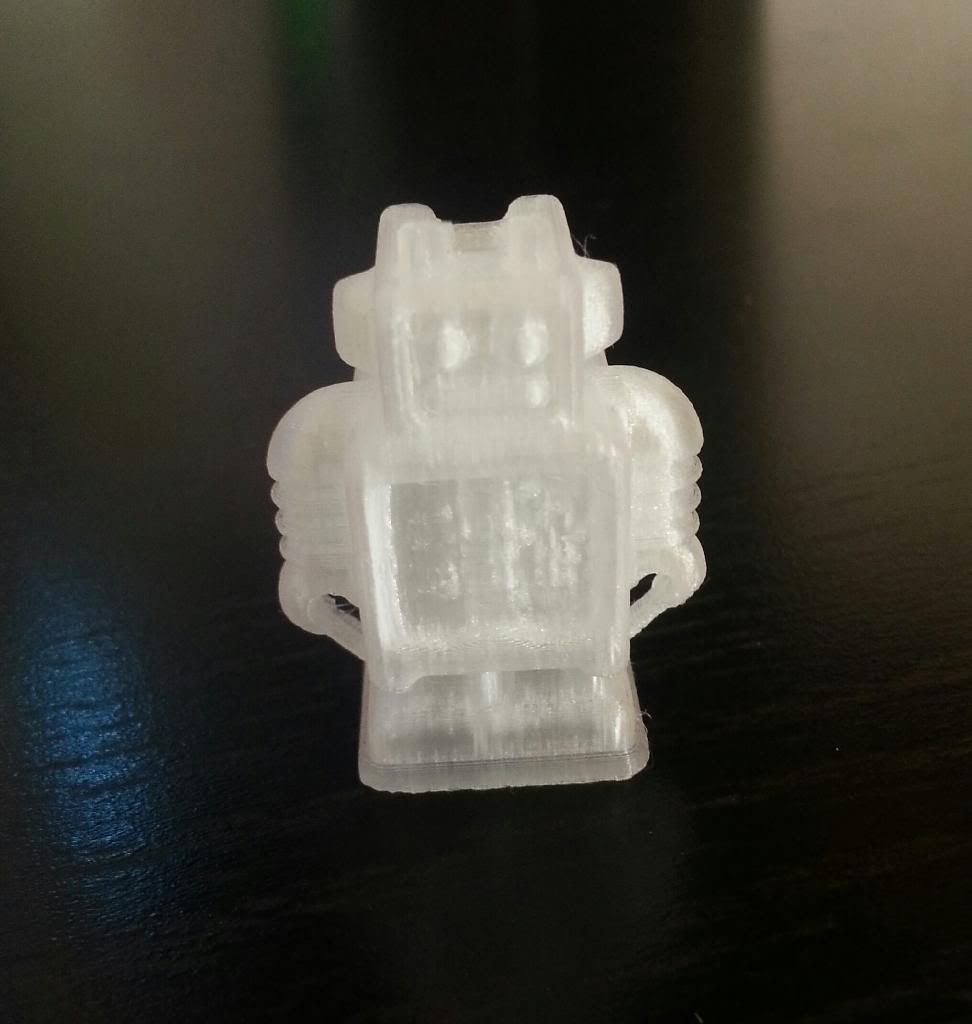
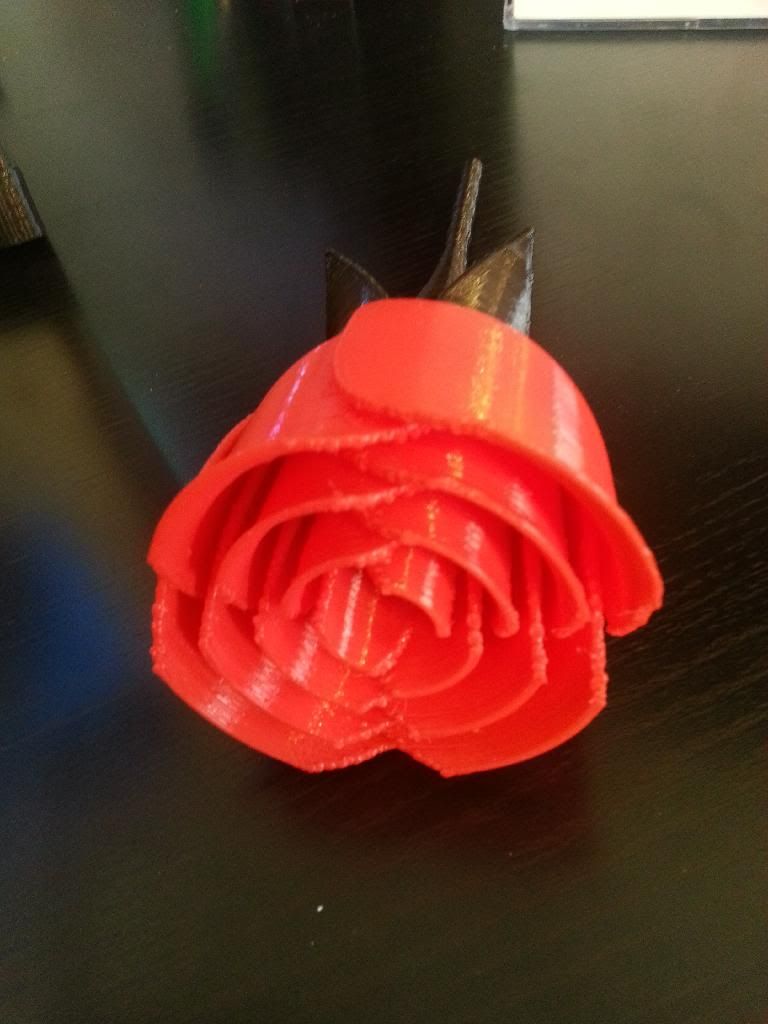
First post in this section, having fun and making money with my new toy! Keeping it basic with the Ultimaker Robot printed in XT on my Ultimaker Original and a Rose I printed for my GF since I spend more time with my printer than her recently.
-
It's a shame they don't make them for 3mm filament anymore...
I suppose there's no news regarding that matter? No more 3mm Ubis hotends? :-|
Here is the response I got from them last week......
no reply no-reply@printrbot.com
Feb 13 (4 days ago)

to me
Hi Carroll - Thank you for contacting Printrbot. At this time, as you know, we're out of 3mm hot ends and cannot promise that we'll have more for sale in the future. If we do, we'll put them back in stock in the store when we do get more. We apologize that we can't be of more help at this time.
So, they kinda left it open. I think that they will make them again...
-
Same here. I just move a part and then the change takes effect.
-
Set the temp to 95C and then touch water to the nozzle and make sure it doesn't boil. Push the head around to the 4 corners and check to see if the temp jumps by more than 5C suddenly.
Now set the temp to 105C and make sure it *does* boil water. Again push the head around to the 4 corners and make sure the temp doesn't jump suddenly.
Hopefully this test will fail and now you have something more direct to debug. The art of debugging is to first get it to fail repeatedly. Then try to get it to work by doing something that is consistent, then repeat the cycle until you understand the failure and a way to fix it.
If the above test fails I would turn off the printer, put it on it's side and remove the head temp cable and hook it to an ohm meter. Look up the correct resistances for a PT100 RTD and jiggle the wiring to see if the resistance jumps around.
This table is good - room temp is around 108 ohms:
http://www.intech.co.nz/products/temperature/typert.html
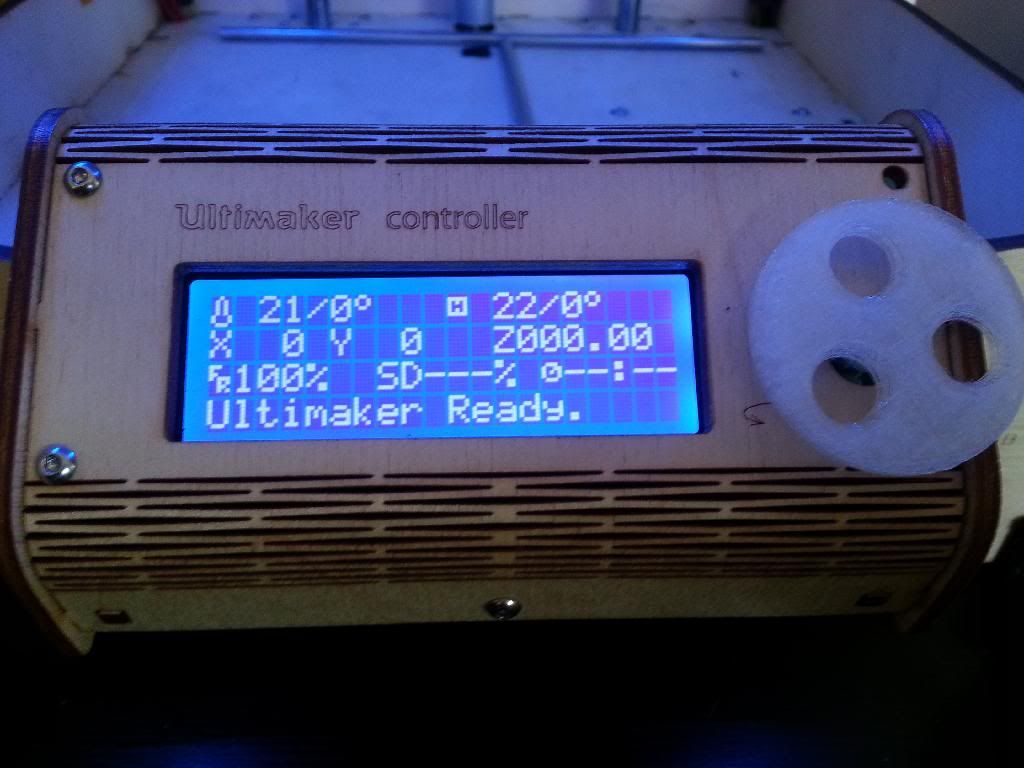
I hope I'm doing this right.....I tested the water boiling by taking a small bottle cap filled with water and touching it to the nozzle. When I did that I got this on the screen of my Ulticontroller.. .....
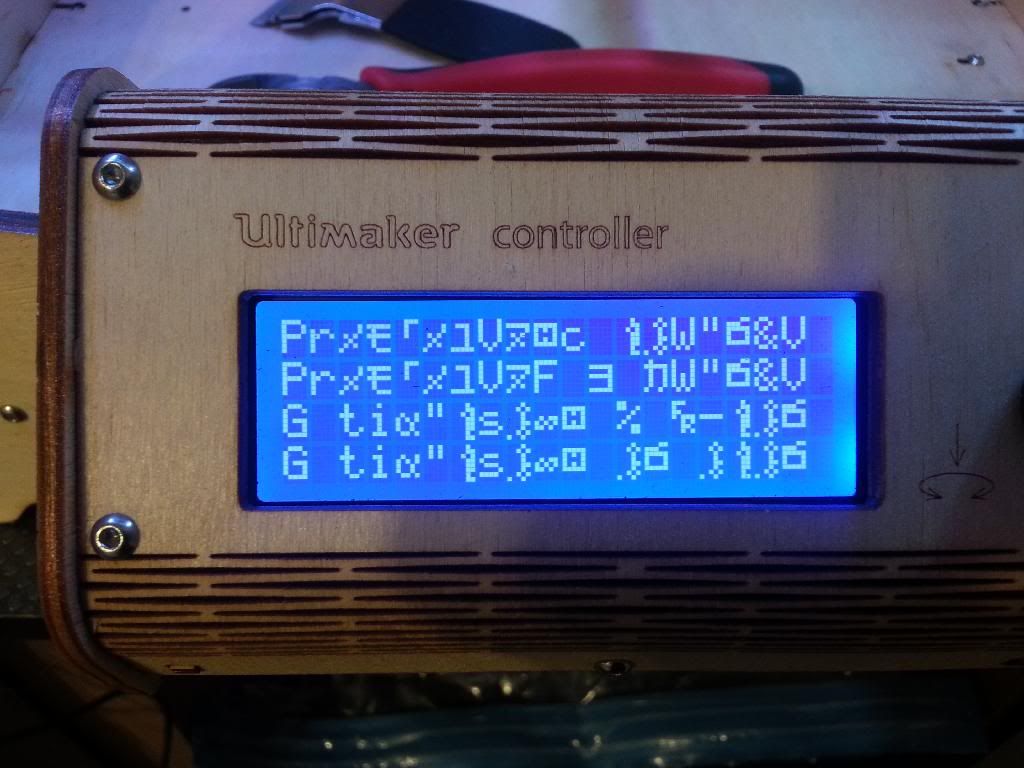
Is this normal? Once I cycled it, it was back to normal. Do I just dip it in and out of the water quickly and wait to see if the water boils off or leave it in the water and wait for tiny bubbles around the nozzle? Either way, I had to set my Nozzle Temp to 130 before the water would boil! Moving the head around didn't make the temp jump at all.
I tried to test the resistance of the temp sensor too but I was having issues. I unplugged the Power and tried to test resistance by pulling the connector from the board and probing the two outside wires of the 3 wire connector and got no ohm readings. I then plugged the power back in, turned the Printer on and checked resistance at the connector that plugs into the transmitter and got a normal reading of 108 ohms at 21 degrees. Then I left the printer powered on and turned it on it's side so I could try to test the sensor . I probed the back of the Temp1 connector while it was still plugged in and got the same readings. Unplugged I couldn't get anything,
Something weird is definitely going on. I have to print at 240-250 with PLA to get good melt. That goes well with the fact that my water isn't boiling until the sensor reads 30 degrees above boiling point.
-
Anybody have a UBIS hotend their willing to sell? PM me, thanks!
-
Ok, thanks! I'll test it when I get home.
-
Oh - that. You need to retract. Is retraction on? Look at the extruder gear - it should turn backwards on moves like this. Also you can look in cura layer view and non-extruding moves are blue lines. If the blue line has a vertical component (a vertical line) at the start then that is a symbolic representation of retraction. If no vertical line then your retraction settings aren't right (there are 5 settings).
Also I recommend this part - it makes it so 4.5mm is plenty of retraction. Without this part you need more like 6mm retraction:
http://www.thingiverse.com/thing:46157
Thanks so much, that clip made a big difference! Retraction was always on but I made some changes and its doing much better now.
I'm still having this "heating failed" issue which is a real pain! I need to hot lap the printer and I can't. After every print I have to cycle the power switch or I get slow heating then the "heating failed" error. Maybe I have a bad heating element or Temp sensor. When a print is finished and the printhead is at, say 220 and falling and I try to start another the print, the temp will go down a degree or two and then slowly start climbing back. Then I get the heating failed and lets say the temp is at 225 when it fails. If I turn the Printer off and on again, the temp now shows way lower, say 85...then I start a print and it builds up faster/normal to target temp.
Any ideas. Is there way to properly check this?
-
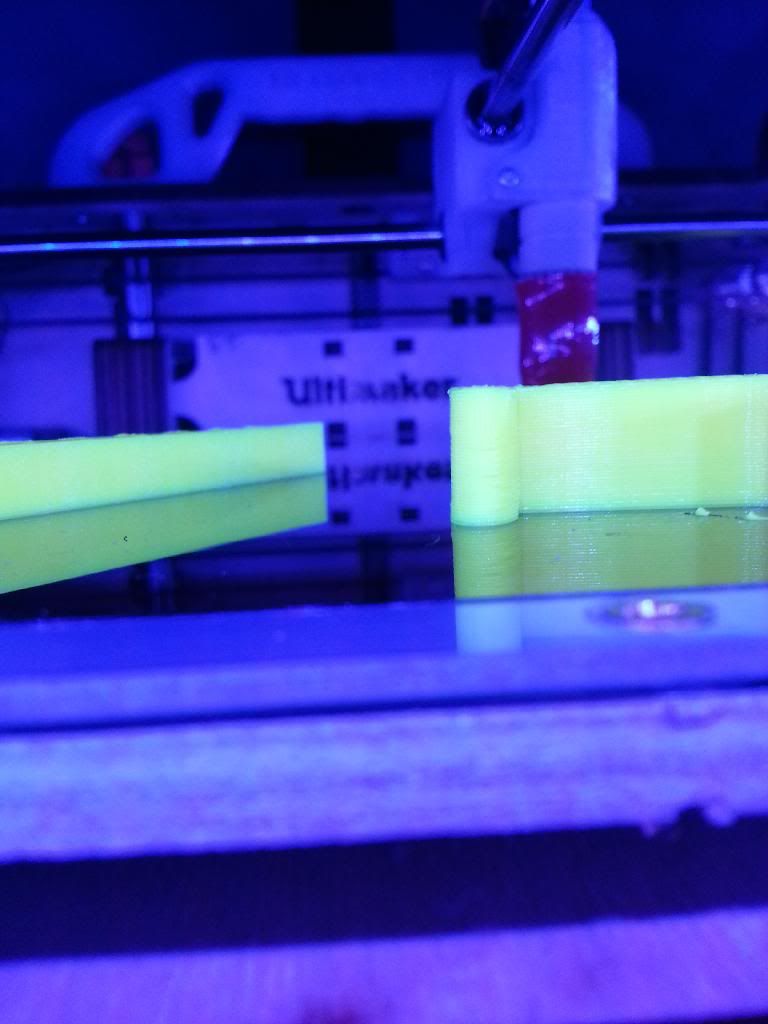
Took a video of the blob. Looks like it happens when the head starts extruding at the beginning of a new layer. I got around this problem by thickening the outer wall but, I would like to be able to print faster with the thinner wall.
http://www.youtube.com/watch?v=RY0P7Nk0dnI
Still can't figure out how to add Plugins, any tips would help. Thanks!
-
Cura 14.01 comes with a relatively new version of the firmware for UM original - maybe only a few months old. So once you load Cura 14.01 you can do a firmware upgrade if you haven't already. Just takes a minute and a USB cable.
Those bumps are usually improved by slowing down your printing speed by 2X but that's kind of a crappy solution. Speeding up your Z acceleration is a great solution.
I think you missed the point of the article - leave Z speed alone but increase acceleration.
In ulticontroller there are many "motion" settings including accelerations max speeds, jerk, steps per mm.
When I set my Z acceleration to Illuminarti's suggested value it was too much for my stepper. It looked good and sounded good but when I moved up and down 20mm repeatedly it didn't come back to the same spot. I ended up simply doubling the Z acceleration. After you change it, you must choose the "save" feature in the same menu or it will go back to default values when you power cycle your UM. I recommend you save and power cycle and make sure the value is still correct before printing anything.
I have a .65mm nozzle and I love it. In cura just tell it the nozzle is .65mm. I usually do layer heights of .2mm.
There are other ways to get rid of "bumps" and they all have to do with slicing. One needs to know EXACTLY what is happening when the bump appears. Is it really the Z scar? Or something similar but different? Is it infill pushing through? Is it right before retraction? Right after retraction? Is it when slowing down after a long, straight, fast extrusion line?
In that case, I did update the firmware when I went through the initial setup. I'm still getting this Heating Failed error repeatedly...ugh.
Sorry it was really late and I was tired lol. I did understant the article and I want to adjust my Z-accel. Can that only be done on the Ulticontroller? I will do it only the Ulitcontroller though, thanks for the info!
I'll inspect the cause of the bumps more today to see exactly whats causing it.
I've been searching the forums and Google Groups but, I can't seem to figure out how to use a plugin?! I am a pretty computer savy guy so I feel embarrassed even asking here. When I click "Open Plugin Location" in Cura it brings up an empty Plugin folder in my Finder. How do I download these .py files and get them into the Plugin folder? Sorry for all the NOOB questions.
 The letters are pretty much the maximum build size of UM2.


Post your latest print!
in What have you made
Posted
I really liked the look of the Ieyo model by Braddock so I decided to print it on my OG Ultimaker. Sliced in Cura 14.03 test 1, .1mm layers, 195 temp, 50mms, cross flow fan and UBIS ceramic. Colorfabb Dutch Orange.