


visu-al
-
Posts
187 -
Joined
-
Last visited
Content Type
Forums
Events
3D Prints
Everything posted by visu-al
-
I printed allready many Jobs over USB so i guess this can't be the problem. Also tried many usb-sticks for the update. Why then are my files not correctly named, when i just download them and put them on the stick. No different versions at the first try. Just did what i was advised to. I now renamed the files, but have to wait till tomorrow to test it, because im printing actually a larger Job. Thanks for the help so far. Kind regards, Alexander
-
Hi Raymond I'm in that companys network with firewall and login but the job-transfering works and i tought update via USB-Stick must run anyway. For USB update i downloaded the latest Firmware a few days ago the day i posted and before the last one (the latest two where tested) According to Ultimaker.com guide i downloaded the latest.tar.tar and latest.tar.xz.tar (56994 and 1 kB) from the official Ultimaker site. I did it with different Versions and different USB Stick and i downloaded the files many times. It doesn't even seem to look at the USB Stick it just says "no Firmware found" quickly. Kind regards, Alexander
-
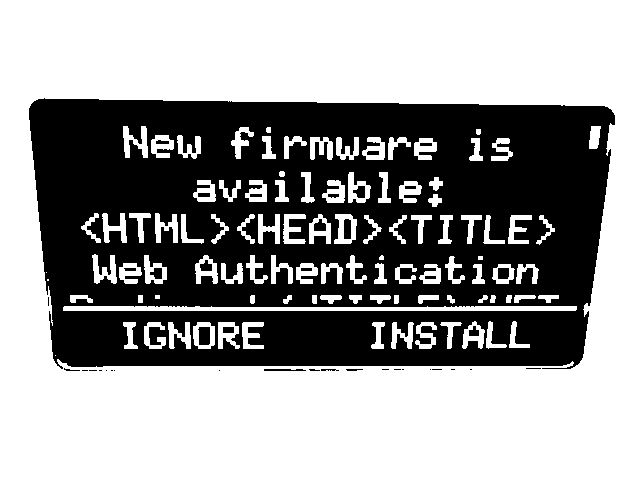
Hello together, i have a similiar problem with our new UM3. Can't update the Firmware. Tried Wifi/Cabel and USB only. USB just says failed and Wifi shows a HTML Code wich need's aprox. 5 second to scroll trough. I have Images and Logfiles if the uploading works. Thanks People Alexander LOG20062018.zip


-
UM2 Go For a second printer?
visu-al replied to deepshots's topic in Buying or selling your UltiMaker
If i print wihtout heated bed on my um2, i use blue painters tape to print PLA. Or Kapton / Polyimid tape if i like to have a glossy surface.. -
Ja total danke
-
0.1 x 47 =0.47mm ->mit first layer +0.3 = 0.50mm hier sieht man gut wie er in der Pause da hoch fährt..
-
Kannst du deinen damit erzeugten gcode mal hochladen (zb dropbox) dann kann man sich das mal genauer anschauen. Es gibt keine X/Y Layer du meinst wohl einfach Z-Layer ja: Teilhöhe / Schichthöhe = Layerzahl -> Layerzahl mal Schichtöhe = Teilhöhe (für die Pause) Normalerweise gebe ich einen Wert im Pause @ Height ein und schaue die Layerview an und siehe die Pause schön..
-
Was hast du bei Pause @ Height eingestellt? Bei mir funkntioniert das gut.
-
Dann könntest du mir auch nicht mehr liefern, wenn ich einen Webshop mit gewerbe hätte?
-
yes the finish on top will be good but the inside bottom will look like spagetthis
-
Könntest du dann das Teil öfter herstellen und zu einem besseren Preis?
-
The link didn't work for me, so i looked for it here is my link to it: http://3dprintshow.com/berlin-2015/3d-printshow-berlin/
-
But your Top needs to fill a huge gap this will not get a nice bottom of this vase.. and i wouldn't use support
-
Take the Olson block, use 0.8mm nozzle print in 0.2mm Layers it would take more like 15 hours..
-
Ultimaker2 Feeder System - Improvements and Ideas
visu-al replied to ian's topic in Third party products & modifications
@gixxer i like this idea please go on -
Wenn du ein par mehr machen würdest und über einen Webshop verkaufen, wäre das legal?
-
i used a stock nozzle and teflon for over 2000 hours printing abs and pla and then it still worked good i just changed to the Olson block
-
Hallo robinlimpek Version 1 klappt nur mit gutem "bed-leveling" Ich drucke dafür zuerst einen Text der 0.2mm hoch ist mit ZWEI 0.1mm Layer Diese Haften prima wenn das Bett korregt niveliert ist (nur PLA) Dan starte ich den nächsten GCODE der first layer 0.3mm hat damit das ganze drüberstreicht. Funktioniert einwandfrei so. So dann dein zweites Beispiel: Dies DARF NICHT aus 2 GCODES bestehen sondern nur aus einem. Denn wenn du das nicht anpasst startet der nächste immer ganz unten. Also du musst über das PLUGIN PAUSE AT HEIGHT einstellen wann die Farbe ändern muss gib also den letzten Layer oder die Höhe an bei der noch die erste Farbe druckt. Dann macht der Ultimaker eine Pause fährt nach oben und du kannst die neue Farbe einführen über Change Filament im Menüt oder wenn du Roberts Feeder hast einfach ausklinken und wechseln. Dann Resume oder so anklicken und der Drucker druckt den Rest in Farbe 2 Ich hoffe das hilft. Gruss VISU-AL
-
For people who wants to print this conductive pet: Switch off Combing! It makes a lot of drops and chunks around the print and.. ..without it just prints very well @ 250-260° on kapton tape and 75°C bed , fan <50%
-
So you say i don't need to buy an UMO to make this happen eventually? I'd love to buy another UM2 just to do this setup XD
-
No, it is a bigger part and it doesn't really matter where i attach the measuring tip.. The last Olson block i ordered, is for this machine to go and try 0.8mm wide and 0.5mm hight Yes it combines well as i tested different layers/heights connecting in the print, i will test top to bottom and same line next time and write it down to have a better answer :cool: i try to imagine how this works that layer height effects the conductivity so much but no luck so far :mad:
-
Maybe you want to use material like laybrick that can hide the printing layers very well ? I can imagine that this is great for architectural prints
-
something for kickstarter? but i also would be happy to get a bom and donate somehow
-
i also just read it there and tested it and it worked better then my earlier results but it seems that some 0.8 shells also work well and i didn't tested this marvins a lot yet
-
Oh yes step nr. 4 must be with the mouse over the 3d space You can also create a library for everything you want some presets are allready there but you can also create presets that are respecting some shrinking if you know or testet the tolerances on your printer and automatically create all kind of heads hex or round with allen bit holes and then just export to stl or even scale it 10 times ( press S and 10) to have the right size in cura. i really love it. if someone wants preset libraries without creating them, just tell me what you want and i create it..


