


CheaT
-
Posts
30 -
Joined
-
Last visited
Content Type
Forums
Events
3D Prints
Posts posted by CheaT
-
-
Hallo mikar
Danke für die Infos über das grüne Fett

Wenn diese 0815-Tube angebrochen ist, kann ich die schon bedenkenlos in einem Plastikbeutel aufbewahren?
Ich habe zwischenzeitlich unsere Mechaniker bezüglich der Schmierung der Linearlager gefragt, die haben mir ein Fläschchen mit der Aufschrift "Sikamoll Schrauberöl" gegeben mit der Begründung das sei das dünnste welches wir haben und wird zur Schmierung der Schrauber verwendet was für meine Zwecke ideal sein sollte.
Leider finde ich davon nirgends ein Datenblatt, ich werds trotzdem mal ausprobieren
-
Hallo Zusammen
Ich suche momentan ein geeignetes Öl um die vier Führungsstangen der X/Y-Achsen zu schmieren, da mein UM2+ nun seit 9 Monaten im Betrieb war.
Zur Auswahl habe ich folgende Schmierstoffe:
Ich persönlich tendiere zum Mobil Vactra Oil No. 1, welches gemäss Datenblatt zur Schmierung von Bettbahnsystemen in Werkzeugmaschinen verwendet wird.
Welches würdet ihr verwenden?
Für die Z-Spindel muss man "einfach" in regelmässigen Abständen das mitgelieferte Fett auftragen, richtig?
Danke für eure Antworten
Gruss CheaT
-
I changed the nozzle temp to 200° C and the bed to 50°C, maybe it will help
-
Hi all
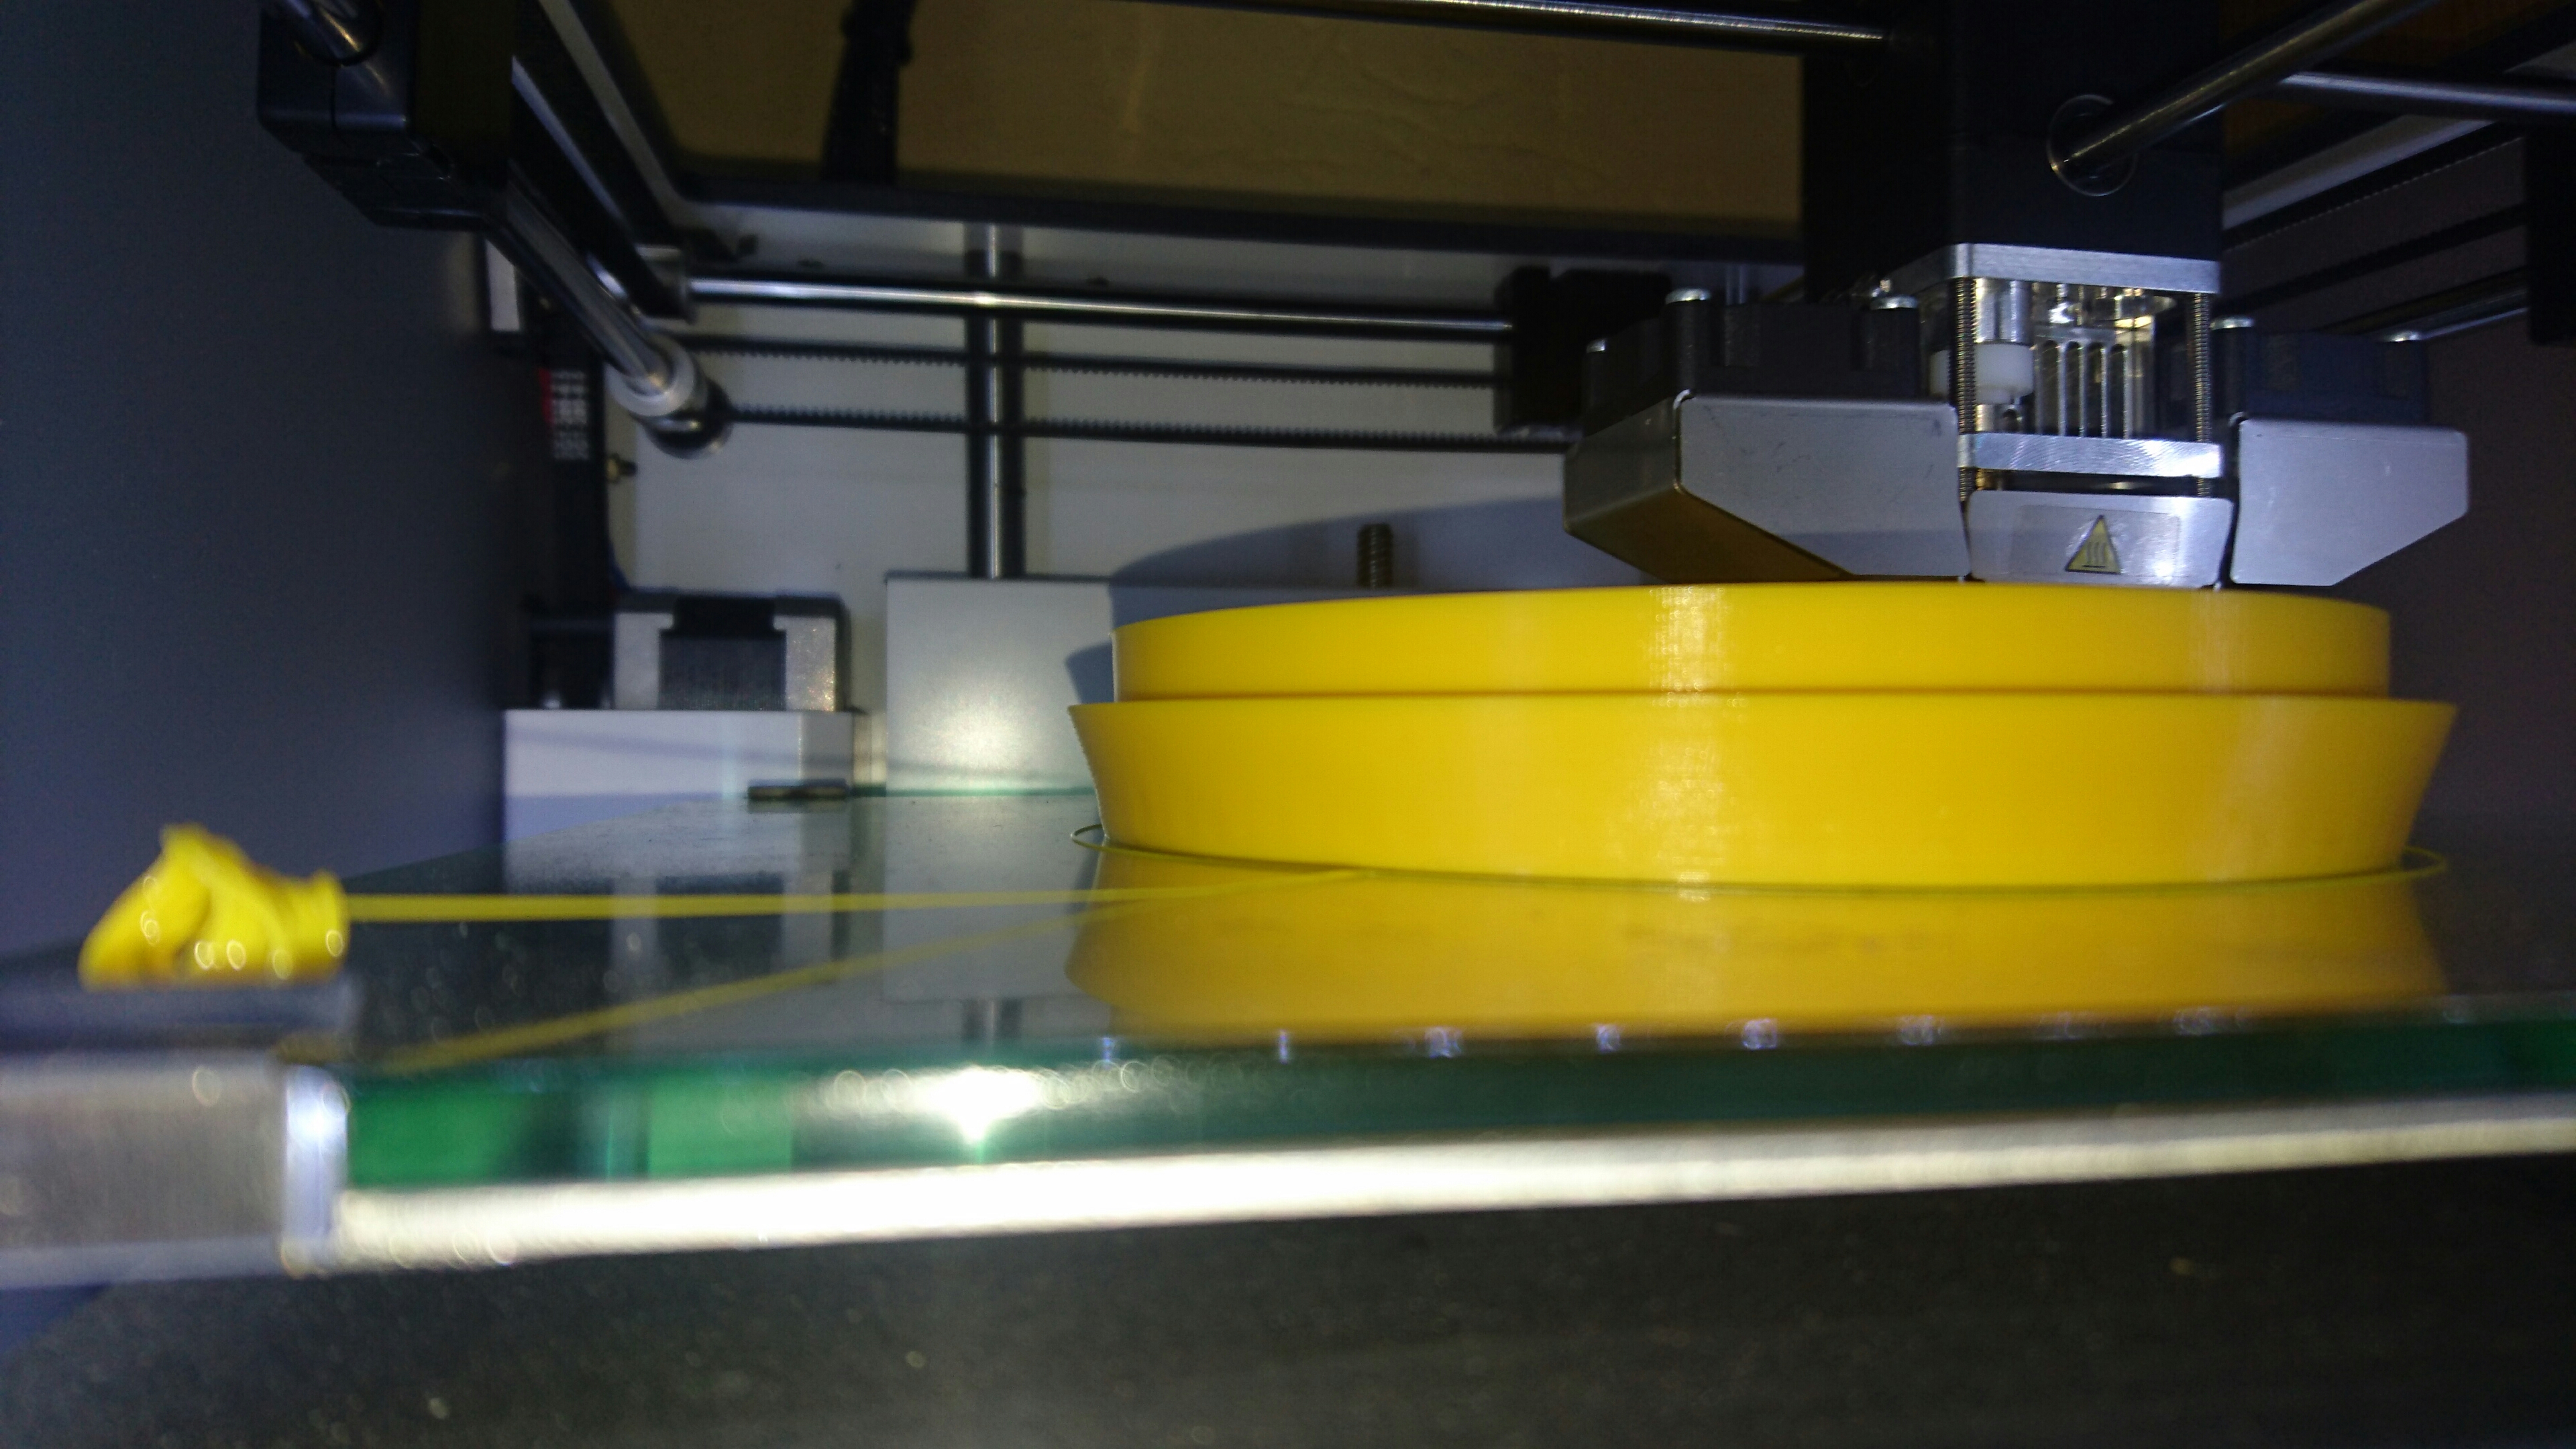
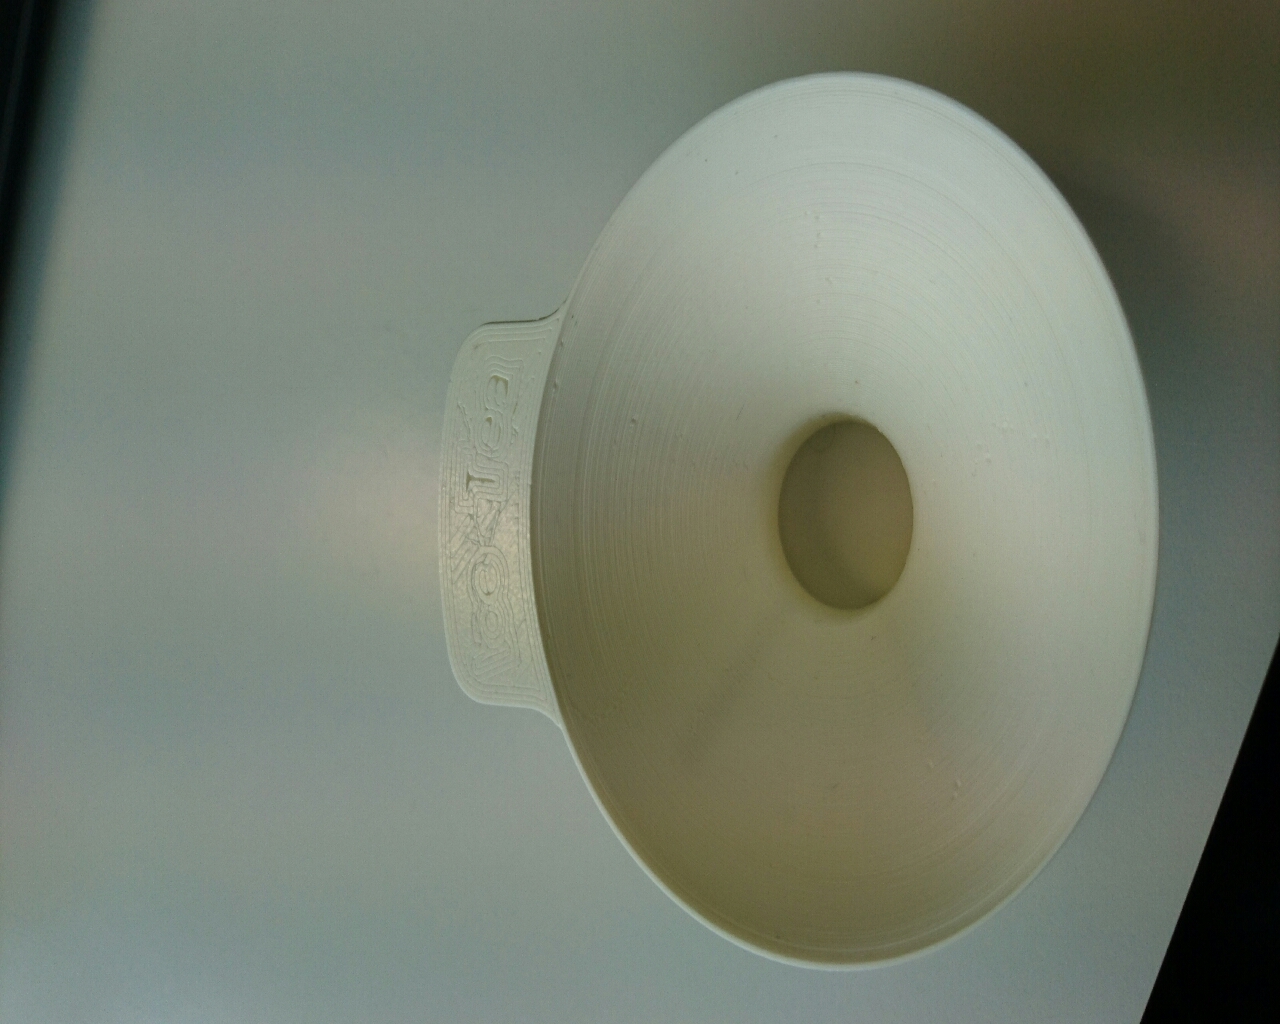
I have a Problem when printing on my UM2+
My walls don't became vertical, they always are bended to the inside and I have no idea how to fix it.
Currently, I'm printing the yellow ring of the Fallout 4 Mini Nuke Storage Box from thingiverse.com (http://www.thingiverse.com/thing:1235346) and the slightly concave shape has bent on the wrong side.
I'm printing signal yellow colorfabb PLA/PHA with covered front door at 210° C nozzle / 60° C bed-temp
Does anybody know how to fix it, or maybe sends me a good cura-profile for PLA?
BTW I've read about a plugin for Cura which allows you to set a higher temperature for the first layer, can anybody please send me a link, honestly I'm too foolish to find it by myself xD
-
Hi guys
Does someone still have the original Ultimater Robot gcode? I deleted it by a mistake (:angry:) and used it as a sample part for my material trials.
Would be great if someone could upload it for me
thanks in advance
-
Hallo Jaxxson
Ich arbeite mit einem parametrisierten 3D-CAD, werde mir deinen Mast mal anschauen wenn ich ein freies Fenster finde
Was für ein Format hast du abgespeichert? Ich kann es hier nicht downloaden, dropbox ist gesperrt
-
I'm printing with an italian hairspray since february and use a sheet of cardboard as front door to keep the heat in the printer and the printing qality was enourmous improved

it is still the same hairspray coating I use since february and i've got almost no warping on really huge parts. they stick very good and when the bed is cooled down, they can just be lift off like an empty PET-bottle
is there a way to mark this topic as "closed"?
-
In Punkto Dual Extruder für den UM2 würde ich im Moment einfach noch etwas zuwarten. Es könnte sich lohnen.
sprichst du damit auf die Versuche mit Wakü/Düsenhub von Crema an?

-
Hallo
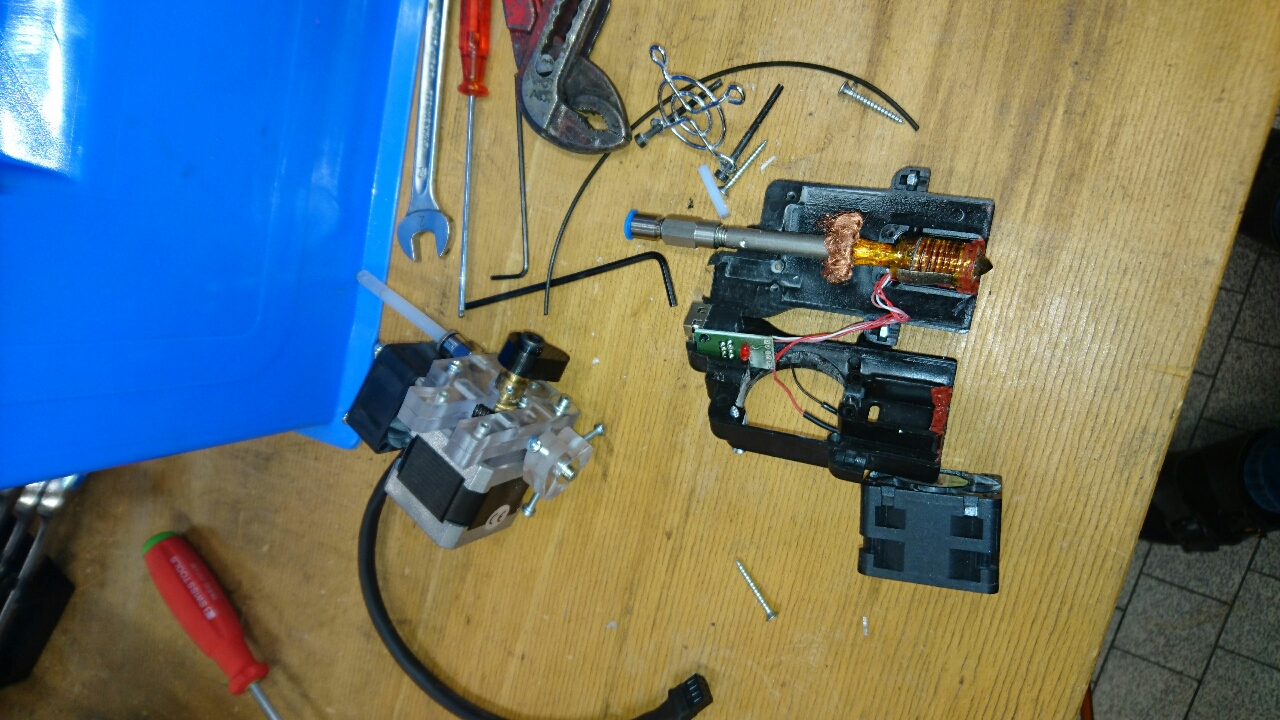
Weiss jemand ob man sich eine zweite Düse aus Ersatzteilen in den Extruder bauen kann?
Hotend kann man ja bestellen, aber wie sieht es mit den Teilen in dem schwarzen "Torso" des Extruders aus? Bin nicht so scharf den Extruder zu zerlegen nur um zu schauen was da alles drin ist, evtl weiss das ja jemand von euch
Gruss CheaT
-
Die Luft umströmt das Hotend und kommt um es herum unten aus dem Extruder. Es bläst schon ziemlich....
-
Hallo Gerd
Ja, die Schrift liegt auf der Plattform auf. Ich kann dir den Wert der Einstellung "Linienabstand der ersten Schicht" erst morgen sagen, da ich heute ausser Haus bin. Jedenfalls ist es der Standardwert, habe den bisher nicht verändert
Dicke der ersten schicht war bisher 0.26mm (standard), habe jetzt auf 0.2mm reduziert fallst das etwas weiterhilft.
Merkwürdig ist jedoch, dass wenn ich den Ultibot hier im Büro auf unserem DeltaWasp 2040 ausdrucke die Layer nicht gequetscht werden, obwohl wir hier auch die Standarteinstellungen von Cura verwenden :/
-
Hallo
Ich glaube meine layer werden zu dick aufgrund einer Überextrusion.
Wenn ich den Ultibot drucke dann werden die beiden Antennen auf dem Kopf richtig zusammengedrückt da die layer zu dick werden.
Auch wenn ich die XBox One Controller faceplate vertikal drucke dann werden die Anfänge zu dick und der Extruder bewegt sie während dem Drucken hin und her oder schiebt sie weg.
Leide habe ich davon keine Bilder, aber evtl können die hier weiterhelfen
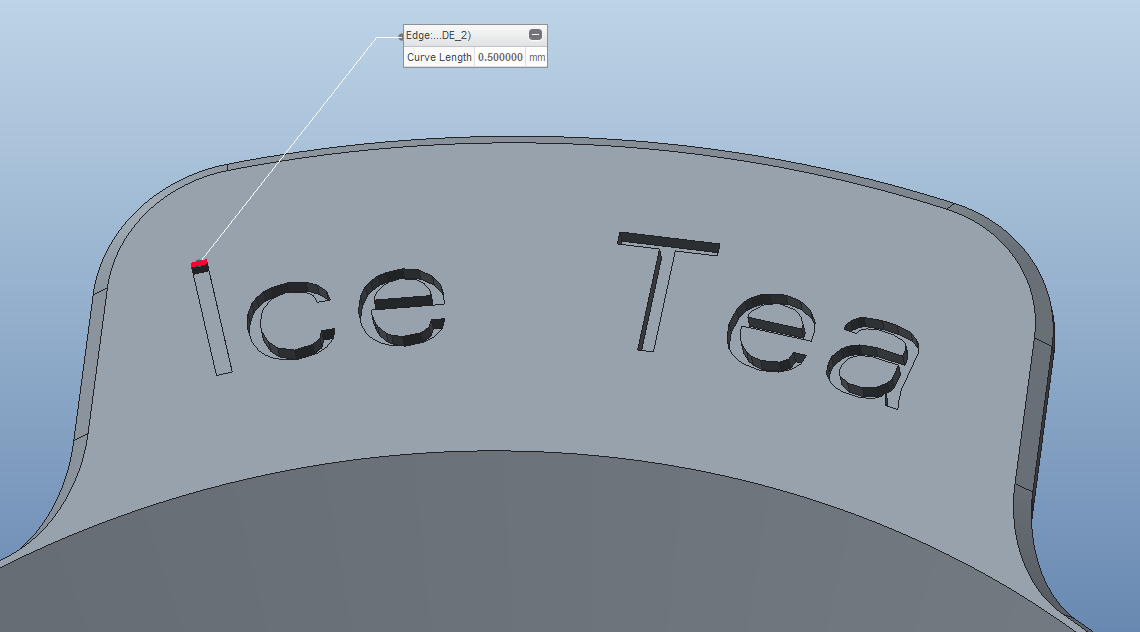
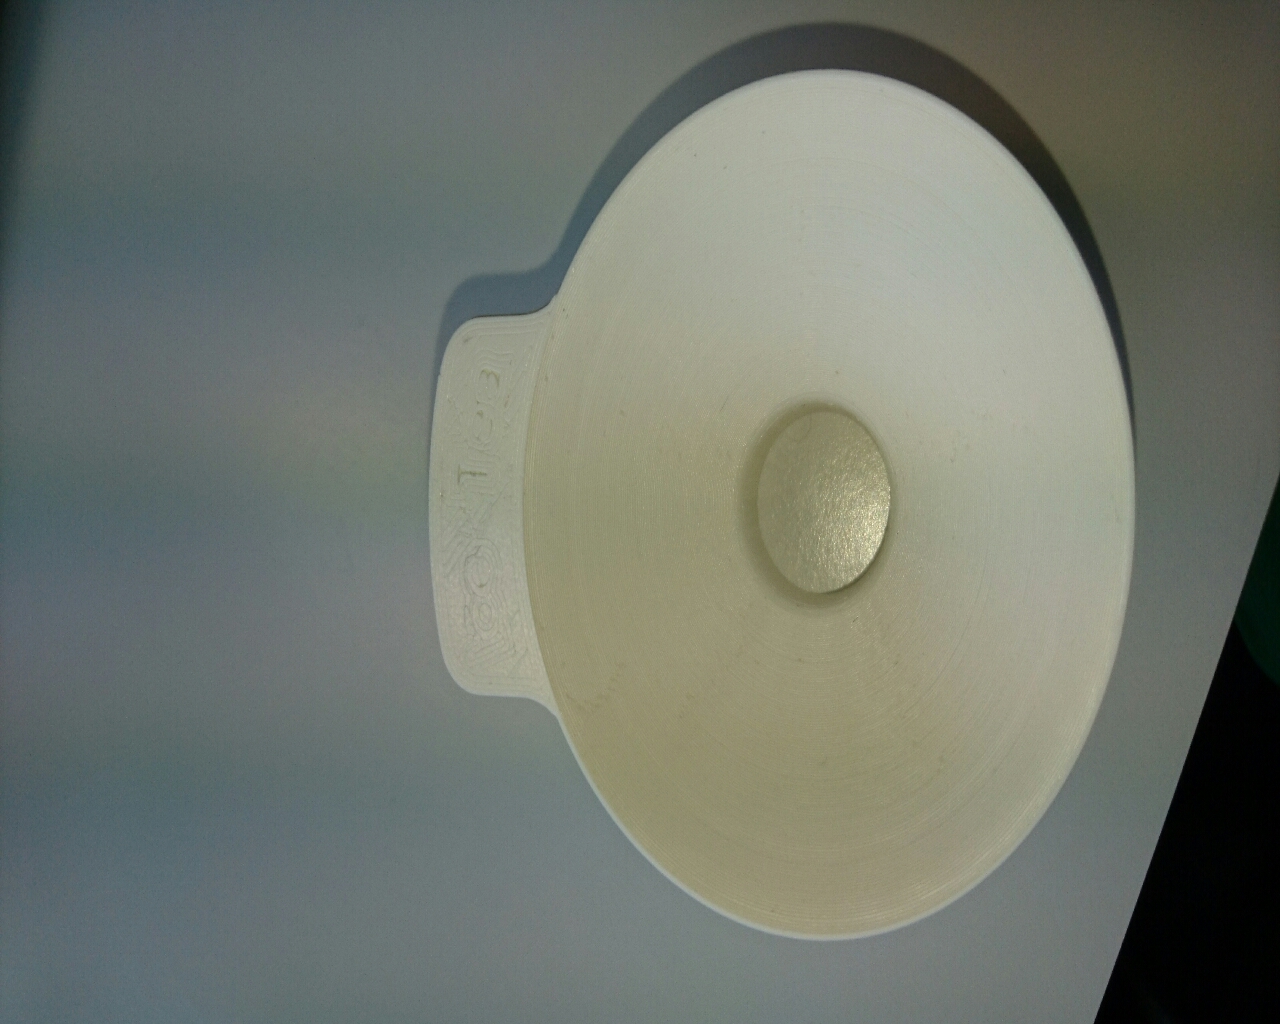
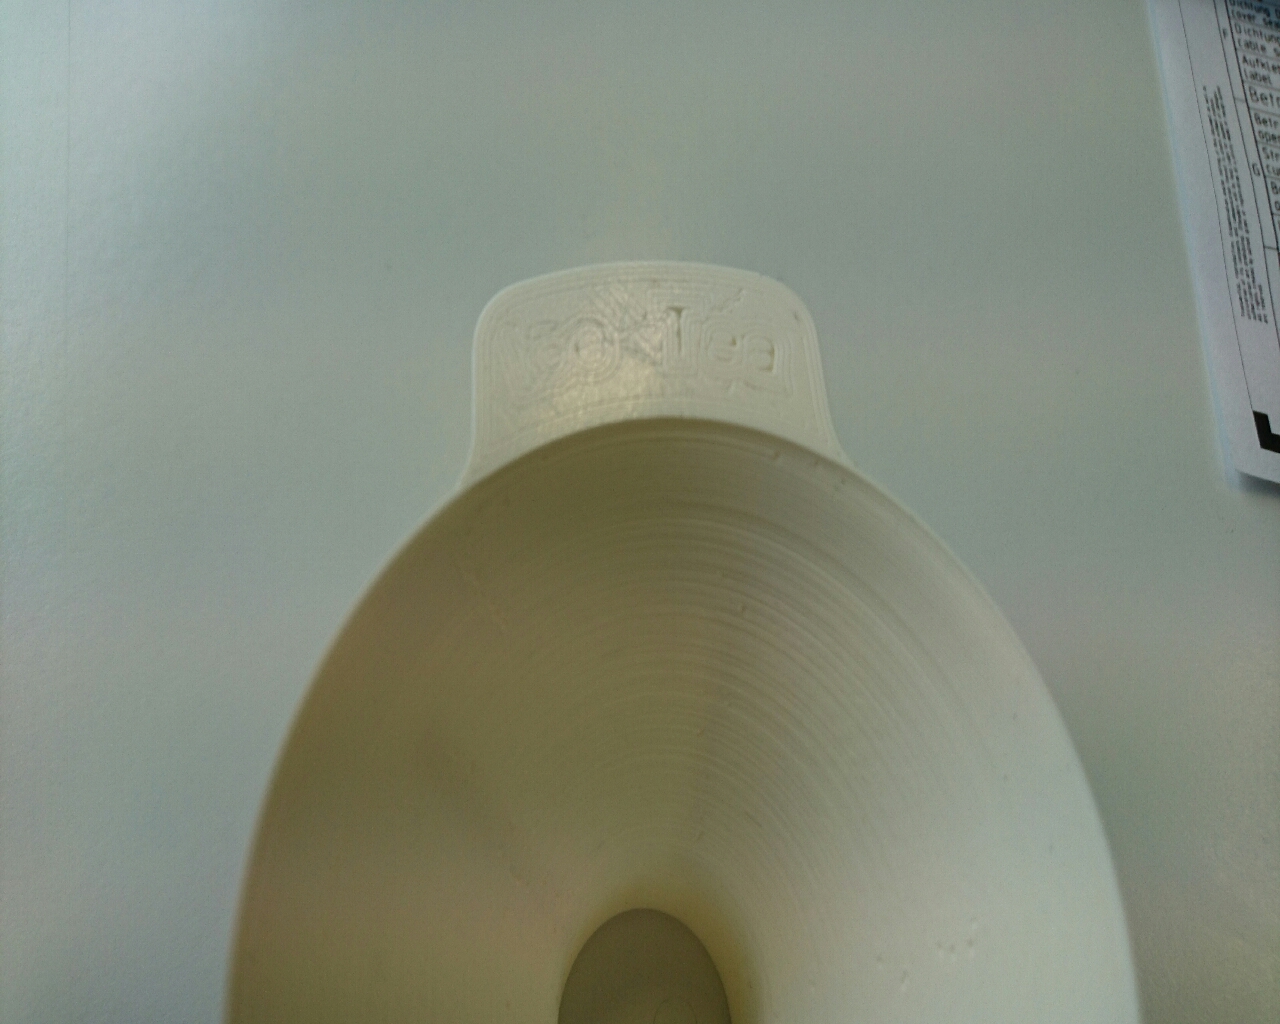
Der Schriftzug ist kaum zu erkennen
Wenn ich aber in den Experteneinstellungen auf "Aussenhaut als Spirale folgen" wechsle wird der Vase nicht dicht weil die Layer zu weit auseinander gedruckt werden oder zu dünn sind, auch wenn ich in Cura die Layerabstände auf das Minimum setze
Irgendwelche Ideen?
-
http://www.abload.de/image.php?img=ixa30.jpg

this is the only picture i have, sorry
i print with the standard settings of pla with 25mm/sec (faceplate), um-robot is the original g-code on the sd-card
-
Hi all
My um2+ "squeezes" small layers with less than approx 50mm^2.
I tried to print this http://www.thingiverse.com/thing:599035 but it didn't work because the first layers were pushed from the bed by the extruder. This "squeezing" appers also on the two cylinders on the head of the ultimaker robot.
IMO it's not a squeezing, i think it's an over extrusion, because when i print the um-robot with the deltawasp2040, there's no squeezing at all. It more looks like an over extrusion which results in too thick layers that they become higher than the part actually should be
Flow is on 100%, material diameter Ø2.85mm (colourfabb shining silver)
do you have any ideas how to fix this issue?
thanks
-
I calibrate the build plate frequently all 4-5 days to avoid adhesion problems, but it looks like it is a waste of time because the part's warp so massively anyway :angry:
hopefully it works with degreased capton tape...
-
I will try another print with capton tape, but i will degrease it first to get better adhestion.
For my calibration, i use this "Ultimaker calibration card"-papersheet which was in the box with the exchangeable nozzles - shall i switch to a normal sheet of paper because i don't have anything else at home wich could be usable :/
maybe this will help..
-
i tried four gluesticks until i found one which works. i can buy it for 3.50€/20g in our local craftsman store
how did you apply your glue, on the cold or heated bed?
i can print approxx. three times on the same glue, then the parts start to warp extreme, as bigger they are
-
ok, sounds feasible
does the hairspray have to include something (i heard gluesticks work only if they include PVA) or can i buy the cheapest one?
-
so, in theory i can just start the print, but move the bed temp down to 50°C?
yes, the glass is only a month old, i got my um2+ since 13th of january
and to apply hairspray, you say a kitchen paper towel with window cleaner and a little push of hairspray and clean the cold glass with, right?
BtW which tape shall i buy, there are 3 different types:

-
how many times can I print on this before I need to change it?
-
Kapton tape and PLA don't work
PLA = Blue painters tape
ABS= Kaptop tape for extra grip
For PLA = Glass + Heat or Glass + Heat + Some glue (hairspray, etc etc etc )
For PLA without hotbed = Painters Tape + cold Glass
good to know, thx
Where can I get this blue painters tape? Just walk into a craftsman store and buy, or do I have to order it somwhere in the internet?
-
You do not say what your bed temp is?; personally I would use 65 but really 60-70(max) is OK, some people go a bit cooler. Personally I have always used hairspray; some people use sludge made from the glue.
Thx for your answers yellowshark
My temperatures are the standart setting for PLA, 210°C on the hotend and 60°C on the bed.
This is a picture of the part after it was finished:
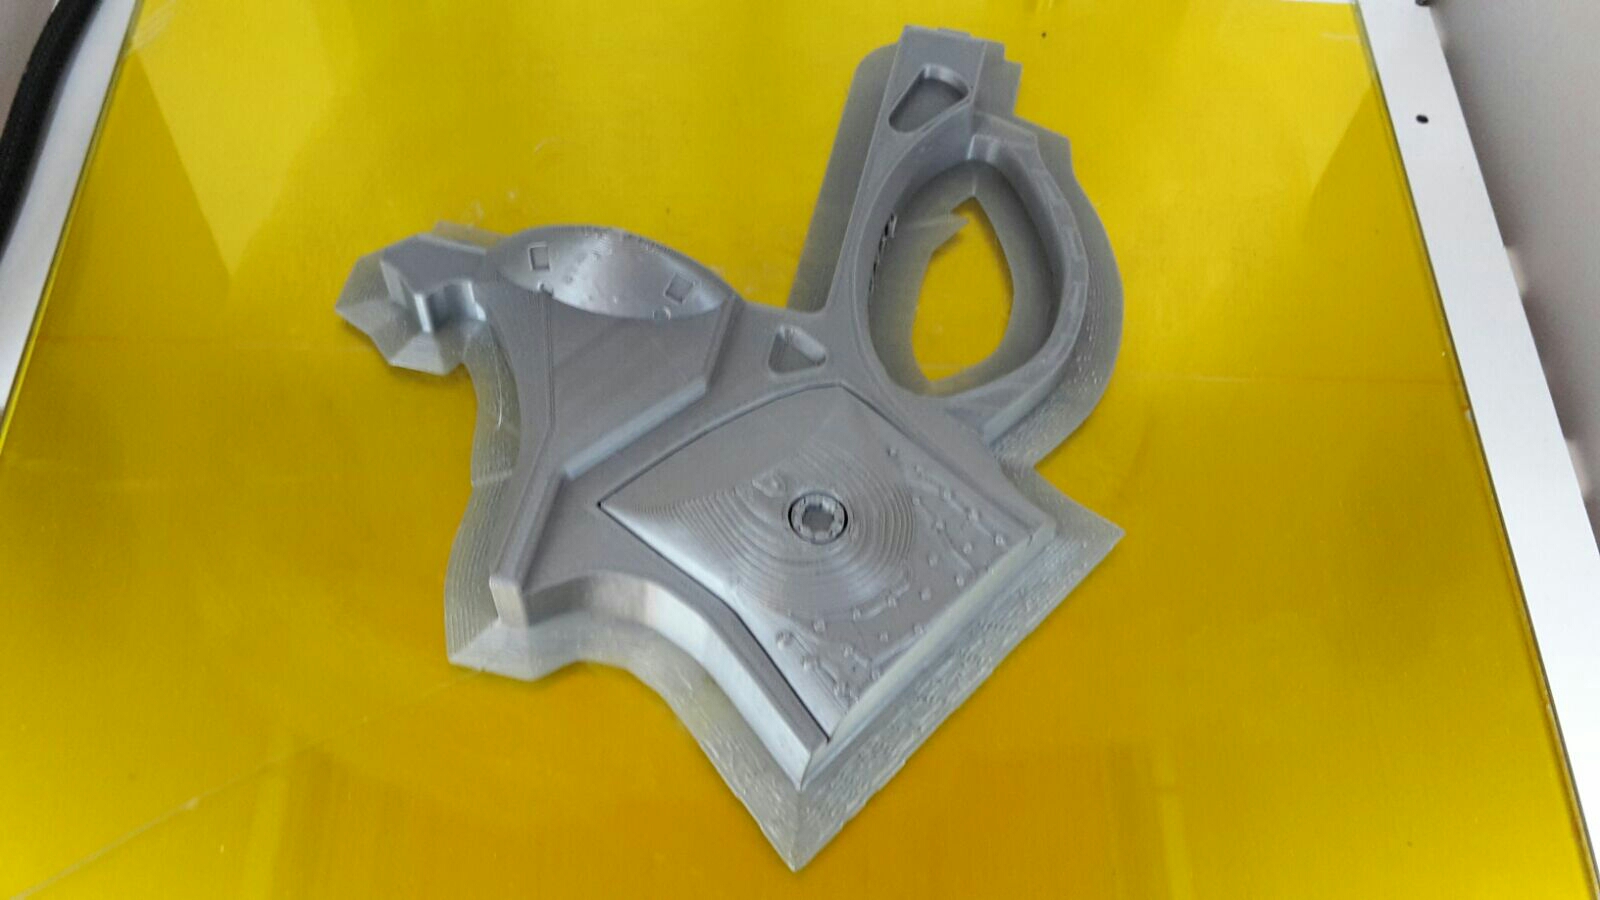
*Edit* the capton tape is on the rear side of the glass plate , so i can easily switch the plate after material change
The edge which points to the front of the printer had an extreeme warp of ~1 mm
I have no detailed pictures of the warp problem at hand because I'm currently in the office
*Edit*
I don't know if it helps, the layer height was 0.2 mm. And yes, i already tried the black material, but only for test parts because the roll is too big for my um2+ (it's the 2.2kg roll) and I will test if it works to print when i put a 50 cm long piece of bowden tube on the material before i insert it in the feeder and wrap in on the roll
-
Du must die ecken anschrauben.
Halt moment das war bei möbel zusammenbasteln XD.
Nein im ernst vielleicht liegts eher am speed vom ersten layer als vom leveling.
ist 20 mm/sek echt zu schnell?
-
Hi all
I bought some spools of colorfabb PLA/PHA because i read here it should be one of the best filaments.
Now, I have on nearly all printed parts huge warping on the corners with the shining silver one.
I print with standard settings for PLA on the glass plate with gluestick and brim (20 lines), 20mm/sec for top and bottom, shape on 30mm/sec and infill 40mm/sec. I also tried capton tape but the adhesion is not very constant, sometimes it is very good and then it turns to very bad.
Does anyone have an idea how I can improve the adhesion on the glass plate and remove the warping? It looks very ugly on the assembled parts :(
I also have a 2.2kg spool of black and a 750gr spool of white colorfabb PLA/PHA. Is there a difference between these materials?
Sry, I am very new on this kind of 3D-printers, I used to print on a Stratasys BST the last 4 years
Thx in advance
CheaT


Geeignetes Öl für X/Y-Achsen
in Deutsch
Posted
Es gibt ja mehrere X/Y-Führungen, die im Extruder und die auf den Führungen im Gehäuse. Die im Extruder sind meines Wissens nach Linearlager, welche sehr verschleissarm und dadurch wartungsfrei sind, die auf den Führungen im Gehäuse sind Sinterlager, welche ab und an einen Tropfen Feinöl brauchen da sie einen höheren Verschleiss haben. Die Führungsachsen sind - was ich hier im Forum gelesen habe - anscheinend auch nicht aus rostfreiem Stahl, wodurch man sie ab und an einölen sollte.
Quelle: "Forumeintrag "Achsen fetten?"
(Es ist meiner Meinung nach total sinnfrei, Führungsachsen aus "rostendem" Stahl bei einem 3D-Drucker zu verwenden)
An den vier Führungsachsen sind auch deutliche Verschleissspuren zu erkennen, zudem macht der Drucker komische Geräusche wenn er die Richtung wechselt :(