


engr
-
Posts
32 -
Joined
-
Last visited
Content Type
Forums
Events
3D Prints
Posts posted by engr
-
-
@Torgeir Thanks for the help. I agree, looks like a temp sensor or else the main board. Will try replacing the thermistor on the heat bed.
-
@Nicolinux It's the latest stable firmware. I tried restoring to factory settings, but same problem, so must be a hardware issue. Thanks for the suggestions.
-
What should I do next? Here are some screenshots of the temperature graph (I turned on and off different items in the legend) and also the event log.


-
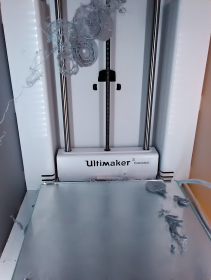
I keep receiving this error mid print.
"Max temp. error on the build plate. Go to ultimaker.com/ER14"
I check the cables on the build plate and the board as recommended.
This is the only forum entry I see which addresses the issue:

-
14 hours ago, fbrc8-erin said:
Is your active leveling on? Is the wrong height the same all the way across the print?
Active leveling makes corrections through the first 20mm of Z-height (if I remember correctly), so if your bed isn't manually leveled well enough, you could end up with it the height being wrong on one end or the other.
Active leveling is on. The part is shaped like this when printed:
¯\__/¯
And the dimensional discrepancy is between the build plate and the ends on both ends. So, yes, it's the wrong height at both ends of the part. -
7 hours ago, SandervG said:
What about the X and Y dimensions, are they correct or off as well?
X & Y dimensions are as good as usual (within .010").
-
I am printing a bracket (shaped like a wide V or sort of batwing), dimensions about 7 inches long and .75 inches high (180 mm x 19 mm). Using Ultimaker PLA with Ultimaker PVA support with 0.1mm layer height using (latest Cura and UM3+.
The final print is only .69 inches (17.5 mm) instead of .75 inches, so the Z is off by a lot. I measured before dissolving the support, so it's not warping.
I can't show the whole part because it's a corporate design, but here are some images which I think show enough.
The only idea I have is PVA shrinkage during print (maybe water content, material pops a little during print, but doesn't seem soft or sticky and it adheres fine)
Any suggestions what is the cause? Thanks.


-
On 3/4/2018 at 8:28 AM, SandervG said:
I assume @brightorange, @wydmynd and @rjd are different users right?
I'm curious to know this too, haha!
-
From the "What to expect in 3.7" firmware blog entry:
Firmware notification. Whenever a new stable firmware becomes available, users will receive a notification. And after each firmware update, you’ll be notified which version you’ve just installed.Thanks. This is what I asked for in the second question of my original post.
-
Would you have expected them else where? Please let us know and we can see how we can improve our communications

Yes, I would have expected the firmware release notes in a dedicated page like the Cura release notes: https://ultimaker.com/en/products/cura-software/release-notes
-
 1
1
-
-
Are you using support material?
-
Had that happen to me once. For some reason something broke free of the plate and stuck to the nozzle, and so any new material would just build up around the head since it was being deposited in midair.
Took me over an hour, but I manually heated up the print core and used tweezers to pull as much softened material as I could. Then I took out the print core and used a micro heat gun (used in soldering rework) to free up residual material. Luckily it was PLA, so it had a relatively low temperature. And luckily the electronics board on the print head was clean so I stayed away from that. Thought I would have ruined something, but it all came out OK. The only damaged part was that white silicone-type gasket which the nozzle protrudes through, but it's not too bad.
Hope you have similar luck.

-
I have not had that happen with my PC prints. Are you printing more than one object with PC at one time?
In this specific case, no, but usually yes. What do you mean by "that"... do you mean the prime tower isn't hairy like in the photo?
-
Same here on both counts--Cura disconnects sometimes, and UM3 forgets who I am often. Windows 10 / Cura 2.5.0 / UM3+
-
You could post your feature request on github.com/Ultimaker/Cura/issues.
Make sure you include why you want this feature, how it would improve Cura, and who would benefit from this feature.
Thanks @ahoeben.
-
Because what you call "priming" is not seen as priming by Cura. The 2 "custom prime towers" are not prime towers, but just regular objects. There is no way to tell Cura in what order objects must be printed.
@tomnagel is correct. And I want to use two custom prime towers in order to prime both nozzles but keep the material separate. The Cura-generated prime tower uses the same tower to prime both nozzles.
-
Have you tried printing your object without primetowers (with the latest version of Cura)? In most situations, that works really well (if you use the provided printing profiles, and use Ultimaker materials).
Not so with polycarbonate. And PVA cannot be applied to PC, although PC can be applied to PVA. Here's a pic of what happens with my custom tower of PC. If I don't prime a sacrificial part, then this hairy mess happens on my good part.

-
Not as far as I know.
Since you are the only answer, you get the "Best Answer" vote. But how do I make this (forcing print order in Cura) a feature request? I don't see a feature request section of the forum.
-
I updated the firmware on U3 (3.6.3.20170406 stable), and I was curious what changes there were in this version. I see a change log for Cura here
https://ultimaker.com/en/products/cura-software/release-notes
But for firmware, I only found this post for an older version
https://ultimaker.com/en/blog/35639-ultimaker-3-firmware-update-whats-new-in-version-35
Is there a site for a Firmware Change Log or Release Notes?
-
Also, based on the version name, I'd guess that the firmware has been out since April 6th, but I didn't get a notification that there was an update....I was just playing with the settings and checked for an update. Shouldn't we get a notification of a firmware update?
-
I want to print a part using custom-made prime towers. Therefore, I want to print this sequence for each layer:
- Prime Tower 1 (with Material 1)
- Part (with Material 1)
- Prime Tower 2 (with Material 2)
- Part (with Material 2)
Using per-model-settings, I can easily set the material. However, Cura insists on printing Prime Tower 2 last.
I have tried different orders of loading parts. I have tried moving things around until I felt like Abbott & Costello with the shell game.
Is it possible to force this as I require?
I've searched the forum, but haven't find this exact question.

- Prime Tower 1 (with Material 1)
-
No, there is not.
What would you need that setting for?
Just wanted to make sure I'm maxing out the res.
Makes sense that it's not a thing, just making sure, thanks.
-
Is there a setting for X-Y resolution in Cura?
-
Did you already discover /temperature.html ?
Nice for the nerds among us
You know what? That is cool!
No, I only had found
/api/v1/printer/bed/temperature
But I'm still looking for a cura-style all-in-one monitor thing.
-
part of the info you are looking for is in the Ultimaker 3 app. Is that an option for you?
True, it's a partial solution--the Android app gives time remaining, but no technical data like temp. Thanks for the suggestion. Still hoping for a web applet or something I can share with our team.


Max temp error on the build plate (ER14)
in Improve your 3D prints
Posted
Replacing the thermistor (temperature sensor) seems to have fixed the problem.
If you know how to solder and replace SMD components, it's the PT100 component on the bed heater (see this site https://fbrc8.zendesk.com/hc/en-us/articles/208281963-Heated-Bed-Plate ) and we used this component https://www.digikey.com/product-detail/en/heraeus-sensor-technology-usa/32207605/1759-1009-1-ND/6677788 [specs 100 Ohms RTD Platinum ±0.3% ±3850ppm/°C -50°C ~ 130°C 0805 ].