


NBull
-
Posts
155 -
Joined
-
Last visited
-
Days Won
2
Content Type
Forums
Events
3D Prints
Everything posted by NBull
-
I agree with Smithy the center position is most the times the best position. if using a realy hard filament more tension is somtimes needed. and if using fragial PVA less. but yes 99% of the time stick to 1/2 tension. If you havn't don it already I would recommend opening the feeder and cleaning the inside. When the feeder have grinded the filament a couple of times a lot of debris can accumulate in the "box" and on the tooth wheel making it to slippery. ps. rember to losen the feeder befor opening, so the spring don't pop out 🙂 You may aslo want to check if you can frealy push PLA through the core. the core can be clean but still have to much resistance. Also check the bowden tube. it might have a bend making to much resistance or be damaged on the inside. Take some filament and try pushing it through the tube to see if theres a spot whit more resistance. As Smithy mentioned it can also be your print settings, if trying to push too much filament out at to low a temperature.
-
I would disconnect the bowden at the print head and some of the wire clips. so you can pull the bowden off the filament piece. then manually heat the printhead til the filament can be pulled out. Assuming theres still a bit of filament left over the print head when the bowden is removed. so you have something to pull on. (Disclaimer, its a long time since i have worked with the u2, so there might be a better way to do it)
-
I deleted my comment. Changed my minde don't wanna get in to the discussion.
-
From the picture I'm pretty sure it's you feeder that's grinding the filament til it breaks. as you also mention youself, its most likely that its your feeder tension thats to high. whats the posision at now? It can be other things too. If using a polybox there can be to mutch friktion for the feeder to pull the filament freely. try and print without, and see it it helps. There can be a small plug in the print head making too mutch resistance. try and make hot pull, cold pull til its clean. or change to another core. Your Pla and Pva can be moist, making it to soft. try and dry it. 🙂
-
PVA too dry? Brittle and cracks in feeder
NBull replied to double0jimb0's topic in Materials & profiles
What printer is this, the s3? -
Material runs off roll holder
NBull replied to Niels_Amstel_Engineering's topic in Improve your 3D prints
When using a wider spool, that doesn't fit in the two grooves on the back holder. I would use an external hold like you do with the white spool. probably the best way to prevent this. If you "need" to use the back holder I would put som type of stop (clamp) on the back holder tube so that the spool cant move away from the printer if that makes sense. Note: When using two external holders you are better off crossing them on the back so that the spool on the left goes to the right feeder. this will help the filament sensor give more precise readings. do to the angle/direction of the filament. -
Okay good to know, thanks for the update. 🙂
-
Hej Waldo. Heres both a zipped and normal. Accuracy_04_Nozzle_v2_Z-hop.curaprofile Accuracy_04_Nozzle_v2_Z-hop.curaprofile.zip Edit: Removed () from Curaprofile name I don't know if this is your problem but sometimes when i download Cura projects or Curaprofiles from the forum. The file name get mixet up so it looks something like this. "1853372799_Accuracy04Nozzlev2_curaprofile.a6584862212dee6b33eded1a52152f48" If you remove the part from after curaprofile and alter the "_" in from of curaprofile to "." it will work, the numbers in front of Accuracy can also be removed. 1 hour and 20 minutes. it's not fast, but to me it would be an acceptable time for an object at this size. If I needed to do it faster, I would probably up the print speed from 30 to 40 and set layer height to 0.2 then it will be under and hour in print time.
-
First print (on the left) I forgot to turn off the brim. that's why the text is smudge Second print (the on on the right) brim is off, and "combing mode" set to "not in skin" z hop when retracted is on. I have put up the pictures unaltered, not sure if the forum allows this big fil sizes if not Ill changes them. (Edit: It doesn't, it automatic down scales it) Hope you can use them.


-
S5 auto change to other print head/spool when out during print
NBull replied to Projects's topic in Improve your 3D prints
I also think this would be a great feature/option for the dual head Ultimaker printers. And not that impossible to implement, there might be a small deviation in in layer where the changes happens, but probably not more then what a spool changes will make. a sacrifice I personally wouldn't mind for the extra option. -
Advice needed about poor quality prints on S5
NBull replied to FablabCardiff's topic in Improve your 3D prints
Hej FablabCardiff You can try this profile if you want, its my "default" profile for the s5. it's aimed for medium size prints so you might have to tweek it for bigger prints if you think it takes to long. But it is in general a slow printing profile. And as Smithy mentioned 60-65 mm/s is way to fast if you want a nice surface finish. I personally never go over 40 mm/s even on "fast" prints. locking at you pictures I think you also might need to check you axel alignment. Accuracy 0.4 Nozzle v2.curaprofile -
Hej waldo. Can you try and print your keychain from the other post with my Accuracy profile. "if you haven't sent it off to the reseller already" Its slow, but works pretty fairly on my S5, im off on weekend but ill take some studio photos of my print on monday then you can compare them 1:1 if you like. Accuracy 0.4 Nozzle v2.curaprofile
-
PVA too dry? Brittle and cracks in feeder
NBull replied to double0jimb0's topic in Materials & profiles
PVA can get too dry, and will make it brittle. but I have not heard of a dessicant bag casing it. Thats more likely to happen when using a dehydrator or oven. Sunlight can also make it brittle btw. To save the spole, I don't know. best thing would probably be to stor it in a terrarium where you can monitor and adjust the humidity precisely. I would personally put it in a big air tight container 50-60L whit a humidity monitor and try to keep it at 20% just opening the lid to adjust if it goes below. or put som drops of water in the container if its way to low. My theory is that is better to raise the humidity slowly. -
Hej Roldy It's because the model is not optimised for 3D printing. There's a lot of fine details in the .stl that are not printed. eg. the walls under the hatch is to thin for Cura to print them. and this messes up the support. if you set the nozzle to 0.3 they will print and you will get the support. please note that theres still a lot of the other walls that ar not printed because they are to thin. I am not sure if theres a setting in Cura that will let you print everything thing whit a minimum 1 wall thickness. Edit: Sorry I didn't notice that you have the thin walls printing. are you upscaling the model? Can you try and save as a Cura project instead of the .3mf so I can see the settings.
-
As far as i know it's not possible to just open the profiles as text. but it might have changed. otherwise there are some tips in this old thread. Ps. when opening the .curaprofiles in Cura all the settings should be imported even though you can see them in the text file.
-
Aligning the axles, Impossible screw placement
NBull replied to NBull's topic in Improve your 3D prints
Aren't you more likely to damage the thread with a ball head. -
Aligning the axles, Impossible screw placement
NBull replied to NBull's topic in Improve your 3D prints
Thanks for the answer, the question for the steeper screw was more ment as a "service tightening" so since I don't see any noticeable signs that its lose I'll just let i be. But I think I have to get a L shaped wrench, don't really feel like i can tighten the screw well enough with the screwdriver. -
When locking at the print preview/camera does that function as intended. Just wondering if it might be a connection problem Is it the same if you use Cura connect?
-
Whether climate change is natural or man made. I will not comment on, as it depends largely on what scientist you ask. Regarding recycling, I personally believe that we as human beings should strive to recycle the materials we can. not necessarily because of the climate, but because I am against, the "use and throw away" culture. Saying that CO2 is a "life gas. No poison at all" is wrong. (CO2) is natural and harmless in small quantities. But if you inhale too much, it "will" kill you.
-
Aligning the axles, Impossible screw placement
NBull replied to NBull's topic in Improve your 3D prints
I was thinking that i was just move the problem to the opposite side doing this. But it is correct i only need to align the wheel on one side. So its just me overthinking the problem. Blinded by the fact that I couldn't make both sides fit at the same time. A side note, are there any need to check the small screw holding the wheel on the steeper? I cant see any way to do this whit out removing the steeper completely. Which i would prefer not doing.
-
A lot of places/countries use the seven numbers categorisation. even though it's not official a standard yet.

-
I would really like to know where you find that scientific experiment. I agree that the press isn't the most trustworthy source of knowledge. And I will not disagree that plants need CO2 to grow. But claim that we can solve all our problems by emitting more CO2 I find hard to agree on.
-
Aligning the axles, Impossible screw placement
NBull replied to NBull's topic in Improve your 3D prints
I will try and explain it better, it can also be that im just doing it wrong! I use the comb tool, but in every groove the screw is not possible to get to, if the rod was placed in-between two grooves it will work. Thats why i wanna move the wheel one tooth over on the belt so that the screw is better placed when using the comb tool.

-
Aligning the axles, Impossible screw placement
NBull replied to NBull's topic in Improve your 3D prints
So skipping a tooth on one side. I just find it weird that the two set screws can be so much offset compared to last alignment. -
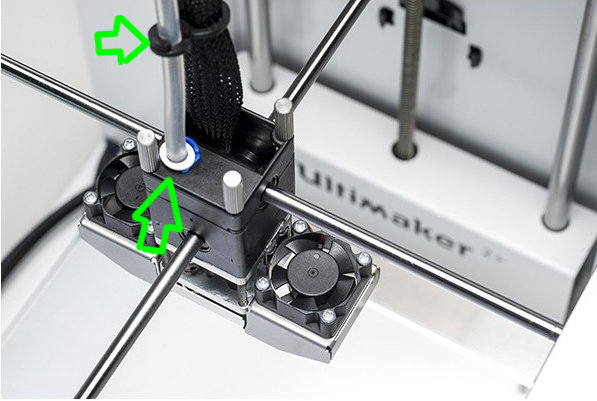
Hi im trying to check align on the axles using the alignment pins. (have been done before) but the right side x axles the one over the camera i cant get in a position where i can get to the screw. its almost like it have jumped a tooth on the wheel. but the the printer wassent that off alignment. so dont think it have skipped a tooth. So big question is if i should skip a tooth to get to the screw. i can also make a new alignment pin where the groves have ben shifted half a spot, but then i'll probably get the same problem on the other side. so any suggestions?


