


Interesting gr5.
May i ask what values you have found to produce the best print quality or does the optimal acceleration and jerk value per printer also depend on other factors?
Thanks
p.s. i went with the 800 mm/s^2 and 10mm/s values for the time being as a test because the wanhao duplicator 6 uses them and i've got a print sample from one which i've been using to compare print quality with.
Edited by Guest


.thumb.jpeg.0b7a05eafc09add17b8338efde5852e9.jpeg)
Recommended Posts
Top Posters In This Topic
50
38
38
38
Popular Days
Jun 17
24
Jun 18
22
Jun 15
18
May 27
16
Top Posters In This Topic
DrR1pper 50 posts
gr5 38 posts
cloakfiend 38 posts
Torgeir 38 posts
Popular Days
Jun 17 2015
24 posts
Jun 18 2015
22 posts
Jun 15 2015
18 posts
May 27 2016
16 posts
Popular Posts
gr5
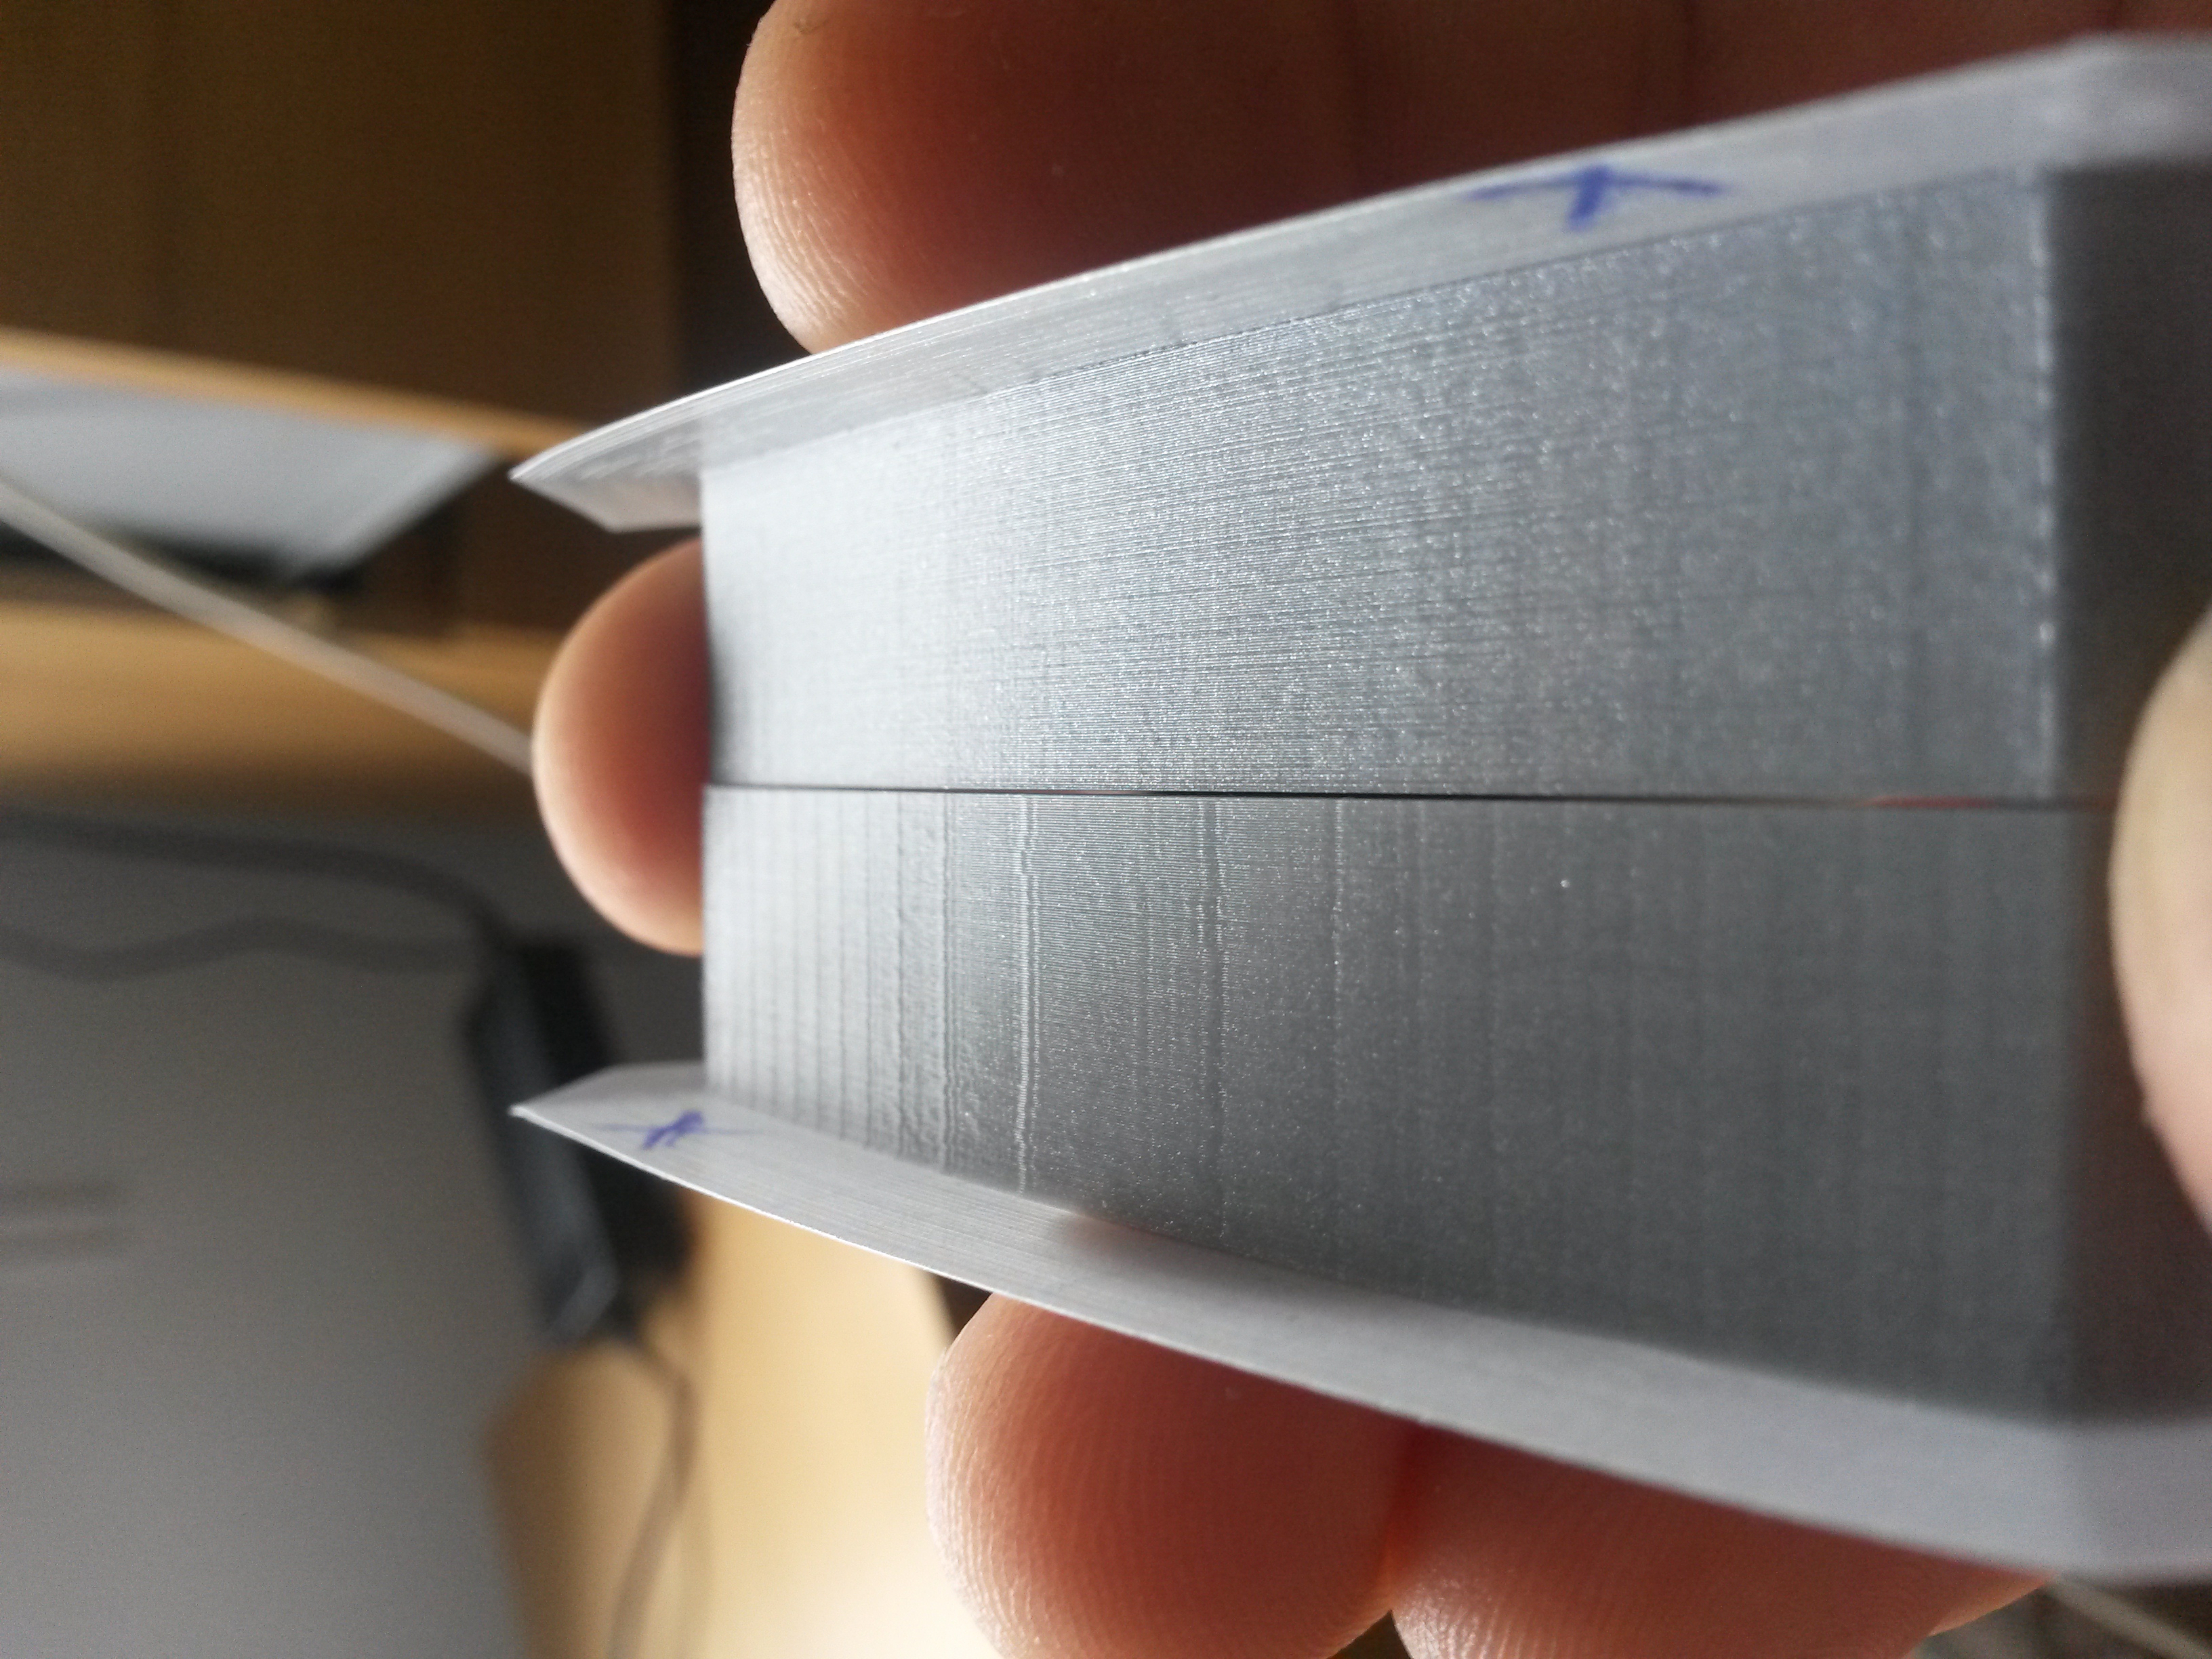
Not so fast Martijn! This is not solved yet! I looked at the gcodes for the lines that get those diagonal lines on benchy. To the left of the arch (near the top of the arch) a typical movement in X
JohnInOttawa
This is of interest to me, I have both an Ultimaker Original and UM3, will certainly mod the Original, just need to decide if I will mod the UM3 as well. Shout out to gr5 - great service,
ArrMack
Hi, the link to this is dead. Any chance you could add an updated link?
Posted Images
gr5 2,170
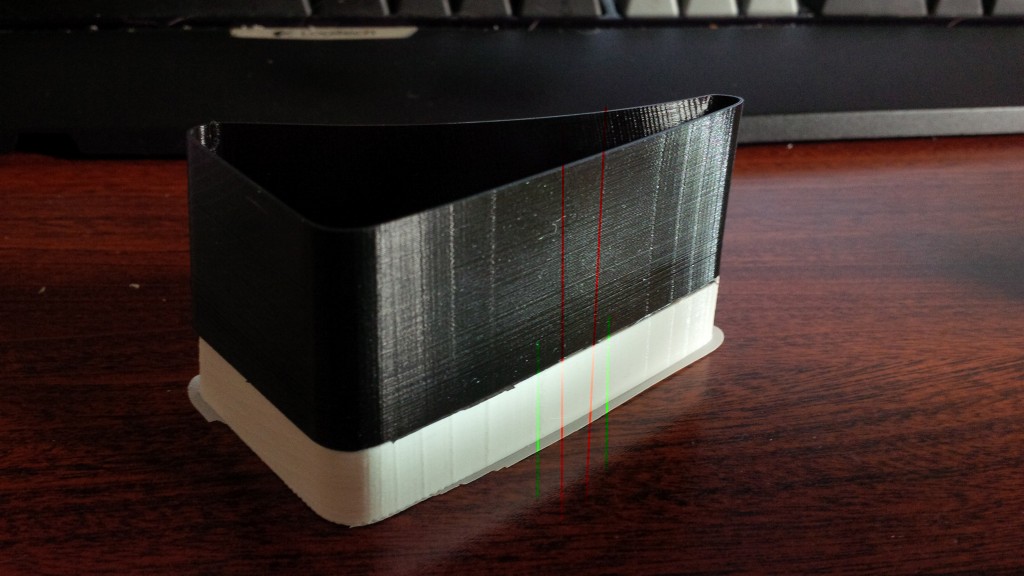
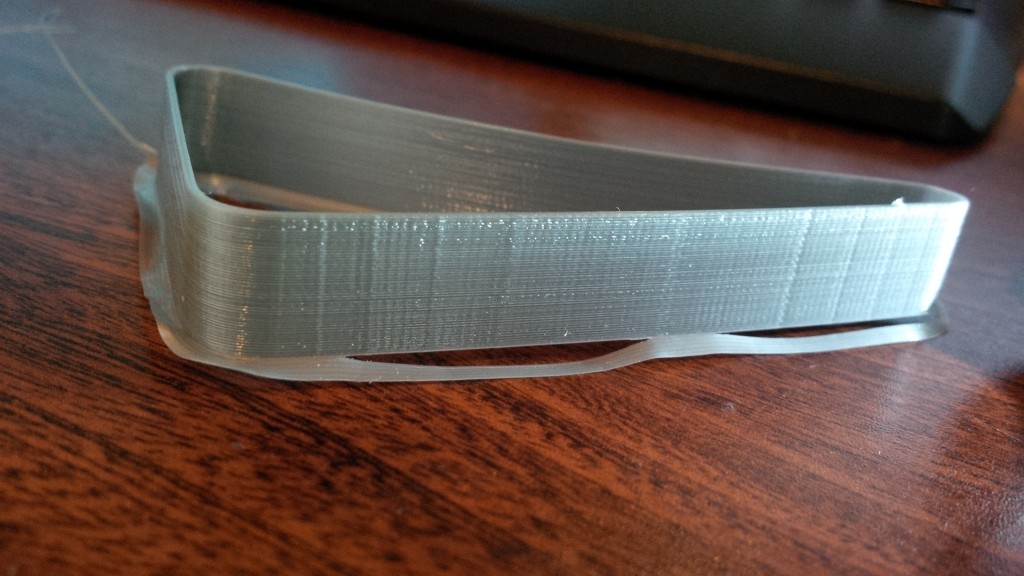
I found that lower acceleration reduced quality because then you get the extruder speeding up and slowing down which causes over extrusion when it slows down (corners) and underextrusion in between. Same thing with lower jerk.
However with high values you can get another quality issue that most people call "ringing" and look similar to zebra stripes but is different.
Link to post
Share on other sites