Jump to content

Why distorted print of 45 degree beam?


Stringman

Recommended Posts

Posted (edited) · Why distorted print of 45 degree beam?

0204160706.thumb.jpg.4062f1d5845bb83590235617369096e5.jpg

This student model mystifies me.  All the struts in this model are supposed to be straight, as viewed in Cura. We printed it in PLA on our Ultimaker 2 in the orientation you see in the photo, with the side that has two beams (fat and thin) across the front of the Ultimaker in the X axis, and the side with the un-bent beam running along the Y axis to the back of the machine.   As I watched the print, the unsupported angles did vibrate with the machine and the action of the print head, yet only the skinny angle beam in the X axis turned out curved (it is straight in the model) . . . . and an identically sized and angled strut in the Y axis was straight as an arrow.  All corners are exactly where they should be so this mates up fine to the rest of the model they designed, but the selective distortion begs for an explanation.  

I'm an electronics tech and not a mechanical engineer so I my background is limited, but I'm going to throw out a guess here:  the unsupported front edge of the Ultimaker 2 build platform can vibrate up and down.  So the entire angle beam in the X axis is able to bounce up and down during the print.  By contrast, the beam printing in the Y axis is supported firmly at the back of the machine and only vibrates at one end.  WHY that would result in a curve beats me, but it's the only distinction I can see between the two sides.   And obviously, as you can see by the fat  angle brace in the X axis, parts that are thick enough to not vibrate don't have any problem at all.

0204160706.thumb.jpg.4062f1d5845bb83590235617369096e5.jpg

Edited by Guest
  • Link to post
    Share on other sites

    Posted · Why distorted print of 45 degree beam?

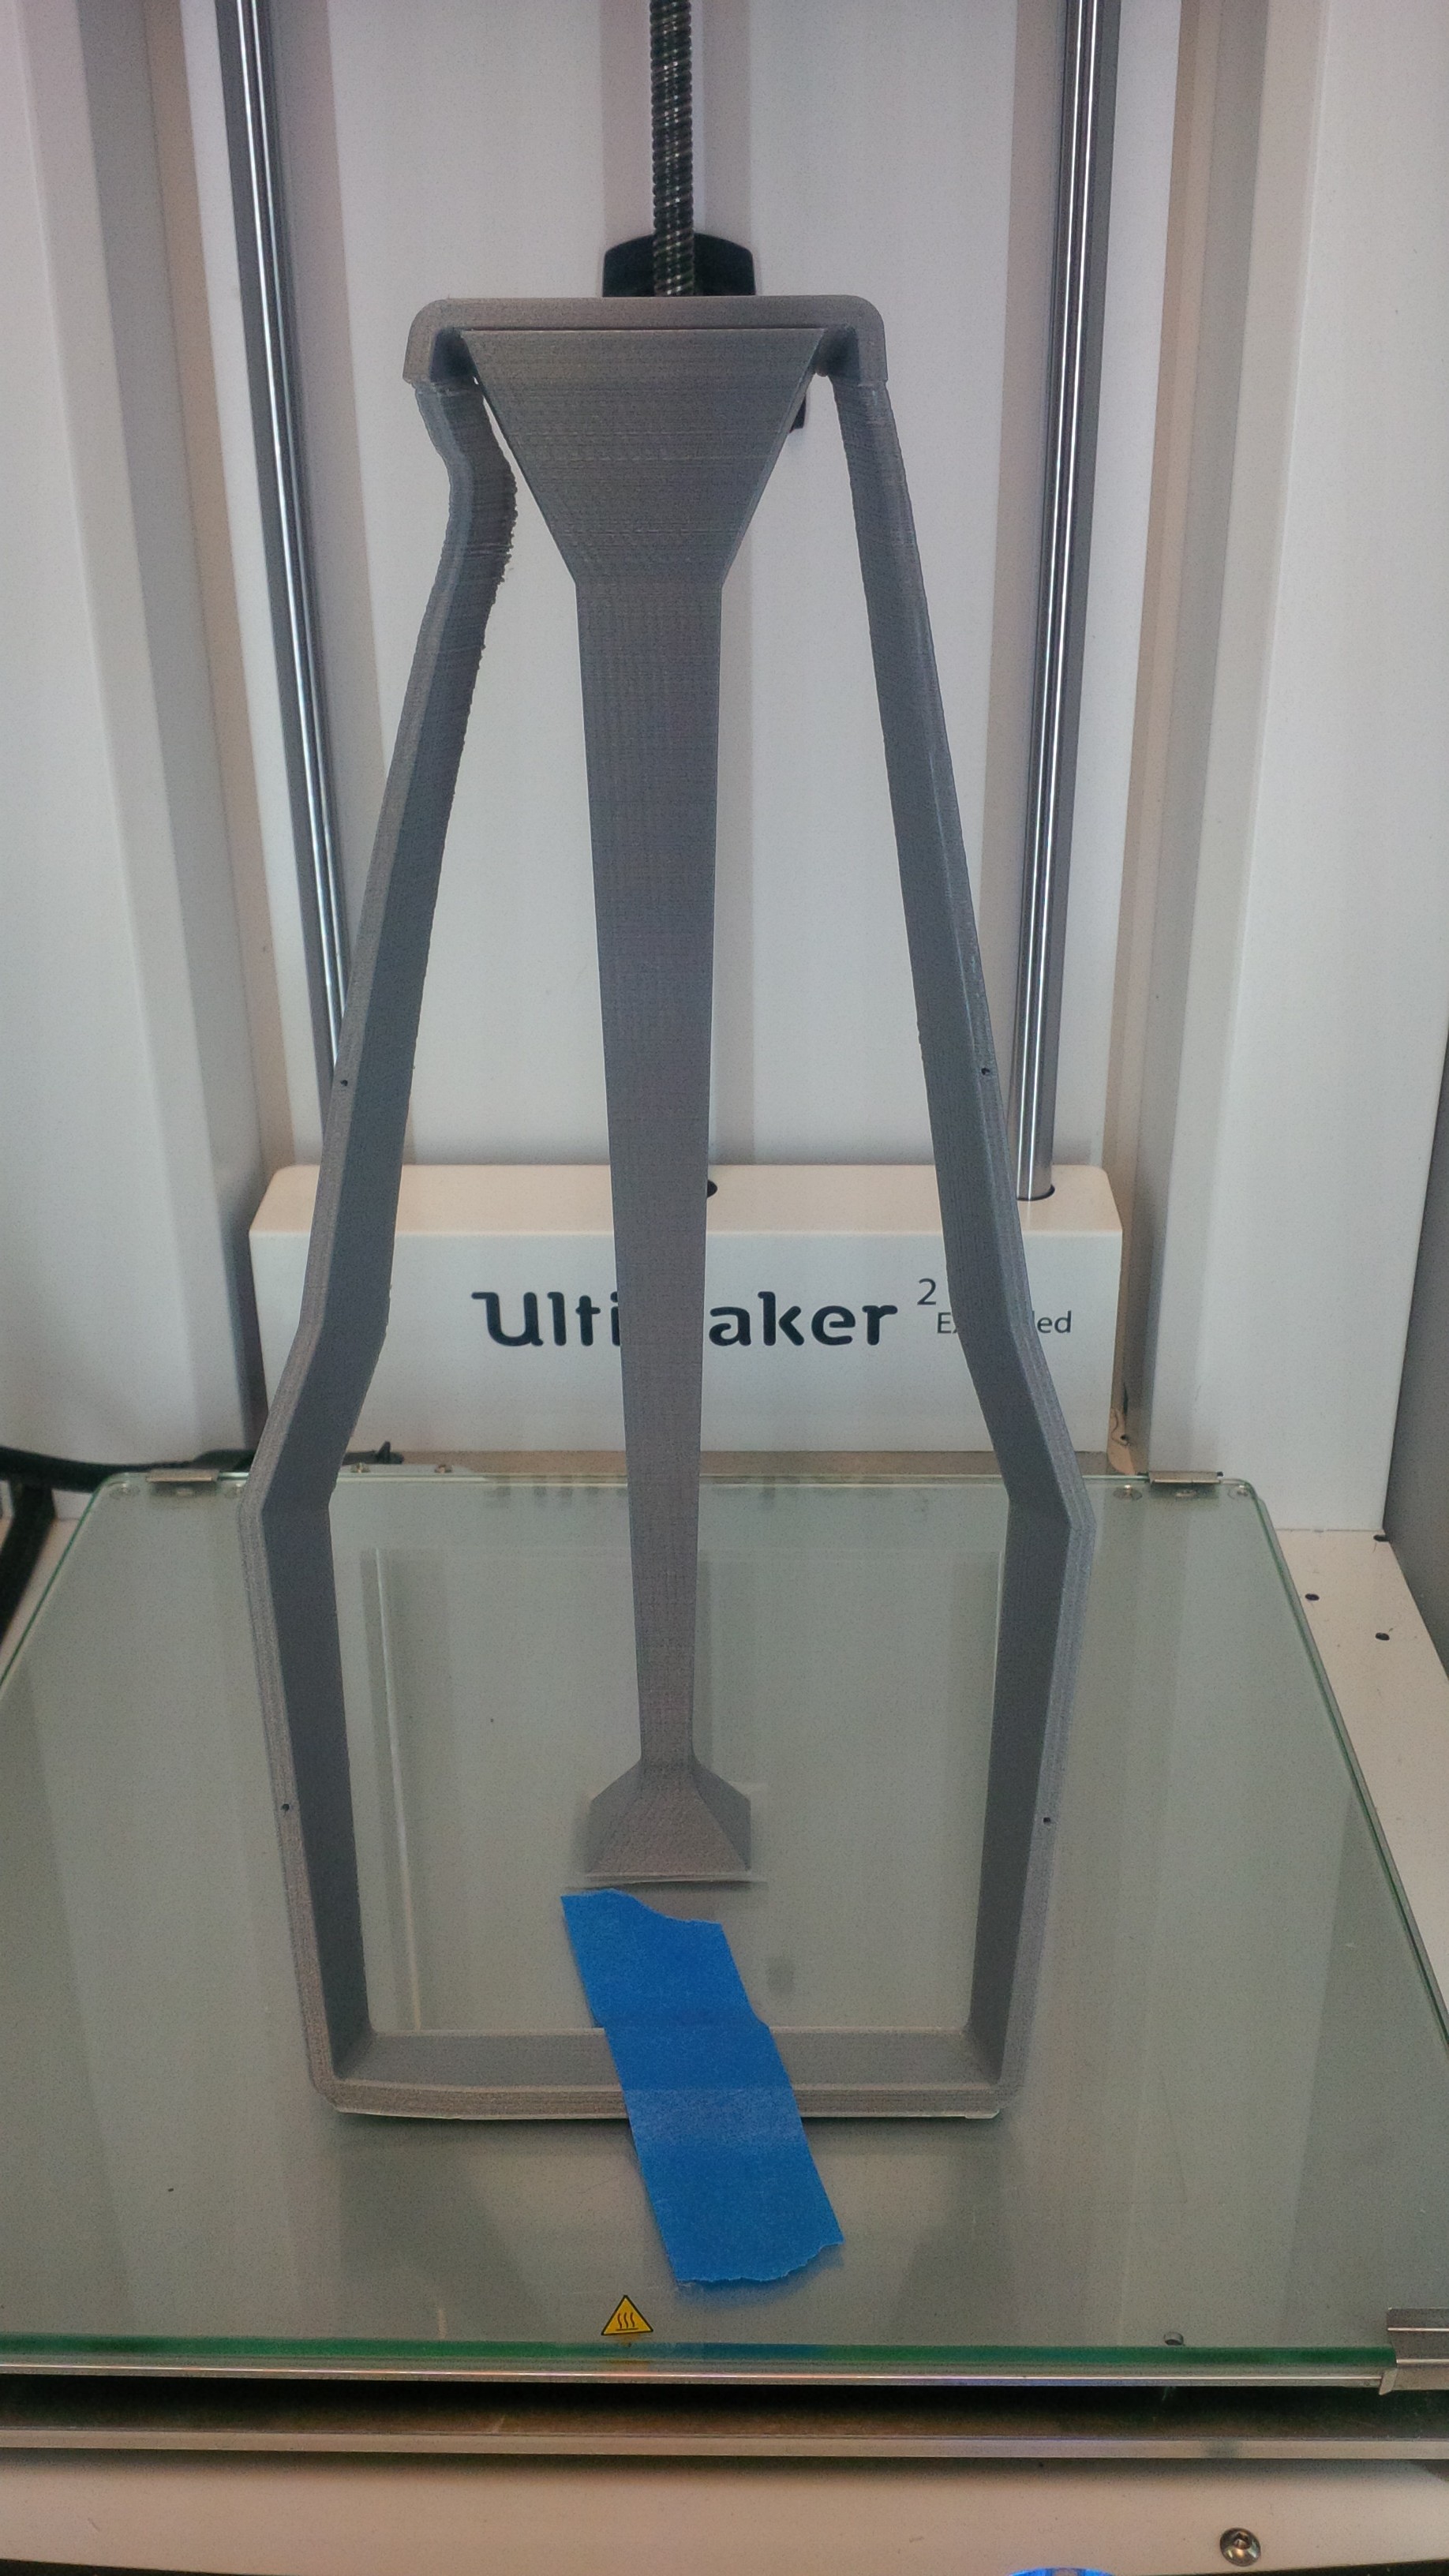
    The left corner has more cooling because the fan on the left side is closer to the nozzle (is this UM2 or UMO? Please update your profile but still same answer just more so for UMO).

    If it's a UM2 then the front two beams get more cooling as when it prints one the other gets more fan but the rear one doesn't get as much fan.

    Were your fan(s) at 100% that is critical.

    I'd print it a bit cool - try 190C. And slow - try 35mm/sec. And with max possible fan.

    Also it would help to support that back strut a little higher up of course.

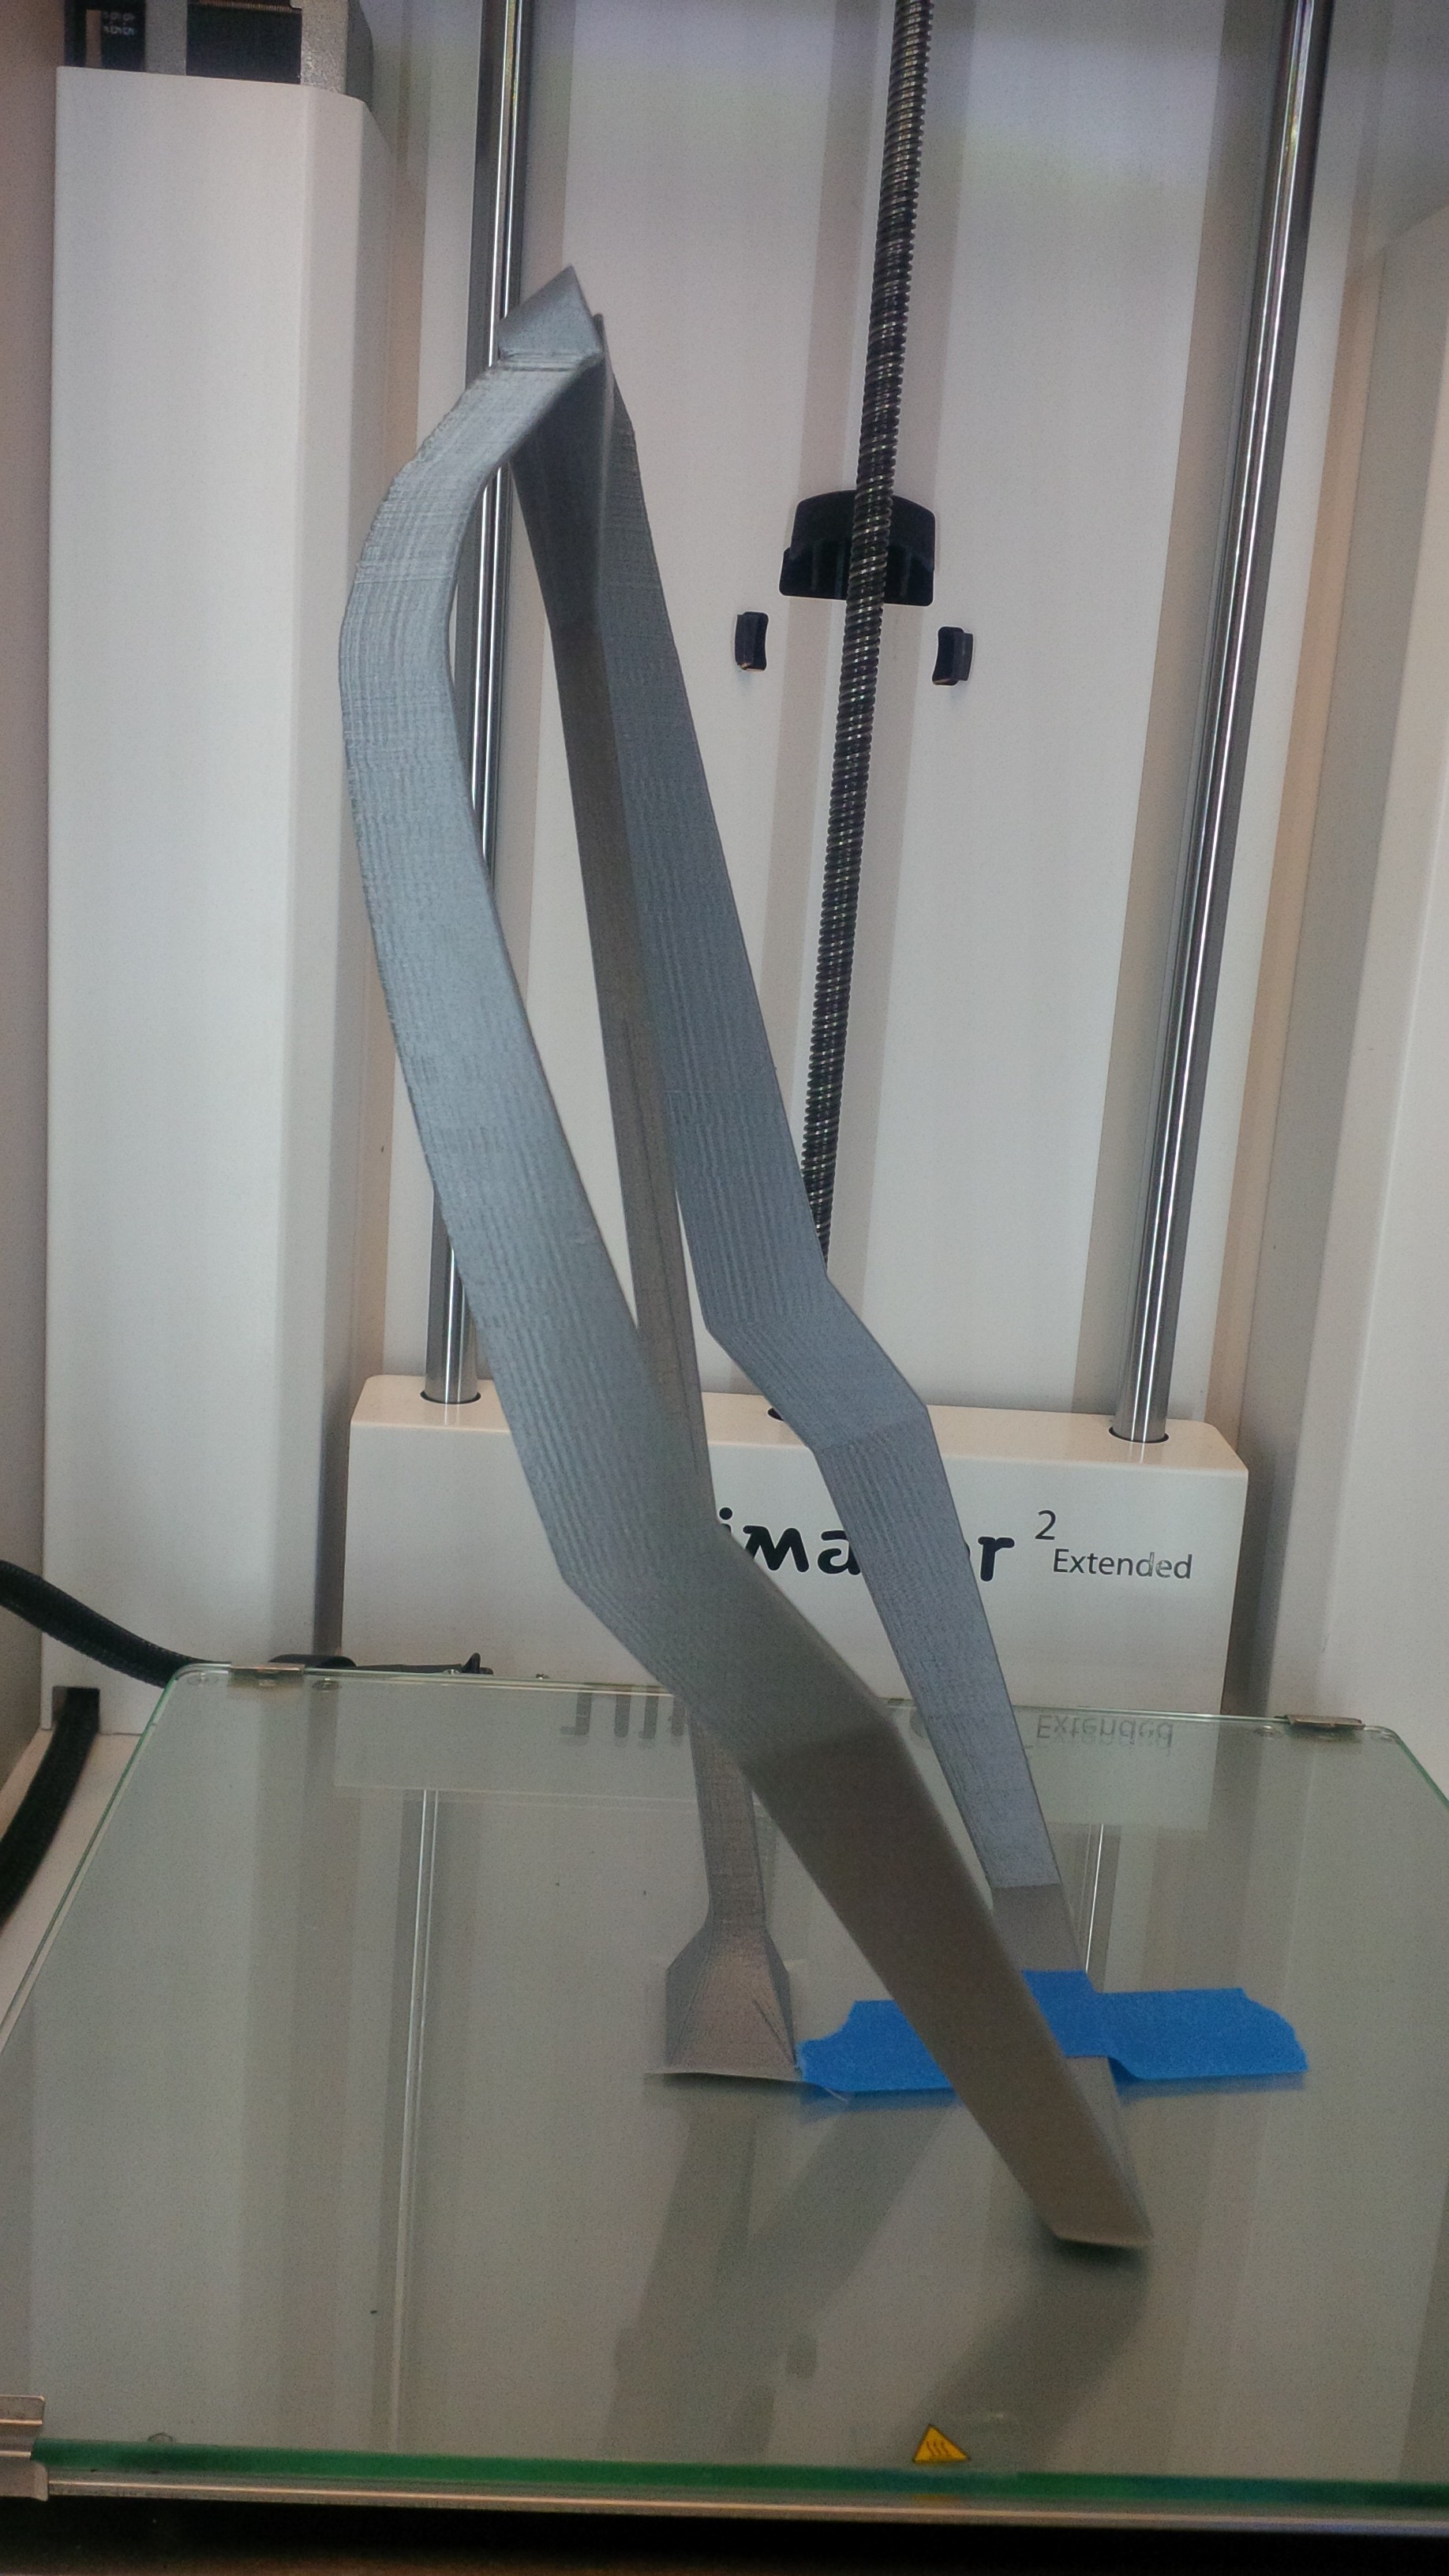
    The thinness is a problem like you thought but also the overhang is a problem. A perfectly vertical rod/strut is easier to print.

    Another possibility - where does it change Z layers. I would expect it to be random on these 3 posts but maybe it always changes Z on the rear one? And so it does 2 layers right in a row and the lower layer is still not cooled yet when it starts the second layer - so every other layer is placed on a liquid layer below.

    Anyway all of these issues are helped with more fan and printing cooler. It's easier to print 2 pyramids than one as one can be cooling while the other is being printed. You only need a few seconds (3 to 5) to cool but on this part you don't always get that much time.

    Let us know what you learn.

  • Link to post
    Share on other sites

    Posted · Why distorted print of 45 degree beam?

    it does my head in to try and think which way it was printed. could you take a photo of it in the printed and in the orientation it was printed.

    Looks like it was printed to hot or not enough fans.

    Whats you print settings? nozzle temp? print speed? travel speed? layer height?

  • Link to post
    Share on other sites

    Posted · Why distorted print of 45 degree beam?


    @labern - I can see your confusion since you are upside-down on the underside of the earth. You must have to turn all the pictures upside-down to see them? Or do you just turn your computer upside-down? :)

  • Link to post
    Share on other sites

    Posted · Why distorted print of 45 degree beam?

    I have also a strange one, similar problem I can't explain:

    IMG_20151231_114150.jpg

    It's suppose to be straight, but for some reason it's curved and somehow connected back to where it was suppose to.

    Here's another angle. This object is suppose to be symmetrical.

    IMG_20151231_114050.jpg

  • Link to post
    Share on other sites

    Posted · Why distorted print of 45 degree beam?

    You definitely need to add some support structure to hold that all still while it prints. Have the support structure contact the main part only on a 1mm diameter spot. use some cross bracing to keep everything stable and steady as it prints.

  • Link to post
    Share on other sites

    Posted · Why distorted print of 45 degree beam?

    But why does only 1 side warp funny? And then how does it eventually re-attach slowly?

  • Link to post
    Share on other sites

    Posted · Why distorted print of 45 degree beam?

    But why does only 1 side warp funny? And then how does it eventually re-attach slowly?


    Magic.

    Each Ultimaker comes with a reserve of pixie dust. Once it runs out, you have to purchase the next upgrade model though.

    I'm curious to see how my Ultimaker 2 Extended+ would print those, with the new fan shrouds/etc.

  • Link to post
    Share on other sites

    Posted · Why distorted print of 45 degree beam?

    @labern - I can see your confusion since you are upside-down on the underside of the earth.  You must have to turn all the pictures upside-down to see them?  Or do you just turn your computer upside-down? :)


    Haha :)

    I had a bad headache that day and must have missed that bit. reading x and y axis the whole way though got me all confused :O

  • Link to post
    Share on other sites

    Posted (edited) · Why distorted print of 45 degree beam?

    Must be some kind of thermal warping, or cura. Or the devils work. A timelapse print would be the only way to get to the root cause. Anyone willing to do it?

    Another reason all future um printers should come with inbuilt monitoring cameras which can offer realtime timelapse up to the point of watching, or at least a folder of up to the point collected images for you to skim through in the preview window which you could make a timpelapse of, or something. Would make total sense and would not be a marketing gimmick but a qc tool and problem solver.

    Edited by Guest
  • Link to post
    Share on other sites

    Posted · Why distorted print of 45 degree beam?

    Must be some kind of thermal warping, or cura. Or the devils work. A timelapse print would be the only way to get to the root cause. Anyone willing to do it?

    Another reason all future um printers should come with inbuilt monitoring cameras which can offer realtime timelapse up to the point of watching, or at least a folder of up to the point collected images for you to skim through in the preview window which you could make a timpelapse of, or something. Would make total sense and would not be a marketing gimmick but a qc tool and problem solver.


    Lots of camera's available that will auto-upload to a instagram/cloud/etc. Our cheap $100 P&S does that. I can be anywhere on my phone or tablet and check on the progress.

  • Link to post
    Share on other sites

    Posted · Why distorted print of 45 degree beam?

    If its not included, then some people will never purchase it. Lots of cool things are available but they cost extra money. and getting them takes some time in researching the best one for you and the best price. People are lazy.

    If you have a camera that drops timlapse pics then you could solve the mystery warping?


    lol most of us don't want to pay more to have a camera 'built-in' when most already own a camera. They could sell a 'upgrade' kit or something, that would work though.

  • Link to post
    Share on other sites

    Posted · Why distorted print of 45 degree beam?

    Cameras are apparently dirt cheap so i dont think it would add that much but having it all setup ready to go would be worth any minor extra cost. While i admit many people enjoy tinkering, im pretty sure there are many who dont like it one bit, and they are the future of 3d printing rather than the tinkeres. Fdm machines are at their limits so simplifying their use including any peripherals such as cameras would help rather than hurt. Many of my friends think i am a genius just because i make stuff, but i keep telling them its easy, that they just need to learn a few things, i guess some people just dont like trial an error. Lol

  • Link to post
    Share on other sites

    Posted · Why distorted print of 45 degree beam?

    But why does only 1 side warp funny? And then how does it eventually re-attach slowly?


    When printing this gray part in the "warped" region the left leg was leaning down too far and after it printed each layer the leg tilted over further and further. The printer kept bringing the leg "back" to the left to recover. It's a bit strange that it tilted so slowly and consistently. I'm wondering if it was above the glass temp in the base (bed too hot) but more likely it was peeling off the glass (not sticking well enough).

    The best fix is lots of cross bracing that your remove and discard after the print is done to keep things stiffer and less stress at the base of the print.

    I guess in addition you need more brim/glue/squishing to keep that part secured down onto the glass. Here's my standard spiel on getting things to stick like hell to glass:

    --------------------

    lifting corners, curling corners, part sticking to glass

    1) Make sure the glass is clean if you haven't cleaned it for a few weeks. You want a very thin coat of PVA glue which is found in hairspray, glue stick, wood glue. If you use glue stick or wood glue you need to dilute it with water - about 5 to 10 parts water to 1 part glue. So for example if you use glue stick, apply only to the outer edge of your model outline then add a tablespoon of water and spread with a tissue such that you thin it so much you can't see it anymore. wood glue is better. hairspray doesn't need to be diluted. When it dries it should be invisible. This glue works well for most plastics.

    2) Heat the bed. This helps the plastic fill in completely (no air pockets) so you have better contact with the glass. For PLA any temp above 40C is safe. I often print at 60C bed.

    3) heat the bed (didn't I already say that?). Keeping the bottom layers above the glass temp of the material makes it so the bottom layers can flex a bit (very very tiny amount) and relieve the tension/stress. For PLA 60C is better than 50C. 70C is even better but then you get other "warping" like issues at the corners where they move inward but if you are desperate it's worth it. For ABS you want 110C (100C is good enough).

    4) rounded corners - having square corners puts all the lifting force on a tiny spot. Rounding the corner spreads the force out more. This is optional if you use brim.

    5) Brim - this is the most important of all. Turn on the brim feature in cura and do 10 passes of brim. This is awesome.

    6) Squish - make sure the bottom layer is squishing onto the glass with no gaps in the brim. The first trace going down should be flat like a pancake, not rounded like string. don't run the leveling procedure if it is off, just turn the 3 screws the same amount while it is printing the skirt or brim. Counter clockwise from below gets the bed closer to the nozzle. Don't panic, take a breath, think about which way to move the glass, think about how the screw works, then twist. This may take 30 seconds but it's worth it to not rush it. You can always restart the print.

    If you do all this you will then ask me "how the hell do I get my part off the glass?". Well first let it cool completely. Or even put it in the freezer. Then use a sharp putty knife under a corner and it should pop off.

    • Like 1
    Link to post
    Share on other sites

    Create an account or sign in to comment

    You need to be a member in order to leave a comment

    Create an account

    Sign up for a new account in our community. It's easy!

    Register a new account

    Sign in

    Already have an account? Sign in here.

    Sign In Now
    • Our picks

      • UltiMaker Cura 5.7 stable released
        Cura 5.7 is here and it brings a handy new workflow improvement when using Thingiverse and Cura together, as well as additional capabilities for Method series printers, and a powerful way of sharing print settings using new printer-agnostic project files! Read on to find out about all of these improvements and more. 
         
          • Like
        • 18 replies
      • S-Line Firmware 8.3.0 was released Nov. 20th on the "Latest" firmware branch.
        (Sorry, was out of office when this released)

        This update is for...
        All UltiMaker S series  
        New features
         
        Temperature status. During print preparation, the temperatures of the print cores and build plate will be shown on the display. This gives a better indication of the progress and remaining wait time. Save log files in paused state. It is now possible to save the printer's log files to USB if the currently active print job is paused. Previously, the Dump logs to USB option was only enabled if the printer was in idle state. Confirm print removal via Digital Factory. If the printer is connected to the Digital Factory, it is now possible to confirm the removal of a previous print job via the Digital Factory interface. This is useful in situations where the build plate is clear, but the operator forgot to select Confirm removal on the printer’s display. Visit this page for more information about this feature.
          • Like
        • 0 replies
    ×
    ×
    • Create New...