

Thanks for the speedy reply, looks like I have a tc1 thermocouple board and I need a tc2 from fabrc8, and it looks like there boards are back in stock now, I'll post what happens.
Does anybody know if you can just wire the temp sensor directly to the board and cut out the thermocouple? I remember seeing something about just hooking up the sensor directly to the signal and ground connection points on the motherboard connection. The more research I do there more I see how much of a nightmare temp sensing issues are with the umo. I can't believe I'm about to buy a prusa i3 kit because I can't get this thing running, this is so lame. I'm so close, I literally feel like I just have to change the right thing in configurations.h and it would work. But I don't know what to change.
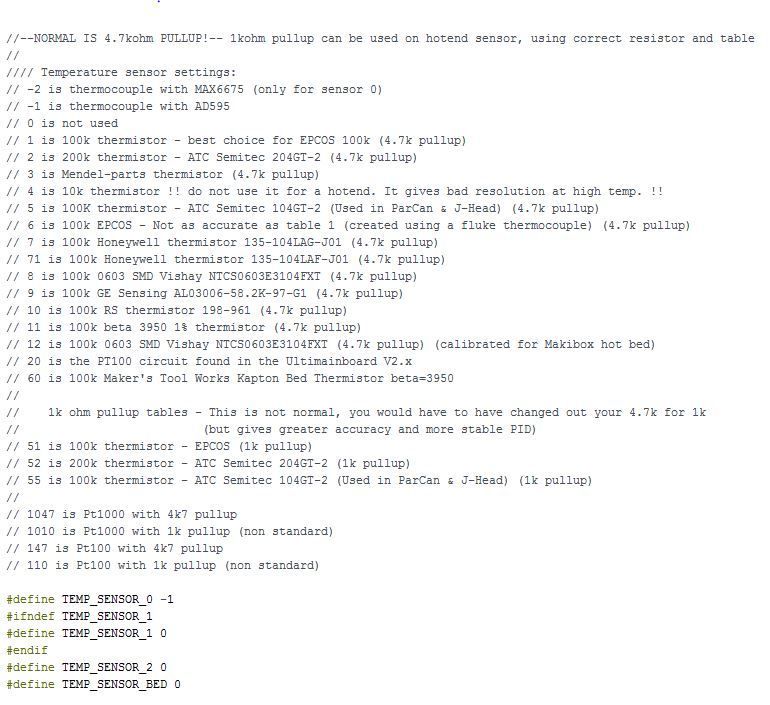
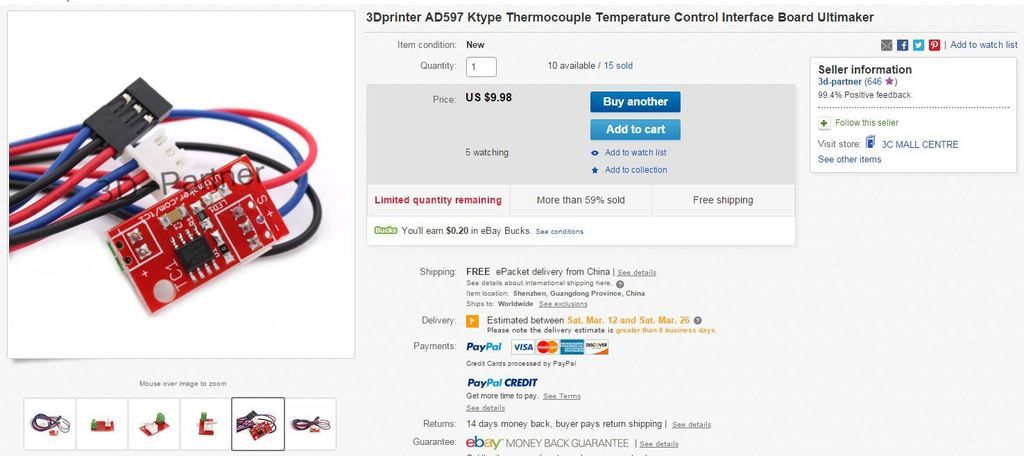
In configurations.h it says 595 but it never says 597 as thermo option, this is my current firmware settings with a picture of the current board. Im sorry if this has already been answered 1000 times I've really been searching both the ultimaker and reprap forums. Printer connects to repetier-host but gives me the same 134 ish room temp reading and I cant move the steppers with the arrow controls.
Ok guys thanks for walking me through that one, I got the temp sensor figured out, running a thermistor direct to the board I have room temp in cura. Now my question is, since I have the wrong 12v 40w for my e3d, can I order the dfrobot 19v 38w heater cartridge (will it be in the margin of error?) and is it a direct drop in replacement for the ultimaker original one?
thanks

UMO heater hole is 4mm so make sure you buy a 4mm cartridge heater. These tend to cost more as it's hard to get much wattage in such a tiny package.
Wattage has purely to do with resistance and voltage. The formula is:
Wattage = Voltage squaed divided by resistance. Or W = v^2/R.
First calculate the R value - so for the 12V 40W that means it is r=v^2/W or 3.6 ohms. Wow. At 19V that's 100 Watts. That will melt itself in seconds even if it's inside an aluminum block. If you can get say a 9 ohm heater (40W at 19V or 16W at 12V) or a 14.4 ohm heater - or in between then that would work for a 19V system. Is your printer running off 19V?
There are many types of temp sensors: thermistors, thermocouples, PT100s. Most thermistors are the easiest to hook up to an arduino (because of the limited capabilites of arduino) but they usually are permanently wrecked if you go above around 150C to 200C so aren't appropriate for the head which typically prints at 200C to 240C. Thermocouples can handle much hotter than 250C so they are used for the UMO. The UMO+ uses PT100 which are made from platinum. Both thermocouples and PT100 need custom electronics. I don't know the diff between ad595 and ad597 but I'm guessing they are about the same. when using the thermocouples and the ad595 (or whatever it's called) the UMO expects exactly 5V=500C and 1V=100C and 0V=0C and so on linearly in between. without looking up the 2 parts I strongly suspect they both put out the same voltages for a given temperature.
Hooking anything directly to the temp sensor on UMO will either not give the right temp or will self destruct at temps of 200C.
Checkout these great sites for building Marlin with various temp sensors:
http://marlinbuilder.robotfuzz.com/
or
The first one has many more options but is an older version of Marlin. But on the plus side you can do a diff on Configuartion.h and see what it did (it outputs configuartion.h in addition to the hex file).
The second one has a much newer version of Marlin but has fewer options. But it seems to have plenty of temp sensor options.
This printer is for sale for $600 in the southern california area if anyone is interested.

Just one think. Umo heater it's 6mm dia, um2 4mm.
-
Our picks
-

UltiMaker Cura 5.7 stable released
ArunC posted a topic in UltiMaker Cura,
Cura 5.7 is here and it brings a handy new workflow improvement when using Thingiverse and Cura together, as well as additional capabilities for Method series printers, and a powerful way of sharing print settings using new printer-agnostic project files! Read on to find out about all of these improvements and more.
-
-
- 18 replies
.thumb.jpeg.0b7a05eafc09add17b8338efde5852e9.jpeg)
Picked By
MariMakes, -
-
Release Notes: S-Line Firmware 8.3.0 (Latest)
Dustin posted a topic in Firmware,
S-Line Firmware 8.3.0 was released Nov. 20th on the "Latest" firmware branch.
(Sorry, was out of office when this released)
This update is for...
All UltiMaker S series
New features
Temperature status. During print preparation, the temperatures of the print cores and build plate will be shown on the display. This gives a better indication of the progress and remaining wait time. Save log files in paused state. It is now possible to save the printer's log files to USB if the currently active print job is paused. Previously, the Dump logs to USB option was only enabled if the printer was in idle state. Confirm print removal via Digital Factory. If the printer is connected to the Digital Factory, it is now possible to confirm the removal of a previous print job via the Digital Factory interface. This is useful in situations where the build plate is clear, but the operator forgot to select Confirm removal on the printer’s display. Visit this page for more information about this feature.-
-
- 0 replies
Picked By
MariMakes, -
-


.thumb.jpeg.0b7a05eafc09add17b8338efde5852e9.jpeg)
Recommended Posts
gr5 2,171
ad597 reprap board sounds right.
Link to post
Share on other sites