


ah, to late, indeed 2.5.1 = Beta2, just some miscommunication
Edited by Guest

Yeah the caption/label hasn't been updated on the website, but when you commence the download, you will see ....


Hi,
Where can i download the 2.5 BETA 2 version?
The downloadlink says versoin 2.5.1
There was some internal miscommunication; it should read "2.5 beta 2", rather than "2.5.1"
Just use that download link..

zerspaner_gerd 382
There was some internal miscommunication
The change was also forgotten in Cura, since there is still only Cura 2.5 Beta

Is there a reason why the 2nd layer on the tower has less material like the remaining layers, no wonder the breaks!
2ter Layer:
...
Gcode type RepRap
You can see (tower) the printing of the 2nd layer has gaps.
With Cura 2.4 is not the case
Could you try with the latest beta (2.5.0-BETA-2) ?
Sorry, I think this is deceiving, because Cura 2.4 does not use the 2nd nozzle, therefore, one can not compare it properly!
Why does Cura 2.5 Beta 2 use both nozzles, this would not really be necessary?


----------------------------------------------------------------------------------------------------------------
Further question, why is the 1ster layer tower speed dependent on "Intial Layer Travel Speed" and not with "Initial Layer Speed"?

Hello,
Another little item that I noticed in 2.5 beta : the layer view for black PLA gives a continuous black view (we can't see the layers at all because it is all black...). This doesn't occur for other materials such as nylon which show a dark grey.
A little screenshot to illustrate (both black nylon and black PLA are loaded here)
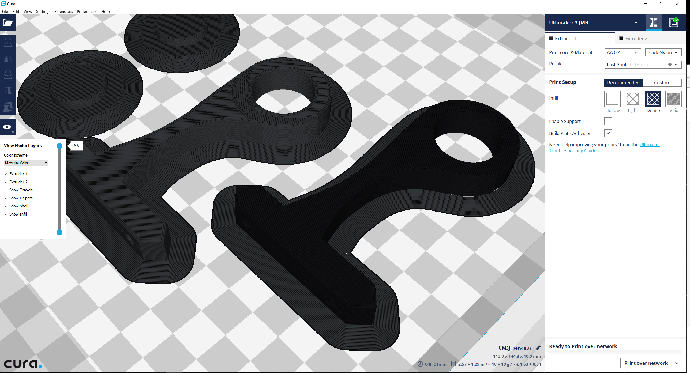
This is not preventing any print, but is an issue to have a closer view on the layers for multiple colour prints. So if you could improve this for the release that would be good 
Thanks
Edited by GuestHello again,
Another small issue that I have faced since the latest beta 2 I think. The connection between the printer and Cura is not always consistent. If I leave the printer being monitored in Cura, after a while the temperatures and time are sort of "frozen", and I cannot submit a new job to the printer. Restarting Cura solves the issue so no big deal.
I also can see that from time to time, I need to authorize cura again to connect to the printer. That smells like some network confirmation change (due to the DHCP maybe ??). As a reminder, I'm using my UM3 wired (not wifi).
No big kind of issue, just that for repeated prints this can be a little bit annoying
Thanks,
One issue I am still facing with Cura is the dreaded rumble (heard in beginning of video
Yes, I could use z-hop but I really, really think Cura should be smart enough to not do this. Every. Damn. Time.
Edited by Guest
Disable combing and it will fly over the infill rather than dragging the nozzle over the bumps. I don't have a problem with this when printing PLA but I can't use combing when printing PETG as it dribbles too much and after a while you get balls of PETG sticking to the nozzle which then stick to the print and you end up with the nozzle crashing into them and getting lost.
-
 1
1

Combing Mode Off for that? That's interesting.
I just don't understand why the default UM2+ profile would require that disabled.
Combing Mode Off for that? That's interesting.
I just don't understand why the default UM2+ profile would require that disabled.
If I understand correctly, the idea behind combing is to move around a given layer as much as possible without doing any retracting. When combing is enabled, it will only retract when it can't get to the destination without going through an already printed region (perhaps it also does a retract if the combed path is much longer than the direct path that will be used if the retract is done). So if some of the infill that has just been extruded ends up a little high, the nozzle may hit it while combing to another area.
There's no chance you are over-extruding and the infill is coming out a little high, is there?
There's no chance you are over-extruding and the infill is coming out a little high, is there?
No, usually I am quick to fault myself but my UM2+ has been doing some really really good prints lately. This one just surprised me with the grinding noises. First print using Beta 2

This may be off a bit from the discussion, but may still be relevant. It is specific to 3.2.1 which I am running and maybe later. It was pretty inconvenient, and I would think it should be patched if possible and if it hasn't already in later versions. I noticed a strange behavior when starting the program by double clicking an *.stl file rather than thru the file menu shortcuts, taskbar, etc in Win7. When started this way, Cura thinks it is running for the first time.
I have allowed Win7 to associate files with *.stl extension with Cura. I had never opened Cura this way before. I am training my son a bit in printing, and he just double clicked his model.stl to start the slicer.
The problem is that when Cura started, it was as if 2.3.1 were running for the first time. We were prompted to define the machine, do the leveling etc. I thought no big deal, I'll just get in, swap to my existing machine definition, and recently saved profile and all will be well. The machine definition was there, and I could select it. My recent profiles were there and selectable, but when I expanded the settings menus, all the setting view preferences had been lost. I think it reverted to the default display of whatever profile I based the saved version. Lots of parameters that had special settings were not displayed. I didn't go in any further to see if the settings were still underneath. I suspect they were.
I closed Cura and re-started from the Start menu, and got the same views. I ended up doing a system restore to a couple days ago to get everything back how it was.
Thanks for reading all that, and I apologize if its no longer relevant.
Matt
Print completed...first one with this Beta 2.
As with the noted rumbling sounds, some other issues
The outer part of the part looks good. The inner is awful. Lot's of marks and underextrusion going on. The surface finish is ugly.
Asides the suggestion of Combing Mode to Off...how else could this be improved? The wall thickness is 1.2 mm, so I am guessing that made it hard for Cura to adequately compensate of Outline Overlap (as S3D would call it)
Also, please check out the prongs and how between each, this is a tiny support structure. It isn't supporting *anything* and there is no way to remove these.
Please please...give us the ability to remove and manually add support where needed


Please please...give us the ability to remove and manually add support where needed

It is already there, in a preliminary way: Support Meshes to add supports and Anti Overhang Meshes to remove support.
https://ultimaker.com/en/community/35603-support-mesh-anti-overhang-mesh
It is specific to 2.3.1 which I am running and maybe later.
Then why post this in a thread about the betas for 2.5.0?

I make config for Type A machines Serises 1 2014+ can you add it to you program?
https://www.dropbox.com/s/hp0xatkwoj0uhiw/Type%20A%20machnines%20Cura%202.5%20resources.rar?dl=0
and one question where is "Split object into part" function?
and one question where is "Split object into part" function?
It is not (yet) available in this version of Cura

Thanks for your thoughts / response bagel-orb. Sorry I'm just responding. Didn't see your response until last night.
Your explanation makes total sense, but helps me little. Rotating the model to have the Z seam aligned with the Layer X & Y start position might work for some models, but it would compromise the overall quality of the finished part for others. Believe it or not, placing the model at a 45° angle vastly improves the look of the skin of the part when it is oval or oblong with a very slight curvature in cross section. May seem trivial to some, but not to a customer expecting an accurate and aesthetically pleasing representation of the finished product. Virtually everything I print is hollow (we manufacture plastic bottles).
As far as diminishing the Z scar, most of the time I locate it at the peak of an oval (as you can see in the example below), or in the corner of an oblong or square shape. Hides it quite nicely.
Turning Combing Off results in excessive retractions and constant Z travel up and down at each layer. Really ridiculous. No Skin, moves the travel moves to the outside, effecting the part's skin condition with "bumps" at both the Z scar and the Layer X, Y start position. And of course both options significantly increase print time.
Before purchasing my two UM3 Ext printers, I had two UM2 with Olsson Block upgrade kits. I then used S3D exclusively. After I got the UM3 machines, S3D failed to handle dual extrusion very elegantly and I came back to Cura. If this behavior persists into 2.5 Final, I'll just have to keep using 2.4 Final for my work and forego all of the fantastic improvements thus far implemented in 2.5 :(
You asked, and those are my thoughts . . .
Best . . .
2.4 Final and 2.5 BETA both 1 & 2 have a distinctively different way of handling user defined z location. I brought the 2.4 version into 2.5 as a GCODE (so glad import gcode is back in Cura. Thanks
Cura 2.5 definitely handles positioning differently from 2.4. Since Cura 2.5, CuraEngine is using multi-threading to speed up the process. The engine generates multiple layers at the same time. The major disadvantage of this is that the engine doesn't know where the previous layer ended in order to get the point on the inner walls closest to the previous print head location. Instead the engine starts each layer closest to the Layer Start Location.
A workaround for your situation is to set the Layer Start X and Layer Start Y to the same values as the Seam X and Seam Y.
I don't think this is a problem for most prints, since most prints use infill, so the starting point of the inner walls is already closest to the last infill line, rather than the end of the outer wall on the previous layer in both Cura 2.4 and 2.5. Moreover, we think that having the location of the seam of the inner walls at a different location as the seam of the outer wall could help strength prints and reduce the size of the z seam which is visible on the outside.
Love to hear your thoughts.

Tim, can't we use a similar technique here to what we with the new spiralize mode? For that, we determine the spiralized layer start vertices before going parallel. I could imagine that it would be possible do the same for non-spiralized models and then you would know where the start vertices for the inner insets should be. Wouldn't that solve the problem reported above by XYZDesignPro?
I make config for Type A machines Serises 1 2014+ can you add it to you program?
https://www.dropbox.com/s/hp0xatkwoj0uhiw/Type%20A%20machnines%20Cura%202.5%20resources.rar?dl=0
Make a pull request please
Why does Cura 2.5 Beta 2 use both nozzles, this would not really be necessary?
----------------------------------------------------------------------------------------------------------------
Further question, why is the 1ster layer tower speed dependent on "Intial Layer Travel Speed" and not with "Initial Layer Speed"?
1) Is should always have printed a skirt for each extruder, as it is used to prime and normalize the extruder pressure. You can disable it by setting the skirt/brim distance to zero for the second extruder.
2) Thanks for the heads up. I just fixed it on the 2.5 branch.
-
1
The outer part of the part looks good. The inner is awful. Lot's of marks and underextrusion going on. The surface finish is ugly.
Underextrusion is most often a hardware issue. It could very well be that this problem coincidentally started when you started testing Cura 2.5. Please try the standard methods to try and resolve the issue on your printer.

This topic is now closed to further replies.
-
Our picks
-

UltiMaker Cura 5.7 stable released
ArunC posted a topic in UltiMaker Cura,
Cura 5.7 is here and it brings a handy new workflow improvement when using Thingiverse and Cura together, as well as additional capabilities for Method series printers, and a powerful way of sharing print settings using new printer-agnostic project files! Read on to find out about all of these improvements and more.
-
- 18 replies
.thumb.jpeg.0b7a05eafc09add17b8338efde5852e9.jpeg)
Picked By
MariMakes, -
-
Release Notes: S-Line Firmware 8.3.0 (Latest)
Dustin posted a topic in Firmware,
S-Line Firmware 8.3.0 was released Nov. 20th on the "Latest" firmware branch.
(Sorry, was out of office when this released)
This update is for...
All UltiMaker S series
New features
Temperature status. During print preparation, the temperatures of the print cores and build plate will be shown on the display. This gives a better indication of the progress and remaining wait time. Save log files in paused state. It is now possible to save the printer's log files to USB if the currently active print job is paused. Previously, the Dump logs to USB option was only enabled if the printer was in idle state. Confirm print removal via Digital Factory. If the printer is connected to the Digital Factory, it is now possible to confirm the removal of a previous print job via the Digital Factory interface. This is useful in situations where the build plate is clear, but the operator forgot to select Confirm removal on the printer’s display. Visit this page for more information about this feature.- 0 replies
Picked By
MariMakes,
-

.thumb.jpeg.0b7a05eafc09add17b8338efde5852e9.jpeg)
Recommended Posts
Top Posters In This Topic
19
13
11
11
Popular Days
Mar 24
16
Mar 23
13
Apr 4
12
Apr 7
10
Top Posters In This Topic
ahoeben 19 posts
nallath 13 posts
LePaul 11 posts
bagel-orb 11 posts
Popular Days
Mar 24 2017
16 posts
Mar 23 2017
13 posts
Apr 4 2017
12 posts
Apr 7 2017
10 posts
Posted Images
qwerty8224 16
Marrut
2.5.1 = Beta2
Edited by GuestLink to post
Share on other sites