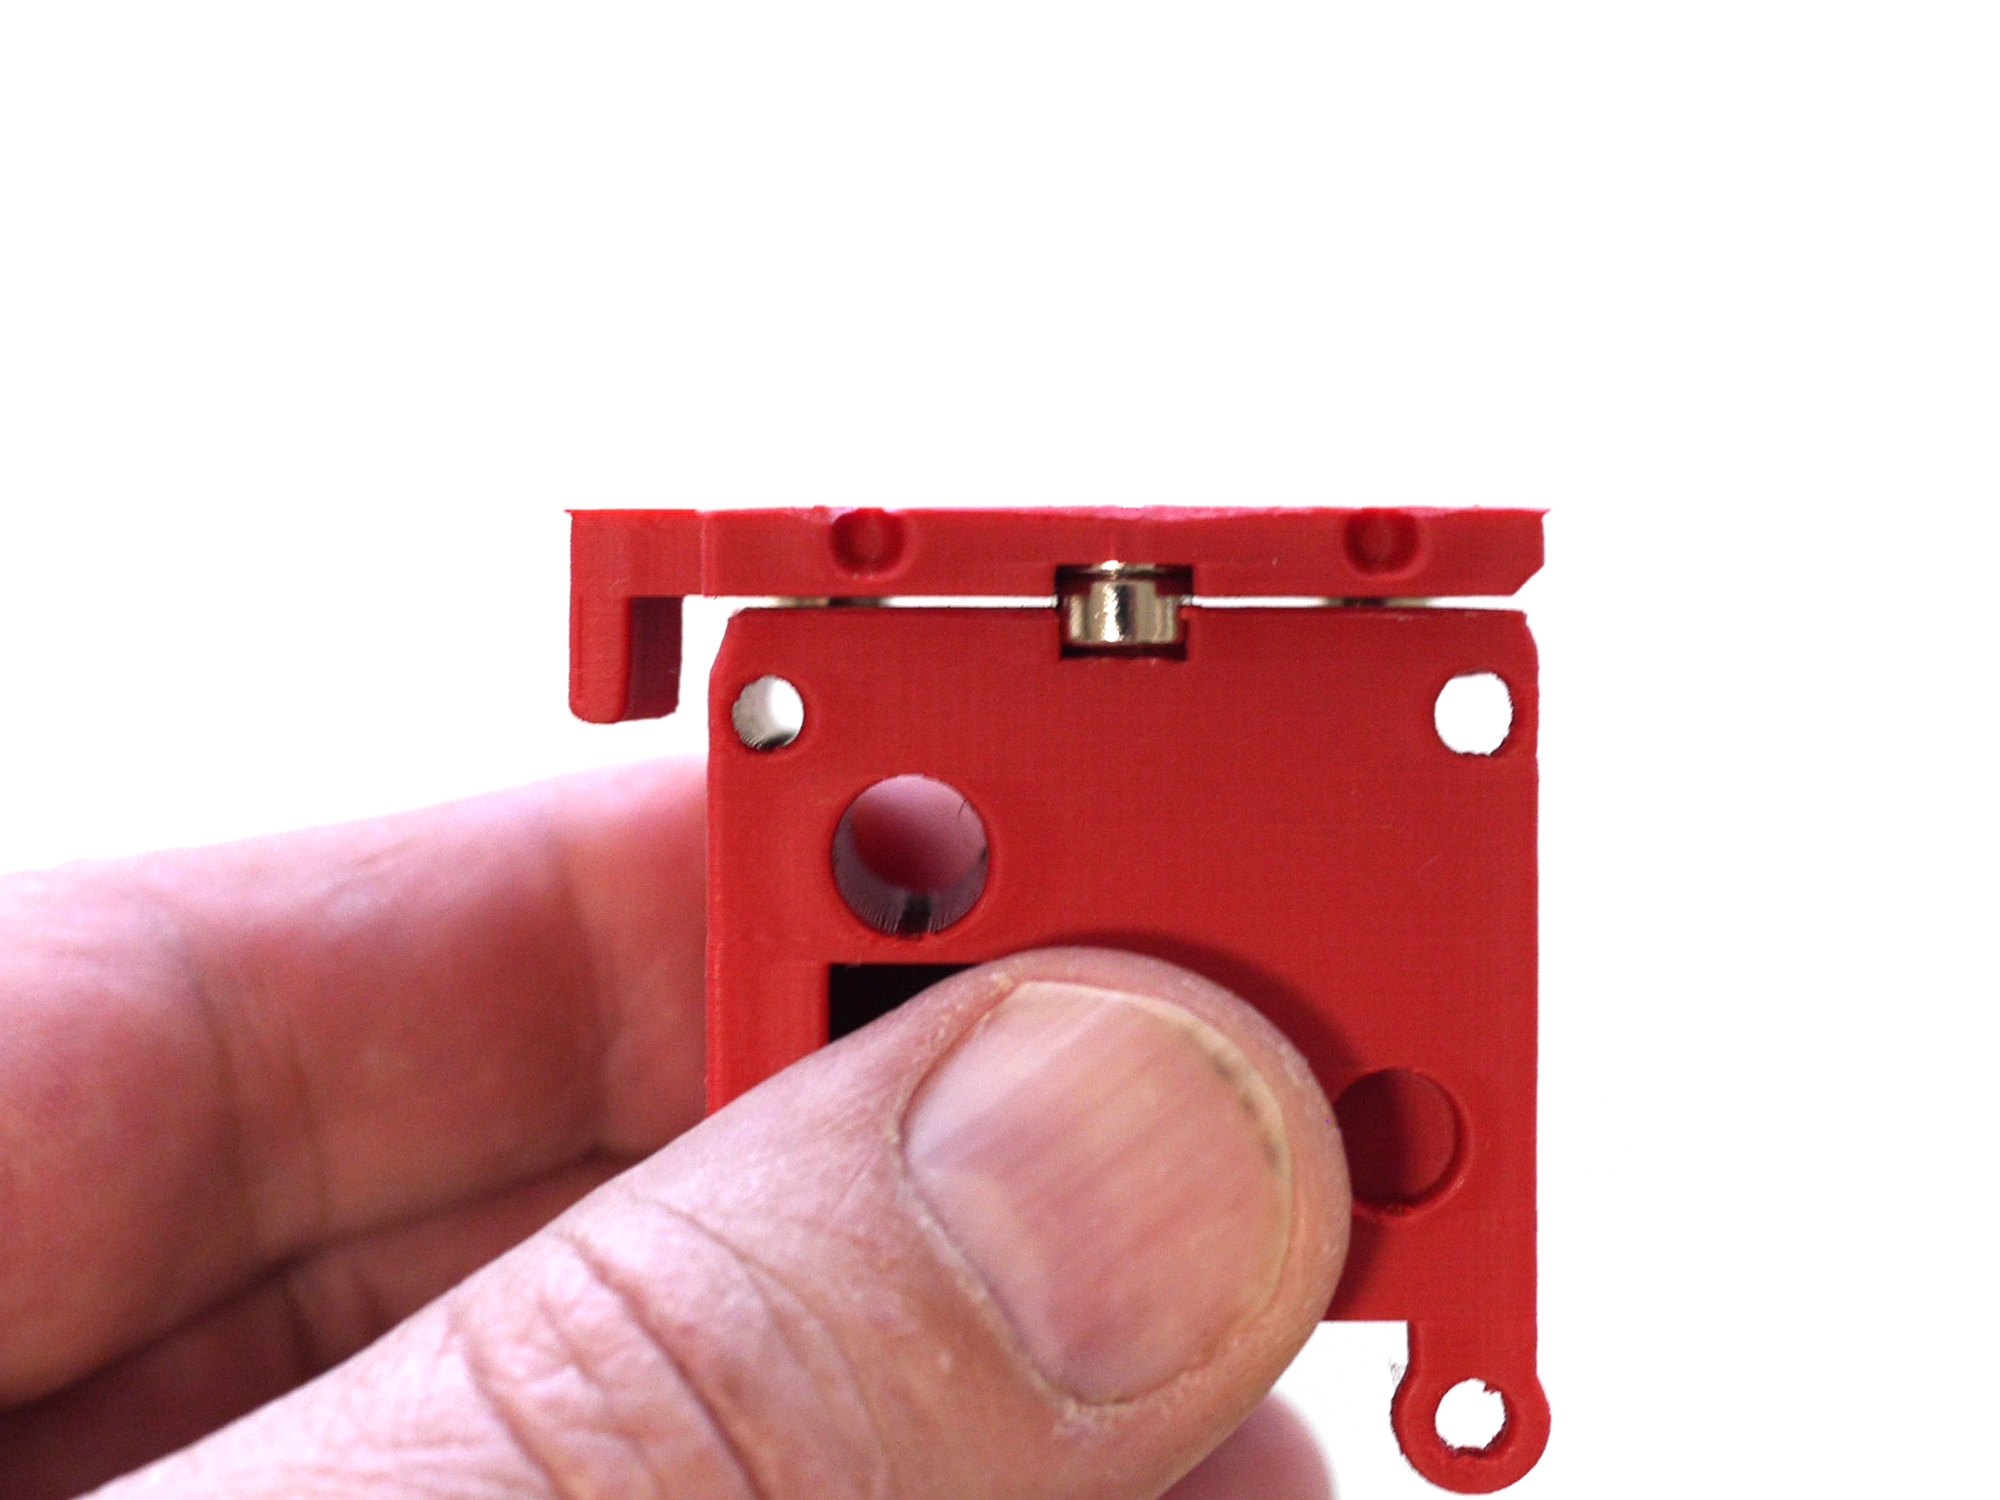
Jump to content

Mark 2 Printed Parts


Recommended Posts

Posted · Mark 2 Printed Parts

question the parts are printed BUT the magnets are not a tight fit into the Head A where they marry up with the magnets in the coupling, in the coupling they are a smooth fit but will be pulled out by the magnetic pull, and in the head A they are a loose fit.

Can they be superglued into the HeadA and can they be glued to the back of the coupling wings,, I printed 2 of the headA (one was a mistake) both have the same recess for the Mags and the same dimension (sloppy).

I also printed 2 of the coupling (first one damaged getting off the Bed) but again the dimensions are the same on both (for the Mags) smooth fit. but inadequate..

I don't want to re print because I don't believe the prints are bad (both of them) it is only where the mags meet on the Head and the coupling all the other parts are good.

I wondered if the mags are slightly under sized I got them from

https://www.first4magnets.com/circular-disc-rod-magnets-c34/6mm-dia-x-3mm-thick-n42-neodymium-magnet-0-9kg-pull-p3566#ps_1-2566

  • Link to post
    Share on other sites

    Posted · Mark 2 Printed Parts

    That's all ok. Just use a drop of superglue to secure the magnets. Slicer settings / extrusion / flow can easily affect the hole diameter in the range of +- 0.05 mm. And that's enough for changing from tight fit to loose fit.

  • Link to post
    Share on other sites

    Posted · Mark 2 Printed Parts

    It’s important the magnets can touch fully, the gap ensures that this happens.

    To be very sure you could reprint tonnage a slight gap.

    It seems to me you are printing with a low extrusion rate?

  • Link to post
    Share on other sites

    Posted · Mark 2 Printed Parts

    Thanks for the advise I will re print Low extrusion rate ??

  • Link to post
    Share on other sites

    Create an account or sign in to comment

    You need to be a member in order to leave a comment

    Create an account

    Sign up for a new account in our community. It's easy!

    Register a new account

    Sign in

    Already have an account? Sign in here.

    Sign In Now
    • Our picks

      • Introducing Universal Cura Projects in the UltiMaker Cura 5.7 beta
        Strap in for the first Cura release of 2024! This 5.7 beta release brings new material profiles as well as cloud printing for Method series printers, and introduces a powerful new way of sharing print settings using printer-agnostic project files! Also, if you want to download the cute dinosaur card holder featured below, it was specially designed for this release and can be found on Thingiverse! 
        • 0 replies
      • S-Line Firmware 8.3.0 was released Nov. 20th on the "Latest" firmware branch.
        (Sorry, was out of office when this released)

        This update is for...
        All UltiMaker S series  
        New features
         
        Temperature status. During print preparation, the temperatures of the print cores and build plate will be shown on the display. This gives a better indication of the progress and remaining wait time. Save log files in paused state. It is now possible to save the printer's log files to USB if the currently active print job is paused. Previously, the Dump logs to USB option was only enabled if the printer was in idle state. Confirm print removal via Digital Factory. If the printer is connected to the Digital Factory, it is now possible to confirm the removal of a previous print job via the Digital Factory interface. This is useful in situations where the build plate is clear, but the operator forgot to select Confirm removal on the printer’s display. Visit this page for more information about this feature.
          • Like
        • 0 replies
    ×
    ×
    • Create New...