Jump to content

Heated bed for the Ultimaker 1


dree

Recommended Posts

Posted · Heated bed for the Ultimaker 1

Just fitted my heated bed kit and done a pla test using the UM robot.

Everything went well, including the software upgrade.

Few points:

Why is there a Prit stick in the kit?

Looking at the pictures in the manual, the aluminium base plate is fitted with the cable exit to the left. However, as mentioned elsewhere there is nothing to activate the Z down switch.

Looking at the plate, there is a tapped hole at the back on the right. If the plate were turned over, so the cable exits to the right, it looks like a screw could protrude down from this hole to operate the down switch. Anyone else noticed this?

Screws to hold cover over electrics were too long.

  • Link to post
    Share on other sites

    • Replies 189
    • Created
    • Last Reply

    Top Posters In This Topic

    Posted · Heated bed for the Ultimaker 1

    I've installed my heated bed yesterday.

    The nozzle temp is displayed as 19° when cold, which seems to be realistic.

    The bed temp is displayed as 37° when cold, which must be wrong.

    Any ideas whats wrong???


    I saw a similar question somewhere, and I believe the answer was found in the fact that the poster had already soldered in a resistor on the board for use with home build heatbed kits... As described here: http://wiki.ultimaker.com/Heated_Bed#Sensor

    Do you have something like that.?

  • Link to post
    Share on other sites

    Posted · Heated bed for the Ultimaker 1

    Why is there a Prit stick in the kit?


    Not sure, no instructions to explain it's usage but I assume it's for some sort of bed adhesion. I've found cleaning glass with washing up liquid (dish soap) and warm water and then printing with the bed at 65/70C produces great adhesion with PLA.


    Looking at the pictures in the manual, the aluminium base plate is fitted with the cable exit to the left. However, as mentioned elsewhere there is nothing to activate the Z down switch.

    Looking at the plate, there is a tapped hole at the back on the right. If the plate were turned over, so the cable exits to the right, it looks like a screw could protrude down from this hole to operate the down switch. Anyone else noticed this?


    I noticed that the hole in the back of the plate which didn't appear to do anything. Flipping it would place it in the correct position for the limit switch as you say but the cable grip ends up on the right meaning you would have to clamp the middle of the cable rather than the sleeving at the end. I think there was a cockup somewhere in the ordering/design process and UM just decided to ship them as they are with no lower limit switch mechanism. Not caaused me any problems so far but it would be nice for UM to let us know what happened here.


    Screws to hold cover over electrics were too long.


    I though that to begin with but the wood actually rests on top of the 24V power connector housing causing a gap between the plastic standoffs and the wood. I was expecting it to work like the fan cover on the UM electronics but after further inspection it rests on the power connector housing with a gap.


  • Link to post
    Share on other sites

    Posted · Heated bed for the Ultimaker 1

    Not sure, no instructions to explain it's usage but I assume it's for some sort of bed adhesion. I've found cleaning glass with washing up liquid (dish soap) and warm water and then printing with the bed at 65/70C produces great adhesion with PLA.

    I noticed that the hole in the back of the plate which didn't appear to do anything. Flipping it would place it in the correct position for the limit switch as you say but the cable grip ends up on the right meaning you would have to clamp the middle of the cable rather than the sleeving at the end. I think there was a cockup somewhere in the ordering/design process and UM just decided to ship them as they are with no lower limit switch mechanism. Not caaused me any problems so far but it would be nice for UM to let us know what happened here.

    I though that to begin with but the wood actually rests on top of the 24V power connector housing causing a gap between the plastic standoffs and the wood. I was expecting it to work like the fan cover on the UM electronics but after further inspection it rests on the power connector housing with a gap.


    See below a 'official' comment on the Z limit switch


    Ultimaker Test Engineer


    • [*]

    [*]Team Ultimaker

    [*]bullet_black.pngbullet_black.png

    [*]54 posts


    Posted 26 May 2014 - 11:25 AM

    Hi Guys,

    Here's some news!

    Daid released a new update for Cura,

    RC4 contains some new things for the Heated Bed update

    -New Firmware!

    -Bed leveling now does 3 points.

    -Extra option in machine setup for Heated Bed (Kit).

    New firmware updates:

    -Z homing speed updated.

    -Manual Z movement to help with Bed calibration added in Prepare menu

    -Software Endstops added. To prevent error from missing Z-bottom stop.

    I'll try to release a new Manual today incorporating the new bed leveling procedure and a lot of your feedback.


  • Link to post
    Share on other sites

    Posted · Heated bed for the Ultimaker 1

    After updating the firmware for the HBK the prepare menu changed to preheat pla1 and preheat pal + heated bed, but both do the same...

    What if I just want to preheat pla and not the HB (mostly for old files on the sd card which do not need a HB)?

    If I change the config in the menu the settings change for both the preheat lines.


    Goedemorgen,

    I have the choice for a PLA and a ABS preheat.

    If You don't need the ABS preheat to often, it might be a 'workaround' to configure that option as Coldbed?


  • Link to post
    Share on other sites

    Posted · Heated bed for the Ultimaker 1

    this could be an idea...

    but it would be nice to have the possibility to add only pla.


  • Link to post
    Share on other sites

    Posted · Heated bed for the Ultimaker 1

    I do not use the preheat option. I go to control temperatur and adjust the temperature for nozzles and heatbed. It could take a while (up to 15min) to heat the heatbed if you want to print ABS. If i want to print ABS i heat first the heatbed and than the nozzels i want to use, but i have the exdruder / hotend upgrade and i use ABS and PLA some times simultanly


  • Link to post
    Share on other sites

    Posted · Heated bed for the Ultimaker 1

    After updating the firmware for the HBK the prepare menu changed to preheat pla1 and preheat pal + heated bed,


    Just curious, is that the exact labels you have?

    I do not have my HB yet, but I was reading the sources, and I do not find the string 'preheat pla + heated bed'...

    I might look at the wrong place, but if not we have:

    "Preheat PLA" (or "Preheat PLA 1" depending on the config)

    and

    "Preheat PLA Bed"

    The first one heats nozzle and bed, and the second one the bed only -- so there is a difference between these - not the one you would expect though...


  • Link to post
    Share on other sites

    Posted · Heated bed for the Ultimaker 1

    Please feel free to rewrite that part of Marlin and issue a pull request to the ErikZalm repository....


  • Link to post
    Share on other sites

    Posted · Heated bed for the Ultimaker 1

    Tnx for the confirmation.

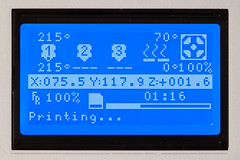
    Actually it looks like heated bed is always on, even if you don't have one!

    On my UMO -- without HB -- I am using an alternative controller and one can see that the HB t° is set to 70°C...

    15331223896_0ed1ddbdd1_m.jpg

    I think we can easily make a firmware version where we have

    "Preheat PLA" : Just do the nozzle

    and

    "Preheat PLA Bed" : Just do the bed

    So if you want to do both you would have to 'prepare' twice (which might not be a problem as the bed typically takes longer to warm up and we don't want to pre-heat the nozzle too long...)

    I'll have a look at this over the weekend if I have a bit of time...


  • Link to post
    Share on other sites

    Posted · Heated bed for the Ultimaker 1

    Why is there a Prit stick in the kit?


    The stick is indeed for better adhesion.

    For normal PLA prints you probably don't need it, but feel free to experiment.

    For ABS you probably want to use the glue stick to create better adhesion.

    For PLA (on the heated bed / Ultimaker 2, which has closed sides but I think you could go towards the same profile) 60º works fine for PLA too.


  • Link to post
    Share on other sites

    Posted · Heated bed for the Ultimaker 1

    @ Peggy (and anyone else interested ;) )...

    I have added a firmware configuration parameter to allow preheating the hotend without the bed.

    Of course now, if you use this firmware and want to preheat both bed and hotend, you will need to 'prepare' both.

    Aside from this, this is exactly the same firmware that the one coming with Cura.

    You can download it from https://github.com/AmedeeBulle/MarlinHBK/releases/tag/HBU_PHO_14.11-RC7.

    (Unless you have a dual hotend setup, you typically need the MarlinUltimaker-HBK-PHO-250000.hex file)

    Note: Although I am pretty confident it is working, I cannot test it as I don't have the hardware (yet)... However it is safe to use, as the changes are minimal and limited to the UltiController menus.


  • Link to post
    Share on other sites

    Posted · Heated bed for the Ultimaker 1

    Hey guys, I ordered this upgrade for my UMO and can't wait to put it in. There was a bit of sticker shock at first, but especially after reviewing the Github parts list and manual, it looks like a well polished kit. I was already planning to rebuild the Z stage for stability, so two birds with one stone!

    I just wanted to see how the upgrade was working for everybody, since it's been out for a bit and ask a few questions.

    I know that the latest Cura has a compatible firmware build, but was wondering if using this builder would be equivalent: http://marlinbuilder.robotfuzz.com/

    I have a few other tweaks; custom extruder drive, direct drive XY, and a bunch of custom parameters for accel, jerk, etc.

    Is there a way to make a dump of my current firmware as a backup?

  • Link to post
    Share on other sites

    Posted · Heated bed for the Ultimaker 1

    Hi Lars,

    I have to say after installing the heated bed last week that I'm very pleased with it.

    After fiddling with print temp, flow and fan speed I really love printing ABS now.

    image.jpg


  • Link to post
    Share on other sites

    Create an account or sign in to comment

    You need to be a member in order to leave a comment

    Create an account

    Sign up for a new account in our community. It's easy!

    Register a new account

    Sign in

    Already have an account? Sign in here.

    Sign In Now

    • Our picks

      • UltiMaker Cura 5.7 stable released
        Cura 5.7 is here and it brings a handy new workflow improvement when using Thingiverse and Cura together, as well as additional capabilities for Method series printers, and a powerful way of sharing print settings using new printer-agnostic project files! Read on to find out about all of these improvements and more. 
         
          • Like
        • 18 replies
      • S-Line Firmware 8.3.0 was released Nov. 20th on the "Latest" firmware branch.
        (Sorry, was out of office when this released)

        This update is for...
        All UltiMaker S series  
        New features
         
        Temperature status. During print preparation, the temperatures of the print cores and build plate will be shown on the display. This gives a better indication of the progress and remaining wait time. Save log files in paused state. It is now possible to save the printer's log files to USB if the currently active print job is paused. Previously, the Dump logs to USB option was only enabled if the printer was in idle state. Confirm print removal via Digital Factory. If the printer is connected to the Digital Factory, it is now possible to confirm the removal of a previous print job via the Digital Factory interface. This is useful in situations where the build plate is clear, but the operator forgot to select Confirm removal on the printer’s display. Visit this page for more information about this feature.
          • Like
        • 0 replies
    ×
    ×
    • Create New...