Thank you for your quick answer! I'll do this when I'll have a full time area for this as I'm a bit afraid ![]() .
.
Do you think I could find pictures that show how to remove these parts somewhere on ultimaker site ?
Thank you for your quick answer! I'll do this when I'll have a full time area for this as I'm a bit afraid ![]() .
.
Do you think I could find pictures that show how to remove these parts somewhere on ultimaker site ?
As far as I know there aren't any assembly instructions available at this time. There isn't a whole lot in there though so I don't think you'll have any problems.


I got those pics from this post:
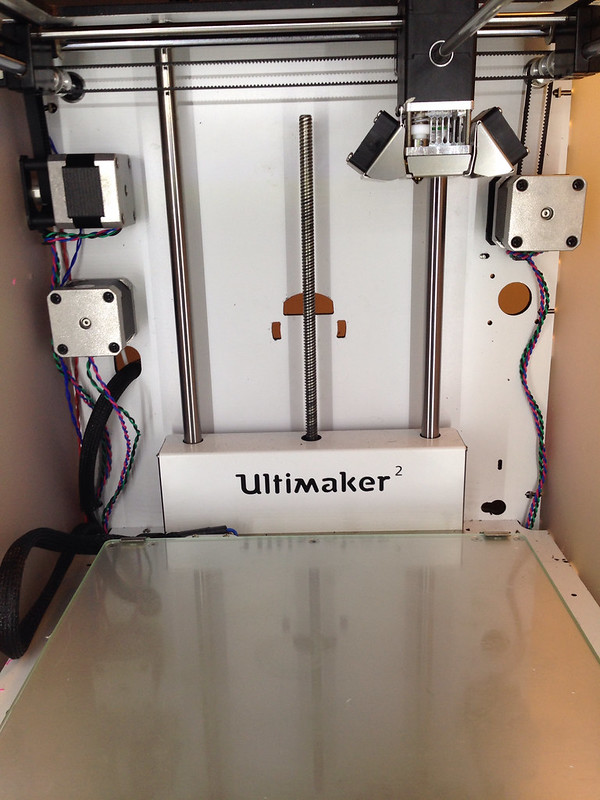
Note that the extruder motor may fall when you remove the 4 screws. Not a big deal really but if it does you will have to remove that back left cover. Maybe before removing the last screw you can put something down inside the cover to hold the motor. A ruler maybe?
Thank you gr5 this will be very helpfull. If I can I'll add some picture on my side. It can help otherS. And yes your idea is good for the motor. I don't want to add me more stuff than necessary ![]()
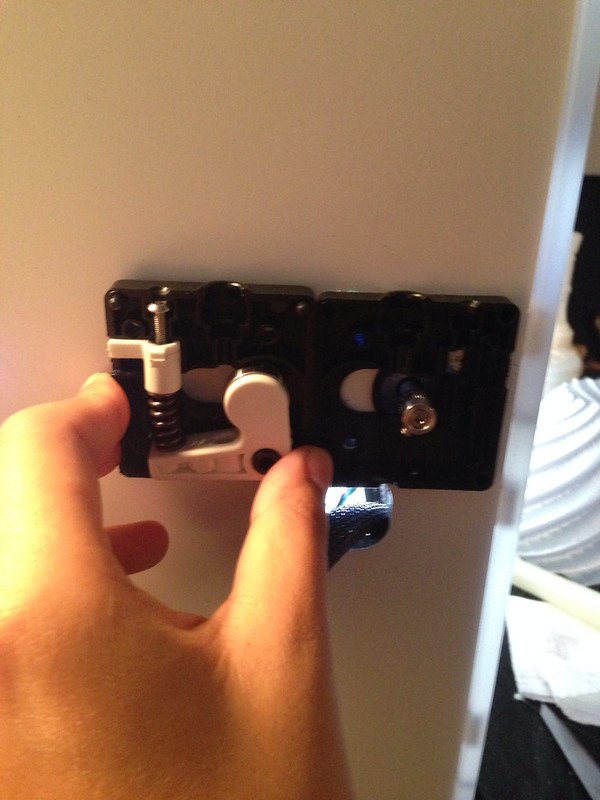
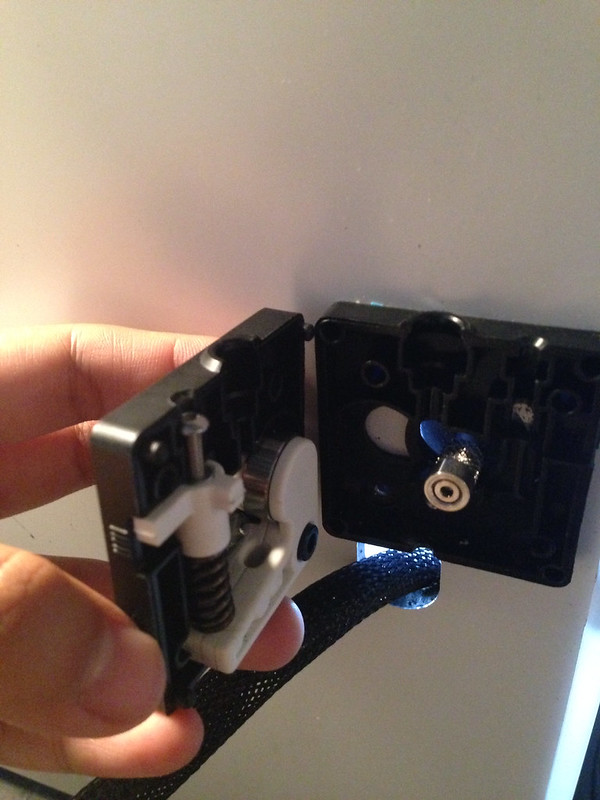
So this is how is inside the material feeder!
I was wondering what was for the top hole and now i understand it. In the manual is not described at all and i think should be..
And what wrenches i need to use to regulate it? I tried all three but none seems to works..
Thanks a lot, I had a knot of NinjaFlex filament in the feeder, this was just perfect! :-P
You don't have to remove all the screws of the feeder.
I have bent an Allen key to tighten the screw. For that, you have to remove the filament first.

I just plugged in my brand new Ultimaker 2. The material feeder was not pinching the PLA plastic - I know because I painted a dot on the PLA before the intake and the dot didn't move.
I solved this problem by pressing the metal rotating pincher into the back of the ultimaker 2 more. No tools, I just pushed it in a bit more.
I had reasoned that the metal only had the criss-cross pattern towards the tip, and the PLA plastic might have been further back than the criss cross pattern. So I pushed the metal winder in a bit (not very much force) and it grabbed. I hope it doesn't wiggle its way back out again. For now, this has solved the problem.
I would recommend tightening the set screw in the knurled feeder (spiky metal part) at the very least as previously recommended, I have been having the same issues with the knurled sleeve coming loose, filament grinding, and with the filament slipping behind the feeder knobs (up against the back panel of the machine). Other than that the printer has been exceptional! I am hoping to print out and install IRobert's improved feeder design this afternoon. See http://umforum.ultimaker.com/index.php?/topic/4393-ultimaker2-feeder-system-improvements-and-ideas/thread for details.
Experienced issues with feeder traction, under extrusion, filament being chewed... Read the above comments and after repositioning (pushing in) and then tightening the knurled feeder's set screw, and a bit of extruder cleaning, I got amazing results. Thanks to all, printing better than ever.
Recommended Posts
gr5 2,172
:eek:
You need to tighten that tiny screw on the part you pulled out.
You will probably have to remove the white metal stepper motor cover in the left rear so you can see the motor.
You have to remove those 4 screws that hold the filament cover but when you do the motor may fall.
You have to slide that part back on and tighten it very very tight. Tighter than you might think. Remove the blue filament before you slide it back in.
Then you have to get it all back together which may be difficult without removing the white metal motor cover.
Link to post
Share on other sites