
it wont help to play the blame game, only creative good people like us... create the best possible solutuon to this mechanical problem !!! :-)

it wont help to play the blame game, only creative good people like us... create the best possible solutuon to this mechanical problem !!! :-)
What does a good extruder need:
(1) SIMPLE DESIGN
(2) HARD DURABLE PLASTIC WHERE IT INTERACTS WITH THE FILAMENT
(3) LONG STRAIGHT BASE ON THE BOTTOM OF THE EXTRUDER TO ALLOW THE PLA TO FLOW STRAIGHT THROUGH THE EXTRUDER (STRAIGHT LINE)
(4) EVEN SMOOTH PRESSURE (ADJUSTABLE) ON THE SURFACE OF THE FILAMENT
(5) PUSHING PRESSURE DEVICE CURVED TO FIT SIDE OF FILAMENT AND NOT FLAT: INCREASING SURFACE CONTACT
(6) BETTER PRESSURE SYSTEM: EXISTING SPRING IS SHIT
(7) BETTER FILAMENT TRANSPORT FROM FILAMENT ROLL TO EXTRUDER: LESS INTERFERENCE

Is there any reason not to implement a design similar to the one of the UM1 with a wheel pushing from the left directly onto the knurled bolt/axis?
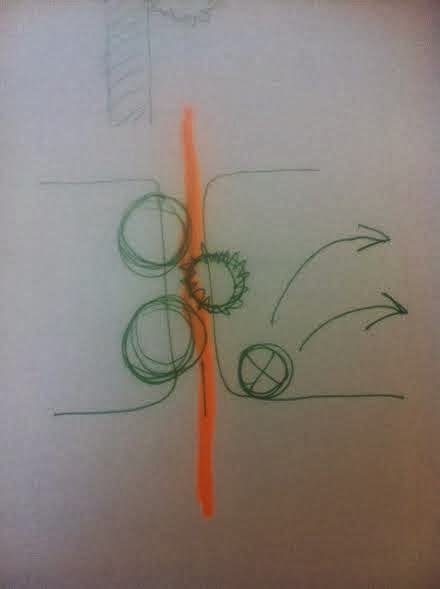
here is one idea I have.
using a larger single spring mechanism with a spring damper. Another nice design feature is the bottom whole to release loose particles of filament out of the extruder housing :-)

Is there any reason not to implement a design similar to the one of the UM1 with a wheel pushing from the left directly onto the knurled bolt/axis?
to be honest !! NO ! I think if something works well.. dont screw with it !
If we can design a new extruder with this same system that works and fits onto the existing openings on a standard ultimaker2.. then YIPPPEEE !! :-)
I think there are two important things that we should remember... we have to provide a evenly balanced good contact movement system to slippy shiny filament.
The biting teeth will push into one side of the filament but that is only one half of the war. The other side had to be moved up with a smooth condifent pressure.
Thats why using the metal wheel might be a bad idea ?? maybe ?? because you are putting a flat surface with a very small surface contact area against a slippy shiny filament surface... thats not good..
We should think outside of the box..... how can we message this filament up the system with love and smoothness... :smile:
it wont help to play the blame game, only creative good people like us... create the best possible solutuon to this mechanical problem !!! :smile:
Ok, its a open source project. But Ultimaker should also pay attention to this problems, the printer is sold with "plug and play" marketing. Its sold as product and buyers should not design new extruder to get it working, at least not after paying the price it costs.
 1
1
I've been messing with extruder (re)designs for a long time now. I'd be glad to help if I can, but first I think somebody with an UM2 should accurately measure all the components (spring, bearing, drive bolt, bowden clamp etc.) so we know what we're dealing with. Also the thickness of the back-side frame and similar. Then it shouldn't be very hard to make an easily printable design which has better tension adjustment, ability to open and manually feed the filament (I think it's very bad that this is missing currently), and be more friendly to flexible filaments and so on.
Maybe we should make a project on YM for this!
i dont want to make this whole tread into a WHY DO WE HAVE TO DO THIS after paying 2000 euros.
I want to keep this tread structly to everyone sharing ideas on how to solve this.
I've been messing with extruder (re)designs for a long time now. I'd be glad to help if I can, but first I think somebody with an UM2 should accurately measure all the components (spring, bearing, drive bolt, bowden clamp etc.) so we know what we're dealing with. Also the thickness of the back-side frame and similar. Then it shouldn't be very hard to make an easily printable design which has better tension adjustment, ability to open and manually feed the filament (I think it's very bad that this is missing currently), and be more friendly to flexible filaments and so on.
Maybe we should make a project on YM for this!
Great to have your help !!!
I can organise a youmagine team project now. Also I can setup a dropbox tonight for the project.
About the specific information, I will try and collect up all the information I have to help !!
Excellent, count me in then. I'll PM you the email I use for dropbox so you can add me.
GREAT !!
if you other guys want to get in on this.. PM me your emails today and ill add you all to the project dropbox !!
I was just thinking... I bought myself a old 16mm movie projector... in that.. you only have to press one little spring button and the top part of the mechanism springs up... load your movie film and click the mechanism back down... so mayve we can do a nice design that can open up for full access to the gear... also a turn handle to turn the extuder by hand. also an opening for waste filament particles...
Count me in too. I would leave my design and I will improve it then! 
Thank you Ian.
Well, I've been tinkering a bit myself but it's turning into a horrible, ugly monster and I'm starting to abandon the idea. The reason it's become so damn big and clunky is that I wanted absolutely NOTHING touching the filament as it entered the bowden to eliminate all friction. I wanted a release mechanism to load filament manually and I also wanted to use the existing parts to make it easy for people to use. Those requirements made me have to move everything to one side which makes it a lot bigger and clunkier than I want it to be.
Usually I try to make things as small and compact as possible but I'm failing hard on this one.
I'm also having trouble with the tension arm, trying to figure out the best way to secure it and ... and... and... meh 
I'll share the images for entertainment (it's ok to laugh  ) and just in case it might offer any kind of inspiration.


i dont want to make this whole tread into a WHY DO WE HAVE TO DO THIS after paying 2000 euros.
I want to keep this tread structly to everyone sharing ideas on how to solve this.
Take it or leave it, ultimaker screwed up and all the marketing in the world wont save them from a major design fault.
Now its back to us to solve this.
Affcourse, i did not mean to hijack the thread in this way. I bought the machine anyway knowing this problem.
I dont like the angle at what filaments entering the extruder and suspect this could make some problems. I also think a ball bearing spool holder is also a must, and i will print one while my printer arrives.
FULLY AGREE !!
the extruder is bad... but the bad flow movement from filament reel to extruder does not help also.
I watched my extruder work last night and the filament would move down and around the ultimaker filament guide like a old rusty truck... gooooo... stop... slowww...goo..... amazingly bad for smooth flow.
To design the best solution, maybe we should look at
REEL -
FILAMENT MOVEMENT -
ENTER EXTRUDER -
MOVEMENT IN EXTRUDER -
COMING OUT
I cant contribute in CAD since i have no experience. But if the new extruder will require any kind of metal machinined parts i can machine it for free and ship it to free to anyone in Europe designing a new extruder.
Are we really sure we are tackling the right issue?
We all know from experience that the UM2 can deliver good results, however for some strange reason sometimes underextrusion happens.
As an example, I printed a box yesterday which was perfect for the first 15 mm height, after that the walls were extremely underextruded. No problem in the feeding mechanism at all to be found.
Today I printed a small variation of the same box and it came out perfect.
The difference was that the first box had internal chamfering up to 15 mm. and above that only 1mm (!) walls. With a 0.4mm nozzle it might be hard to provide these 1mm walls.
The design of today had 1.2mm walls and came out perfect.
So is the first issue because of the extruder or is there a small bug in Cura, not providing enough filament to the nozzle for the 1mm walls?
So what is the rootcause of the issue, are we tackling the right issue here?
I made some pictures, but have not been able to share it in the forum yet. But might not be necessary for you all because you encounter the same issue?
I agree that we may be tackling the "wrong" issue for some people but I think in this posting we should concentrate on improving the feeder. There is another thread looking for the root cause of some people's underextrusion.
There are plenty of improvements to be made on this feeder and they certainly won't hurt the UM2.
Two things:
1) I ABSOLUTELY LOVE Robert's idea of having the filament touch *nothing* before getting to the metal extruder wheel. This could eliminate the wear of tear of getting ABS powder mixed in with your PLA print (the current extruder is made from ABS). Alternatively it could touch only a tube made from the same material as the Bowden as this material is proven to be tough even when rubbed with chewed up filament.
2) No one has mentioned the nut that pushes on the extruder motor. There is a nut that holds the panels of the UM together underneath the extruder motor and it tries to tilt the stepper. Keeping the stepper flat/flush requires more force than normally would be needed. It would be nice if that could somehow be addressed also in the extruder design - maybe make the right 2 screws that hold the stepper be not part of the extruder housing and instead be underneath it. That way you can also remove the extruder housing without the stepper falling.
I like many of the ideas stated. A lot! But will refrain from restating them over and over again as many people are tempted to do - I just couldn't resist repeating my point 1 above. Sorry.
I don't think we should restrict ourselves to existing extruder parts as long as they are very common parts and easily ordered in Europe and USA.
I will preface that I dont currently have an UM2. I do have a good deal of expeience with my UM1.
I think a means to manually feed material could be a great benefit. OTOH, see above.
As mech designer, I have the opinion that the diamond knurl used to drive the filament is a design compromise to several better available solutions. Because of this, I replaced my UM1 drive with GeoHagens solution long before the upgrades to the UM1 extruder were available. I recognize that changing this one component violates the upgrade policy to keep existing stock components.
OK, the diamond knurl is a common/readily aviable machining process, but the form falls down when one looks at the function. With only several points of the knurl can be in contact to drve at any given time, grinding in caused. The form resembles that of a metal file. Higher pressures against the drive cog are often adjust 'in' to get better traction. That begets filament deformation and dimensional problems going thru the bowden. And dont forget grinding....
A better alternative would have a drive tooth form that is perpendicular to drive direction. Suxh as those used in (taboo word alert) makerbot extruders or the drive cogs available at printrbot, or the Geohagen drive cog.
I have been contemplating a dual wheel drive that uses two such printrbot cogs, one as drive, one providing spring pressure, but driving because it is loosely "geared" to the directly drive cog. This way when high drive resistance is encountered, the filament is driven by both cogs. The pinion mesh between both cogs has to allow sufficient backladh so the gears never (bottom out'
Been using the GeoHagen extruder for 2 years. It has never needed to be cleaned. The stepper skips steps before the cog slips, and the filament is barely deformed.
Hoping to be helpful. Bear in mind the disclosure at the top.
Matt

ArunC posted a topic in UltiMaker Cura,
.thumb.jpeg.0b7a05eafc09add17b8338efde5852e9.jpeg)
Dustin posted a topic in Firmware,


Recommended Posts
geeks 1
Big one Ian! :cool:
I also have complaints about the back of the UM2. :twisted:
But, Ultimaker will he ready we send spare parts? This looks like a latent defect. :roll:
Link to post
Share on other sites