

You could have an issue in the nozzle or teflon insulator. Partial clog, deformed insulator, damaged bowden tube... You might want to consider starting another topic and detail your issues and your tests so far with a few pictures or print settings.

You could have an issue in the nozzle or teflon insulator. Partial clog, deformed insulator, damaged bowden tube... You might want to consider starting another topic and detail your issues and your tests so far with a few pictures or print settings.
Also consider the quality of the filament. E.g. if the dimension is variable, so is the tension.
Just published a small update on my external feeder.
Added a few mm of extra guidance for the fillament, just did an extrusion test with MP flex 45, flexible fillament from Makerpoint, reached 8,5 mm3/s at 230 celsius.

https://www.youmagine.com/designs/feeder-for-ultimaker-2-rail-system
edit: extrusion test picture here
http://umforum.ultimaker.com/index.php?/topic/3904-flexible-filaments-comparison/?p=87415
i have reading the forum a lot recently because on my printer, the original non-glass-filled isolator failed after 230hrs of printing and a new, glass-filled replacement is already worn out after a printing a single roll of filament (colorfabb blueish white, at 210 degrees).
i suspect that apart from the isolator unquestionably being too soft, there is maybe another problem that leads to isolator failure, namely the feeder design: the knurled bolt of the feeder is probably running on the wrong side of the filament.
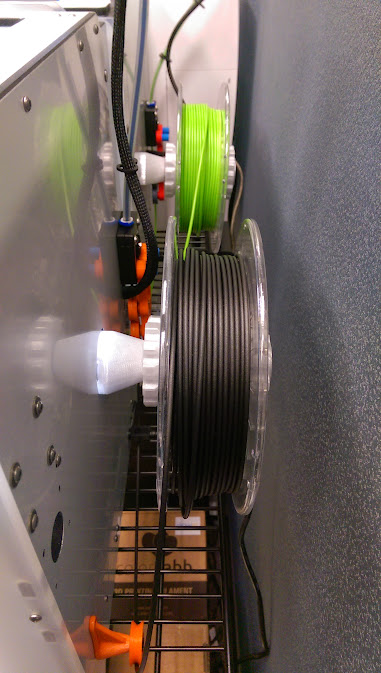
when a spool is loaded normally, the knurled bolt is running on the convex outside of the filament while the opposing smooth bearing is on the concave inside.
As the filament has a tendency to curl up in the same was as it had been on the filament spool, it is orienting itself in a way that the track marks left by the knurled bolt will always be on the outward facing convex side of the bowden and - in extension to that - the teflon isolator.
Unfortunately, the outward curved side of the bowden tube and same side of the teflon isolator is where all the pressure from the feeder motor goes. My guess is this causes a lot more friction than would be necessary.
On Colorfabb filament which i am using the track marks left by the knurled bolt are rough and deep so i think they are what is grinding up my isolator. Additionally, the wear marks on the isolator are just on one side; the other side of the isolator hole still looks like new.
So when i get my replacement parts i will try to feed the filament from the other side, so that the track marks are running on the inner, concave non-pressure side and see if that helps.
For a permanent solution, one could easily print a "mirrored" feeder and change the rotation direction of the feeder motor.
Any thoughts on that?
I have the UM0 and I have been considering for the same reasons to turn the spool 90 degrees and mount it under the table so it also will unroll in the same shape and direction as the Bowden.
Bertho
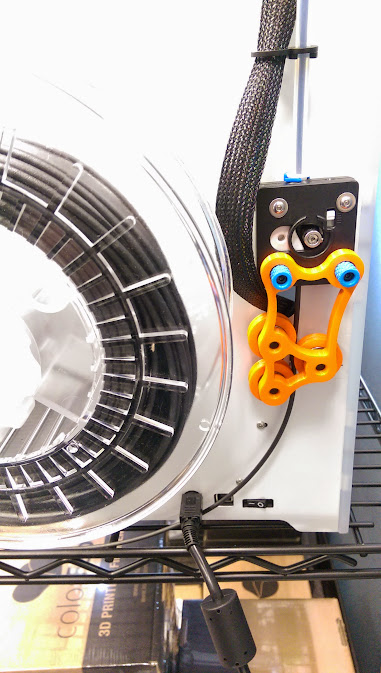
If you're still using the original UM2 feeder it can actually be put on in reverse without modification (guess how I know... And guess how much I scratched my head about the filament refusing to load...). You will of course still have to either change the firmware so that it spins the motor in reverse or physically swap the pins on the connector of the feeder.
So when i get my replacement parts i will try to feed the filament from the other side, so that the track marks are running on the inner, concave non-pressure side and see if that helps.
For a permanent solution, one could easily print a "mirrored" feeder and change the rotation direction of the feeder motor.
Any thoughts on that?
Check this out:
https://www.youmagine.com/designs/spreading-ring-for-reverse-bend-filament-feed-for-ultimaker-2
Thanks I had not seen that thread before.
I reassembled my damaged hotend and am feeding the filament from the opposite side now; tracks are now on the concave side and that did probably help with friction as my printer is now printing again. the result is not pretty because of underextrusion, but definitely way better than before on the same model.
No idea however if it helps with teflon isolator wear.
Check out the http://umforum.ultimaker.com/index.php?/topic/9295-switching-between-pla-and-abs-thoughts-on-under-extrusion-clogging-burnt-pla with underextrusion, as it typically seems to be a result of several parts producing more friction/backpressure than they should be, rather than one single issue. Also don't forget that sometimes it's directly due to the filament itself, so it's always worth trying another spool if you have one (and don't forget to measure said filament if possible and put that diameter into the material settings).
2wd 
Similar to printrbot´s version but this has a slot instead of a flat contact surface
Anyone tried this?

I've been wanting to try it. I spent about 20 minutes on it a couple of weeks ago but didn't get very far. As usual I put some restraints in place which made it difficult (trying to use what is already included in the printer and not having to buy as much extra stuff). I might go back to it some day but, eh, I'm sure someone else is more qualified and perhaps has the machinery to make it more proper.
I would like to see a dual wheel solution that still used the original knurled feeder part (but added one extra) and also allowed for a spring loaded solution to be able to handle some material diameter variation.
I added a filament straightener to our machines that helps immensely with reducing under extrusion. Before we would get about half way through a roll and the radius of the filament would cause binding issues in the head. With the straightener we've been able to use the entire roll without seeing any change in extrusion. It does make loading filament a little more difficult but its worth it.
https://www.youmagine.com/designs/um2-filament-straightener

Hmmm... never had a problem with bent filament causing underextrusion. But I'm using Robert's feeder (highly recommended!). Doesn't make much sense to me to straighten filament that will be bent again in the Bowden tube afterwards... I think it's much more important to keep the inside of the Bowden tube clean. I do this by wrapping a pipe-cleaner around the filament before it enters the feeder.
The filament isn't "bent" per-say, its just been tightly wound around the spool. The radius at the outside of a new roll is much larger than the filament at the end/center. The smaller radius can cause binding in the bowden tube and PTFE coupler.

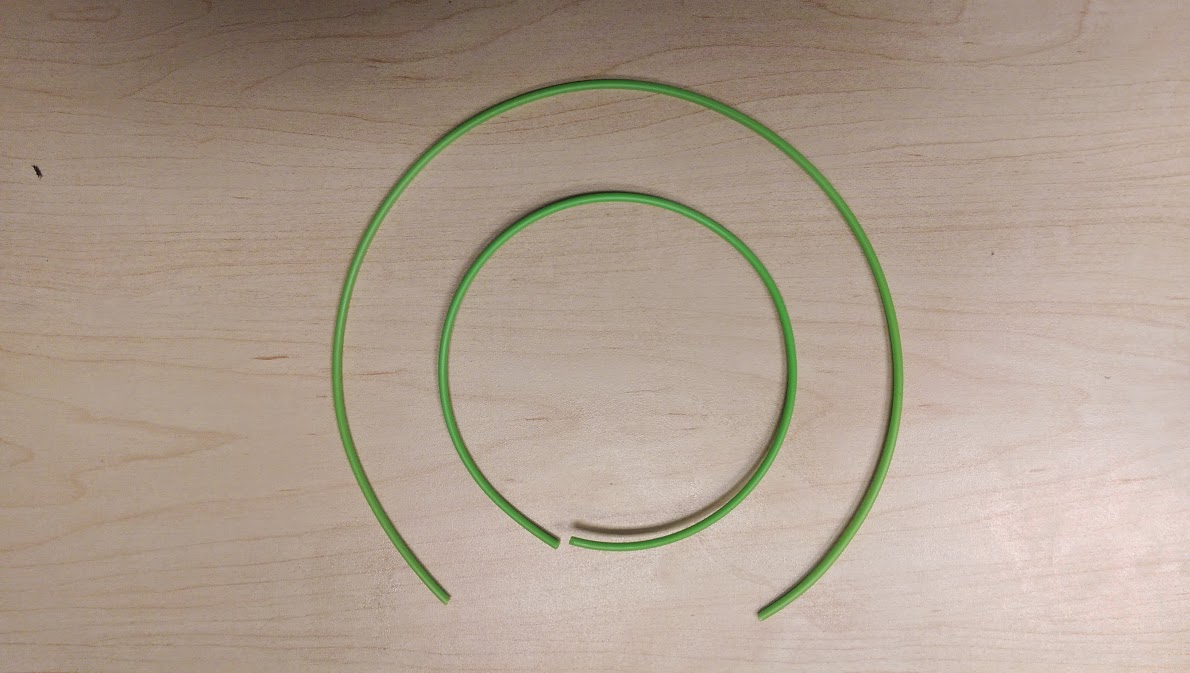
I don't have a pic of the filament after running through the straightener but it results in a radius larger than the new roll.
Interesting MendellS. Have you measured how much force is required to pull the filament through the wheels? So long as this is less than the force required to push the unstraightened filament this would work fine.
Now replace the middle wheel with the drive wheel and spring load the other two and you have a feeder and straightener in one 
Interesting MendellS. Have you measured how much force is required to pull the filament through the wheels? So long as this is less than the force required to push the unstraightened filament this would work fine.
Now replace the middle wheel with the drive wheel and spring load the other two and you have a feeder and straightener in one
I haven't measured it but you can easily move the filament with two fingers. The wheel offset isn't that great and the bearings provide a nice smooth action.
I've been using these for months now and they seem to be doing a great job.
Here is an idea I had for a feed mechanism. Please excuse the drawing I'm on hols with the family and only have the kids pens to work with

The sketch shows two taper wheels one being the drive and the other driven by the gear at the base of the taper. The filament in orange is pressed into the taper by a profiled bearing that is sprung.
The mechanism has two interesting benefits.
1. The bite provided by the two tapers should allow for much greater pushing force before slipping. (it's used on most feed systems for bar peeling where force and bit are critical)
2. Now this is the interesting bit. The taper means that a thicker filament moves out on the taper to a smaller diameter i.e feeds less. Thinner filament moves into the taper to a larger diameter i.e feeds more.
Point two should provide a more consistent flow through the nozzle with no need to monitor filament diameter prior to the feeder to correct for inconsistent filament diameter.
Now the angle of the taper is critical to the function of this system. I'm only at the idea stage so far and would really like to know what everyone thinks.
Very interesting! I like to learn more about the "bar peeling" that you mentioned. Any suggested information source?
I have been playing around with dual drive wheels and I am trying to see how this compare. Pulling force relates to friction and force. There will be a lot of force for relatively little spring force with the taper wheels. Is that better than two opposing drive wheels spring-loaded with high force to match the taper wheels' force? I do not know but that is the question to resolve.
Bertho
To be more specific the bar peeling used a v shaped wheel with a groove in the base. I'm not to sure about info on these systems. I used to work for a company that produced titanium bar, the bar peel systems we used and most others we looked at employed the same feeder.
The bit of a v style is supposed to deform the filament / bar less than opposing rolls.
The taper means that the drive wheels don't need to be sprung which also means that it's much easier to transfer drive from master to slave wheels.
I've not seen a feeder systems that compensates for deviations in filament diameter. That's not to say I'm 100% sure that this will but in theory it should.
@gixxer i like this idea please go on
OK.... I've done some calculations.
First off I had anticipated that the angle of the taper would need to specifically chosen for our average filament diameter. This is not the case at all... and feel a little dull for not seeing this sooner :oops: .
The angle of taper has no impact on the diameter at the contact point of the filament. Yes the filament will move up and down the taper as its diameter fluctuates which will in turn give different feed rates but not enough.
The correction in feed rate for a drop in filament diameter from 3mm to 2.85mm would only be 1.6%, which is negligible (bugger all). I would really like someone else to run the numbers on this two confirm though, as I can almost see the bottom of my fourth glass of red!
However all is not lost. I do still think that a v shaped block would provide better friction on the filament along with a profiled sprung bearing. There's only one way to test this theory though and that's get one machined unless I can find an off the shelf v groove to fit the drive.
I know that the R&D team at Ultimaker have done a huge amount of work testing different profiles of wheels so before I go spending money I'd love to know if this approach has already been looked at.
It is worth noting that without the twin taper setup fluctuations in the filament diameter would be magnified instead of marginally corrected by I assume the same 1.6%. However if the extra bit on the filament prevents slip the marginally amplified flow variation would go unnoticed. Its also worth noting that for real gains (assuming the v groove was better) the point at which the stepper motor skips / steps back would need to be modified, which I believe is done by increasing the supplied current but not sure if this is a firmware mod.
Eagerly awaiting criticism :-P ..... constructive that is :mrgreen: .
I like the basic idea since the gearing is simple to do.
The taper ought to influence the feed significantly. Think about if the cones were almost flat. A 1mm filament would be right at the drive junction. A 10mm one might be near the tip of the cones and hardly move at all.
You also need to keep in mind that filament sometimes is oval, not round.

ArunC posted a topic in UltiMaker Cura,

.thumb.jpeg.0b7a05eafc09add17b8338efde5852e9.jpeg)
Dustin posted a topic in Firmware,


Recommended Posts
Top Posters In This Topic
120
118
52
37
Popular Days
Feb 10
33
Feb 25
29
Feb 13
26
Mar 27
23
Top Posters In This Topic
ian 120 posts
IRobertI 118 posts
Blizz 52 posts
geeks 37 posts
Popular Days
Feb 10 2014
33 posts
Feb 25 2014
29 posts
Feb 13 2014
26 posts
Mar 27 2014
23 posts
Posted Images
gregwar 1
Takei Naodar, I've tried your design, but I'm still getting troubles
If there is too much pressure on the filament, the extruder slips, if there is not enough pressure, the filament is not pushed correctly. Both leads to really bad underextruded parts.
Trying to tune the pressure is a permanent nightmare
Link to post
Share on other sites