

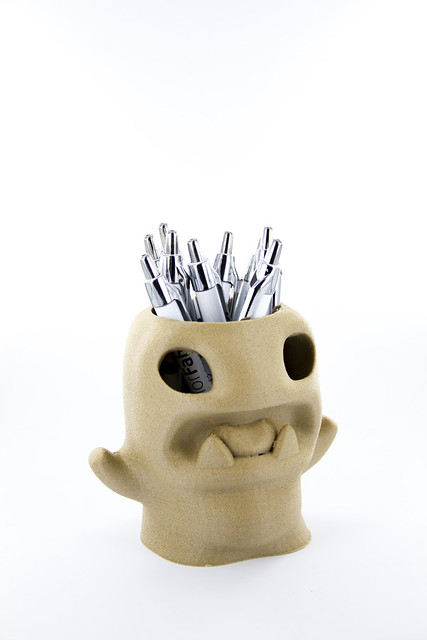
really lovely print ! like the colour as well :-)
this is untoched

Amazing Rose ! The print looks very nice  ! I'm waiting for my UM2 , could you share the settings that you use for the print ?
About the 3d models, you download it on the web or do you create it ?
Thanks,
Ju
Hi everyone,
I have just received my brand new UM2 and I wanted to share the traditional robot here :smile:
I have to say that for the very first out-of-the-box print, it's quite fantastic! I'm totally in love with this machine. It's more user-friendly than my toaster :-P


I can't wait to know the printer a bit more and make some really nice prints, like the rose from NachoKaoS :wink:
Cheers
Mao
Amazing Rose ! The print looks very nice
! I'm waiting for my UM2 , could you share the settings that you use for the print ?
About the 3d models, you download it on the web or do you create it ?
Thanks,
Ju
i create some rubbish..... :oops: and download the models. :-P
etc etc....
the settings for the rose i will post tomorrow had it at the SD card and its bussy now.
here the link for the rose enjoy.http://www.thingiverse.com/thing:84075
This is the first time I've printed a 3D scan on my UM2... delighted with the results; very little clean up needed, and great detail. This was printed with 0.06mm layers, no infill and 80mm/s.

very clean print !.. nice stuff :-)
Ian :-)
Here are my last prints:
A quick and dirty guitare box I modelled with Blender in a workshop in a bar. The aim was to make people discover 3D printing, by making an object for the bar. This one will be used for collecting some money for the bands playing live music. Very fast printing, so the quality is not that good, but it's enough for the need:


very nice :-)
did you print the main body and arm of the box together ?
What kind of support did you use under the arm ?
Love how well the side letters came out !.. really nice !
I printed the main body and the arm together, with a standard support from CURA (short time for this, so I didn't try to model someting better).
Here are my latest test prints with procedural displacement in blender, for testing purpose, before cleaning. No support for this, tried to model it for that under my son's art direction. My son called it snow elephant.


An other displacement proceduraly generated. The new white filament from Ultimaker is making nice prints, you don't see that much the layers at 210°C, but you get some small blobs:

Christmas is coming, so you will see more lamps I guess :-P


Great prints!
The snow elephant looks really cool, and the edges came out pretty nice.
What is the size of the lamp?
The edges make it look really cool as well, great structure!
http://www.thingiverse.com/thing:154516
These two pictures illustrate the difference between woodFill fine and woodFill coarse. Both printed with a 0.8mm nozzle, but woodFill fine could also be printed with standard 0.4mm nozzle. Personally I prefer the coarse woodfill
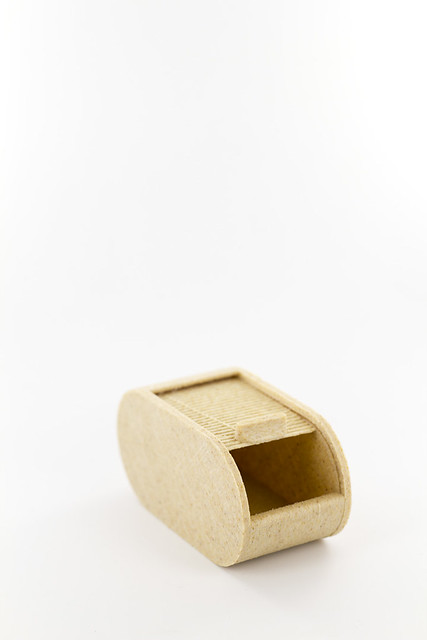
http://www.thingiverse.com/thing:51775
And yes the roll top box really works
@ viralata: Wow amazing prints. I really like them. How did you create the models? Which software did you use?
You are right Christmas is coming soon and lamps are a great idea. I would love to design some myself. I am familar to 3D CAD Systems used for Engineering like Solid Works, Catia etc. but this seems to be designed with something else. Did you create the woobles with a pattern?
Well after some bad prints and major overhaul of my Ultimaker+, I finally finished what I wanted to print for a while.
I printed the TinTin rocket some time ago, but felt it missed something
the rocket exhaust needed some major cleaning as it was covered in strings, and I still have to work out what is causing that.
the base is made from 15mm polished perspex.
and all the parts are connected with M8 rod for stability.
https://dl.dropboxusercontent.com/u/8108870/IMG_1011s.jpg
https://dl.dropboxusercontent.com/u/8108870/IMG_1008s.jpg


I almost fainted when I took this one out of the printer
Had to crack away some of the rolling "tons" from the outer shell, but then after inserting the cage the thing spun freely with almost no friction o.O.
And it only took two tries for this to work 
Stability is not bad: it doesn't come apart even if you apply axial force, but it rattles quite a bit. I'll definetly improve on that. The first version had just about NO play in any direction. But it also took considerable force to turn it...
That being said, I printed this on a 100% vanilla UM1. Up to this point, I have not done any modifications to the machine (yet), I'm not even using a different fan shroud. I LOVE THAT PRINTER :mrgreen:
Huge thanks to Jumpmobile for showing me the design principle of this bearing!
This is going on YM as soon as I'm happy enough with it to consider it finished. It's going to be a part of my upcoming filament spool holder (which is going to have really low friction ).
/edit: Can anyone view the video? My browser says he wants the quicktime plugin, but no way I'm going to install that Apple BS...
/edit: tried a few different codecs but none seems to work. Any suggestions?
I'm starting to get my UM2 dialed in. These are my latest test prints. The orange one is the very latest and it's bloody flawless
All images shot at the same distance so the UM Robot can be used for size reference.


Next step will be to try to increase speed.
/edit: Can anyone view the video? My browser says he wants the quicktime plugin, but no way I'm going to install that Apple BS...
/edit: tried a few different codecs but none seems to work. Any suggestions?
I was able to save the .mov file and play it on my Mac. But why don't you upload the videos to Youtube and link them here? The forum software detects the link automatically and displays the video inline.
He saved the video in 4 formats. Same video. 4 formats. One of them should work for you. They all worked fine for me.
Did it work?! Coool....
I had that design laying around for about nine months. Never printed it 'cause i didn't think it would work....
Greetings Jump
I made a little snap on dust filter. There's lots of different filters out there but they all seem to assume you'll remember putting them on before loading the filament. These guys have obviously not met me... So, I made one that you can take on and off whenever you feel like it.


edit: Sweet jeebus, that white balance... Oh well 
Do you care to share the model? Thx.
Sure, here ya go: https://www.youmagine.com/designs/dust-filter
Nice work Robert!
robert is from sweden.. you guys just got taste for good design.
really like it Robert... simple and beautiful !
Ian :-)

ArunC posted a topic in UltiMaker Cura,

.thumb.jpeg.0b7a05eafc09add17b8338efde5852e9.jpeg)
Dustin posted a topic in Firmware,


Recommended Posts
Top Posters In This Topic
362
282
221
179
Popular Days
Jan 5
30
May 12
26
Jan 13
23
May 1
22
Top Posters In This Topic
ian 362 posts
cloakfiend 282 posts
skint 221 posts
SandervG 179 posts
Popular Days
Jan 5 2014
30 posts
May 12 2014
26 posts
Jan 13 2014
23 posts
May 1 2014
22 posts
Popular Posts
kmanstudios
Took me forever to do this. And it is still rougher than I would have liked. 3D concept rendering: Finished piece:
kmanstudios
I just finished this. It was a multi-part print for ease of painting. Some of it I am not sure what happened...but hey, it is purty....And, I am unanimous in that ? Test Render Parts
gr5
Bath interferometers. I have made about 20 of these for people who use them to test their telescope mirrors. They are amazingly accurate and can do better than a $40,000 Zygo PSI optical tester. Th
Posted Images
nachokaos 0
this is untoched
Link to post
Share on other sites