Jump to content

Post your latest print!


IRobertI
Posted · Post your latest print!

well working on two things! first is still my model space ship and here are the stairs, with some international scale references! a dime, penny, Ha'penny and a 10 Eurocent piece!

ya46.jpg

t1im.jpg

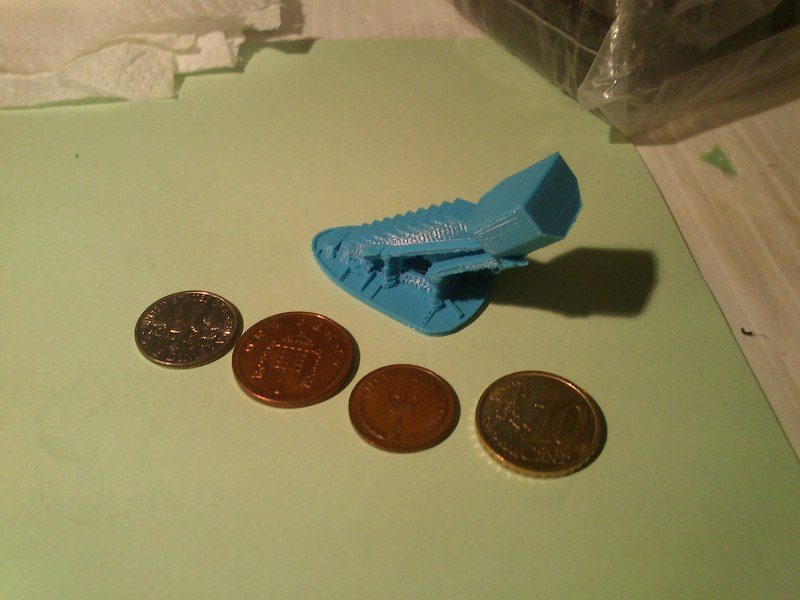
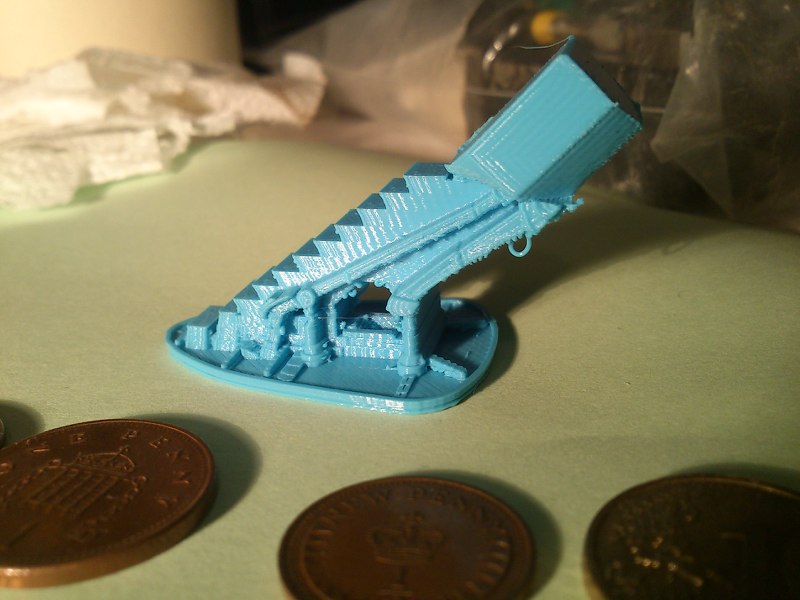
The detail is just phenomenal, and that is still nowhere near maximum resolution,

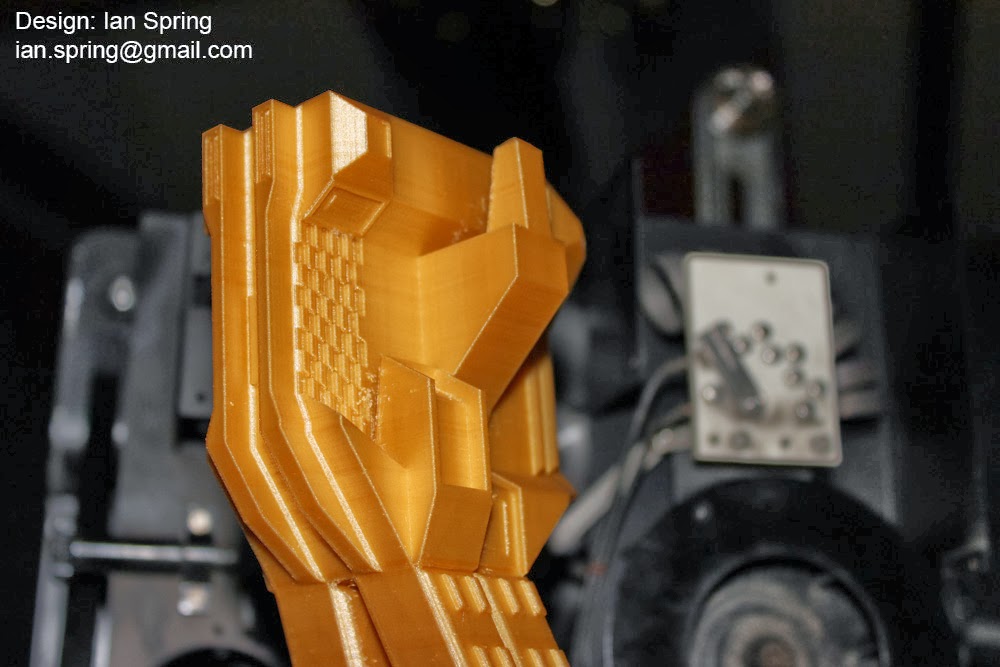
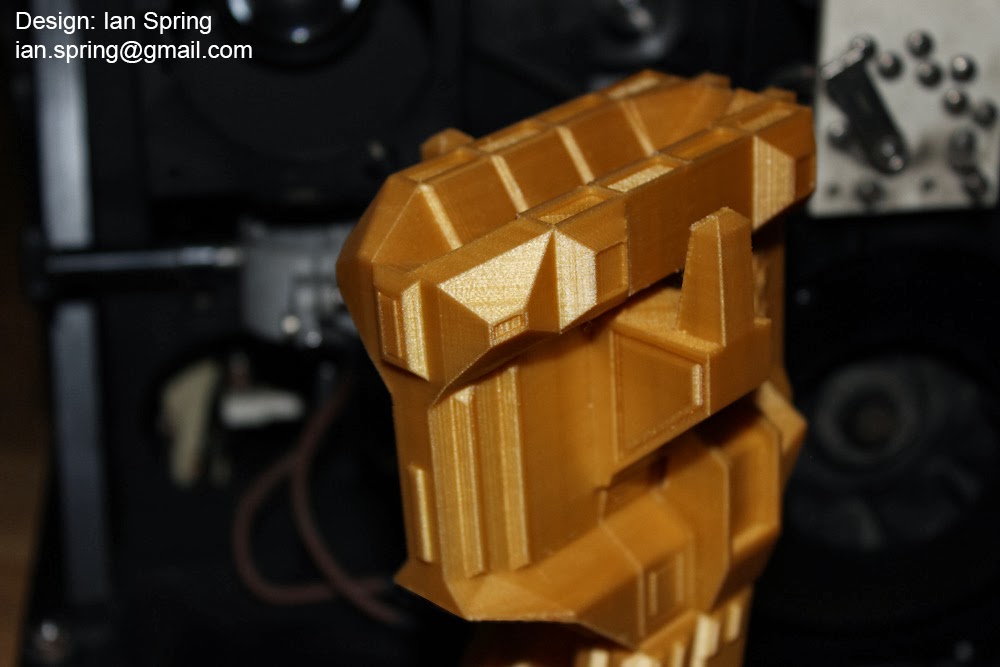
aaaaaaand now for something a bit more, erm, ban-able? (i hope not!)

nvj3.jpg

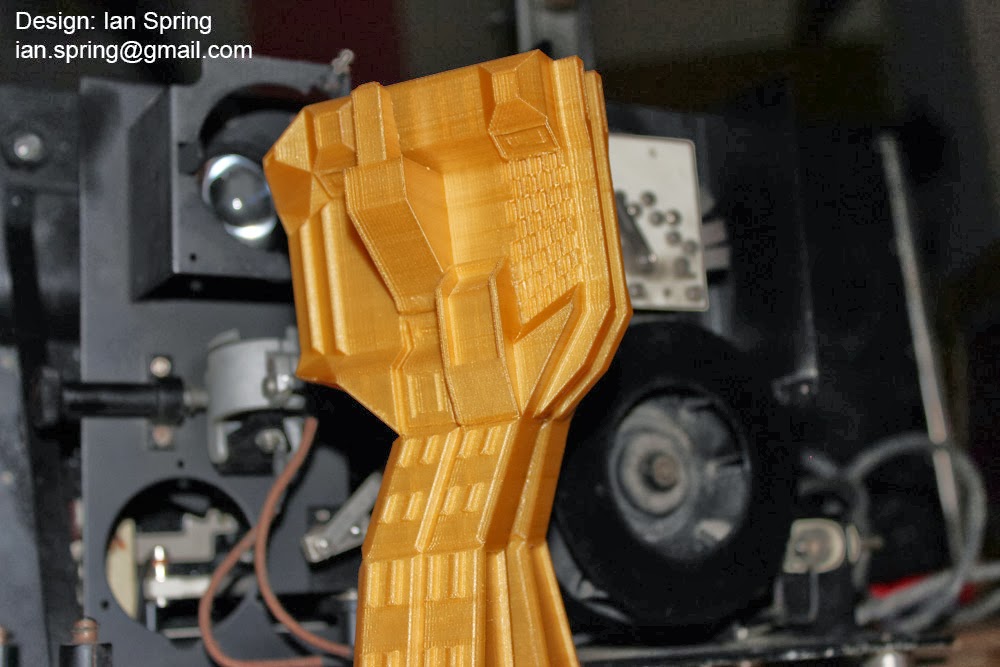
Fear not though. its an airsoft / bb-gun / toy gun. decided i wanted a gas blow-back "bullpup" rifle to add to my small collection, but the cheapest one is close to £400, so though "why not make my own" and i am :)


  • Link to post
    Share on other sites

    Posted · Post your latest print!

    Well here's another one of my rather petty prints...

    Still I wanted to share it because I'm pretty proud of my printer right now :D

    Sander showed a 20 microns print earlier, so I wanted to check that out for myself. I opted for 30 microns because the print would have taken ridiculously long if I had gone even further down.

    Note that this is a standard Original Ultimaker, except that it has a HBP. But everything else is 100% vanilla UM1.

    IMAG0397DSC02112

    It's only a small part, 42x18x4mm, but this one took 2 hours of printing already...

    I was primarily interested in how the chamfers would look, and I was not disappointed :D

    The 1x1mm chamfer on the pics consists of 32 layers, each recessed by 1/32th of a mm. For the naked eye, it looks pretty much perfect - it has a very slightly rough texture, but it looks like it was injection molded. Under the microscope you can see that even the x-y accuracy is pretty good. There are a few irregularities (jeez we're down to 0.01 mm perceivable resolution), but all in all the layers are pretty well placed.

    Also, I kinda have the impression that this part is stronger than it would be with 0.2mm layer height, not unlike Damascus steel which is layered dozens of times - I will definetly look into that theory when I have time.

    The parts are "weaved" together with the 45° infill layers (solid). Most fabrics become stronger with a tighter weaving, so why shouldn't this be noticeable here, too?

    But it's really difficult to say - this part is too small to tell. I'll make some test parts when I get to it.

    Next up: I'm drying gluestick on the HBP right now - need to make a part that covers about 90% of the build space...


  • Link to post
    Share on other sites

    Posted · Post your latest print!

    could you print some hooks like this and do a simple weight test on them and see how they handle the force ?

    would be interesting .

    Ian :-)


  • Link to post
    Share on other sites

    Posted · Post your latest print!

    so its friday... the office is calming down and of course like any normal person.... im planning what I am going to 3d print with my ultimaker2 at the weekend...

    THANK GOD FOR ULTIMAKER... yipppeee :-)

    Ian :-)


  • Link to post
    Share on other sites

    Posted · Post your latest print!

    Finally some normal persons :)


  • Link to post
    Share on other sites

    Posted · Post your latest print!

    im planning what I am going to 3d print with my ultimaker2 at the weekend...


    Weekend!

    Rhino course!

    or in your case,

    Do a design challenge ;)

    make something from three random words:

    http://creativitygames.net/random-word-generator/randomwords/3

    "vegetable monster arch" ???

    Cheers!


  • Link to post
    Share on other sites

    Posted · Post your latest print!

    Hey guys, I finally built my Ultimaker last week and decided to check what this puppy can do.

    For my second print, I decided to give Yoda a chance and printed him at .06mm layer height.

    This is what he looks like after some sanding and a paintjob:

    Yoda Finished

    Let me know what you guys think! I would be happy to know if you have some tips for squeezing more juice from the original Ultimaker. :)


  • Link to post
    Share on other sites

    Posted · Post your latest print!

    Last week a friend asked me if it's possible to print a replacement hook for a workshop lamp that got broken. I told him, this is absolutely no problem... :shock:

    Drawing this hook was very quickly done, however printing was a challenge.

    My first attempt was to print it lying flat with support, this ended up with a loose sphere (the one at the end of the hook). Next try was to printing it standing upright with Raft and support, however this was also not successful (not enough contact area to keep the print on the build platform).


    Therefore I decided to print it in two half hooks and glue them together:


    hooks In Cura


    20140201 195449


    The workshop lamp is now complete again. Mission accomplished! :cool: :cool:


  • Link to post
    Share on other sites

    Posted · Post your latest print!

    Hi Alex_3d

    Welcome to the comunity, that is a very nice paintjob you did there.

    Tips on how to increase you print quality can be found all over the forum, but just to sum it up:

    its impoirtant to keep ypur printer well calibrated, keep the belts tight and the axis aligned.

    don"t print too fast and use the right temperature for your material/speed.

    There are also plenty of modifications available (dual fan, heated bed, new pulleys, direct drive, nozzle diameter...)

    I am using a 0.8 mm nozzle for example, that really increased the printing speed without any notivable loss in quality (except on very small and delicate prints.

    good luck and have fun

    b


  • Link to post
    Share on other sites

    Posted · Post your latest print!

    Hey guys, I finally built my Ultimaker last week and decided to check what this puppy can do.

    For my second print, I decided to give Yoda a chance and printed him at .06mm layer height.

    This is what he looks like after some sanding and a paintjob:


    Let me know what you guys think! I would be happy to know if you have some tips for squeezing more juice from the original Ultimaker. :)


    It's every time amazing to see what's possible to get out of an Ultimaker.

    The painting makes a part each time complete. The Yoda is appearing very nice!

    I'm not a painter, therefore I'm always impressed when seeing such a sculpture.

    Welcome to this forum!


  • Link to post
    Share on other sites

    Posted · Post your latest print!

    .. Yoda ..


    Paint job awesome it is!


  • Link to post
    Share on other sites

    Posted · Post your latest print!

    i always wanted to print a crazy big robot that I designed. This is my first attempt, i modelled it up in about 20 minutes with cinema and never got around to actually printing it last year... so i said... what the hell and let this 30 hour print finish up last night.

    .1mm layer and very little cleaning... apart from a few tiny little overhangs.... the print was more than fantastic.... HEHE :smile:

    here are a few photos.... :smile:

    Good night guys !

    Ian :smile:

    robot2.jpg

    robot4.jpg

    robot1.jpg

    here is the model if anyone wants to give it a try :smile:

    https://www.youmagine.com/designs/klobb-a-future-robot-head-hunter--2


  • Link to post
    Share on other sites

    Posted · Post your latest print!

    Cool print (nice color choice). And this grungy hardware backdrop fits very well.


  • Link to post
    Share on other sites

    Posted · Post your latest print!

    Hi all,


    This is lets say my first serious print, the rest were small test pieces to see what the printer can do.

    It still needs stuff to do with it but the printing part is done.


    Binaural recording head_01

    you can see more here..


    Binaural recording head_01Binaural recording head_02Binaural recording head_03Binaural recording head_04Binaural recording head_05Binaural recording head_06Binaural recording head_07


  • Link to post
    Share on other sites

    Posted · Post your latest print!

    Just came back to my UM2 and found this little guys dancing around and having party ....

    ... what the heck ... ? :shock:


    20140202 213527

    :-P :-P :-P


    Ian, thanks for this wonderful UltiRobot re-design!


    Sigi


  • Link to post
    Share on other sites

    Posted · Post your latest print!

    Hi all,


    This is lets say my first serious print, the rest were small test pieces to see what the printer can do.

    It still needs stuff to do with it but the printing part is done.


    you can see more here..


    Nice print... but my god those images are huge :shock:

    What is it for?

    And just out of curiosity: Why hide away her brain, instead of making the head eg. perforated/mesh/wire style?


  • Link to post
    Share on other sites

    Posted · Post your latest print!

    Just came back to my UM2 and found this little guys dancing around and having party ....

    ... what the heck ... ? :shock:


    :-P :-P :-P


    Ian, thanks for this wonderful UltiRobot re-design!


    Sigi


    SIGI---- BRILLIANT !!!!! :-)


  • Link to post
    Share on other sites

    Posted · Post your latest print!

    I love seeing all these new prints! @ Ian the detail is something I would have definitely not expected with this type of printer, I am again totally glad I settled on supporting the UM team.

    @ Achillix, did you use support for your model? Which turned out freaking awesome btw!

    Also, I'm totally going to print out those figures, I think they would make good test pieces. Thanks for the post @ Sigi they look great!


  • Link to post
    Share on other sites

    Posted · Post your latest print!

    Nice print... but my god those images are huge :shock:

    What is it for?

    And just out of curiosity: Why hide away her brain, instead of making the head eg. perforated/mesh/wire style?


    Yes,the pictures..I got used to the internet speeds here in Switzerland and I don't pay attention to what I upload!

    Anyway, next time I'll resize them first..

    It is a recording dummy head that help to make binaural recording which lets say simulate the human hearing.

    Hide away I hope you don't mean the cap. The head has to be closed and filled with absorption material in order, 1st not to resonate like all hollow stuff do and 2nd The sound must reach the microphones only through the ear canal.

    Long story short it has to be as close to a human head as possible.. which means closed.

    @AaronAlai

    Yes I did.. you can see the other pictures in the album. Although I'm not happy with the finish where the support was touching the model. It's impossible to remove all the support structure.


  • Link to post
    Share on other sites

    Posted · Post your latest print!

    About the support structure - check out Meshmixer. Illuminarti has a great blog post about it (http://www.extrudable.me/2013/12/28/meshmixer-2-0-best-newcomer-in-a-supporting-role/).


  • Link to post
    Share on other sites

    Posted · Post your latest print!

    Hi all,


    This is lets say my first serious print, the rest were small test pieces to see what the printer can do.

    It still needs stuff to do with it but the printing part is done.


    you can see more here..


    Cool stuff! als nice blueish color, which one is it?

    As for me, I spend the weekend modeling some nifty thing I wanted for a very long time.:

    A rabbit! (wallace and gromit, curse of the were rabbit)

    Made with Rhino (course pays off;) ), remeshed with Zbrush ( Zremesher is really awesome!)

    2014 02 02 16.06.08

    entangled bunny

    look master frodo, a bunny!

    a bit rough

    who stole my carrot

    gromiiiiiiit

    before painting

    I want to paint him true colors!


    And something I quickly made this morning:

    some adhesive issues..

    darnit! does not fit!.


    Also, I wanted to make something cool which I can show off, so i made a preset for cufflinks.

    However I need to think something up to make it one piece:


    My Initials!

    Any ideas?


    My first Ultimaker spool is running empty! Time to but some new ones!

    From what i have seen on the forums , the colorfabb orange is really cool too!

    I have already got red and XT. Also I need to print with the samples from Colorfabb from the London print show.


    Cheerio!


    Lennart Bruggink


  • Link to post
    Share on other sites

    Create an account or sign in to comment

    You need to be a member in order to leave a comment

    Create an account

    Sign up for a new account in our community. It's easy!

    Register a new account

    Sign in

    Already have an account? Sign in here.

    Sign In Now

    • Our picks

      • UltiMaker Cura 5.7 stable released
        Cura 5.7 is here and it brings a handy new workflow improvement when using Thingiverse and Cura together, as well as additional capabilities for Method series printers, and a powerful way of sharing print settings using new printer-agnostic project files! Read on to find out about all of these improvements and more. 
         
          • Like
        • 16 replies
      • S-Line Firmware 8.3.0 was released Nov. 20th on the "Latest" firmware branch.
        (Sorry, was out of office when this released)

        This update is for...
        All UltiMaker S series  
        New features
         
        Temperature status. During print preparation, the temperatures of the print cores and build plate will be shown on the display. This gives a better indication of the progress and remaining wait time. Save log files in paused state. It is now possible to save the printer's log files to USB if the currently active print job is paused. Previously, the Dump logs to USB option was only enabled if the printer was in idle state. Confirm print removal via Digital Factory. If the printer is connected to the Digital Factory, it is now possible to confirm the removal of a previous print job via the Digital Factory interface. This is useful in situations where the build plate is clear, but the operator forgot to select Confirm removal on the printer’s display. Visit this page for more information about this feature.
          • Like
        • 0 replies
    ×
    ×
    • Create New...