

Amazing stuff all around these last bunch of posts!

An enclosure for a my retro console that I've been working on for a while.


I've been working on a all-in-one case for my cellphone that can replace my wallet and keychain on most outings. The latest version has enough space for 2 house keys and 4 creditcards. There is also enough room between the back of the phone and the credit cards to stuff a business card or bills in. I’m working on a final version 3 of this case that I’ll print in white ABS vs the blue PLA I’m using now.
Later I hope to try and crowdfund design and print a bunch at Shapeways for the top selling phones like iPhone/Google Nexus 5/Samsung Galaxy S5. Examples of custom backs could be a message to a loved one or QR coded business card message. I have a Facebook page if any of you are interest in watching my progress.
Great idea! 
So after almost 2 months of printing nothing. I just clicked on my ultimaker 2 last night and printed this amazing little monster character.
I was very impressed that after 2 months of nothing being used.. that the machine was able to be switched on and print something of this high quality without any preparation....
BRAVO !!! Ultimaker !!
Ian :-)

www.ultimaker2.com
Ian we aren't losing you are we? How can we get you addicted again?!?So after almost 2 months of printing nothing.

On topic: Nice print!
Ian we aren't losing you are we? How can we get you addicted again?!?
On topic: Nice print!
first thing is... there are enough crazy creative lunatics on this forum.. I wouldnt be missed much !
Secondly... I was changing apartment... changing job and changing a lot in my life and my poor beautiful ultimaker2 had to be switched off in that time.
But now things are all calming down and the magic of translating 00011000101010101001 into something in my hand is BACK... and I love it as much as I ever have..... I probably will be the first person to print his own 3d Ulti Coffin... HEHEHEHEHHE...
PS... Big happy hugs to all the lovely people here on the forum... missed you guys !
Ian :smile: :smile:
Hey Guys,
It's been a while since I posted my Yoda test. In the meantime I was working on my original character to test the limits of the original Ultimaker. He is based on the legend of Conan stories, he is whopping 32 cm tall and composed of 20 separate pieces (not counting the tiny ones). I've made the 3d model using 3ds Max and Mudbox. So far he is assembled and primed; next step - paint job.


Packed and ready for migration into office.


Hope you guys like it
a-ma-zing!!
Were you satisfied with the result?
- Did you have to do some covering up during priming or not really?
How did you assemble it, just glue it?
I am very curious to see what it looks like when it is painted!
I am really impressed!

Trying to solve the problem of not knowing who are using the 3D printer at our makerspace i made this:
https://www.youmagine.com/designs/ultimaker-nametag
I`m too busy with real jobs at the moment to contribute in here, but as usual full of awesome stuff! I cant wait to get designing/printing for fun again!
a-ma-zing!!
Were you satisfied with the result?
- Did you have to do some covering up during priming or not really?
How did you assemble it, just glue it?
I am very curious to see what it looks like when it is painted!
I am really impressed!
I'm never satisfied haha, more like got tired of sanding and dremeling. This is PLA (would probably work with abs in the future). I got it to a point of it being decent and buildup layers not bothering me too much . I put it together with superglue (gel variant), which let me wiggle parts into place for a few seconds before gripping it. I used Tamiya putty to cover up the seams, sanded it and filed to get all the big stuff out. Primed it first time (it tends to get into small cracks), sanded it once more and primed it again.
@Didier Klein
It took some time to print, maybe a week of pure printing time. It took longer to sand it and assemble.
Thanks for feedback guys, I'll try my best
good evening,
Here are some new printed and assembled parts together. We can now connect noticed by some aluminum of various parties. A pivot, not shown here will be used to offset the level diference between the suspension of the right and the left.
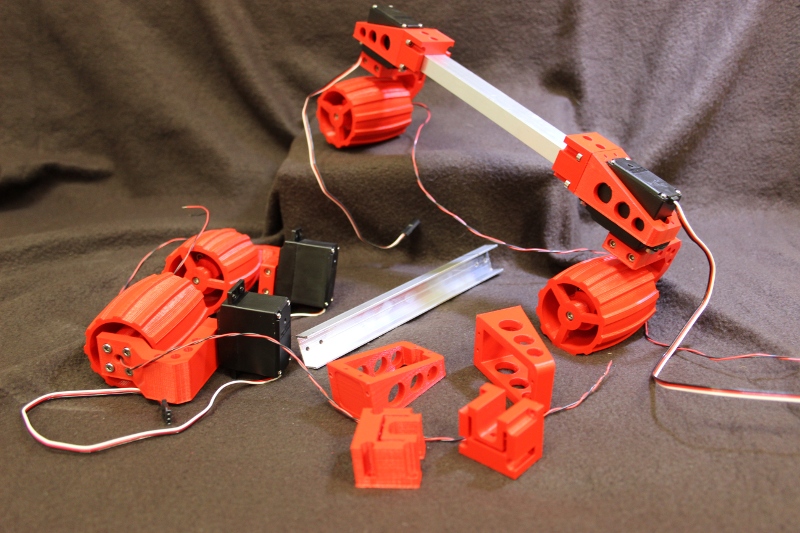
Mounting part :
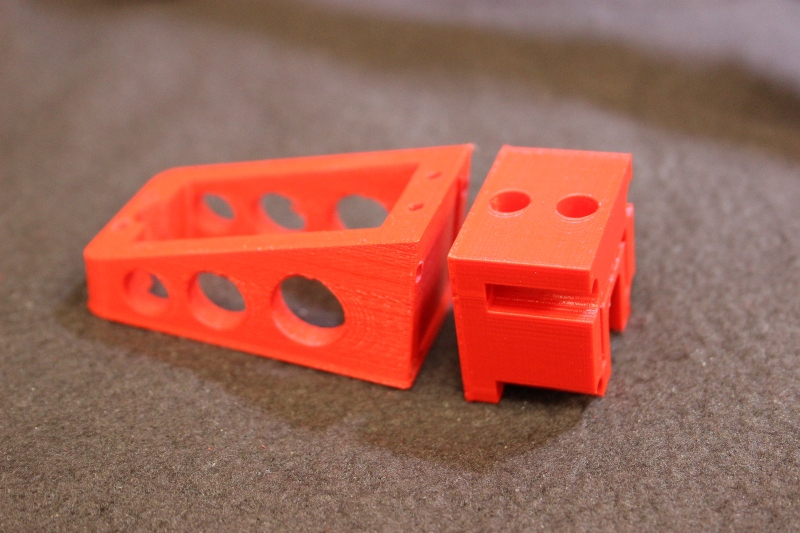
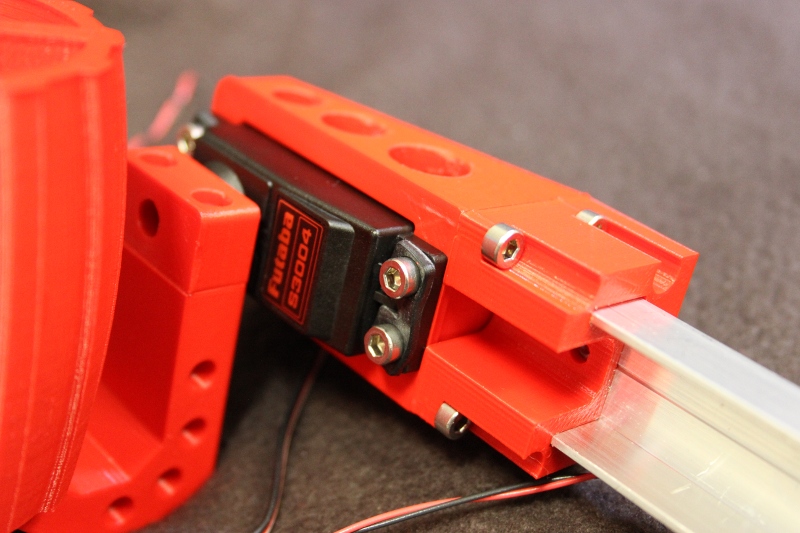
See you soon.
Hey folks,
this is follwing to my post #2046 in this thread regarding this clamp insert I made from ABS.
Now I got the chance to test if it fits. It does.
If you wonder what the heck the device is I made it for: old vine press.


Oilfield models for a conference and sales. This is 1/3 of the model all printed at 1/4 scale. Many separate parts and welds which hold the original together which is the reason for multi parts. Also the main part is larger than machine capacity

I needed some experience concerning how big I have to draw a hexagonal hole to make a nut fitting.
To cover both orientations I made two test parts with hexagonal holes starting from 7.1 mm to 7.5 mm.
The M4 nut has a nominal size of 7 mm but is in fact 6.9 mm
I printed it in PLA Faberdashery Firetruck Red with the standard PLA settings from the Ultimaker 2.
Layer height 0,1, Speed 60, using brim, infill 30%
Here you see how I arranged the orientation of the parts.

Comparison of the two finished parts. I would have done better by increasing the minimal layer time or by adding another one of the vertical prints to get better results on the latter. But as a stress test ok anyway.

All following pics show how the nut fits into the different sized holes. Left the flat printed block, right the vertical printed one.
At 7.1 mm at both blocks the nut can be pressed in with one finger. It won't fall apart if turned upside down.
Very useful if you want to place a nut during mounting an assembly and if you want it to stay there while fiddeling in the bolt.

At 7.2 mm at both blocks the nut can slide into the hole nearly by its own weight if placed accurately, may stick a little bit, and may fall out by turning upside down if put in and removed a couple of times caused by slight wearoff of the hole walls.
Tightest tolerance if you want it to fit properly and you don't have space to bring a force on it some how or if you want to remove it from time to time.

At 7.3 mm the nut falls into the hole and falls apart easily.
If you want to throw the nut into the hole this size might be suitable for you.

7.4 mm shows same effect with more space of course.

At 7.5 you got a lot of space. Nut is still blocked against rotating but with enough force the edges could flap over and round the hole. Only suitable if you have to adjust the position of the mounted part and you need a bit of resistance against rotating while thightening. For me, end of the usable range.

All in all it came out that both orientations work somehow. If I can choose I will lay the hole flat. But if I am forced to have it in vertical position I recommend to orientate the tip of the hex upside so I may avoid support structure up a a certain size of nut.
Normally this test sould be made for every ususal nut size but I assume that the space may be scaled by using the percentage from the the relation between nut nize and hole size worked out in this experiment.
That's it from the laboratory
cheers
nudel
This is a project which pretty much made me to get into 3D printing, as I realized the necessary parts would be quite tricky to make otherwise. My goal was to get a lot of light to my room - a lot of dimmable light with good color rendering properties. Here's a photo of the result - the lights are dimmed down from maximum quite a bit:

The design is intentionally very function-driven. I have had my ups and downs with my UM2 to get all the parts printed, but I'm very happy with the result. Now I just need to make more of these lights - the nights are getting darker

My stone for projectEGG
I have made this one a week or so ago, but didn't want to publish pictures until we gave it away:

My take on a bouquet to give as a present on a wedding. Something that doesn't wither after a couple of days
Blizz - I love that one! It took a while to print all the roses, did it? What parameters did you use? I was thinking long ago to print a bouquet but the printing times seem to be too long.
It did take a long time, but the receiving couple was one we hold dear so it was worth it.
Initially I tried printing 3 roses but the retraction messed up my filament. It's already bad for one, let alone the constant switching between 3. Ended up using 0.1mm layers and a print speed of 50mm/s. Took just under 3 hours per rose head.
For the stems I initially wanted those with thorns but that would result in about an hour extra to print the support and I needed 10 (one for every year they were together before the marriage) So I took the one without, made it longer and then printed it with a brim (it has almost zero contact surface with the plate so I didn't want to take the risk). Those took about 45 minutes per piece.
The vase was also printed at the same settings and took about 10 hours. All in all about 65 hours including the mistakes and do overs. But they were really happy with it (or the money we put in the vase, dunno )

ArunC posted a topic in UltiMaker Cura,

.thumb.jpeg.0b7a05eafc09add17b8338efde5852e9.jpeg)
Dustin posted a topic in Firmware,


Recommended Posts
Top Posters In This Topic
362
282
221
179
Popular Days
Jan 5
30
May 12
26
Jan 13
23
May 1
22
Top Posters In This Topic
ian 362 posts
cloakfiend 282 posts
skint 221 posts
SandervG 179 posts
Popular Days
Jan 5 2014
30 posts
May 12 2014
26 posts
Jan 13 2014
23 posts
May 1 2014
22 posts
Popular Posts
kmanstudios
Took me forever to do this. And it is still rougher than I would have liked. 3D concept rendering: Finished piece:
kmanstudios
I just finished this. It was a multi-part print for ease of painting. Some of it I am not sure what happened...but hey, it is purty....And, I am unanimous in that ? Test Render Parts
gr5
Bath interferometers. I have made about 20 of these for people who use them to test their telescope mirrors. They are amazingly accurate and can do better than a $40,000 Zygo PSI optical tester. Th
Posted Images
Dim3nsioneer 557
Incredible this criminal energy here... :shock: oops...sorry :oops: ... I meant this creative energy here, of course... :mrgreen:
Link to post
Share on other sites