

Robert:
I remember watching Stargate back in the day, but that piece doesn't seem familiar. Is it a single part out of something larger?

Robert:
I remember watching Stargate back in the day, but that piece doesn't seem familiar. Is it a single part out of something larger?
Indeed. It's a single replicator block: http://stargate.wikia.com/wiki/Replicator
oh! Very cool! I don't remember that episode at all!
"Episode"? The replicators were a major plot line in both SG-1 and Atlantis, spanning several seasons 
HA! I don't remember anything about replicators! :oops: It wasn't one of my fav shows, but I know I've seen a bunch
Since those things are made of mostly the same part, it would probably be quicker and more efficient to mould the pieces. Make a 5-10 piece mold, cast one or two batches a day and you're golden.
Advantage is that you could use some high quality engineering grade resin.
I left a black PLA part outside for a year, it got some discoloration and little change in shape, but nothing too bad.
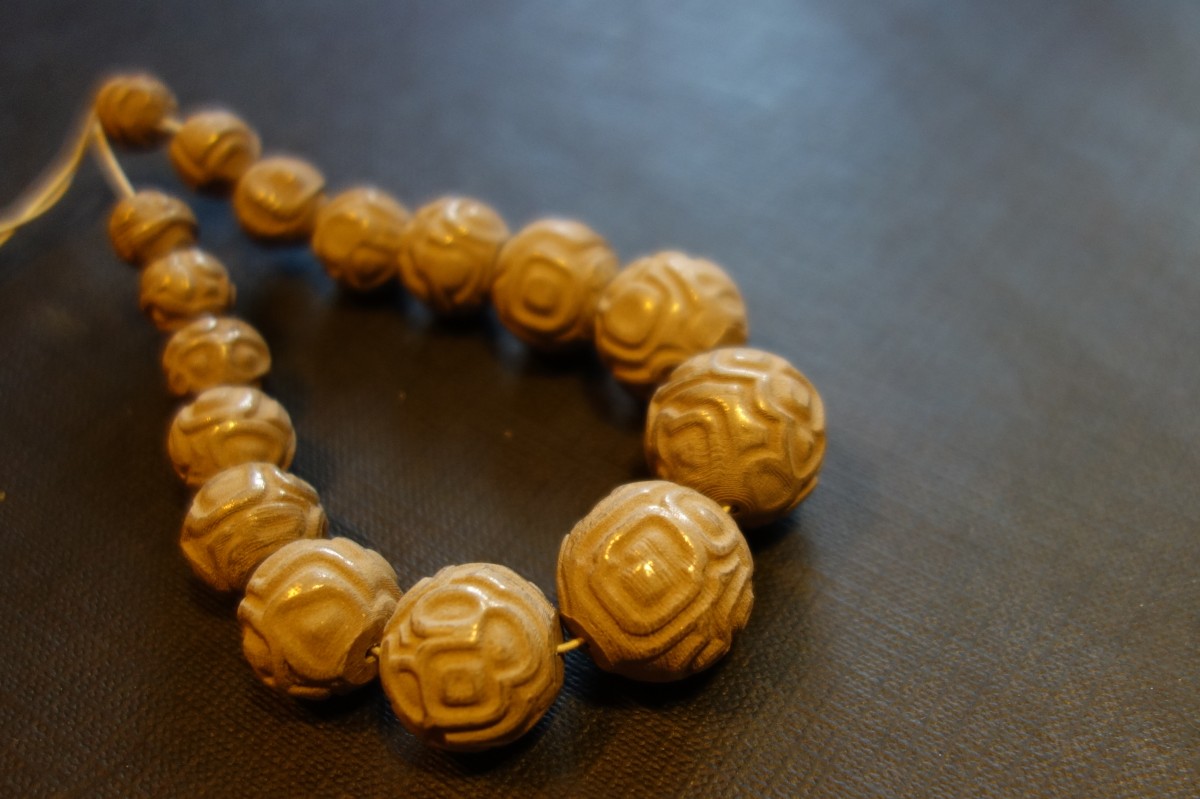
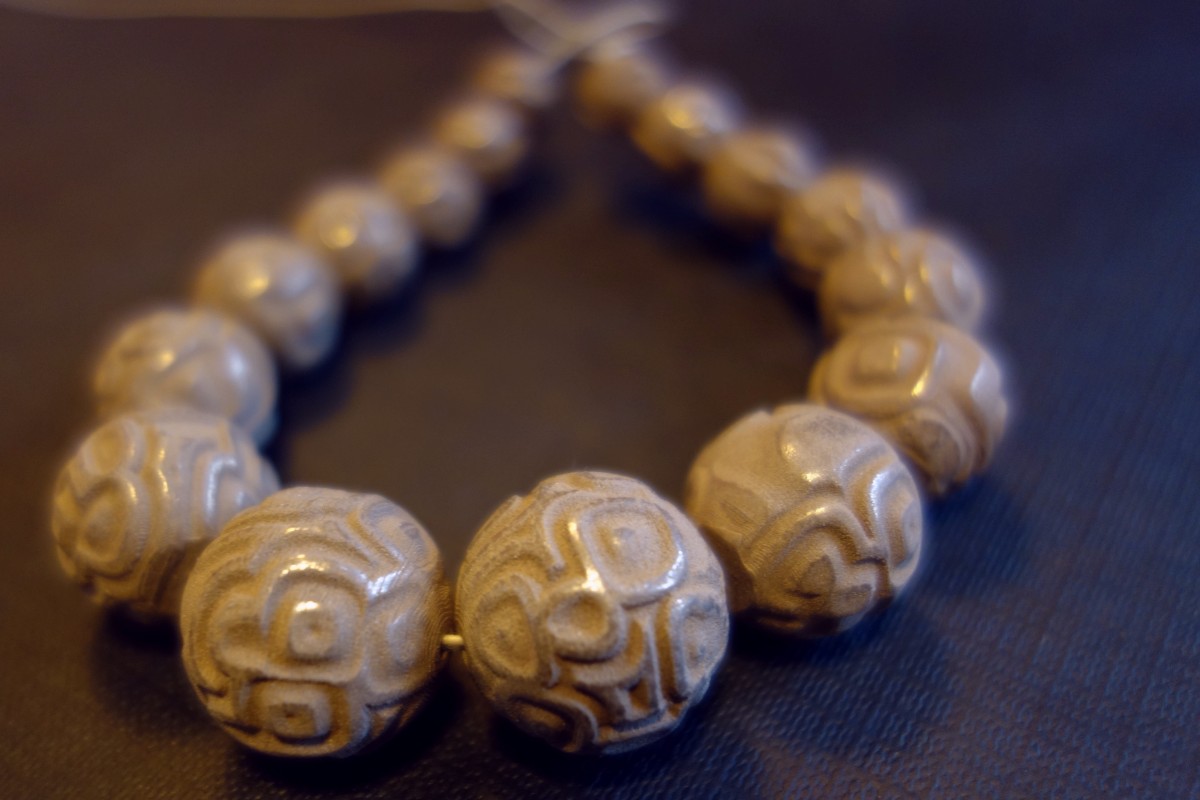
And here is may last print, once again a necklace, modelled in Blender with procedural texture and array modifier. This way, I can add as many pearls I want, every one is unique.
Just a tip: better not use "print at once" to prevent the small oozing patches when the head jumps to the next pearl. They are quite annoying with bronzefill as they tend to be more polished than the rest.

 1
1
After finally dealing with and fixing not one but two separate problems that have plagued me for a while now, I decided it was time to waste some filament and print a frivolous 'long' print. I was not brave enough to do a 18 hour print, but this hour long one did nicely.
It is 67P/Churyumov-Gerasimenko, printed from data supplied by ESA. Proper color and all. It might be one of the most elaborate ways of obtaining STL data  The real print is actually quite a bit nicer than in the picture. The details are pretty good, despite its rather small size. It is not amazing and does not really compare to the other prints here, but it's decent enough.
I might do a bigger one later on, when I have the settings dialled in a little more.


Presenting the latest prototype of my WARTHOG extruder drive!
It's made of lasered stainless steel (3mm for the gears, 2mm for the rest) and printed PLA parts. I used Diamond Age Kiwi Lime PLA, printed at 200°C, 0.2mm layer height and 35mm/s speed.
The extruder drive is almost functional, just a few things missing. Once the design is working, I'll publish it on YM.
Just finished my biggest print to date:

The fume extractor above my stove has a circular exit hole and comes with a large circular flex tube that you are supposed to connect to an exit hole in your wall... However, my apartment is not of modern date (about 100 yo), and the exit hole is rectangular...
The circular stud of this print goes inside the extractor tube, and is one of two pieces that will connect circular-tube with rectangular-hole. The other part im printing has the same size base but a rectangular stud that fits the hole in the wall...
Once done, I will bolt them both, base-to-base, inside the kitchen cabinet that cover the wall hole..
Printed in white PLA, with a 0.6 mm. nozzle, 200°C, 0.2mm. layers, 100 mm/s print speed.
Part 2:
It very much reminds me of the problem Apollo 13 had, fitting a square filter in a round hole. The prints look nice!
I've been working on a Harley Quinn bust with stand recently. I've fixed the hood, removed the support and filled some imperfections. Just lots of priming and sanding to do now!


Some really nice prints on these forums as always.
For the past week all kinds of great ideas have been going through my mind about how to make my dremel workstation easier to print, use less filament, and easier ways to adjust both axis and how they rotate. This is the forth version i have designed from scratch which is called the MARS 2 (GEO) MultiAxisRotaryStation. I dove deep into designing this version with geometrical shapes, tension springs, and linear bearings. the last version did not use bearings and works great, but I wanted to have a version that moves up and down easier. Anyhow, this is what I'm currently printing over the weekend.
Anyhow, this is what I'm currently printing over the weekend.
Very curious about the end result!
Very curious about the end result!
I was able to complete it last night after 25+ hours of straight printing. I did have to reprint 1 small part and fix the file slightly, but it looks, feels, and works as intended. The only thing I'm missing are some 8mm rods about 12" in length. The ones I have are just a little short, but good enough for testing. The carriage weighs about 2lbs. Fully assembled with the brake/locking mechanism attached.
Here are some pics of the MARS 2. There's a total of 12 printed parts and I printed the prototype in my least favorite color, since i had a full roll sitting around.
This is my contribution of this weekend. A bicycle chain clothes protector. For the small disks (16cm) found on tandems it is difficult to find a protector. Here is the idea:

It is mounted using 3 tie raps.

Now lets see how long it holds and if it does its work.
I always "Like" StarGate content but those low poly circles really bug me.
Exactly the same thought I had. For this reason, I have the emblem completely new designed and then printed in max size. Now everything is symmetrical and the circles are round. :mrgreen:

In addition, you can now stand up or hang up the emblem


There ya go. That's better
Beautiful!
There ya go. That's better
I see exactly the same way :wink:
Beautiful!
Thanks, I've uploaded it to Thingiverse if anyone has interest.
http://www.thingiverse.com/thing:642680
nice print dirk!
Made the weapon Thorn from the game Destiny.

1

ArunC posted a topic in UltiMaker Cura,
.thumb.jpeg.0b7a05eafc09add17b8338efde5852e9.jpeg)
Dustin posted a topic in Firmware,


Recommended Posts
Top Posters In This Topic
362
282
221
179
Popular Days
Jan 5
30
May 12
26
Jan 13
23
May 1
22
Top Posters In This Topic
ian 362 posts
cloakfiend 282 posts
skint 221 posts
SandervG 179 posts
Popular Days
Jan 5 2014
30 posts
May 12 2014
26 posts
Jan 13 2014
23 posts
May 1 2014
22 posts
Popular Posts
kmanstudios
Took me forever to do this. And it is still rougher than I would have liked. 3D concept rendering: Finished piece:
kmanstudios
I just finished this. It was a multi-part print for ease of painting. Some of it I am not sure what happened...but hey, it is purty....And, I am unanimous in that ? Test Render Parts
gr5
Bath interferometers. I have made about 20 of these for people who use them to test their telescope mirrors. They are amazingly accurate and can do better than a $40,000 Zygo PSI optical tester. Th
Posted Images
IRobertI 520
I needed to make something Stargate related as well.
Eventually I'd like to build an actual replicator out of the blocks but man... I saw someone else who did it and it took 200 pieces. Not sure I have the patience for that.
Link to post
Share on other sites