
I need to correct, the initial layer thickness should be equal or greater to your set layer height. I have been printing with the .8mm nozzle with a layer height of .4mm and a initial layer thickness of .4mm with out any problems.

I need to correct, the initial layer thickness should be equal or greater to your set layer height. I have been printing with the .8mm nozzle with a layer height of .4mm and a initial layer thickness of .4mm with out any problems.
I have printed one layer and aborted the print, then measure that layer with a caliper and it's giving me between .5mm to .7mm thickness.
Stop using the leveling procedure. It has bugs. Or update to the latest firmware which fixes some of the leveling procedure bugs. Anyway my advice is to ignore leveling procedure and just turn those screws. One full turn is I believe .5mm. So try about a half turn on all 3 screws and then print the skirt and adjust live.
Your initial description sounded like the nozzle was too far from the glass. And then your post #437 above sounds even *more* like the nozzle is too far from the glass. Don't trust the leveling procedure - just turn the screws instead.
I must have missed this levelling procedure bug. Which version this refers to? Is there a thread about it?
I had some first layer issues too with the 0.8mm nozzle, spitting huge amounts of plastic while xy-movement nearly stops.
Unfortunately I don't know what I did right, perhaps switching printer off and on, or using different cura version, issue dissappeared since then. Probably not very helpful, sorry...

Firmware 14.06.1 and older had bugs that affected bed leveling.
There is a thread about it here: http://umforum.ultimaker.com/index.php?/topic/5935-z-axis-homing-inconsistent-on-um2-workaround-and-patch/
Hey guys,
I have designed and published a case to hold all your different nozzle sizes and also different materials. So you don´t have to count the points on it ;-) A little feature is the plug, which shows you the current installed nozzle.
https://www.youmagine.com/designs/nozzle-case
Useful! :-)
nice
OK guys you can welcome me to the Olson Gang.
Is there any specific tattoo I should make or something?
EDIT: it's working very nicely so far. Looks like I can now switch nozzles on my UM2, very very happy.
Luckily enough, it was very easy to take out the temp sensor. All it took was a little WD40 and a firm grip on pliers. No heating required. The whole thing took maybe 15 minutes. Everyone owing an UM2 should have this, at least as an option. http://www.3dsolex.com
Sup!
Just got a second UM2 and I'm waiting for a replacement heater and sensor (stuck in OEM nozzle) to be ready to install that second custom block. That UM2 now feel inferior to my first one :eek: .
Did anyone notice any change with printing overhangs? I feel the borders are warping upward a lot with any slope more than 45 degrees.
Borders warping up is common for overhangs. It has more to do with the fact that PLA shrinks in the first few milliseconds and is laid down like a liquid rubber band. Like snot. and pulls inward which means upward if it is an overhang - especially on the corners. Fan helps a lot. TONS of fan. 200% fan. Extra fans. I don't know anything else that helps. Although printing super slow - 5mm/sec on the next layer up pushes those "warping upwards" on the next pass (they remelt but you have to go very slow - 5mm/sec). I never went for the 5mm/sec solution myself. Instead I support overhangs sometimes with CAD to hold them down.
so, question from my side;
what is the recommended fan mount?
the stock fan mount is not the greatest when printing with one nozzle. what is the recommended fan mount replacement since this nozzle sticks out a bit more?
I'm making a new one. I'm trying to have separated fan ducks so I can isolate the nozzle with an aluminium cover independently. Something closer to what the Ditto Pro has.

aluminium cover means non-printable design.. i like printable designs.. 
True but if you want to cover your heater block and isolate if from the air flow you need something that wont melt. Aluminum cover is just one way along many others.
I notice Stephan has some steel nozzles shown in his storage box, I take it for the XT-CF20 and also for some of the other ColorFabb filaments etc, that cause more wear, I'm interested in getting the nozzel upgrade set soon, but was also interested to know where the steel ones were from and what are the problems with using them, heating etc. I'm only realy interested in the 0.25 and 0.4mm sizes for good quality prints.
I've not had any problems with my origional supplied one yet but planning ahead.
Nozzles are coming from E3D.
http://e3d-online.com/E3D-v6/Extra-Nozzles
The steel versions are not recommended for PLA because if I understand it correct PLA stick too much to steel and doesn't flow properly. This is why no full metal print head is good at printing PLA *so far*.
Steel nozzle is more resistant to the abrasive materials like the XT-CF20.
Cheers Dude, I'm going to a 3Dhubs & ColorFabb workshop in a few weeks so will be interesting to see some info and some samples, ive enjoyed the WoodFill and BronzeFill, it's a shame the others arn't available in small lengths.
I wish ColorFabb would sell by the 10m the same as Faberdashery so that I could get hold of some of their other PLA colours and some of their Fills.
Did anyone notice any change with printing overhangs? I feel the borders are warping upward a lot with any slope more than 45 degrees.
Actually, yes, I think I have. I haven't printed as much as I'd like yet but I think I'm seeing that as well. I need to do a side-by-side with my other printer and the same file to confirm before I say anything conclusive. But I'm pretty sure the overhangs were worse when printing a part of my feeder than I'm used to. Will try to test some more this weekend if I can.
It would be good to compare a .4mm e3d nozzle versus UM2 standard nozzle versus the upcoming JET nozzle.
The main difference would be in the size of the actual hole (it's supposed to be .4mm) and how flat the tip is and how big the "shoulder" is. A larger shoulder is better at pushing down the outer shell layer when "drawing" the inner shell layer which is helpful on overhangs. Too large of a shoulder and the quality looks horrible.
Comparing different nozzle designs is something I wanted to do for a long time.
Both me and my Ultimaker has been way too busy to though, so I have only concluded that the difference between E3D and the original UM2 nozzle is small enough to not obviously have negative impact on the things I print.
The interesting thing though is that an exchangeable nozzle like the E3D is quite cheap and easy to manufacture, so if one come up with a better design and can order them in the hundreds it might be feasible to start producing such nozzle :smile:
Anyway, I encourage you to start testing different nozzle desings!
One obvious nozzle to start with is the UMO (which actually fits, although it is much larger).
Another is the Delta Tower nozzle, which looks like the E3D on the outside but according to a rumor is improved somehow.
Now when I think about it, I am almost prepared to sacrifice an original heater block for science to make something out of the nozzle part that can fit in the custom heater block :smile:
One thing that I have observed by the way is that it appears the plastic gets a bit softer at the same temperature setting with the custom heater block.
The longer melt zone would explain this. In practice I often print 5 degrees cooler than I did with the original block.
This might also affect the quality of overhangs.

Did a few tests, have a look at the Faberdashery Red and the Colorfabb pink for side by side comparison of the Ultimaker2 nozzle vs the Olsson block + e3D nozzle.
The tests are based on printing starting at 210 celsius, going down to 190 in steps of 5 degrees.
Bed 60, speed 35 (stl & gcode in the dropbox link)
There are differences between using the e3D and the Ultimaker2 nozzle.
But for me it seems these differences are smaller than the difference you see between some fillaments.
Looking at Olsson+e3D vs Ulitimaker2 I think bridging seems a bit better with the e3D. The Ultimaker block seems to give more variance over a range of temperatures. For example with the UM2 nozzle I've seen the 45degree overhang getting worse around the 205 celsius, and beter at both higher and lower temps.
The small details (the little ribs on the corner) seem better on the UM2 nozzle.
Based on this practical test I think the diference between colors is also bigger than the difference between brands. Fe I don't like the grey's from Faberdashery and Colorfabb, but I love the Inofill silver. With some of the colorfabb colors I still have the "fur growing issue", grey and pink seem softer than f.e. my favourite; fluoresent green)
.
If you want to have a look a the HighRes photo's download (button top right) them here;
https://www.dropbox.com/sh/t0im1c0967zosg3/AADBG9HUjj_T5lrdr3ByceYLa?lst
small versions in the gallery;


My first print in XT with the block did not come out nice at all. Stings and blumps of plastic all over. Still I could complete it and the part came out fully usable although not the nicest possible.
I tracked the reason of the poor results thanks to gr5 post
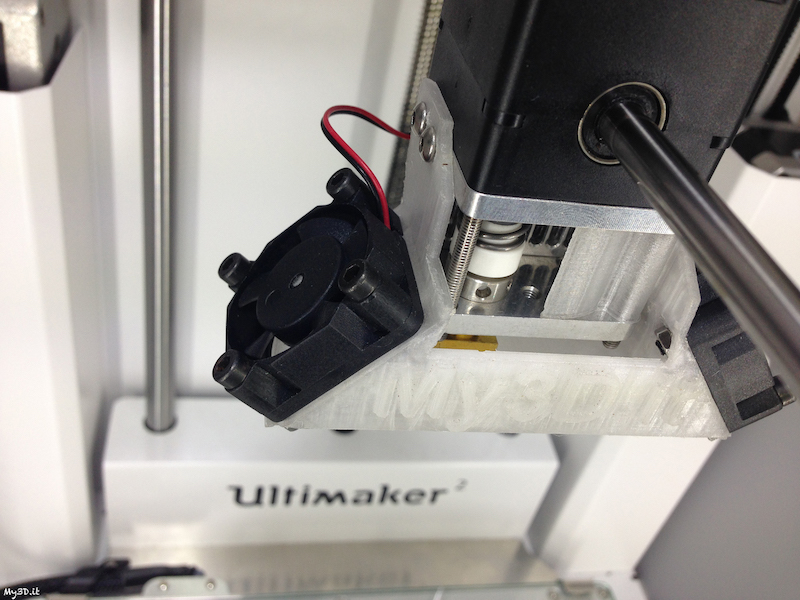
Indeed the block was in contact with the aluminium fan shroud and this was possibly causing temperature fluctuations in the block and poor temperature control.
Now luckily enough, this part I was printing in XT was Cor3ys fan shroud! https://www.youmagine.com/designs/ultimaker-2-fan-shroud
So I replaced the fan shroud and immediately printed a second one. Made a minor modification. Since I am using this deflector by Darkdvd:
https://www.youmagine.com/designs/deflecteur-1p
(see thread here http://umforum.ultimaker.com/index.php?/topic/10080-um2-boucher-un-trou/)
to try to draw some more air to the teflon coupler, I made a little cut on the left part of the fan shroud to allow some air flow behind the coupler. This area is "closed" in Cor3ys design, while it is normally opened with the original alluminium structure. So I restored some space in this area.
The print in XT came out very nicely this time, so I think that indeed the problem was the contact between the block and the aluminium.
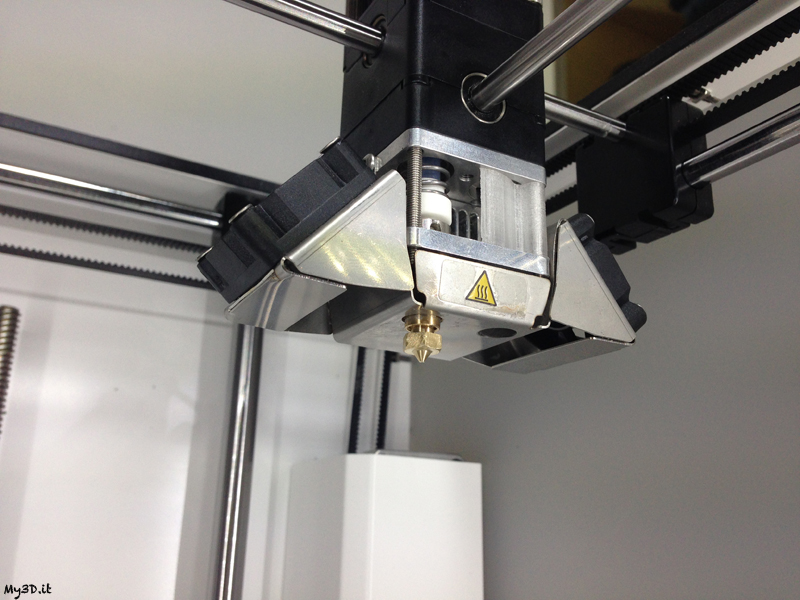
Here's my current setup:
I'll be getting some abrasive filament soon and was wondering if steel nozzles would be more appropriate.
I plan on printing:
Stainless Steel PLA, Magnetic Iron PLA and Carbon Fiber PLA from Proto pasta and XT-CF20 from colorfabb.
Do you think it steel nozzle will even work with PLA? How abrasive could it get on the block itself?

ArunC posted a topic in UltiMaker Cura,

.thumb.jpeg.0b7a05eafc09add17b8338efde5852e9.jpeg)
Dustin posted a topic in Firmware,


Recommended Posts
Top Posters In This Topic
110
109
71
62
Popular Days
Aug 18
22
Feb 19
22
Feb 20
19
Jan 24
19
Top Posters In This Topic
swordriff 110 posts
gr5 109 posts
ultiarjan 71 posts
Anders Olsson 62 posts
Popular Days
Aug 18 2015
22 posts
Feb 19 2015
22 posts
Feb 20 2015
19 posts
Jan 24 2015
19 posts
Posted Images
mohissa 0
I'm using glue. My problem is not so much adhesion as it is the initial layer thickness. I don't know why it's not doing what I'm asking it to do. With the 0.4mm nozzle it prints great with little to no issues. But when I switch to the 0.8mm nozzle I find the nozzle is somewhat too far from the bed. Although I have reduced the initial layer height to 0.2mm.
I have printed one layer and aborted the print, then measure that layer with a caliper and it's giving me between .5mm to .7mm thickness.
Link to post
Share on other sites