Jump to content

Let's talk about 12 screws...


Recommended Posts

Posted (edited) · Let's talk about 12 screws...

Let's talk about 12 screws:

All Ultimaker 2 users should to be very attentive now...Than here comes a ultimate free upgrade for your machine ...

...The future is now...

What happened if ...

... I would say the following?

+ Twelve screws on Ultimaker 2 printhead will soon be obsolete.

+ You do not have to buy an additional upgrade and no other optional components, so that the Ultimaker 2 works more efficiently than before.

+ You will get the opportunity to produce an upgrade for your machine itself.

+ With the upgrade, you get the basic preconditions for successful dual extrusion.

+ You will soon be able to cool one or even two ColdEnds more than adequate.

+ With the same upgrade, you will also be able to cool the objects to be printed better than ever before.

+ If you work exclusively with PLA, it is quite enough if they also make the upgrade with this material ... really.

+ If you also want to continue working with ABS and more specific materials, please make the upgrade, at least with ABS.

+ With this upgrade you need for ordinary printing operations, never again the maximum fan-performance / speed.

+ Your Ultimaker 2 will be able to run more quietly.

+ Maintenance of the Ultimaker 2 printhead will be easier than before.

As of today, they may all call me like an idiot, but please not before they've tried this upgrade itself. Of course I had spent before this announcement, many hours with experiments. And also I myself am very surprised with respect to the performance of this upgrade, which I had not expected.

Here we go:

P01 UM2 PH (OrigFanCase)

- Compare the new dimensions with the Original, relevant here are the depth and the width.

P02 UM2 PH (CPv9 SH)

P03 UM2 PH (CPv9 DH)

P04 PreventHeatAccumulation

Tip: It is a good idea if you correct all holes before mounting with a 1mm drill.

P05 HighPerfDualChamberCooling

P06 MaxColdEndThermalProtectionSH

P07 MaxColdEndThermalProtectionDH

P08 UM2 PH (CPv9 SH Tr)

P09 UM2 PH (CPv9 DH Tr)

P10 OpenForMaintenance

P11 Slide&LockFans

P12 ManuallyCreatedSupportMarkedInRed

P13 RecommendedObjectPlacement

P14 AddCuraSupportLines

Note: For a successful reproduction of these objects a combination of manual and automatically generated support material is required. Cura v15.01 is currently unable to generate the required support material for these objects completely automatically...

P15 NoDebateOnColorChoicePlease

- This pretty PLA material I use mainly for prototypes, it does not have any properties to be highlighted, but it is sufficient for testing purposes.

P16 ImportantInstructions

- Note: After installation of the new fan cage to check for correct function of the end stop switch is mandatory. Perform this test either with the machine switched OFF, or test while the engines are in IDLE.

P17 NewStandardCoolingSettingsSH

- With these new settings you get less noise at almost identical effectiveness tested with Single Head and new cages.

P18 ForExperts PleaseMeasure&PostNewSettings

- Here I would use some support from you, I would be very happy about it. So please measure it again after the successful installation of the new Cages.

P19 HaveFunNow

First attempt with material of known low Quality.

CPv9 FirstPrints #0

Here is another attempt with optimized settings and known better material.

- Who has the opportunity and time to make these three objects, with a more particular less sensitive material as PLA, or maybe even from a lightweight metal? This would be a good additional option for me personally and perhaps other interested parties. Please login with a matching offer in this regard via PM to me ...

Interested?

...The download...is already available on YouMagine

...Download it from here please...

CPv9-LINK: https://www.youmagine.com/designs/ultimaker-2-cpv9

And do not worry ... Because if you bought a newer model UM2, then the one shown here CPv9 version will not fit, as in the meantime minor amendments to the UM2 original design were made. But soon all UM2 users will be able to use newer machines with a customized fan-cage, it is already underway.

Markus

Edited by chin
  • Link to post
    Share on other sites

    Posted · Let's talk about 12 screws...

    Hi :)

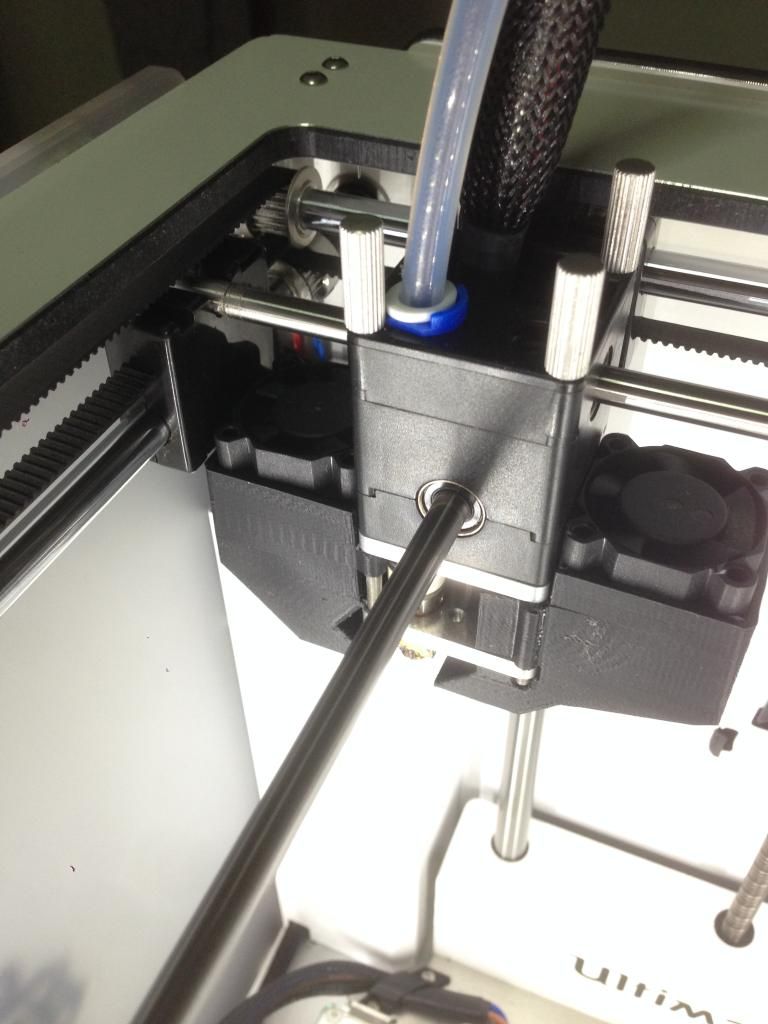
    Interesting design, i tried my self to have some kind of similar approach to you (Splitting the fan shrouds in two) but using the same type of screws and position as the original one. My design is ugly :) but i tested it a couple of hours and it seems to print good. I don't have any deformation of the material (PLA).

    Do you think they will melt if printed in PLA? (if you print at 230°c for example)

    Do you have any problems with the temp sensor (being more exposed)?

    I like the idea, does the position of the fans increase the airflow a lot (compared to the 45° position?)


  • Link to post
    Share on other sites

    Posted · Let's talk about 12 screws...

    Yeah I have printed other faun shrouds and had problems with having the whole nozzle exposed like that with the air rebounding off the glass or larger prints and cooling the temp sensor block.

    Also why have you decided to put a deflector covering one side where the missing hot end goes?


  • Link to post
    Share on other sites

    Posted · Let's talk about 12 screws...


    Like the idea of splitting the fan holder in 2 parts, but on the other hand access to the heaterblock is not important to me anymore since I use Anders Olsson's block with removable nozzle. I wonder if there are negative effects of having the complete block exposed.


    My experience till now is that a printed holder (tried another design in XT) will deform over time.


    Why did you put the fans horizontal ? My gut feeling says the flow is more logical when mounted diagonal like in the original design.


    I would realy like to see a metal version designed for single extruder from UM.


  • Link to post
    Share on other sites

    Posted · Let's talk about 12 screws...

    a lot of drooling on my side... :)


    ...but a little question please:

    • [*]It seems to be much taller than the original shroud. Won't it hit the sliderblocks of the x-axis? And if it does: how much build space would be lost?

  • Link to post
    Share on other sites

    Posted · Let's talk about 12 screws...

    Can I make a suggestion?

    Would it be better if the mount clip on the axles instead of the axles going throught?

    Something like the blue safety clip on the clear tube that guides the fillament.


  • Link to post
    Share on other sites

    Posted · Let's talk about 12 screws...

    @ TinkerGnome

    Yes, this definitely hits the sliderblock ! It's limited to the hight of the upper metal plate in the nozzle block.

    I know this because i made an own fan shroud design wich had this problem and im still working on one, now seeing this new approach of mnis i will probably redesign mine with some of this good ideas..


  • Link to post
    Share on other sites

    Posted · Let's talk about 12 screws...

    Hello everyone and thank you for your many contributions / opinions.

    After this probably very long answer I will make the fan cages available. I want not to disappoint anyone. The reason for this decision: I can not currently working on this little project, because my wife is abruptly ill and I do not know how it will go on...

    @Didier Klein :smile:

    Of course, I am aware that PLA is almost completely unsuitable actually for such applications. But PLA-printing with PLA fans-cage... I'm actually surprised because maybe up to 5 minutes without active "side-fans", and the PLA does not deform. During the heating phase, only the rear-fan is running. While the first layer is deposited at 220 degrees, no side-fan is still running and I do not see any change ... In the second layer, started the side-fans to work (Cura-v15.01 Expert setting: Fan full on at hight is 1mm)...

    OK, there is little visible deformations (curves) in the hottest zones, and I think this is absolutely un-critical, but without active side-fans during storage of particularly large first layers it will be quite sure to be a problem.

    So far, no heater failure...

    The Ultimaker Machine display shows me a very stable temperature behavior + - 1 degrees throughout the printing time, I have no idea how reliable this information is. I usually had the fans at 75 percent max...

    More than 220 degrees, I have not been tested. The printer is not in a cabin, the room temperature is usually 21 degrees. Unfortunately I currently do not have time for more intensive testing at higher temperatures...

    But I have recently found that the side-fans directly to the machine operations, such as: "Heatup nozzle", can be activated manually. Since when is there this great feature?...I may once again a bit sleepy?

    I think at a 45 degree position of the side fans, more heat is sucked in from the working surface, but I do not have suitable measuring Equippment for a confirmation of this conjecture...

    :smile:

    I hope I understood your question correctly:

    The reflector directs more fresh air to the ColdEnd (Teflon piece). And the deflector creates suction and so draws the air by his back to the front, I think, I believe, I mean :ph34r: Anyway, there is for air only one way forward, this is even clearly perceptible.

    In addition, the two-chamber system directs the heat above the lower aluminum plate away much more effective. You can actually feel a little storm. And right after a completed print session when the print head so moves to the home position, you can clearly feel with your fingers that the lower aluminum plate is almost cool :shock:

    :smile:

    Again, I'm not quite sure I really understand everything correctly:

    However, the main concept of this fans-cages is intended for Ultimaker 2 in its original version, and maybe, I do not know yet, is it compatible without modification to the two new models...

    Initially I had in mind because the Hotend is not encapsulated, but the only way I can prevent heat accumulation below the aluminum plate. Have you already discovered the many small holes in the cages? The channels carry some air upwards, ie on the Hotend beyond.

    Sorry, but I have no profound idea of aerodynamics, it is much more trial and error...Maybe someone can later visualize the exact operation of this fans cages for Us?

    The question regarding positioning of the fans I've already tried earlier to answer.

    And also I would like very much to see exactly this fan cages in glistening metal and have of course :smile:

    :smile:

    No there is no danger of collision with respect to the slider blocks.

    P20 Fans&SliderBlock

    Between fan and slider block is a gap of at least > 1 mm. However, I am referring to a correct replication and original design. The total height seems to confuse many, I think. The total width of the fan-cages is ~1mm close to the original design. And the total depth of the fan cages is almost 5mm below the original designs.

    You lose almost no space, so please refer to the pages 1,2,3 and 16 in the original size. A finished printed and already mounted object may perhaps have small deviations in dimensions, so everyone should measure it once.

    :smile:

    Certainly, anyone can make suggestions, but I can not currently make any improvements. Therefore, I will also publish the source files and look forward when someone wants to perfect and present the design. Disclosure of modifications is certainly desirable for all Ultimaker users. Therefore, I hope it is an unwritten law for many.

    And now, unfortunately I did not understand your suggestion, please explain it in more Detail :smile:

    Perhaps you meant a Snap feature, so that the fan cages can be fixed and replaced without any screw?

    Tip:

    You can in the use of CPv9 while the printer is printing, touch the bottom aluminum plate with your finger for a long time without fear of burning or pain. In this test case, the fan speed is above 60 percent ...Make this little test rather NEVER with the original fan-cages, Ouch...Ouch...Ouch...


    Even more:

    The Rear fan from the print head of my Ultimaker 2, has another small additional feature that is not absolutely necessary, but easy to implement.

    This fan is switched automatically with a bimetal thermal switch so that the printer is idle makes absolutely no noise.

    TLRS 9700 UM2 RearFan #3

    LINK: http://umforum.ultimaker.com/index.php?/topic/8180-um2-rearfan-automatic-the-um2-silence-and-i-in-my-little-living-room/&do=findComment&comment=76821

    The thermal switch will always turn the fan with some delay ON when the top aluminum plate heated to more than 40 degrees. CPv9 is so powerful, that it is no longer 40 degrees above are achieved, the rear fan remains OFF as CPv9 works with medium to high power setting. Only with active Hotend and low CPv9 fan power setting, the rear fan is activated ...

    Thank you, dear Ultimaker community :smile:

    Markus

    Download it from here please...

    CPv9-LINK: https://www.youmagine.com/designs/ultimaker-2-cpv9


  • Link to post
    Share on other sites

    Posted · Let's talk about 12 screws...

    Everytime I am amazed by what this community can do. Even though I don't own an UM2, Mnis, THANK YOU for being awesome and working on this. I'm curious where this design will be in half a year, who reworked it into even beter designs etc.


  • Link to post
    Share on other sites

    Posted · Let's talk about 12 screws...

    Basically, the fans are suitable, which were mounted and delivered with the first UM2s.

    P21 FourBays

    Regularly every fan with dimensions of 30x30x10mm should fit even if the basic design is visually slightly different.

    Markus


  • Link to post
    Share on other sites

    Posted · Let's talk about 12 screws...

    I have had another look at your drawing and now can see that the fan shrouds are blowing air on the cold end and the printed part.

    By doing this are you trying to increase the life of the PTFE coupler?

    It would be interesting to measure the temperature difference (if any) at the point the PTFE coupler touches the Hot end Heater Block. (as this is where it deforms). comparing your fan shroud with the original. PTFE has low heat transfer so cooling the top may have little or no effect at the bottom. As with the Stainless isolator.


    EldRick did something similar and has reported that it has had a significant impact on the life of the PTFE coupler.

    http://umforum.ultimaker.com/index.php?/topic/6084-um2-bowden-block-cooling-improvement/


  • Link to post
    Share on other sites

    Posted · Let's talk about 12 screws...

    Are you still using the 3rd fan? the one that cools the teflon thingi

    p.s You got me right. I proposed a snap on feature. Sorry for my english guys.


  • Link to post
    Share on other sites

    Posted · Let's talk about 12 screws...

    Hm... Strange. I followed the installation guide and the shroud and fan would definitely have hit the sliderblock. Not too sure if it is due to a misintallation. However, every other part seems to be in the right position. This is about 1cm away from endstop.

    2015-02-19%2001.47.52_zpsijyq4uw4.jpg


  • Link to post
    Share on other sites

    Posted · Let's talk about 12 screws...

    I had to.

    The fans are 11 mm to far up.


  • Link to post
    Share on other sites

    Posted · Let's talk about 12 screws...

    At some point (I'm not sure when) the lowest plastic part of the print head was changed to a thinner variant. Could it be this that is causing issues?


  • Link to post
    Share on other sites

    Posted · Let's talk about 12 screws...

    Yes that's the case.


  • Link to post
    Share on other sites

    Posted · Let's talk about 12 screws...
    EldRick did something similar and has reported that it has had a significant impact on the life of the PTFE coupler.


    http://umforum.ultimaker.com/index.php?/topic/6084-um2-bowden-block-cooling-improvement/


    I'm not saying I don't believe this claim but it would be good to back it up with factual numbers not assumptions that it makes an effect. That way you can see how much of an effect and make further adjustments to keep improving your design. If it's cools very well then you could adjust and allow more airflow on the printed part etc..

  • Link to post
    Share on other sites

    Posted · Let's talk about 12 screws...

    Sorry, but I have no profound idea of aerodynamics, it is much more trial and error...Maybe someone can later visualize the exact operation of this fans cages for Us?


    If I get the CAD Files and some details about the Fan (Datasheet) I could make that...

    BTW maybe replace the old fans for something more powerful ...

    With the new Version the Fans have to be at the height of the upper metal plate... (if you want to have 2mm tolerance)

    Fan.png


  • Link to post
    Share on other sites

    Posted · Let's talk about 12 screws...


    • i just made a modification to the fanduct of mnis to make it shorter for our hitting sliderblock


    • printed, installed and is working at the moment (touch-sliding under the sliderblocks)


    • after some more tests and corrections i will maybe upload it


  • Link to post
    Share on other sites

    Posted · Let's talk about 12 screws...

    One thing I don't understand. Why must the exit of the fan duct be always stretched over the entire block instead of just focused on the nozzle itself?


  • Link to post
    Share on other sites

    Posted · Let's talk about 12 screws...

    :) Thank you people for the very active participation

    First, I quote myself and am very glad I wrote it:

    "However, the main concept of this fans-cages is Intended for Ultimaker 2 in its original version, and maybe, I do not know yet, is it compatible without modification to the two new models ...". Perhaps could I better write: "... to all newer UM2 similar machines.

    Oh, this I had also written: "However, I am Referring to a correct replication and original design."

    Anyway...VISUAL-A operates or has already made adjustments for the different from the original model, also I am very pleased and can not wait to see some of it. And also I have modified CPv9 fan cages almost done. Because it is supposed to be a good solution for all. So you can decide which solution best fits your requirements at the end.

    YES, I try to keep the ColdEnd cold :smile:

    I know that the transition zone from Hotend to ColdEnd the most critical area is. It is indeed very difficult to cool a piece of plastic in a uniform, it acts just like an insulator everywhere, especially when the heat comes from below.

    In fact, my understanding is that the perforated insulator-screw should keep in basic form, the ColdEnd, and cool. This screw has direct contact with the bottom aluminum plate. Both aluminum panels, the aluminum heat sink, and the little rear fan should give priority cool the ColdEnd. In this scenario, the entire print head needs to be cooled so that the ColdEnd can be kept as cool as possible.

    The small rear fan is undersized for Dual Head with Single Head perhaps sufficiently, I think CPv9 makes the rear fan actually almost superfluous.

    That's why I try to cool the entire print head with the side fans:

    With CPv9 the heat of the entire print-head construction is greatly reduced and taken away immediately, this is possibly more scope for further experiments. Maybe it works then even with ColdEnds of ceramic or metal and PLA no longer sticks to these materials.

    Yes, but the rear-fan at my UM2 is for quite some time depending on the temperature automatically active / inactive, this is controlled very simple means of a thermal switch. I have subsequently made in one of the posts from this thread corresponding explanations.

    Big Sorry for the big confusion, I now know a little more respect UM2 modifications. But area0404 your black fan cages look better than mine. I think black filament should I order in any case... :lol: ...And again area0404, your question makes sense, it must be cooled only around the nozzle in the ideal case. But with increasing speed and temperature, much larger areas of an object must be cooled as quickly as possible, I think...

    Thank you and I have already begun to create lower Versions. ;)

    @all: If I still owe someone an answer, then I apologize. :oops:

    Markus


  • Link to post
    Share on other sites

    Posted · Let's talk about 12 screws...

    gallery_36594_1844_76218.png

    I made it shorter and added holes to mount the fan (actually the fans are just taped on)

    printing this now to see fi it fits..


  • Link to post
    Share on other sites

    Posted · Let's talk about 12 screws...

    This Version was slightly touching with the screw on them, so allready printed the right side in a size with better clearance this picture shows the old (left) and new (right) design:

    gallery_36594_1844_406645.jpg

    And here is a picture of the actual model rendered with red higlighted support structure:

    gallery_36594_1844_442333.png


  • Link to post
    Share on other sites

    Create an account or sign in to comment

    You need to be a member in order to leave a comment

    Create an account

    Sign up for a new account in our community. It's easy!

    Register a new account

    Sign in

    Already have an account? Sign in here.

    Sign In Now
    • Our picks

      • UltiMaker Cura 5.7 stable released
        Cura 5.7 is here and it brings a handy new workflow improvement when using Thingiverse and Cura together, as well as additional capabilities for Method series printers, and a powerful way of sharing print settings using new printer-agnostic project files! Read on to find out about all of these improvements and more. 
         
          • Like
        • 18 replies
      • S-Line Firmware 8.3.0 was released Nov. 20th on the "Latest" firmware branch.
        (Sorry, was out of office when this released)

        This update is for...
        All UltiMaker S series  
        New features
         
        Temperature status. During print preparation, the temperatures of the print cores and build plate will be shown on the display. This gives a better indication of the progress and remaining wait time. Save log files in paused state. It is now possible to save the printer's log files to USB if the currently active print job is paused. Previously, the Dump logs to USB option was only enabled if the printer was in idle state. Confirm print removal via Digital Factory. If the printer is connected to the Digital Factory, it is now possible to confirm the removal of a previous print job via the Digital Factory interface. This is useful in situations where the build plate is clear, but the operator forgot to select Confirm removal on the printer’s display. Visit this page for more information about this feature.
          • Like
        • 0 replies
    ×
    ×
    • Create New...