DennisV
-
Posts
18 -
Joined
-
Last visited
-
Days Won
1
Content Type
Forums
Events
3D Prints
Posts posted by DennisV
-
-
I've continued my experiments. Posting here in case my trial and error might help someone else down the road. I've twiddled:
- Top Surface Pattern to Zig Zag, to match Ironing Pattern zig zag
- Ironing flow: 0%
- Top surface skin layers: 2
The blobs are not present, but continue to see ironing / sanding path lines. Best seen in the top example of the attached photo. Perhaps hard to tell, but the results are pretty much the same across them all.
-
21 hours ago, gr5 said:
Google "acetone smoothing abs". See if the pictures that come up interest you.
Acetone smoothing is on my radar. For consideration of minimizing production time, and everything that goes along with handling chemicals, I'm considering it a last resort.
-
22 hours ago, neotko said:
zigzag Indeed will improve the result for that print. Ironing flow to a lower amount than default 10% will yield better finish also specially for last toplayer if you want to keep the concentric style
so try a) cut ironing flow to the lowest possible
or b) changing to zigzag Ironing style
Thanks for the continued suggestions. I did another print with the following changes:
- Ironing Pattern: Zig Zag
- Ironing Flow: 2%
The blobs of material are gone, but you can see lines matching the path of the print nozzle.
Definitely an improvement over the previous ironing attempt. Still not as good as good as when I turn ironing off and do Concentric Top Surface Skin Pattern. Given the success others seem to have with Ironing / Sanding, I still feel like I'm not doing something right. I'm attaching more of the settings that seem relevant, in the event someone can identify what I'm doing configuring correctly.
-
1 hour ago, gr5 said:
Maybe I should instead ask: why ABS? Does this need to withstand high temperatures? how high?
I will mount this on a car. ABS is very common for this type of application, so I'm using it for consistency. Thanks.
-
 1
1
-
-
4 hours ago, neotko said:
Most probably the issue is the concetric skin pattern is messing with the order the ironing is done. Try normal typical non concetric style, it should look better, also for this kind of prints on S3D I use 1 perimeter for the last layer, it makes things cleaner, concentric for that fonts sure will look decent without ironing, but Cura 'redo' the last print on the oposite angle, and that's not compatible with a concentric style, so probably it's doing the ironing mostly on the small parts that are actually infill and making a bit of a mess for the final look
Thank you for your thoughtful reply.
- I see a Ironing Pattern: Zig Zag option. I will try that. Do I also need to alter the Top Surface Skin Pattern? It has a Concentric, Lines, or Zig Zag option.
- You mention "I use 1 perimeter for the last layer". Can you please clarify? I see several options for altering Top surface, which I assume is synonymous with "last layer".
I appreciate you sharing your time and expertise.
-
Hi folks. I'm continuing to refine how to get the best top layer without any post print processing. I've read quite a bit about ironing / sanding, but am not seeing the results I'm expecting. I wonder if I misunderstand its purpose, or am not configuring it correctly.
I find that my results are actually worse when I check "Enable Ironing" in Cura. In the attached photo, the printer (Ultimaker 2+) and material (Ultimaker ABS), are the same. The key difference is Enable Ironing is selected in the bottom example. You can see circled in green, where it results in little blobs of material. I'm not seeing this when it's turned off.
I appreciate there is a "Me: Dr. it hurts when I do this. Dr.: So stop doing that." approach. Though I expect I'm probably just misusing the feature. Insight and suggestions appreciated. @neotko
-
I would like to request that Cura recognize a .svg file as a valid file type to open, then launch the Convert Image... dialog.
Right now, Cura does not appear to be able to open a .svg file. So if you're working with a desktop imaging application such as Adobe Illustrator or Photoshop, you have to save to a bitmap format like .gif, .jpg, or .png in order for Cura to open it. These bitmap files create anti-aliasing of angles and rounded edges. These will in turn result in uneven side walls when Cura slices.
The workaround I'm aware of is to use your imaging application to save as .svg. This then requires an intermediate application to open the .svg and save it as .stl (Tinkercad can do this). Then go back to Cura to open the .stl and slice, then save as .gcode for Ultimaker. It's an additional set of steps that seem unnecessary. If Tinkercad can do it, why not Cura?
Would love to hear if someone has found a better way to tackle this.
-
 1
1
-
-
In case anyone else runs into this, it appears the issue was with my source being a PNG file. Since PNG is a bitmap file the curves and slants get anti-aliased. Cura doesn't seem to handle that very elegantly.
If I export SVG and slice it in another program, I'm able to get very nice curves and slants. It is too bad that Cura can't import an SVG file itself.
-
On 12/27/2017 at 5:41 PM, gr5 said:
Look into the "neosanding" feature.
Thanks for the suggestion. Is this the same as the "Enable ironing" feature under Shell settings? I've tried with that ON.
Surprisingly, my best results so far are with ironing OFF, but setting:
- Wall Thickness 0.8 mm (with 0.4 mm Nozzle)
- Top Surface Skin Layers 1
- Top Surface Skin Pattern Concentric
-
20 hours ago, yellowshark said:
have looked closely at the model on the Cura bed and the lines are not wavy then that is what Cura will slice
Thanks for your thoughtful reply. Looking at the file closely in Cura, I see that it is not rounded smooth either. So it appears you've helped me find the source of my problem. Thanks!
Now I'm left to chase a fix.
I am creating the file by using Adobe Illustrator to set some type. Then saving that as a PNG image. The image looks smooth at 100%. Antialiasing of the edges becomes visible when enlarged, as one might expect. I'm creating the image in Illustrator at 100% (i.e. the same size I want printed). So in theory, there should not be artifacts from enlarging.
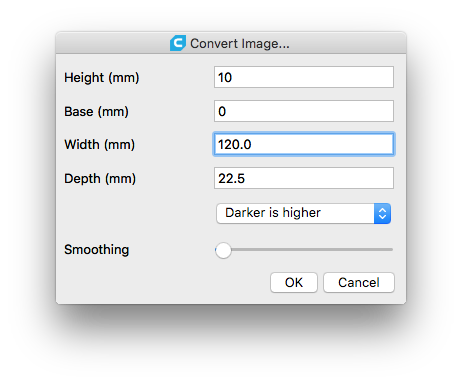
I'm creating the Cura file by opening the PNG with File > Open, and the resulting Convert Image... dialog.
Perhaps there is something going on with the Cura Convert Image size settings that is causing this? I've tried to find details on the feature, with no luck.
Additional insight or suggestions appreciated!
-
Hi. I notice that when I print something with a surface that is diagonal, or curved, relative to the X axis of the print bed the side wall comes out wavy. Example images of a top down view below, made on Ultimaker 2+ with ABS .4mm nozzle and .1 layer height.
I'm trying to determine the cause:
- Limitation of 3D printing?
- Limitation of Ultimaker 2+?
- A symptom of Cura trying to slice based on Convert Image import?
what are the logical next steps to try to address:
- Adjust layer height?
- Change wall thickness?
- Switch nozzle?
- Temperature settings?
I'm obviously new to CAD and 3D printing, so I'd appreciate any educated guidance so I don't waste time and money chasing the wrong solution via trial and error.
Thanks.
-
Hi all. I'm trying to determine what is a realistic expectation regarding the smoothness of a flat top surface. I've been fiddling with a lot of settings chasing a finish that doesn't have perceptible printing lines. Perhaps what I currently have is as good as it can get, and I need to move on to evaluating finishing options? Would appreciate any insight from those more experienced than me.
Below is an image of my best outcome thus far. It feels pretty smooth to the touch, but lines are visible on the finish in decent lighting. This is using PLA. Will the results be noticeably different with another material such as ABS?
Thank you.
-
When I use Cura 3.1 to open an image file a dialog appears called "Convert Image...". On that screen is a slider for "Smoothing". When I drag it, I don't see any value (i.e. 1 - 10) associated with it. Nor am I finding a decent description for what it actually does. Just a tool tip displaying "The amount of smoothing to apply to the image". Can anyone shed more light on this, or point me to a more detailed Cura reference? The official documentation seems to leave out a lot of detail, or I'm just not finding the right place too look. Thanks.

-
On 9/30/2015 at 11:23 AM, jweaver said:
I tried messing with the base value, but even at 0.0 it leaves a "plate" at the bottom..
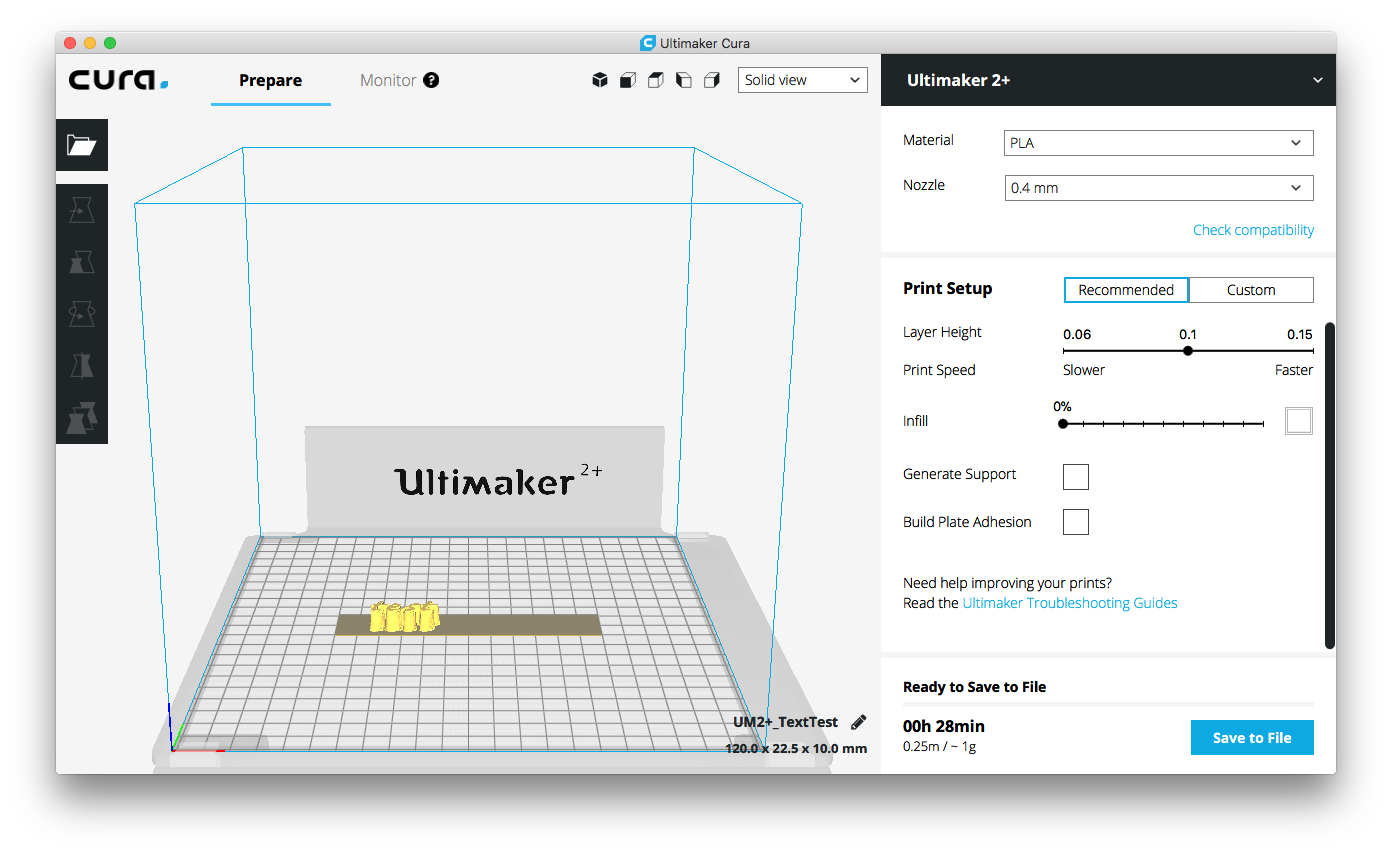
I also saw in Cura what appeared to be a bottom layer that would be printed even with Base set to 0. Once I actually printed it though, that layer was not created. Only an outline of that layer. You can see my Cura screen, and a print example in a separate thread I started before finding yours.
-
 1
1
-
-
-
I discovered by doing a test print that while the Cura display seems to suggest that a flat layer of material will be printed around the text, it in fact does not print that way. The printer draws a very fine line that follows the border of what's displayed in Cura, but does not fill it in. So I ultimately get what I was wanting.
-
Hello. I'm trying to print solid letters with no base (i.e. cutout stand alone letters). My approach thus far has been to use a graphics program to create the letters, save as an image, then import to Cura.
Photoshop > PNG > Cura > Ultimaker 2+
Here's an example of my image file from Photoshop

What I'm seeing is Cura does not seem to respect transparency. When I import a PNG or GIF that has transparency enabled, Cura displays a solid block.
With transparency disabled, I will see the extruded letters, but always with what I believe is considered a "base".

Even though I'm setting the base value to 0mm in the import image dialog.

Thanks for your help and patience. I'm completely new to CAD software and 3D printing. My first post to the forum.


Ironing / Sanding Expectations and Best Practices
in Improve your 3D prints
Posted
I have made some good progress, through trial and error of applying what I've read elsewhere and advise from @neotko above. My best result so far appears to have come from a combination of:
Counterintuitively, setting Enable Gradual Infill was a little bit worse than the above. I would have thought the settings that come with Gradual Infill (even higher Infill Density of 90% and Gradual Infill Steps 5), would have been better than uniform Infill Density of 50%.
I'm not sure where to go from here, other than to push the values of these settings a bit further. Maybe this is as good as it gets?