


JRDM
-
Posts
49 -
Joined
-
Last visited
Content Type
Forums
Events
3D Prints
Posts posted by JRDM
-
-
Exceeding the power brick a tiny bit can cause the power brick to drop out and start again, making the machine restart. It’s a safety mechanism that better power supplies have. As long as there’s no shorts or faults in the machine, then the brick might be the problem.
2 and 2+ seem to use the same power brick.
-
I use a clean PEI build surface for everything except nylon and polycarbonate. No rafts and only very rarely a brim or “hold-down tabs” for certain geometries. The temperatures may need to be adjusted but it usually works so well. I keep an extra build plate for the minority of materials that don’t work with PEI, flipping over the existing build plate works in a pinch to apply some other hold material for plastics containing nylon or PC.
-
I wondered about that and was going to ask until I found this thread. I was skeptical of the Go's value when it was first announced, but have really warmed up to it.
-
I've been working on a heat sink and hot end upgrade for the Ultimaker 2 series to allow me the use of higher temperature plastics than the stock machine using a few drop-in upgrades to the machine. The heat sink uses the existing fan. The hot end I've designed uses the existing cartridge heater and sensor. This upgrade doesn't affect the build volume. The only required firmware change is to increase the max temp. The machine already had a Bondtech mini because the previous owner converted the whole machine to use 1.75mm filament. I do believe the same parts will work for 3mm filament.
The heater block is currently a heavily modified E3D v6 to accept the original heater and sensor and use it the way the original hot end was configured, I hope to machine a nicer block from bare aluminum in the coming week or so.
So far I've used PETG, mABS, PC-ABS and PC in this setup without issues. I've not gone higher than 290˚C just yet but I do know it's very comfortable and reliable at that temperature.

-
I love the Duet platform but the PanelDue just doesn't do as much as its competing legacy options does for other firmware.
-
13 minutes ago, bob-hepple said:
I watched all the videos on this and was one step from pre ordering then sense came to me, all you get is the motion system and tools changer, you have to sort the rest like how to get it all to work with simplify 3d, and they make a statement it sort of works no mention of the firmware, no mention of the heavy scripting needed, .... so yes I like the look but needs a lot more work on it, Software is not there yet... just my thoughts.
I think the whole frame is included too. It is very much an expert tinkering platform. On their MRRF presentation they were basing their work on the Duet platform and they liked it because of its hardware extensibility and easy native scripting capabilities. It sounded like the only reason they didn't just bundle it is they wanted to leave opportunities for other controller platforms to step up.
I really didn't catch what slicer they used. I think once the Duet is set up, changing tools is just a matter of saying "T1".
-
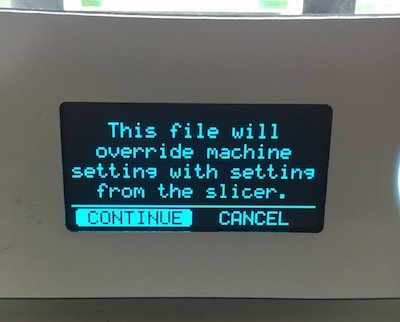
I wanted to eliminate the pesky machine material override warning when using non-Ultigcode. I understand it's necessary for beginners but I'm well beyond that. It's a minor annoyance, but apparently it's not too hard to change.
I downloaded the latest TinkerGnome firmware source code and adjusted all the appropriate settings for my specific Ultimaker. There's several settings in configuration.h and configuration_adv.h to configure it for a specific machine (Go, 2, Ext, ...) I won't go into that here. It might be best to test all those settings before moving on.
The change is done in UltiLCD2_menu_print.cpp
Find this line:
menu.add_menu(menu_t(lcd_menu_print_classic_warning, MAIN_MENU_ITEM_POS(0)));
comment it out like this:
//menu.add_menu(menu_t(lcd_menu_print_classic_warning, MAIN_MENU_ITEM_POS(0)));
and right below it but before the next squiggly bracket " } " add:
menu.add_menu(menu_t(userStartPrint));
Compile and flash the machine.
Changing your firmware can break things badly so please only do this if you at least know how to configure and install the firmware already.
But for me, there's no more of this:
-
 2
2
-
-
Ultimaker 2
Ultimaker 2 Go
-
Is there a favorite nicer third party replacement "Hot-End Cooling Fan" or should I just get the original equipment ones? I'm looking for maybe longer lasting and maybe quieter if the replacement's air flow & static pressure are still decent. I'm willing to spend more if there's something better. I do suspect just replacing the aging fan with a new identical original equipment part will do a lot to make it quieter. The one on the machine probably has 2000+ hours on it.
-
I have UM2 and UM2Go and I don't use Cura but rather, S3D 4.
-
I use Simplify3D's machine controller from a computer and I find that the UM2 automatically turns off the heater a few seconds after I try to set a temperature. Is there a way to adjust this behavior? I'm using the latest but this behavior seems to have been like this for the past couple years too.
-
Thanks, I'm aware of your site but I wasn't able to find that style on my own. It's on my shopping list.
-
The drawing seems to say 6082 alloy. More specifically "EN AW-6082" I don't know what the EN or AW means. They do provide the model as a STEP solid model format. You'd have to import it into Fusion360 and dimension it I guess, or export it as DXF if that's what you're looking for.
-
I have a UM2 that has the original bed clips. It also seems like Ultimaker still uses the same clip style. I find them hard to swing open with the sharp edges and all, unless I use pliers or a screwdriver, which I consider to be awkward and risky.
Is there a nicer alternative available?
-
Any progress on this topic? Does anyone have a working profile I can start over with? What I have is workable but not beautiful.
I've been trying to do my own tune and this is what I have so far:
ret distance 4mm
no restart
no vertical lift
ret speed 1250mm/min
coast 1.75
wipe 1.75
on atomic PLA, I tried 190˚C to 205˚C.
part cooling fan on 80%.
I turned off retract during wipe
I turned off "only retract when crossing open spaces"
my only ooze control is retract if traveling more than 3mm.
My machine is an original UM2 with Titan upgrade and Olsson block. I've replaced the bowden tube and the bushing with the new better one. All my UM2 upgrade and replacement parts came from gr5.
-
An 85mm tall hood would let the tube & wire harness clear, and stay under the shelf, even after factoring 6mm panel thickness. So it can be either way, though the 85mm hood would be the simplest solution.
I might just end up developing my own, I was just hoping for something quicker.
The bellows might not be a bad way to go either.
-
I have my UM2 on a desk surface where there is a shelf above it. So ideally I'd like a hood that is no more than 85mm / 7.25" above the top "deck of" the UM2.
I have an acquaintance that said his previous employer bought a hood for their Ultimakers. I had the impression from his description that the rear face was slanted forward on the top edge. This would make it easier to keep the machine where it is because the shelf is only over the rear edge of the machine. I think he said he found the design on the Ultimaker forums but doesn't remember the name of the design and I can't find it either.
If someone can remember what that design might be called or found, I'd really appreciate it.
-
Oh sure. Sorry. Did not mean to be rude. .. questions are obviously ok. I did not mean ultimaker specific I think in general multi extrusion without lifting heads or separate moving heads wil not give you a lot of pleasure... regardless the machine you put the head on...
I'm of two minds about it. I tell inexperienced users to get *very* good at single first, and start out with only a single extruder.
I've made three dozen or so large parts (in the realm of 200mm x 300mm) ABS or PETG as the part material, with HIPS as a breakaway support. I felt it was worth doing for the kind of parts I had to build, but it can be frustrating to dial in. Thankfully I could adjust my extruder setup to get matching heights.
-
I replaced the PTFE bushing with the TFT from your store. It turned out there was hidden damage in the bore that likely made it not guide the filament well into the heater block.
The replacement bowden tube & thicker clips were probably a help too, the original one had seen better days.
https://www.flickr.com/photos/34962649@N00/27036614514/in/dateposted-public/
The one on the right is before bushing replacement, middle was directly after, left most one is after a couple build parameter tweaks.
-
Well, it's hard to be clear on why but I just don't consider the part to be "pretty good". The banding is nowhere near what I consider should be up to the standard of a well tuned UM2.
I suppose it could be the Z stuff. The rods look perfect, the lead screw looks over lubed but if it's lead screw, I would expect to see more periodicity to it.
I am certain my PTFE bushing is mushed out so that's coming in the next day or two, try that and play with the Z and see what else I can check.
-
Layers aren't consistent. I was hoping for a lot better than that.
-
The big one in the middle is the latest one.
https://www.flickr.com/photos/34962649@N00/27406831222/in/dateposted-public/
-
I bought an Olsson block from PrintedSolid, who seem to resell from gr5.
I noticed that the hole was a bit off-center from the threaded boss on the top side but I didn't think much of it at first.
I'm still having some print problems and remembered that plastic flow can have shear problems with protruding edges in the flow.
The bore is not as bad as the first image in this product description, but it was noticeably off: http://gr5.org/store/index.php/olsson-block-no-tools.html
Anyone here seen that offset in their Olsson block and still got great results?


Suggestions for the next Ultimaker
in UltiMaker 3D printers
Posted
Even just two materials causes headaches that stack on top of normal printer problems. There’s more points of failure and there’s no ideal way of doing it, just a bunch of competing strategies that have their own trade-offs.