


viralata
-
Posts
112 -
Joined
-
Last visited
-
Days Won
1
Content Type
Forums
Events
3D Prints
Posts posted by viralata
-
-
Thank you for the answer, I didn't know it was the same PSU and didn't want to make a mistake. But the price of this PSU is very high ! 145€, the price of a cheap 3d printer. I have a 24v 15A PSU lying on a shelve, I think I will use it as a replacement for the moment, except if somebody tells me I should not (Not sure how sensitive the ultimaker is to the quality of the PSU).
-
Hello everybody, after several years and thousands of hours of 3d printing mys ultimaker original+ stopped working. I think it's the PSU. But it is the PSU of the heated bed upgrade, it has four pins inside a metalic circle. It is said to deliver 24v. With a voltmetre I get a reading like 10v that drops instantaneously.
I don't find it in any reseller in France (only original PSU can be found).
Does anybody know what voltage I should put in each pin and how many watts it should provide for each pin ?
Or if somebody knows where to buy it ?
Thanks
-
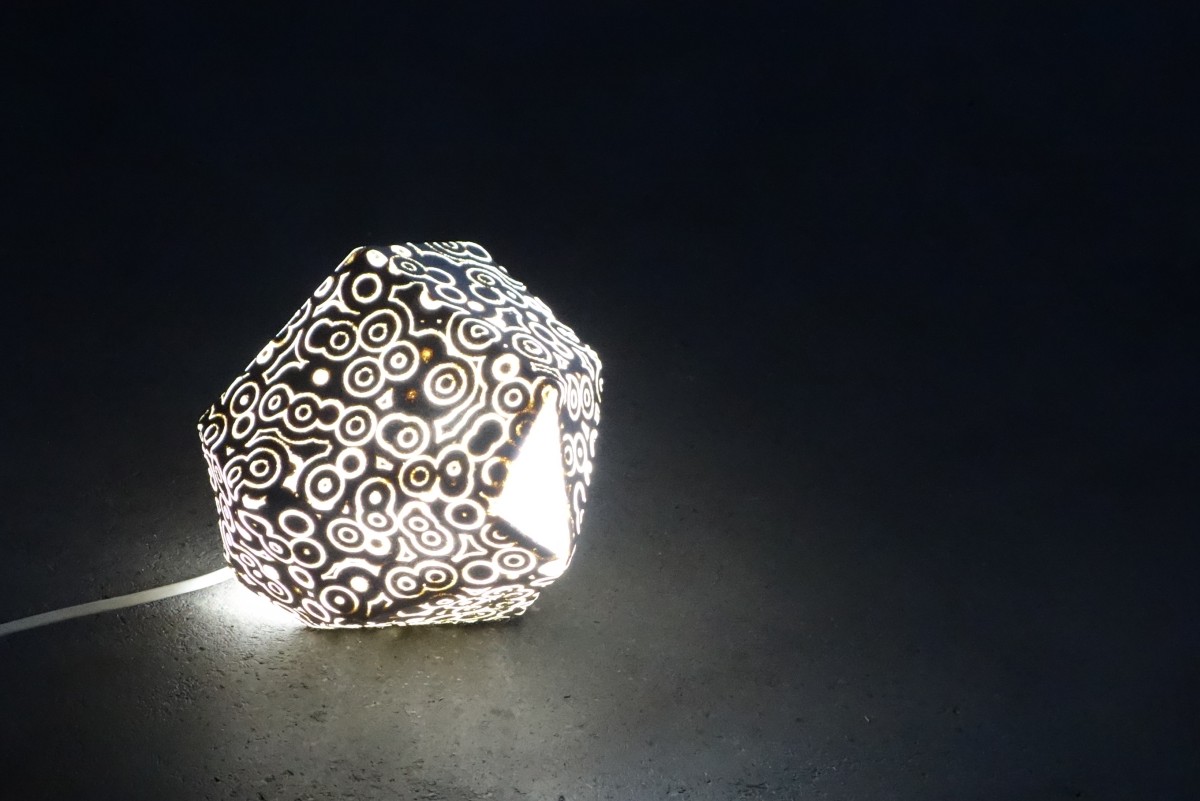
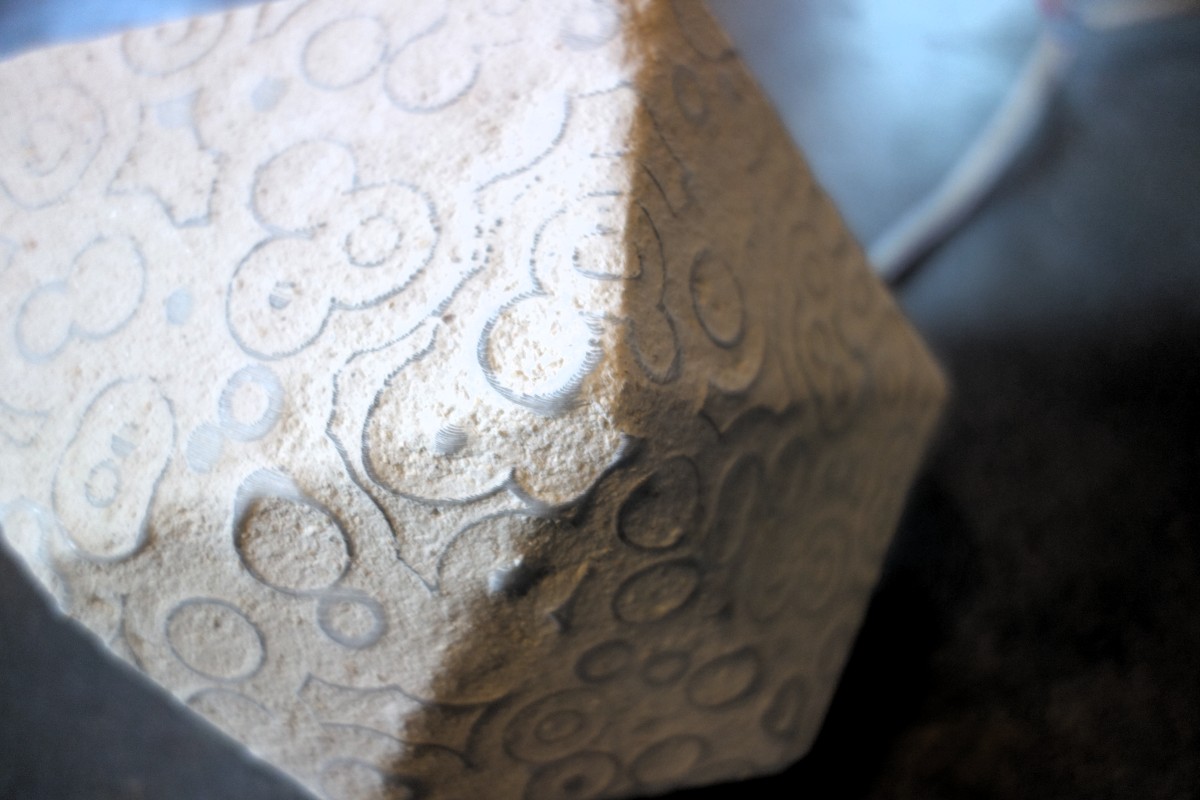
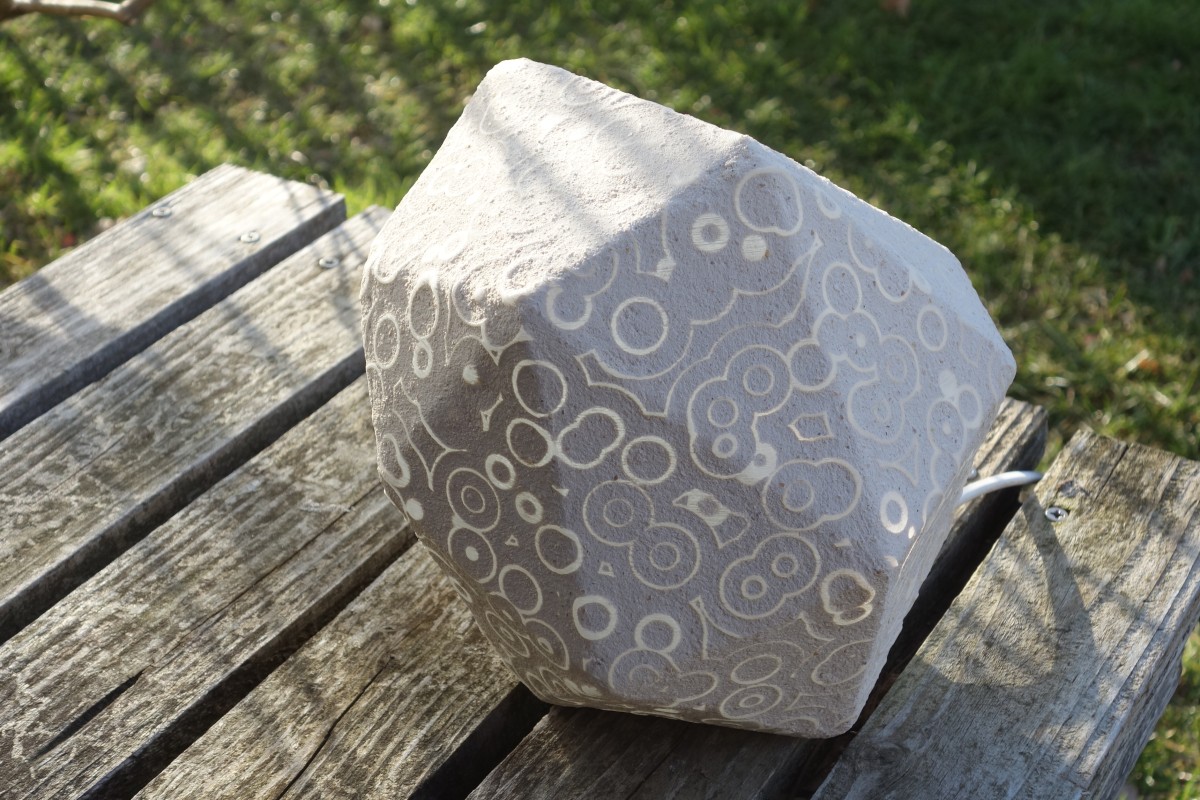
I forgot to post a lot of prints lately, but I like this one so here is a lamp shade:


More details here: https://ultimaker.com/en/community/prints/5051-wireframe-lamp-shade
Nice that the light comes through. Did you print it with a shell thickness of 1?
I noticed with some tests that the light passing through is not proportional to the thickness. More or less, up to 1.2mm (with the white blueish colorfabb) the light passes, with more thickness it's almost stopped. So the parts letting the light passing are here 0.8mm thick, the other ones 2mm thick.
-
I forgot to post a lot of prints lately, but I like this one so here is a lamp shade:
More details here: https://ultimaker.com/en/community/prints/5051-wireframe-lamp-shade
-
 4
4
-
-
Hello all,
I don't have so much time to publish my prints anymore, and here is the reason why:
I founded Chantier Libre a non-profit fablab 3 years ago, which promotes the use of libre softwares and open hardware. Of course the first tool we used was my trusty old Ultimaker Original.
We launched a crowdfunding campaign to allow us to build more machines (SLA and ceramic 3D printer, big size 3D printer, thermoforming machine...) and mainly to build the first prototype for our openhardware big CNC machine Fraizilla.
This CNC is designed to cut 2.5x1.25m panels for projects like Opendesk or Wikihouse.
The estimated cost is under 6500€.
The design is easily extendable. The steel frame can be build in a workshop with lasercutter and metalsheet folding machines. All the other components are standard an easy to find online.
Here is a video introducing Fraizilla:
You can support us so that we publish all the design files (freecad files and building instructions):
And in case you wonder, the name Fraizilla is because in french fraise means strawberry and cutter, and the machine is big and powerfull ;-)
-
1
-
-
Here are my two last prints, both planters as I needed some for the fablab.
The first one is quite simple

The second is more complicated as I didn't want to need a saucer for that:

So I modeled a ventilated drain to prevent stagnation of excess water at the bottom.

More details in my "print" section.
All the files are of course on Youmagine
-
6
-
-
Here are my last ones, some Xmas decoration, that you can use for hanging mobiles. On the Youmagine page you will find the Blender file to try it if you want


And an explanation of the design in Blender
-
5
-
-
@viralata is that ABS processed with acetone vapor? Or PLA submerged in acetone? Or something else?
It is ABS processed with acetone vapor.
-
This railway station is really impressive !
This is may latest one, a wedding cake topper from a skanect scan, some Makehuman bodies and a lot of tweaking in Blender


-
1
-
-
It's difficult to tell clearly from your pictures what's going on, but it looks like your top surfaces are too thin, and you need to increase the retraction length, and maybe the speed as well.
Thanks, yes I made a mistake with the thickness of the top surface. I'm currenrtly printing it again
-
-
2
-
-
This one is less experimental, and more classic:

It's a model of the village where our fablab is located. The name is St Cyr de Favières and it will host the meeting of all the St-Cyr villages of France. So every one of them will receive a small model of the village as a souvenir.
I used Blender for modelling, and used pictures, map of the village and aerial view as a reference. The aim was not accuracy but that the village was recognizable. Therefore I had to balance between lack of time and printability to choose which details to models.
I made two versions, one full that takes 25 hours to print (0.1mm), and a smaller one with only the central part (6hours to print in 0.2mm). As I have 22 of them to print, they will have the smaller one, printed in Colorfabbwoodfill that gives a nice not so plastic feeling.


-
2
-
-
Thanks for the comments. The old fashion sledgehammer is the way (but I made the hole too big, so it shouldn't be difficult to retrieve money.
-
-
2
-
-
Here is my last project. At the fablab, I was testing the Ciclop 3d scanner. So I started with an easy scan: a big object not shinny, a piggy money box.
Scan turned out well (a lot of work with meshlab is required to get a nice mesh).

Then I wanted to make my own remix of this scan, in Blender, I used a decimate modifier and the Tissue addon to get this shape:


Hope you like it, and I guess my son will like it
-
3
-
-
Very nice, I love them to. How is made the earth in the pots ?
-
Thanks for your answers. They helped me to finaly find wher was the problem that now is settled. Was not easy though:
I decided to test the lifting power of the feeder: The faulty feeder couldn't lift 3kg while the second one was lifting 4kg easily and started grinding at 5kg.

So I started to look at the differences between the two, and while adjusting the "pressure" screw I realized that on the faulty one I could screw it much deeper than the other one. So I dismantled the injected plastic parts for both of them and saw that the middle part was cut into two by the screw that

I must have screw too much one day. Now way to guess it as the part is fixed between the two other ones, the lack of stifness is not obvious either.
I'm still testing but it seems I found back my reliable wonderfull Ultimaker that I was missing so much. And it forced me to check everything, replace some parts taht where getting old, so I guess I can trust it now for some time.
-
Hello everybody,
I've been printing for 2 years with my UMO perfectly. I now think I can say I know my machine. Unclogged it several time, upgraded with heated bed, dual extrusion, so I know the basic troubbleshooting.
For 3 months now I can't print anything correctly at 0.2mm and need to print under 40mm/s at 0.1 mm layer height (while I was used to print at 80mm/s) and don't manage to understand where does it come from. I have filament grinding always wasting my prints and never know if a one hour print will be succesfull (I was used to happily print 40hours print with no problems).
If I print big flat objects, the first layer infill is like wavy (the underextrusion come and goes like waves ). If I help by just slightly pushing the filament I have no problem anymore. I checked the spring of the feeder.
My guess is that a stack of slight problems (aging ultimaker) makes a big one.
I checked:
- the bowden tube and teflon coupler
- hotend is new
- Peek isolator is new
Here are the things I tried:
As the problems started after printing a lot of things with Colorfabb XT, I thought maybe some XT remains in the hotend when switching to pla and partialy clogged it. So I changed the hotend (twice even). I read here that some people had ther teflon part damaged by the 250°C needed for XT. So I checked it and there is no friction.
I checked the toothed filament pusher (sorry, can' remember the name) and realized it was much less sharp than the second extruder one (that doen't work so often) so inverted them, no change.
The small injected weel that press the filament seems quite used, could it be that ? (it happened to me in the past that this wheel slide on the bearing and stay blocked)
The injected plastic lever that press the wheel on the filament seems to not press anymore. Is it a known issue for old UMO ? If I press it by hand or with a small clamp I have less grinding but it will still happen after less than 30 mn.
I tried several different filament (most of mines are colorfabb and as I bought a pack are one year old, always kept in a box, but no air tight storage). Even a knew one and always some grinding (I'd say less grinding with XT).
By hand the filament comes out from the hotend (so if my temperature sensor is wrong, it is not completly dead),
One other guess is that my bowden tube has a double curvature (from a travel in my car) that increase the friction. I'm waiting for a new one.
I cant' see if I should change everything once for all (complete hot end, bowden...) or if there is a way to solve the problem.
Any help appreciated.
- the bowden tube and teflon coupler
-
This is not the latest print, no time to post everything, but one I like:
Printed frame for broken mirror:

Some explanations in french on the fablab site (with more pictures, that make the whole process undertandable I think):
http://chantierlibre.org/2015/05/01/un-miroir-casse-7-x-plus-de-miroirs/
-
And here is a video that let better see the shape of the lamp, with some images of the whole process:
-
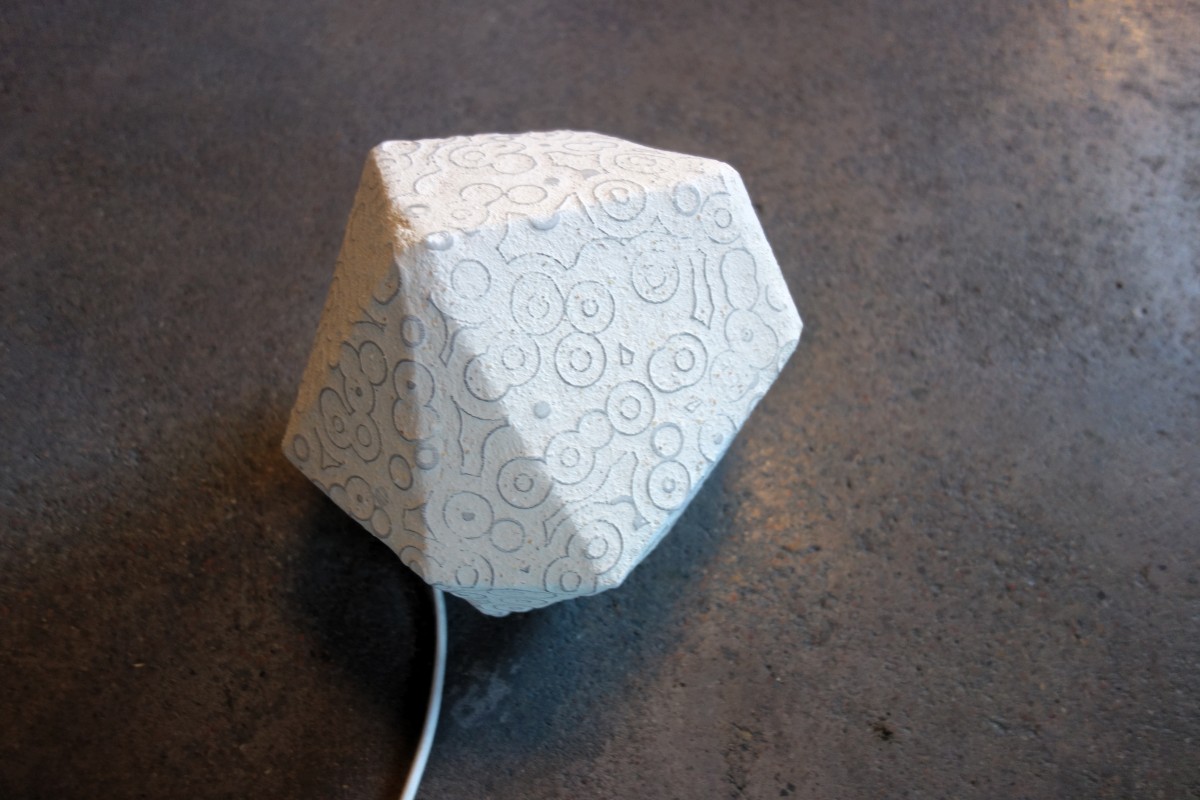
Printed a complete lamp with the same technic I used before for lamp shade (see more pictures in this topic). 28hours print in 0.2mm layers with colorfabb XT :
-
1
-
-
I finaly took some time to make a complete lamp out of the same technic. Just reusing an old broken lamp, printing the lamp in one part and plastering with white natural clay:
-
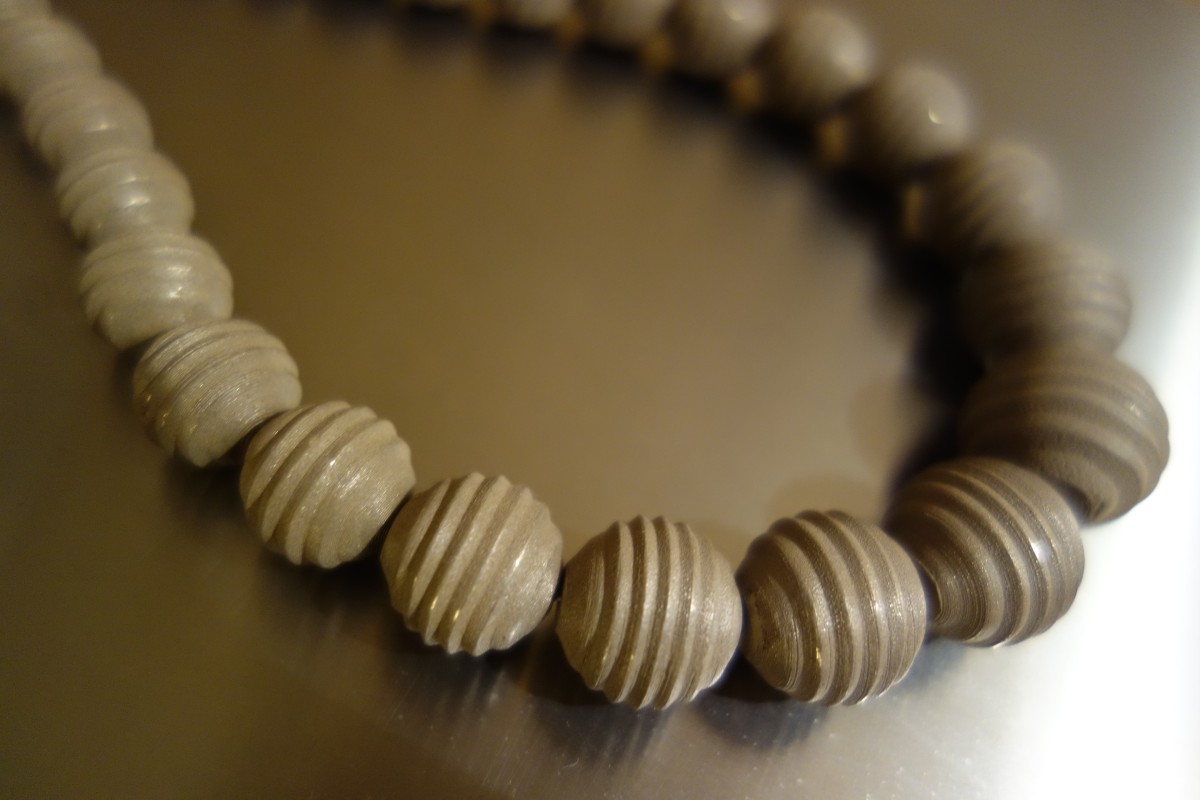
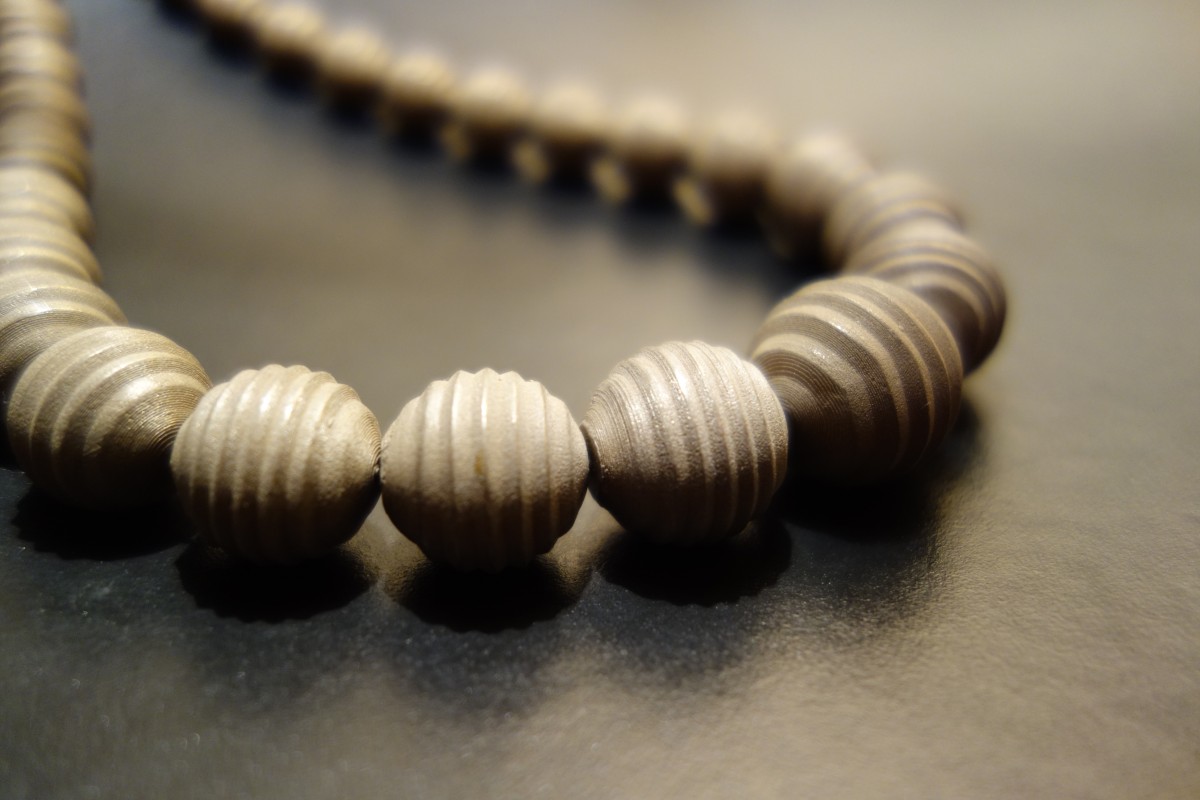
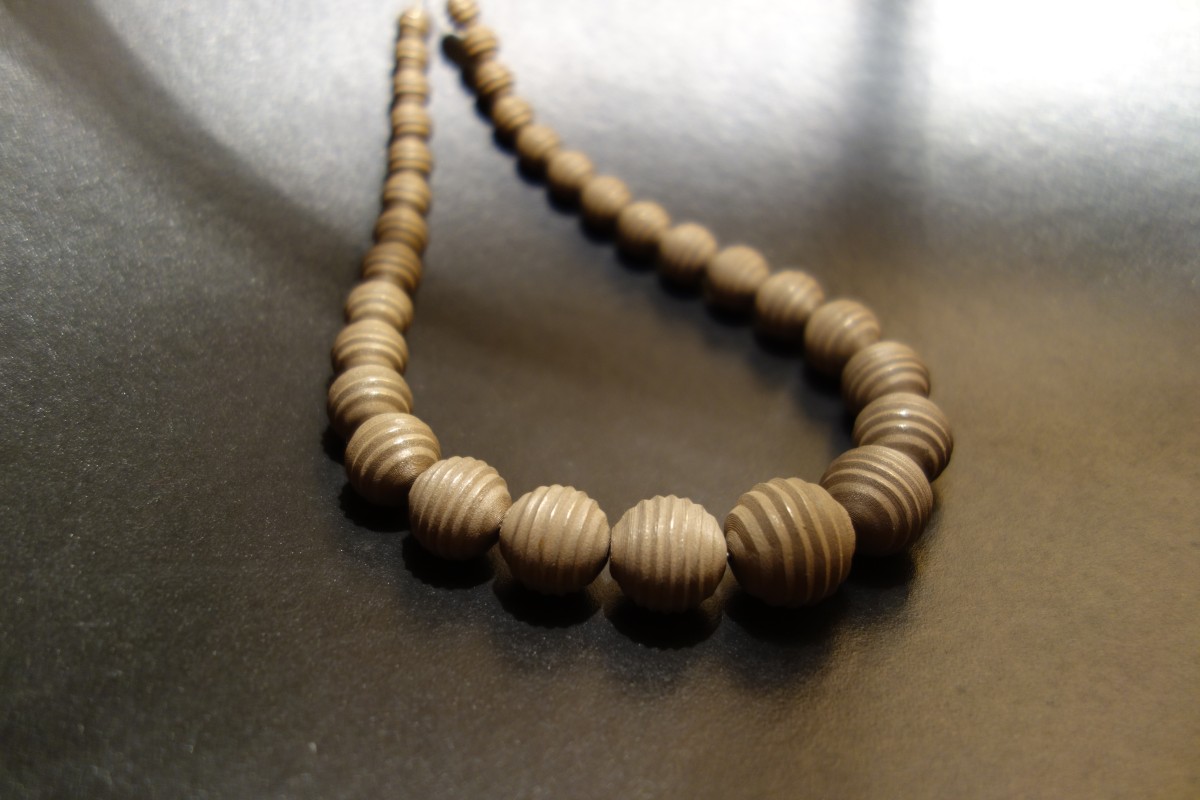
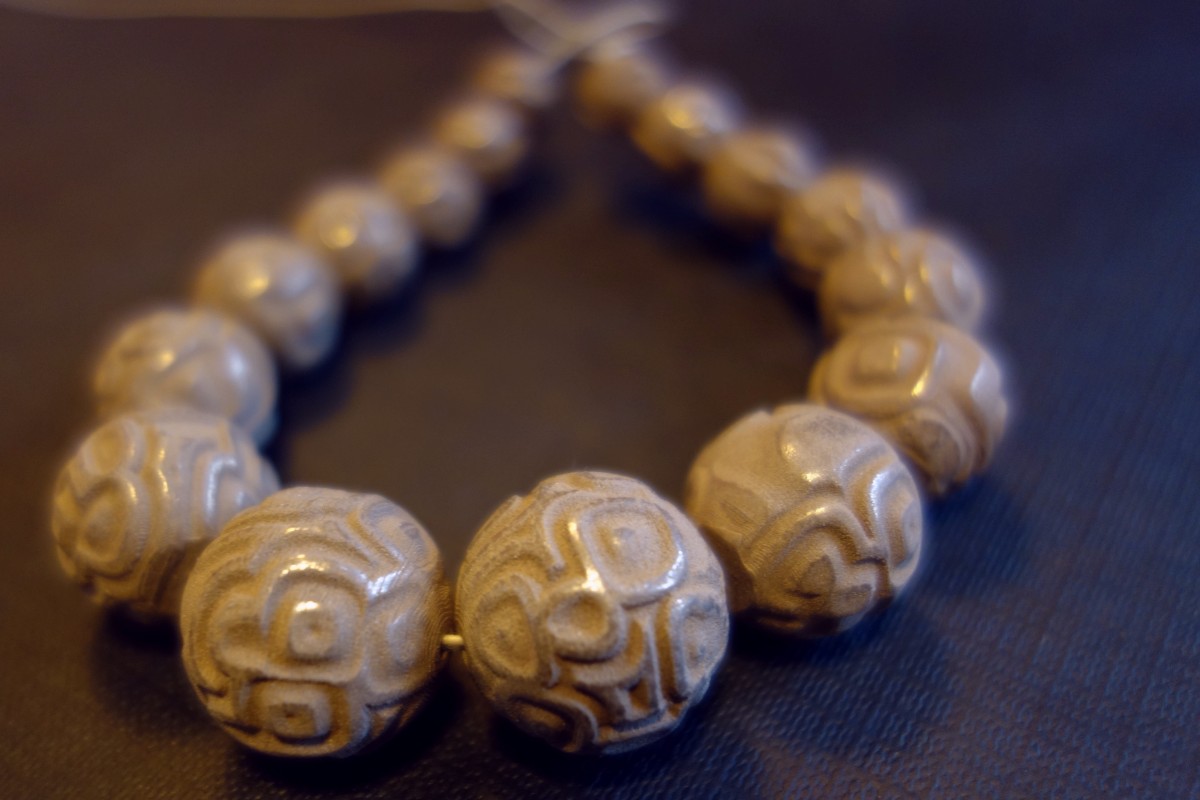
And here is my last procedural necklace modelled wit blender. One might not see on the picture but there are some variations in the pearls and each of them is unique.
As my spool of bronze fill is over now, I think I will wait a bit before printing more jewelery things.
-
1
-
-
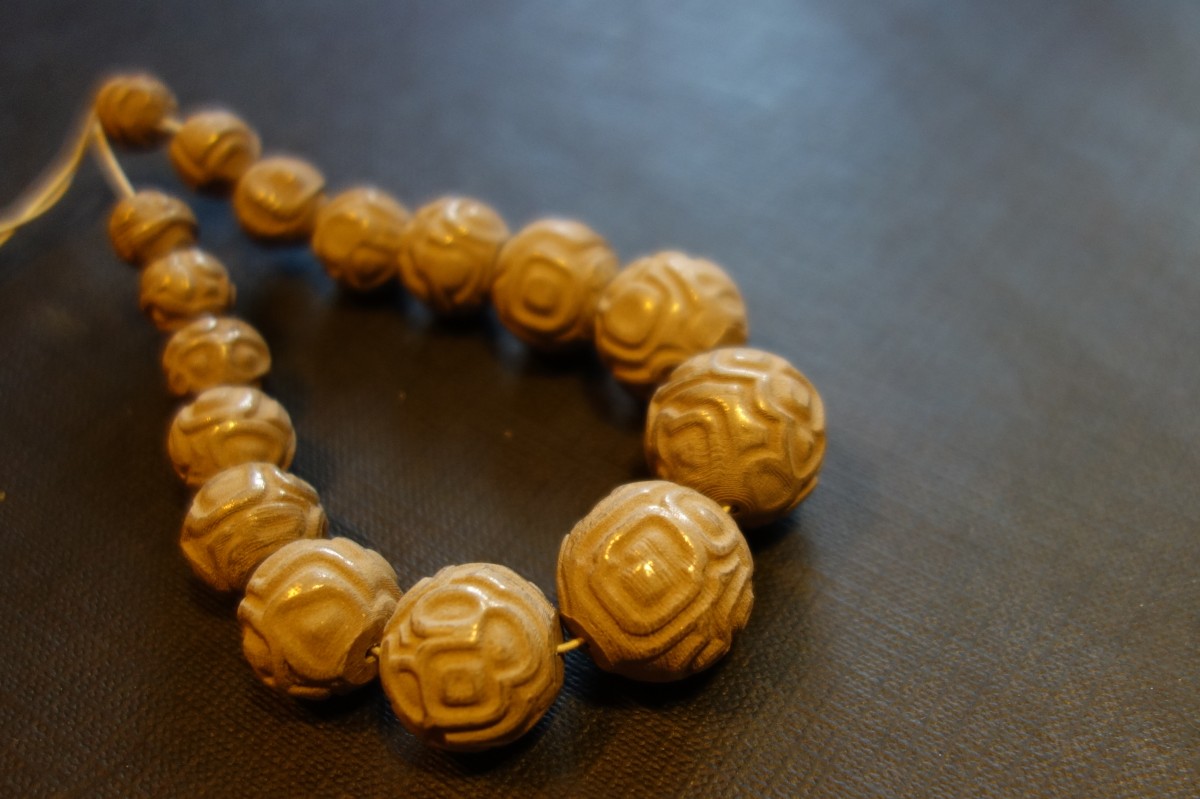
I left a black PLA part outside for a year, it got some discoloration and little change in shape, but nothing too bad.
And here is may last print, once again a necklace, modelled in Blender with procedural texture and array modifier. This way, I can add as many pearls I want, every one is unique.
Just a tip: better not use "print at once" to prevent the small oozing patches when the head jumps to the next pearl. They are quite annoying with bronzefill as they tend to be more polished than the rest.

-
1
-


[Solved] Ultimaker original electronics not working
in UltiMaker 3D printers
Posted · Edited by viralata
Thanks, after further investigations, it seems I had a chain of problems: oxidation on the plug of the PSU explained the bad readings, but it is working in fact. Then I had a bad contact in one of the plugs of the cable going from the small card (on which you plug the PSU ) to the main ultimaker board. If I use another PSU plugged directly to the ultimaker board, everything is working. So I just need to replace this cable.
Thanks