


viralata
-
Posts
112 -
Joined
-
Last visited
-
Days Won
1
Content Type
Forums
Events
3D Prints
Posts posted by viralata
-
-
Nice light saber ! My bronzefill print is losing rapidely its shinyness. It may be due to the cloth I use to protect it, but I wanted to know if others have the same issue.
By the way, my latest print: letters randomly generated in Blender for my fablab:


-
Some test of mixing traditionnal drawing technic (pencil, sculpting stamps...) with 3D printing. This was during a workshop for microediting with a cooperativ of artists. All the 3D printing is done with procedural textures in Blender.
The book should be finished within one or 2 months.


-
I did a video to explain the whole process, from modelling in blender (though it's not for beginners) to polishing
-
-
Bronzefill looks so nice I had to try with another architectural test. This filament just change the way you feell the printed part: heavy; shiny; even the sound is different. It really gives a precious and valuable aspect to prints:
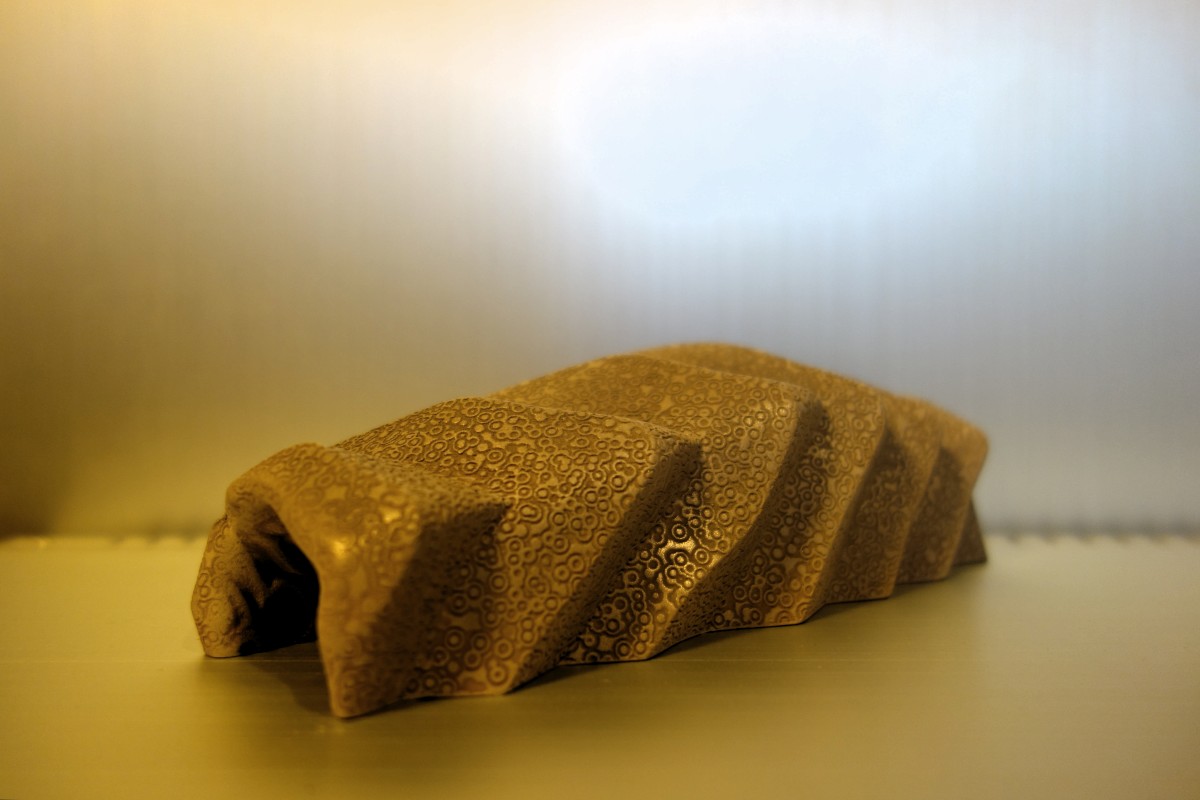
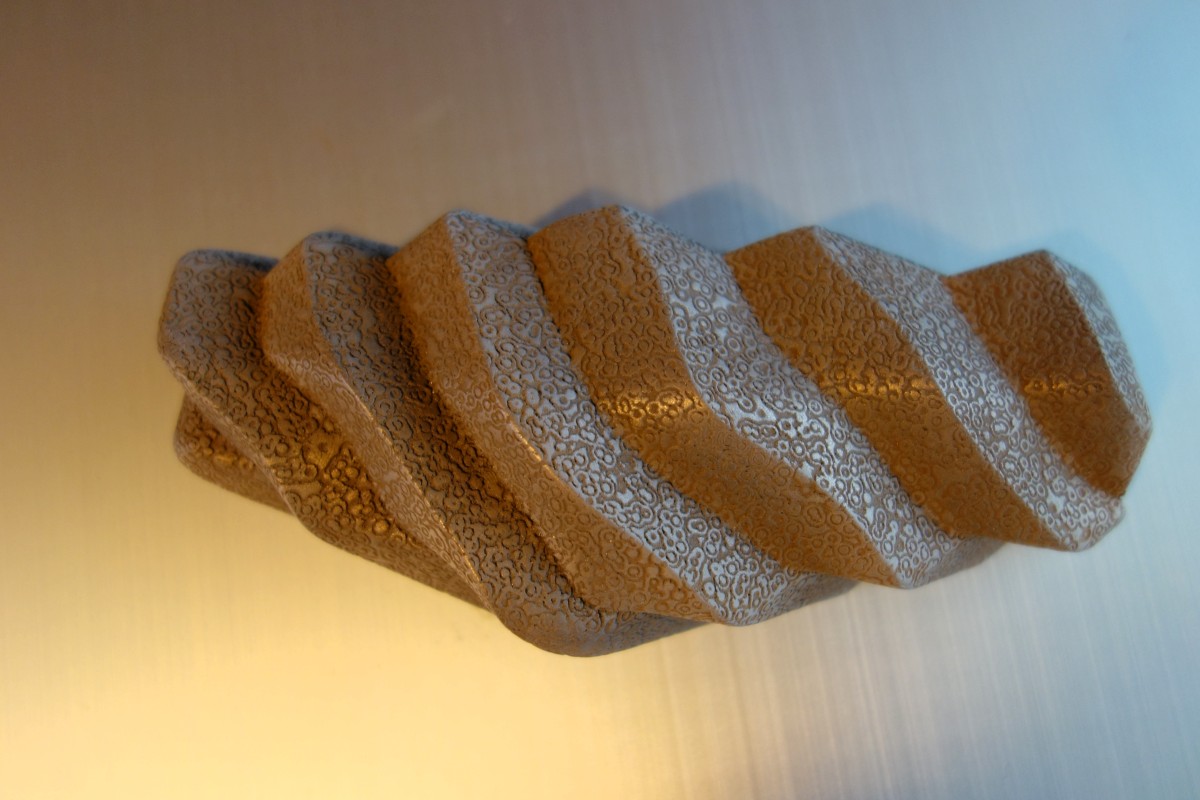
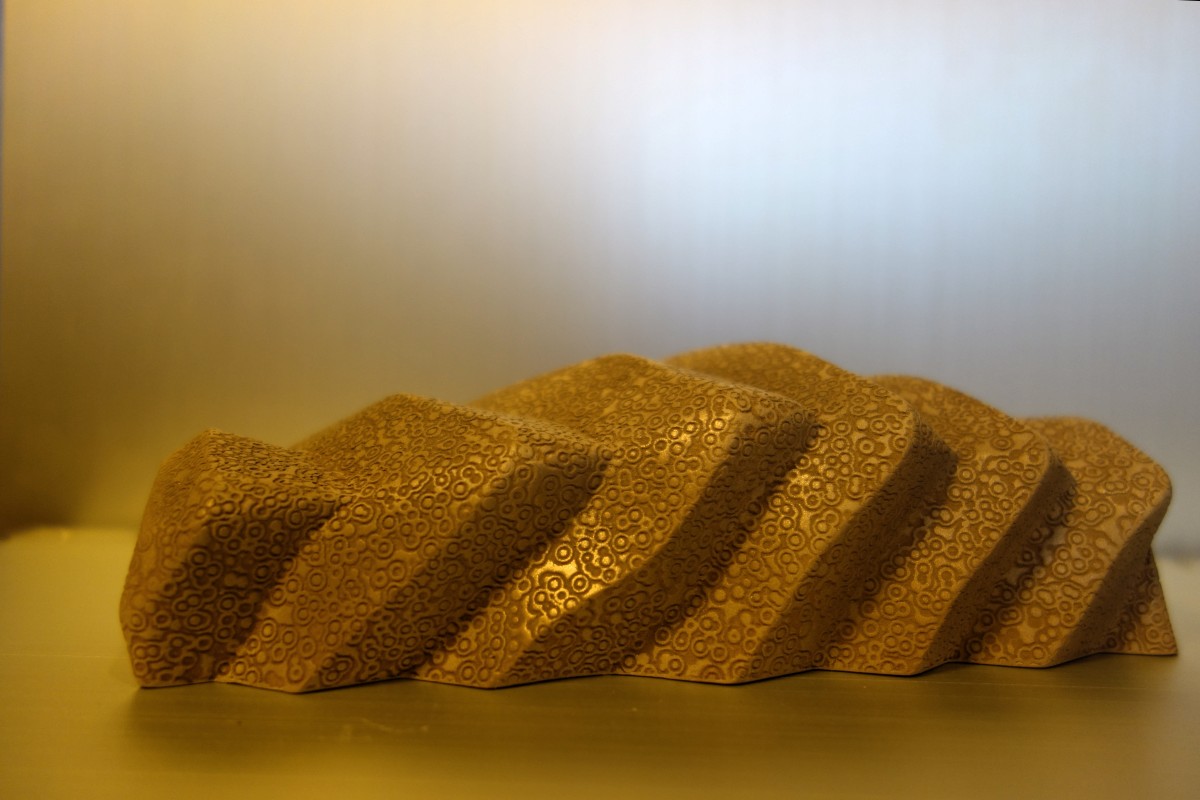
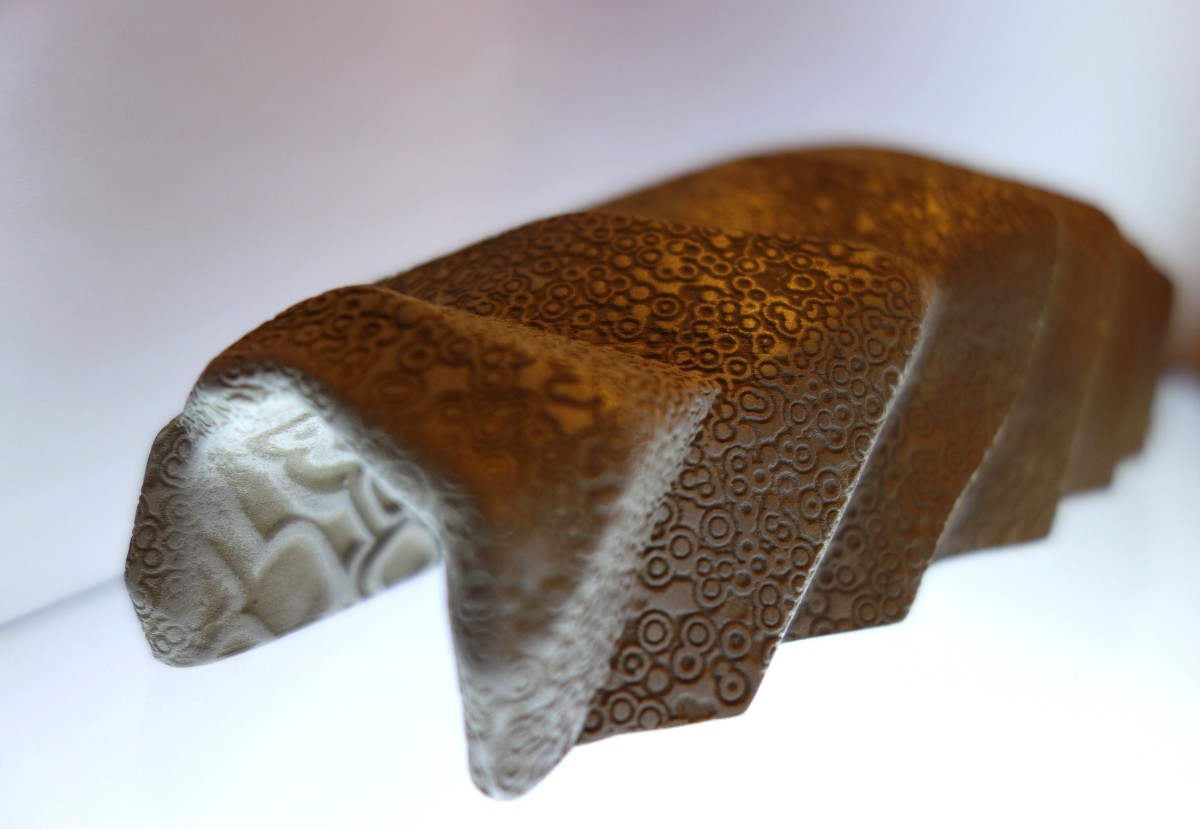
may I say that my wife told me that the building looks like something else, I let you guess what...
-
My first test with Bronzefill:


I definitely love this filament. It doesn't look like bronze in fact, not as shiny as the picture may let think, but it is shiny, heavy and feels like ceramic, or crafted noble material. You won't believe it's printed.
Prints quite well, doesn't stick that much at the beginning so better have two loops around your model to let it stick first. Except that, quite easy.
-
3D case I love this, you are just really crazy !!!!
My two last acrhitectural prints more pictures on this post

-
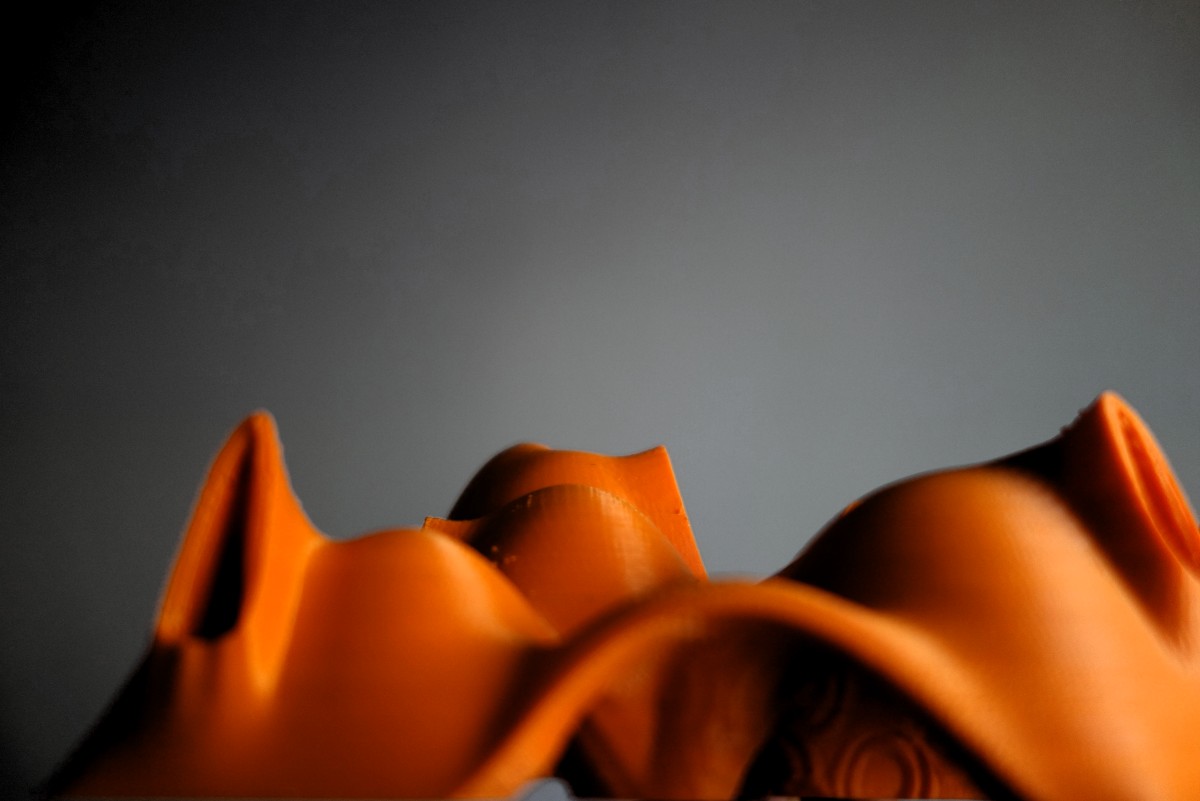
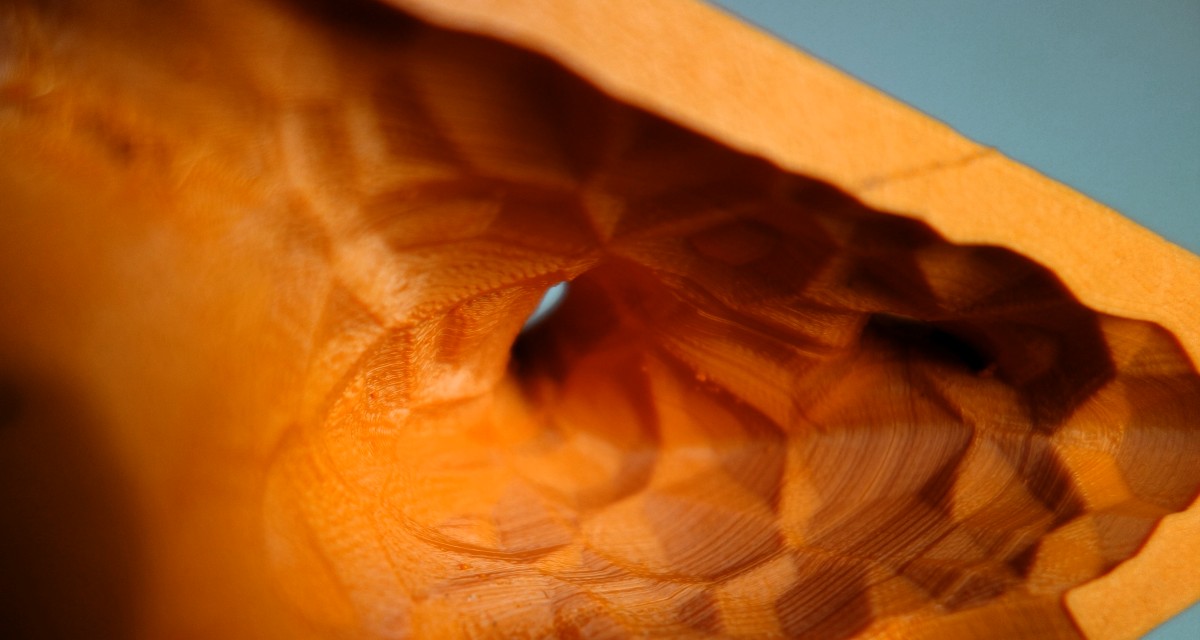
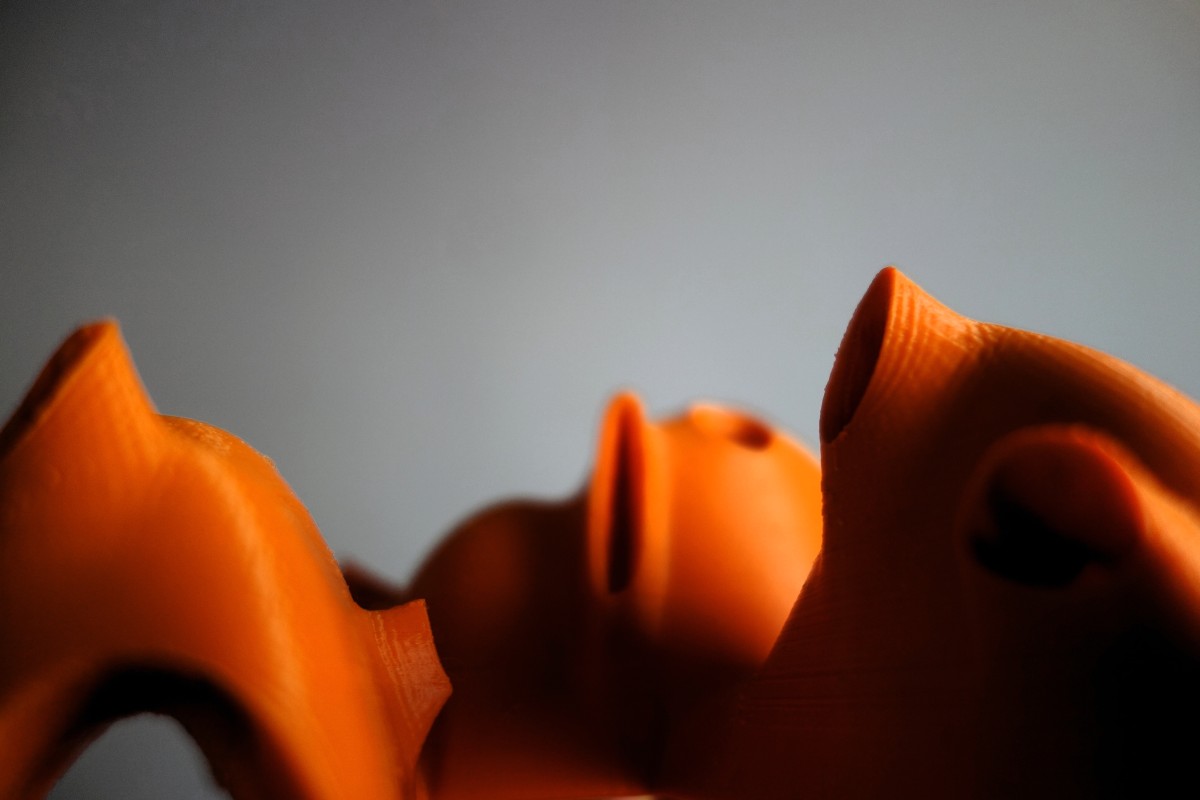
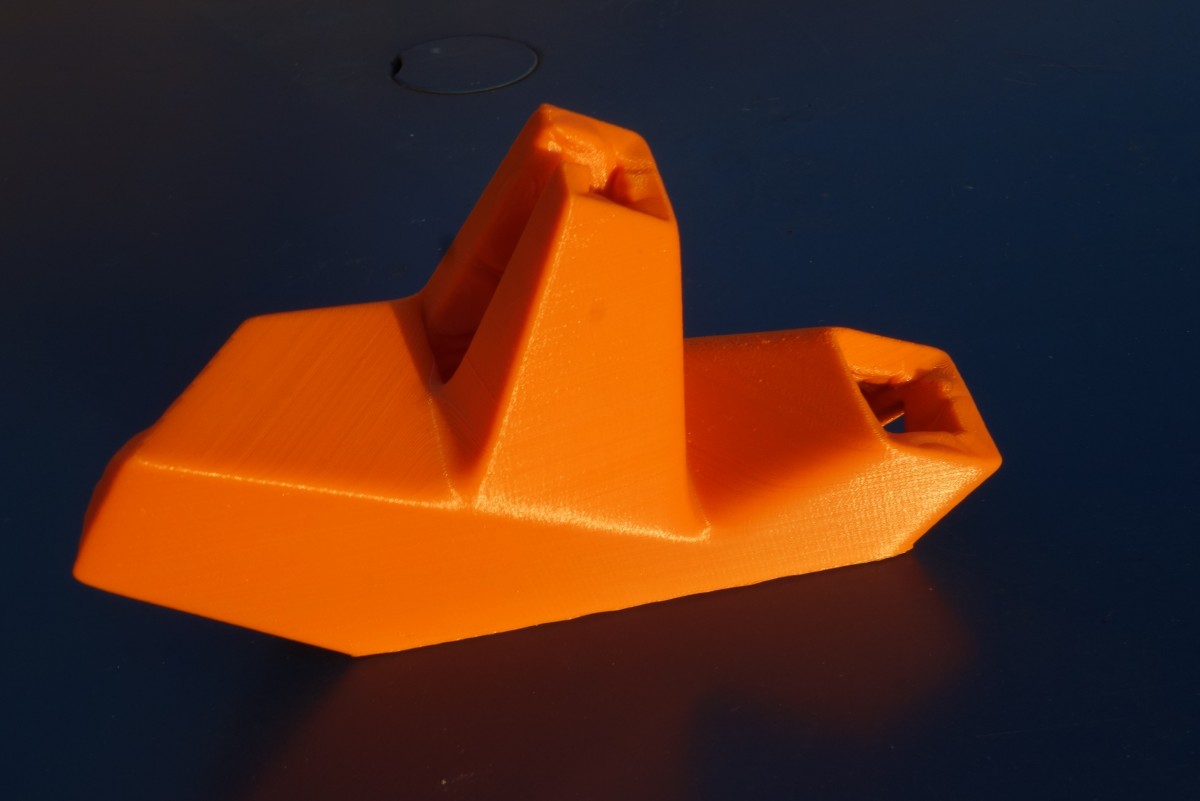
Been away from the forum for long, but not from my printer. Printed a lot but here are my last architectural prints. Tests and tests again of what can be achieved, what are the real interesting ways to use 3Dprinting forarchitecture.
Printed with colorfabb orange at 0.1mm layer and 50mm/s Speed
-
The 11th of October the FJA Folle Journée de l'Architecture at the Architecture School of Nancy.
Every participant will have the opportunity to design it's own model, even without any knowledge in 3D, thanks to premade forms they will mix and morph in Blender.
Those models will then be clipped together all day long to grow a 3 dimensional model made of 3D printed model, all differents.
This will allow to blur the perception of the inside and outside, top and bottom, surface and volume.


Last year we printed 54 models with 4 printers. Let's see how many we manage this year with the two printers we will have.
-
Cette année de nouveau le FJA à l'école d'architecture de Nancy de 10h à 17 le samedi 11 octobre.
Cette manifestation ouverte à tous et gratuite permet de découvrir de nombreux ateliers et activités autour de l'architecture, avec comme thème cette année "Des habits et Vous ?"
Concernant le lab, l'idée est que chacun puisse personnaliser une maquette qui sera ensuite imprimée. Pour cela, comme nous l'avions expérimenté l'année dernière, nous utiliserons Blender et les shapekeys pour permettre à des gens n'ayant pas de base en 3D de créer leur propre forme en mélangeant différentes formes prédéfinies.
Ces mini maquettes sur une base pentagonale peuvent s'imbriquer les unes dans les autres pour créer une structure arborescente qui "poussera" au cours de la journée. On se détachera ainsi de la verticalité et de la perception habituelle du volume construit. Chaque maquette pourra en effet être vue de tous les côtés, brouillant les notion de dessus/dessous, d'intérieur/extérieur, volume/surface.
Merci à l'association RIR qui nous a prêté une ultimaker pour cette journée, nous en aurons donc deux.
-
Thanks for the comments.
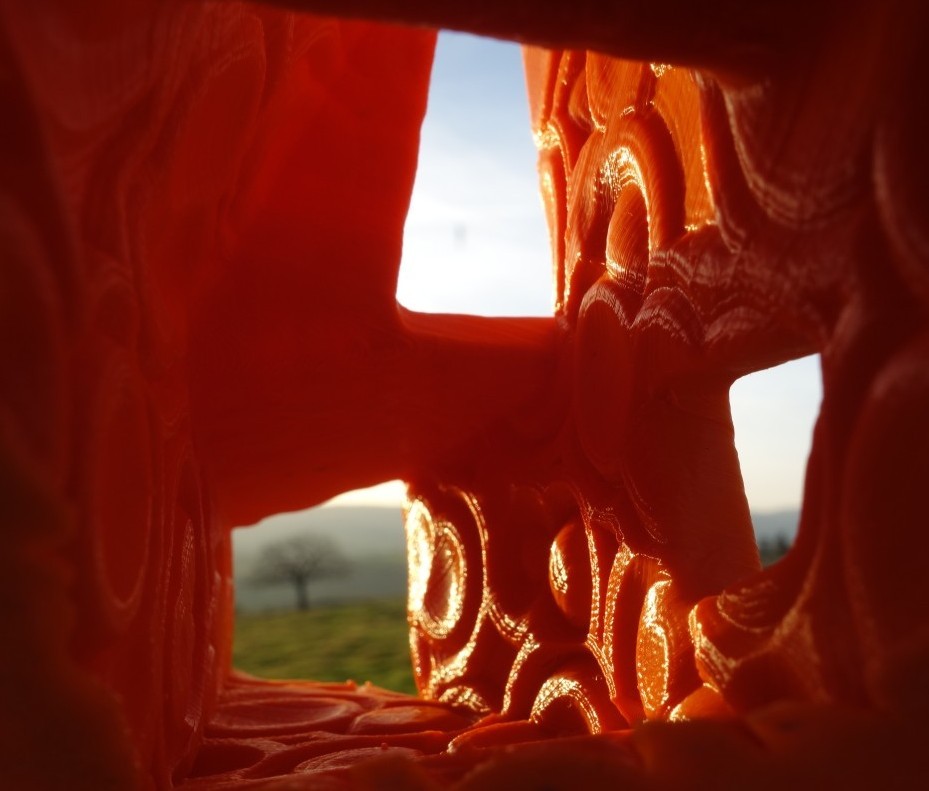
The dirty roll gave me an idea by the way: to use it to set the transparancy of some transparent printed objects: I fill it with mud, then clean it but leave some clay in the holes. I realy like the way the light plays with it:


-
Ok it's not my latest one, but I didn't show it here:


It is 3D printed rolls for marking raw earth plasters.
More info and pictures here
-
I staid a long time without posting, but not without printing ! So I will try to get back on the forum. Here is one of the experiments I made for a workshop with children:
I took the idea of the old rubber rolls for printing I found in my house, and adapted it to 3D print. And as I love raw earth buildings, I used it to make some drawings on raw earth plaster:
First step is modelling in Blender the roll, then put some drawings on it (with sculpt mode or here with procedural textures):

Then of course slice it with Cura

As you can see it's not fast to print.
Then put it on a paint roll (of course the 3D model must fit your 3D roll)

Then you can use it on a fresh mud plaster: natural, beautiful and with no harm. Of course some try and error are needed, and my long experience with earth plaster helped a lot.

Depending on the texture, you can get seamless results
Don't forget to clean the roll, but I quite loved it dirty and it gave me idea for the next topic:
And if realy you don't want environment friendly materials, you cans of course use it on concrete for anti-slippery floors for example:

-

This old bird cage remained empty for years. It is a beautifull object and I always wanted to give it a second life, but without emprisoning a bird in it. This led me to print a bird in 3D for it. While searching for examples, I found this very nice model of the famous Eames bird: simple and beautifull.
To make this bird more lively, I lighted it from the inside, so I had to modify the model with Blender to cut a hole in it for the led. The wires for the led are the legs of the bird.
Then, a little bit of arduino programming made it react to it's surrounding changing the color and speed of this light beating heart.
Some info in french here


-
I agree with you, but to have cura automaticaly ignore them was a great help for not wasting time: I could use the same model for the plans printing and for the 3dprinting.
But if I want to see the doors and windows printed, then I have no choice than to make them thicker.
-
The fix-horrible type change slightly the place of the lines, but does'nt solve the problem. Here is an image:

-
I'm trying to find the right way to print architectural models.
Up too 13.12, Cura was just ignoring the too thin walls (like for example windows in my models, that would be .01mm thick). SO the doors and windows wher automaticaly removed.
In 14.03, those very thin parts are sometime strangelys fill, with some layers filled, and some ignored, resulting in very ugly printings.
-
Si tu imprimes avec du PLA, l'acetone n'y fera rien.
Le premier pas est de chauffer à 250°C (preheat ABS si tu as un ulticontroller) et de pousser le filament à la main dedans pour voir si cela débouche. Cela suffit parfois
Sinon (comme dans mon cas actuel, ca marche quelques heures puis rebouche). il faut devisser la tete (j'ai lu que c'est plutot conseillé avec la tete chaude à au moins 180°C pour ne pas prendre le risque de casser la vis en laiton) et alors qu'elle est à 250°C nettoyer avec un bout de filament et si nécessaire un bout de fil de fer assez fin par la sortie.
Le rebouchage peut aussi venir parfois d'un jeu entre le tube transparent et le teflon: le filament sous la chaleur et la poussée peut alors s'élargir là et rester coincé (il est alors dur à retirer si l'imprimante n'a pas chauffé longtemps).
-
Je me suis rendu compte de l'intérêt du ventilo quand je suis passé à la double extrusion, pour laquelle un seul ventilo ne suffit plus: sur des gros objets, pas de problème, le plastique à le temps de refroidir avant de redeposer une couche. Par contre, pour des objets très fins ( dans mon cas l'axe d'une roue dentée), les couches ne durent pas longtemps, le pla n' a pas le temps de refroidir et l'impression s'affaisse sous son poids.
-
Thanks for the nice comments.
@ Daid, all of my work (except some very rare cases) is under CC-by-sa, so feel free to use it, just crediting me in a sort of way.
I know I should put them on youmagine, it's just that most of them have some things I would like to improve before publishing it (for example the last model would be much better printed in several parts but I wanted to try it in one print), and as I have no time to do it, they stay useless on my computer :oops:. Maybe during the hollidays...
-
Thanks Gr5.
Some technical details:
printed at 0.1mm height, 20mm/s, 195°C, with ooze shield and wipe and prime tower.
The tower was not firmly enough stucked and broke down. Even with the ooze shield, it's much better to stay aside and remove manualy some of the oozing to be sure. As the printing lasted 38 hours, some parts were left like that and and some white want into the transparent.
I have some holes betwen the two materials in the "voronoi" wall, not sure if it's only because the transparent is underextruder a bit.
-
Here is my latest dual extrusion architectural model print. Natural and white PLA: more details in this post:
http://umforum.ultimaker.com/index.php?/topic/2346-first-tests-of-architectural-prints/

-
Here is the last test with dual extrusion. In spite of the wipe and prime tower breaking down (it's not included in the raft in Cura 13.11.2) and therefore a lot of oozing, and some underextrusion of the transparent PLA, I'm quite happy with the result:


-
My last one, dual extrusion test:

More images and explanations on this post:
http://umforum.ultimaker.com/index.php?/topic/2346-first-tests-of-architectural-prints/?p=28444
Post your latest print!
in What have you made
Posted
My last print: an icospher collar for my wife. Printed with bronze fill. I didn't sand it because I wanted the printing lines to stay visible and give a more "handmade" style. I polished more the edges and less the faces. Modelled in blender (modeling was quite fast in fact: add an icosphère, add an array modifier with an empty to change the scale and a boolean modifier to make the holes):