


mkaj2019
-
Posts
116 -
Joined
-
Last visited
-
Days Won
1
Content Type
Forums
Events
3D Prints
Posts posted by mkaj2019
-
-
Hey S5 Community,
I would like to know what type of mods you have installed on your S5 printers. It would be interesting to see what type of mods are possible, available and also functional tested.
Greetings
Markus
-
Hast du mal mit dem Windows 10 integrierten 3D Builder geschaut ob es vielleicht Fehler im Modell gibt. Der 3D Builder kann die teilweise auch recht gut reparieren, wenn er einen Fehler gefunden hat.
-
Yes, have a look at my video. This is moving freely. When I try to realign it the rod just falls out. Right now I don't touch it and wait for the replacement parts
-
Das ist toll, vielen Dank!
-
32 minutes ago, Chiara_Excite said:
TPU als Stützmaterial PVA von Polymaker
Das klingt ja nicht schlecht. Könntet ihr euch vorstellen euer Druckprofil hier zu posten? Ich hatte seit den ersten furchtbaren Versuchen mit dem Ultimaker PVA aufgegeben und drucke seitdem nur noch mit dem Breakaway Filament.
-
-
Hey Guys,
I contacted the official support company in Germany and got informed that the damaged sliding block is a "wearing part" and is not covered by warranty. So make sure you buy some as spare before your sliding blocks are failing like mine.
Additional information from the company is also that enclosing the printer with a case (not the UM air manager) might lead to quick deterioration due to too much heat transfered by the rods into the plastic sliding block.
I personally do not want to give money to ultimaker for some crappy plastic pieces. Therefore I will try some alternatives from Aliexpress. I will keep you posted.
-
-
Hi Carla,
yes I oil them very regularly and also stick to the maintenance plan from cura connect. But the printer is also printing quite a lot. I have printed over 1000 hours in 10 months since purchase.
-
Ich kann das nicht ganz bestätigen. Es gibt durchaus Frage bei denen ich nicht zugestimmt habe oder die mir egal waren. Eine überfrachtete Seite kann ich z.B. überhaupt nicht leiden, worauf die Frage 3 eingeht.
-
 1
1
-
-
Hello Everybody,
I have discovered some unusual rod backlash (see video in the attachments
) at one of the slinding blocks on the S5 in my company. Is this behavior normal? The printer is not even 1 year old.
Greetings
Markus


-
Ich hatte sowas als Bug mal im Slicer PE. Da hatte ich es wegbekommen indem ich das firstlayer genauso dick gemacht habe wie den Rest der Layer. Schau doch mal ob das bei anderen Layerhöhen auch auftritt
-
Ich habe in einem anderen Thread noch folgendes gefunden:
Hi,


This is a similar issue I've experienced before. The heads don't have separate sensors. The way the leveling works is that the capacitive sensor is used to detect the glass bed, however the software only detects when the capacative reading stops changing. (i.e when the bed contacts the nozzles the sensor reading stops changing and it knows it is in contact)


How ever if the bed screws are wound right out the bed is very high off of the aluminium plate then the nozzles will contact the glass before the system starts to look at the measurements and it continues to push into the glass.


The simple solution, wind the bed down a few turns on all of the bed leveling screws and try again. The nozzles should not be touching the glass when the bed has rapid-ed up, and before the bed is moved slowly up to touch the nozzles.


If the issue continues you may have a defective sensor, which I have heard of before. Also check there is no debris on your nozzles or glass bed.
Kannst du mal versuchen das Bett soweit wie möglich runterzuschrauben. Danach manuell und dann auto leveln?
-
Mhm, du hast auch das normale Druckbett drauf oder? Sie haben ja noch Kapazitive Störungen durch ESD genannt beim Troubleshouting. Kannst du den Drucker in einem anderen Raum prüfen, ob er das gleiche Problem macht. Keine Ahnung ob eine fehlende Schutzerde auch sowas verursachen könnte.
Ansonsten wird dann wohl tatsächlich der Sensor kaputt sein oder irgendwo ein Kabelbruch.
-
Ah okay. Hast du das Sensor-Kabel mal neu gesteckt und mal die Kabel geprüft? (Siehe: https://ultimaker.com/en/resources/52808-capacitive-sensor-low-performance-or-interference-detected)
- Es kann bei Molex/JST Steckern usw auch mal vorkommen dass die crimp pins in den Steckergehäusen nicht fest eingerastet sind. Einfach mal auch an den Drahtenden sanft zuppeln.
- Sensor Kabel im Druckkopf auf Quetschungen überprüfen (Falls Kabelbruch)
- Wenn du ein Multimeter hast kannst du auch einmal den Durchgang prüfen vom Stecker zum Crimpanschluss an der Sensorplatine.
-
Das Problem habe ich noch gar nicht gehabt. Es gibt doch in den S5 Einstellungen eine Funktion zum Prüfen des Autobed leveling sensors, aber der wirft dir dann bestimmt den gleichen Fehler aus, oder?
-
Ein Ölstift ist auch nicht schlecht damit man besser die Führungsstangen schmieren kann. Mit der mitgelieferten Tube kommt man teilweise recht schlecht dran und kann das auch nicht wirklich gut dosieren.
Und dann habe ich noch eine kleine leere Pumpsprayflasche gekauft, die ich mit Isopropanol gefüllt habe. Damit mache ich immer meine Filabase Dauerdruckplatte auf dem S5 sauber.
Bei Werkzeug gibt es natürlich einiges was man gut gebrauchen kann vor allem aber dann für die Nachbearbeitung der Teile.
Hobbymesser, Schleifpapier, eine Schnittunterlage, Feilen, kleine Messing-Drahtbürste (zum Nozzle putzen), Bohrer und Akkuschrauber, Dremel. Ein paar Handschuhe als Schutz beim Schneiden mit dem Hobbymesser und damit man die heiße Druckplatte sofort rausnehmen kann nach dem Druck (weil man mal wieder keine Geduld und Zeit hat), Küchenrolle, einen Entgrater, und eine Heißluftpistole um das "gestringte" Material schnell wegzuschmelzen z.B. bei PETG manchmal notwendig.
Ach und dann wichtige Teile zum Drucken sind die Stege zum Einstellen der Riemen und des Axialspiels der Führungsstangen:
https://www.thingiverse.com/thing:2965005


-
 1
1
-
-
I am using an Ultimaker S5 in my company also for about a year (over 1000h print time). I am now also suffering from underextrusions but I cannot find the source.
I cleaned the extruder, I performed a lot of cold pulls and I swapped the print cores. It is still the same result.


I am using Cura 4.3.0 and the S5 Firmware 5.2.11.20190503
-
Ah okay I understand. Yes I have tried to print slower first which resulted in a worse layer adhesion.
-
Yes PETG is great, but it has also its limits.
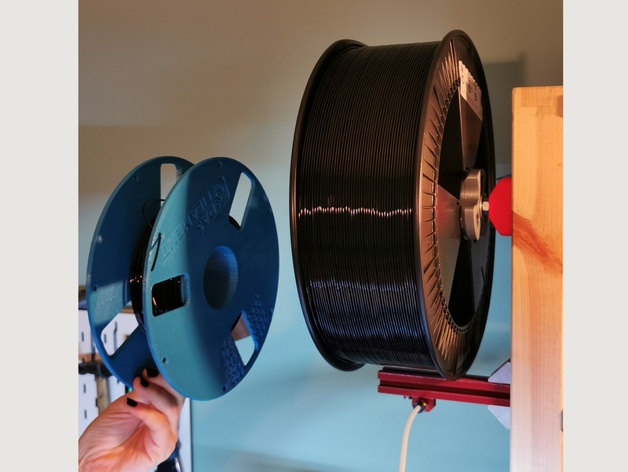
At home I am printing a lot with PETG (See the picture below of my 2,6 kg DAS FILAMENT PETG Spool)
But at work I need a lot of different materials. Our company is producing analytic instruments and for prototypes I always need different properties especially resistances to various chemicals. ASA is on top of the chemical resistance extremely easy to sand/grind and has good antistatic properties (good for production jigs or e.g. assembled PCB tester).So overall I am not really looking for the best layer adhesion in the filament world but more on how to print the certain materials as good as possible.

-
Hey guys,
I just wanted to give you a quick info about my struggle with printing ASA by BASF Innofil3D ASA and the solution.
BASF Innofil3D has a material profile for ASA in the Cura market place which did not work for me on my Ultimaker S5 at all.
The main issue that I experienced with the marketplace material profile is that all prints suffer from a really bad layer adhesion and warping. I changed fan speeds and print temperatures and could not find a sweet spot. Somewhere online I found a comment that ASA seems to degenerate the longer it stays in the hot nozzle.
Speeding up my prints and turning the layer fan off reduced the warping and improved the layer adhesion in my opinion. It was way more difficult for me to break off parts from the 3DBenchy. Unfortunatly I cannot meassure the difference.
My Ultimaker S5 Print Settings are at the moment:
Print Temp: 255°C
Build Plate Temp: 110°C (Build Plate is a Filabase and works very well with ASA)
Extrusion Flow: 98%
Print Speed: 60 mm/s
Infill and Wall Speeds: 50 mm/s
Travel Speed: 120 mm/s
Infill before walls: False
Fan Speed: 1%
Maximum Fan Speed: 20%
Fan Speed Threshold: 10s
The print quality of course suffers a little bit due to the higher print speeds but I can accept this as long as the layers a perfectly bonded together. If somebody has the same material could he/she confirm or disprove my observations? I am always open for suggestions/feedback.
Greetings
Markus


-
1
-
-
1 hour ago, Link said:
Use the z offset plugin
Thanks for the hint! Have you tried it on an S5?
-
How do you guys adjust the z-offset for the first layer? My nozzle is always too close and I have to reduce the initial layer flow to 88% to get no overextrusion.
-
3 minutes ago, P3D said:
The PPrint material you mention is quite interesting, so that material is approx. three times as stiff as the UM PP, if I interpret the data sheets correctly.
Can't you just disable automatic leveling and use manual leveling?
This is unfortunatly not possible with the S5, as far as i know.


S5 Mods/Upgrades/Improvements
in UltiMaker 3D printers
Posted · Edited by mkaj2019
I have done a few things on my S5 so far.
The first thing I did was to replace the UM glass plate with a spring steel print plate by Filafarm (for PLA, PETG, ASA, TPU...). The set came as 4 seperate parts: the spring steel, the print surface sheet, the magnetic sheet and a thinner glas plate. The magnetic sheet with an adhesive side is mounted on the thin glass plate and clamped in the S5 bed sheet metal tabs. The thin glass plate broke in half a few weeks ago but Filafarm quickly send me a free replacement. They told me this has never happened before.
Nonetheless the trust in the glass plate was lost. That is why I have replaced the thin glass plate with a nice carbon plate and it looks like this at the moment:
I have also replaced the bowden tubes after one year of usage with capricorn tubings.
I have also added a cheap thermometer to check the build volume temperature when I cover the printer for materials that are prone to warping.
Last week I also changed the nozzle of my oldest print core to a microswiss nozzle. The procedure is a little bit tricky but replacing the nozzle is still way cheaper than buying a new core.
One of my sliding blocks is still broken/ worn down but I am still waiting for the machined replacements from China. For now I have simply swapped the sliding block from the y axis to the x axis. On the y axis it is not that critical if the rod is not clamped anymore. (for more infos visit the topic below)
Greetings
Markus