


conny_g
-
Posts
802 -
Joined
-
Last visited
-
Days Won
12
Content Type
Forums
Events
3D Prints
Posts posted by conny_g
-
-
How about doing both to learn - ground the rosc today and order the other drivers in parallel ;-)
-
-
-
I am convinced if you have the white UM Mainboard you should have th A4988 drivers.
If you don’t I can’t tell.
-
Do you use a different extruder than the original one?
Then you need to adjust the steps/mm.
-
What is complex about the rosc pin soldering / grounding fix?
Well I ain't gonna play with a solder on the board unless I really need to XD I mean, if this cheap stuff works, I'm all good. I already found hard enough how to learn to solder stuff on a SMD board when my fan transistor died in 8 different times when doing fan tests, I'm not very fond of doing that stuff with something even smaller XD!
That makes sense!
-
Just running another test without the smoothers. And the temperature of the bottom side of the board (under the stepper drivers) is the same, you can't touch it.
I did some tests with my cheap Seek addon from iphone (the old model) and the temperature with and without is around 10-25C higher with the smoothers after 1h of print time.
Also indeed doesn't make sense to add smoother if you already did the complex solder fix. You are just changing the stepper waves and it might add errors like you get.
Edit. Also as a general rule for um2/um2+ boards is a good idea to add a heat sink for on the stepperchips since they have poor natural heat sink on the plastic cage. For example for UM3 Ultimaker changed how the board is aligned (flipped 180 degrees like on UMO+) and added a grey sticky thing that heatsinks the back of the stepper chips into the aluminium frame.
What is complex about the rosc pin soldering / grounding fix?
But the heat sinks make a lot of sense, the board is already darkening around the drivers. I have installed them in that printer today and will also add them to the 2nd soon.
-
So my conclusion is: if you have the ROSC pin grounding of the stepper drivers in place you don't need the diode smoothers, it rather makes things worse.
Have you already fixed this?
Yes, that’s what I did, I grounded all Rosc pins by bridging the resistors.
(Btw, in that post Torgeir is talking a lot of weird magic and two posts later he simply bridges the resistors. So where’s the magic? If you have good eyes or glasses, a 0.1mm wire and a decent soldering iron that is really easy, there is no magic. He’s talking organ transplant, but then the solution is to put a patch on a finger ;-) )
-
Just running another test without the smoothers. And the temperature of the bottom side of the board (under the stepper drivers) is the same, you can't touch it.
-
Smoothers with 4 diodes, about the same heat and similar result, maybe slightly better than with 8 diodes, but still less good than without smoother.
Left side without smoother (only ROSC pin), middle with 4 diodes, right with 8 diodes.

The diodes are different types, the 8 diodes smoothers have a end-to-end voltage of some 0.8V while the 4 diodes smoothers have a voltage of 0.6V.
So my conclusion is: if you have the ROSC pin grounding of the stepper drivers in place you don't need the diode smoothers, it rather makes things worse.
-
Interesting. For me the result with the smoothers is worse than without, there are strong stripes in the Z axis now. Which result from positioning errors in XY. And any zebra that's left is not better (but it was not very visible anyway).
I have the ROSC pin fix installed though (to ground it vs. 10k resistor to ground).
Left side without smoother, right side with the smoother.


As I have ordered smoothers with 4 diodes initially I will try those in the next run. But my impression is that ROSC fix plus smoothers do no good.
-
I received my smoothers and installed them to one of my printers on XYZ, it's the ones with the 8 diodes. Also installed the smaller Raspberry Pi heatsinks on all the motor driver chips. Test print running, the curves model mentioned by @neotko.
The smoothers get quite warm, I would say 60 degrees (still touchable), the heat thrink I put over them to protect them (still unshrinked) starts to shrink slightly. The ultimaker board on the bottom side gets rather hot where the drivers are. Hardly touchable, I'd say slightly higher than 60 degrees, maybe 65-70.
Would you say that's how it is for you and that this is acceptable?
Don't know how hot the stepper drivers get without, never touched them in operation before.
-
They stick with a proven solution.... don’t want to risk reliability since the board works great for a few years.
-
 1
1
-
-
Ordered ones too and I am very curious how this will work out.
-
Hi Matt,
the Mark 2 mod has been developped and tested on UM2/2+ which are using the Ultimaker Board 2.1.1/2.1.4.
AFAIK these boards mostly merge the Arduino Mega 2560 and the stepper motors onto one PCB keeping it at least mostly identical, but I have never compared them side by side, what else was changed / added with the Ultimaker Board.
In the end it’s important that the Tinker firmware finds everything at expected ports.
Maybe @tinkergnome can tell if the UMO board would work?
Conny
-
It’s important the magnets can touch fully, the gap ensures that this happens.
To be very sure you could reprint tonnage a slight gap.
It seems to me you are printing with a low extrusion rate?
-
I recently bought a 2nd UM2 and upgraded it to UM2+ as well.
Was thinking about the same thing, if I wanted to try the Mark 2 mod with the UM2 head.
As feeders I am using Bondtechs, but the head might do.
I have experience with Mark 2, converted my 1st printer, and off the top of my head I would not know a reason why it should not work.
The heaters of the 2 heads have less power, but I think that doesn’t matter a lot, it will just take longer to head the 2nd head.
In terms of quality I can’t tell if there is a difference, I don’t think so. But I would change the UM2 head to Olsson block to be able to change nozzles.
All in all, the head should be fine, but change the feeder into UM2+ or Bontech.
I think the feeders should be the same to have the same settings on boths heads. Makes thinks more complicated if one feeder has other capabilities than the other.
-
Here a printing result of a 2 colors tree frog by nervoussystem, it was sliced by Cura 15.04.6 with prime tower option
0.4mm layers at 50mm/s print speed, PLA material at 200° print temp
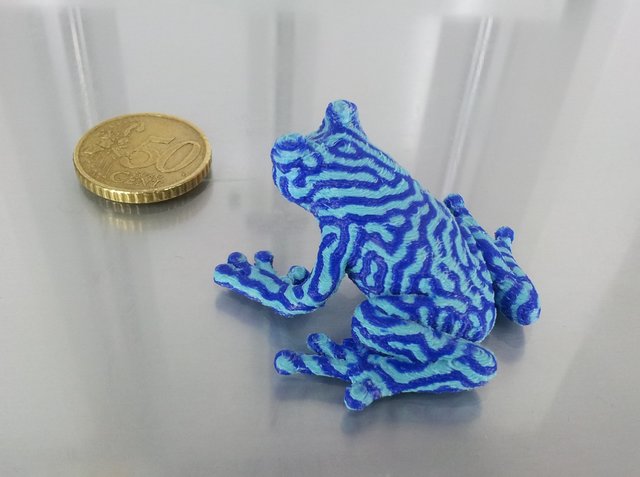
Looks like the light blue material was slightly too hot?
-
Do you guys know what is this witchcraft Cura 2.6.2 is doing ?


Of course, it crashes the printhead...
Are we supposed to set the X/Y layer start position ?
Project here: https://1drv.ms/u/s!AgmRtaUlyi-AkatGjQ7MSffV3vFKuQ
Had the same issue last week. You need to set Travel > X/Y Layer start to something 100/45. For both extruders.
-
there's something wrong with the permalink. I think they are not supposed to be amazonaws urls ;-)
Thanks, we just moved to new servers to make the site faster. Did you notice any difference? These incorrect links are/were only suppose to last very briefly as a short aftermath from the move. I'll check when it is expected to work as normal. Our apologies for the inconvenience.
Ah, that's the reason for the downtimes the last days.
I'd say the site is still not "fast". If it's faster than before I can't tell really, the feeling is still - "uh, I have to reload, that will take a while".
Just did a test, it's still some 4-5 seconds for a reload. For my taste and expectation that's 3-4 seconds too much :-)
-
My first result with 4.0 on dual extrusion is, bad. maybe some "tuning" to do.
Yes, that's also my experience every time I work with S3D. While Cura is perfectly tuned to work with the Ultimaker you need to find a bunch of settings in S3D yourself. Of course it's the same with dual, you need to tune yourself, what Cura already has.
And it seems to be less clever in dual printing than Cura. For example the preheating of nozzles while the other ones prints. I was quite "surprised" to see that the new toolhead sat there after tool change and took 20 seconds to heat up.... in the first moment I wondered why it would not print.
-
The S3D dual profile of MarcoUbtz I linked above worked pretty quickly, thanks, Marco! :-)
But somehow S3D feels so much less intelligent in dual printing than Cura, once you got used to the new Cura 2. Not so happy with how it behaves.
-
There is something:
https://www.dropbox.com/sh/nbc006f6ym2d6b9/AAD8J_Mv_j4y6Hq3KEtJRvcea?dl=0
(page 12, first entry, by @MarcoUbtz)
there's something wrong with the permalink. I think they are not supposed to be amazonaws urls ;-)
-
I am looking for a sample/template factory file for Simplify3D for Mark 2. I remember that there was one around, but can't find it.
Anyone still knows where this was mentioned / published?
And once we have it, should we add it to the Mark 2 Git repository?


Best solution for UMO with 'end of step' uneveness; TLSmooth, ROSC jumper, SSSDriver?
in Third party products & modifications
Posted · Edited by Guest
Yes, double check everything tomorrow.
For that kind of work I can recommend this kind of magnifying glasses:
http://www.eschenbach-sehhilfen.com/de-DE/278/produktuebersicht/detail/82/laboCOMFORT
with 2x or 2.5x.
No issues with small SMD anymore.