


personal-drones
-
Posts
257 -
Joined
-
Last visited
Content Type
Forums
Events
3D Prints
Posts posted by personal-drones
-
-
Du coup, y'aurait t'il un fan duct spécial à imprimer pour le bloc E3D ?
Oui, c'est celui là:
https://www.youmagine.com/designs/ultimaker-2-fan-shroud
Dans la foto tu vois la version que j'ai imprimé pour ma UM2, legerment modifiée par raport au file original de youmagine, pour mieux tenir conte du deflecteur de darkdvd
https://www.youmagine.com/designs/deflecteur-1p
Pour monter les fans sur le duct tu aura besoin de 8 vis M3 14mm + boulons.
C'est une bonne idée de changer le fan duct car si le fan duct original en alluminum touche le Olson block, ca ne va pas imprimer bien du tout. Ca ne va pas tenir la temperature des que les fans entrent en fonction. Avec le fan duct original il faut bien controler, pendant le montage, que le block tienne une distance de l'alluminum du fan duct. Avec le duct de youmagine tu n'a pas ces problemes.
-
Les parties noires c'est CF? Ou je jaune aussi? Très joli le build

-
C'est bien ce que je conseillait de faire en effet.
Ben en principe si on se met en mode 'RepRap' dans Cura, on aura la bonne séquence de démarrage directement dans le GCode...
-
As tu essayé avec un gcode repreap flower. La raison est que dans un gcode ultimaker, les operations initiales (le chauffement de la buse etc...) son demandées a l'imprimante, elle ne sont pas dans le gcode. Donc quand tu execute auto0, la premiere partie des operations (que devrait faire l'imprimante) ne viennent pas effectuées. Pendant que avec un gcode reprap tout est dans le gcode.
Arrgh avec auto0.g l'imprimante démarre au quart de tour l'impression directement dans le coin sans chauffer la buse !
donc rien ne sort.
et renommé auto0.gcode ne produit rien.
c'était trop beau pour être vrai son truc :(
-
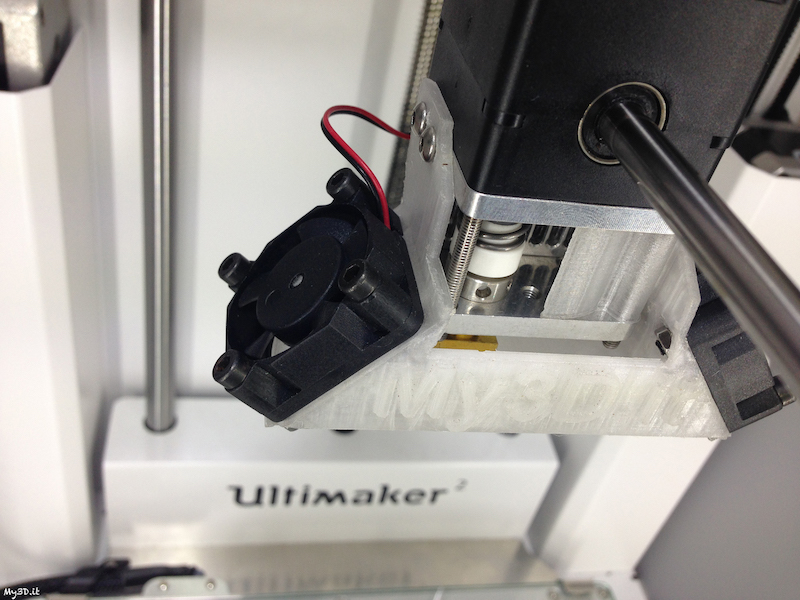
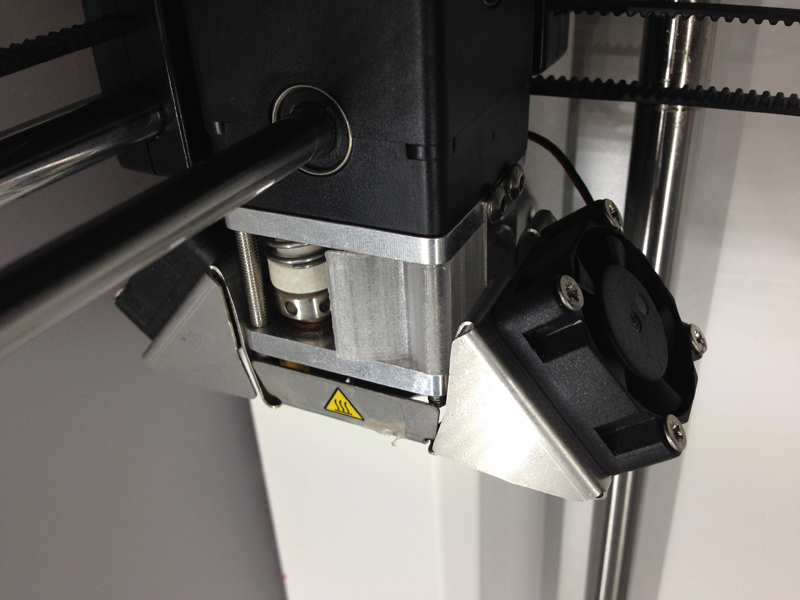
My first print in XT with the block did not come out nice at all. Stings and blumps of plastic all over. Still I could complete it and the part came out fully usable although not the nicest possible.
I tracked the reason of the poor results thanks to gr5 post
Indeed the block was in contact with the aluminium fan shroud and this was possibly causing temperature fluctuations in the block and poor temperature control.
Now luckily enough, this part I was printing in XT was Cor3ys fan shroud! https://www.youmagine.com/designs/ultimaker-2-fan-shroud
So I replaced the fan shroud and immediately printed a second one. Made a minor modification. Since I am using this deflector by Darkdvd:
https://www.youmagine.com/designs/deflecteur-1p
(see thread here http://umforum.ultimaker.com/index.php?/topic/10080-um2-boucher-un-trou/)
to try to draw some more air to the teflon coupler, I made a little cut on the left part of the fan shroud to allow some air flow behind the coupler. This area is "closed" in Cor3ys design, while it is normally opened with the original alluminium structure. So I restored some space in this area.
The print in XT came out very nicely this time, so I think that indeed the problem was the contact between the block and the aluminium.
Here's my current setup:
-
50 c'est deja limite. Franchement le default de 80 pour l'infill des profiles cura je le trouve difficile (impossible) a utilizer.
Dernierement j'utilise 30 pour outer layer, 40 pour infill et inner layer. J'ai renoncé pour l'instant a aller plus vite que ca. Pour le pla. Pour le XT c'est 20 outer, 30 inner + infill.
-
Mon workflow c'est de downloader le modele en format .obj de 123Catch. Puis je l'ouvre avec meshlab pour isoler la partie qui m'interesse. De meshlab j'exporte un .stl que je passe sur https://netfabb.azurewebsites.net/.%C2%A0
-
j'ai monté un drone ( hovership ) qui avait qques problemes a cause du manque de rigidité du XT et du PLA ainsi que beaucoup de casse , depuis plus rien , des gros crash et il vole tjr aussi bien, je suis ravi !
Les photos!
-
Do you mean you left the nozzle size at 0.4?
I also ran the same PLA filament at the same settings that I had for the 0.4 nozzle
-
-
OK guys you can welcome me to the Olson Gang.
Is there any specific tattoo I should make or something?
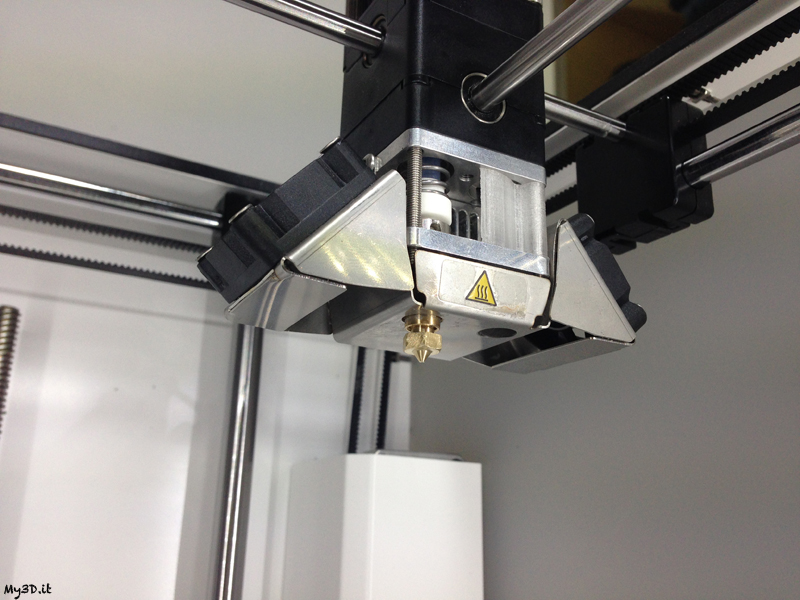
EDIT: it's working very nicely so far. Looks like I can now switch nozzles on my UM2, very very happy.
Luckily enough, it was very easy to take out the temp sensor. All it took was a little WD40 and a firm grip on pliers. No heating required. The whole thing took maybe 15 minutes. Everyone owing an UM2 should have this, at least as an option. http://www.3dsolex.com
-
Alain j'ai un peu joué avec ces choses la dernierement. C'est super chouette ton montage.
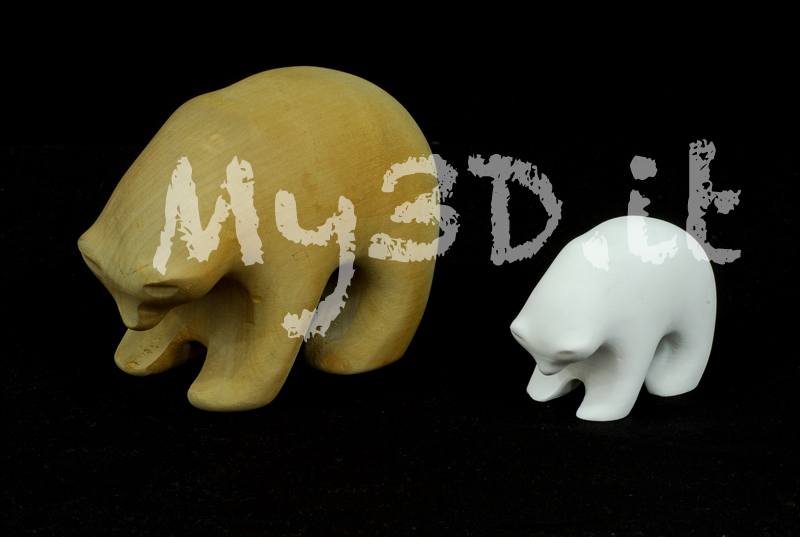
J'ai trouvé que le Kinect c'est très bien, ma ca a des limites, en particulier pour les petits objects. Skanect va se perdre si l'object est trop petit ou avec un profil tres irregulier.
Par contre j'ai eu beaucoup de satisfaction avec Autodesk 123D Catch, je te le conseille vivement. Tu prends un serie de photos de l'object en tournant autour. Tu charge ca su 123D catch et ca va faire un modele. Ca ne marche pas 100%, il faut "affiner la technique". En particulier il faut que chaque photo soit facilement superposable avec la suivante (faut des poiints de repere sur le fond) et les photos doivent etre de bonne qualité (garbage in, garbage out). Quand je suis passé de mon iPhone a ma reflex Nikon, une bonne illumination, un tripod, j'ai eu des resultats absolument surprenants.
J'ai fait un scan d'un os ancient pour une personne a l'Université. Et bien sur j'ai imprimé
Tous les details sont la.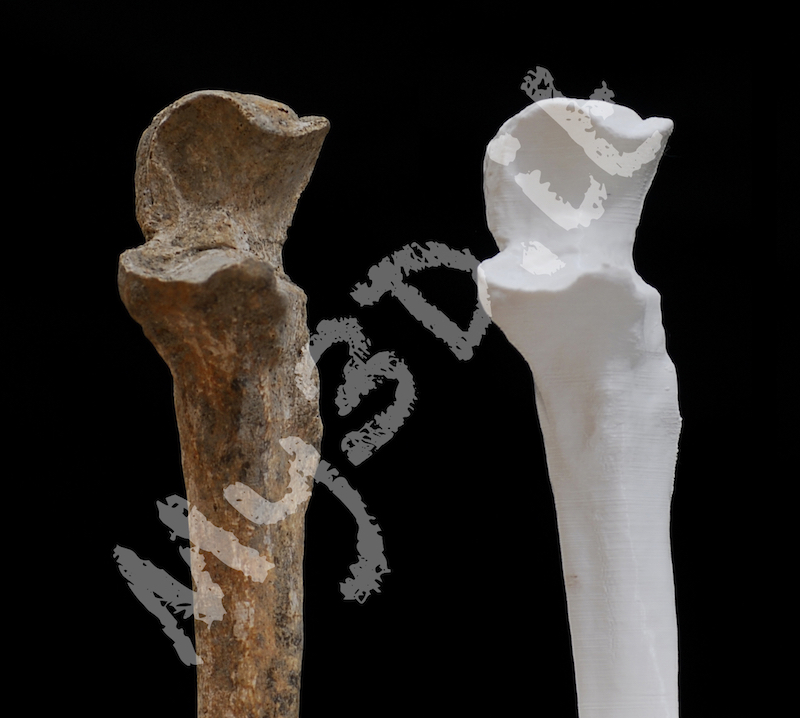
-
My best bet for a couple of minutes was a post I had made, where I stated that the default azure UM filament did not have a good reputation.
Then I thought that clearly, the amount of criticism allowed on this forum, that I do appreciate every day and is something that makes Ultimaker special in my eyes, was not consistent with a ban for this reason. So I visited the page in an incognito window, and then through a proxy, and the truth became evident, it was not me

-
Alcuni usano Simplify3D. Offre diverse opzioni interessanti, come ad esempio la possibilità di aggiungere o togliere supporti "manualmente". Consente di stampare tramite cavo USB. Io lo uso in alternativa a Cura per alcuni files, tuttavia Cura rimane il mio preferito e lo uso per il 95% delle mie stampe. Simplify3D ha la UM2 nella lista delle stampanti, quindi hai un profilo, ben funzionante, da cui partire per creare le tue configurazioni di stampa. Si possono creare diversi profili per diverse situazioni, facilmente. Ad esempio un profilo per il PLA, uno per ABS etc... Poi al momento di fare lo slicing scegli il profilo "giusto"
-
I believe you can do it with Simplify3D although I never tried, you could look into that
-
You are surely aware that the teflon coupler in the hot end needs to be replaced every 300-400 hours or so. Printing ABS further reduces his life. You could very well be in a situation in which the coupler is deformed so that you can still print ABS at high temperature, but PLA will fail.
Disassemble the hot end, take the teflon coupler out and have a good look at it. Also see if a filament freely slides in it, or if there is friction. Replacing it could solve your underextrusion problems.
Also, when going from ABS to PLA there is the risk that you carry along tiny bits of ABS that will clog the nozzle at the PLA temperature. So another thing to look at is that everything is entirely clean, the feeder, the tube, the hot end. Some recommend, when changing from ABS to PLA, to make a "dummy" 1 hour print in PLA at the ABS temperature, to make sure every possible debris of ABS is entirely cleaned out. Then you go back to the PLA temperature and print your real thing.
-
Tu utilise quel materiel avec quels parametres pour tes pieces?
Normalement il faut imprimer plus lentement, a une temperature plus basse et avec ventilation, pour ameliorer les porte a faux.
-
Francesco le tazzine saranno sempre ben lavate. I batteri proliferano dove trovano "la pappa"
Mi preoccupava di più il profilo chimico. Ad esempio sicuramente l'ABS non va bene. XT anche se riscaldato non dovrebbe rilasciare sostanze tossiche. Giustissima comunque la tua osservazione http://umforum.ultimaker.com/index.php?/topic/10132-is-plapha-safe-to-use/&do=findComment&comment=98209
-
Tu as un drone ? j'ai un Phantom 2 avec sa GoPro .
J'en ai plusieurs, surtout des petits (classe 250mm). J'adore les monter
Le Phantom ca me manque, mais les dernier models sont vraiment super. -
Oui c'est subtilement asimmetrique. En tous cas c'est facile: la foto la dessus, c'est dans le mauvais sens, tu vois que la piece pousse un peu sur le devant. Dans le bon sens (180°) la piece reste a l'interieur de l'hot end entierement.
Il y a un sens ?
Je l'ai chargé et l'imprime en XT dès ce soir !
-
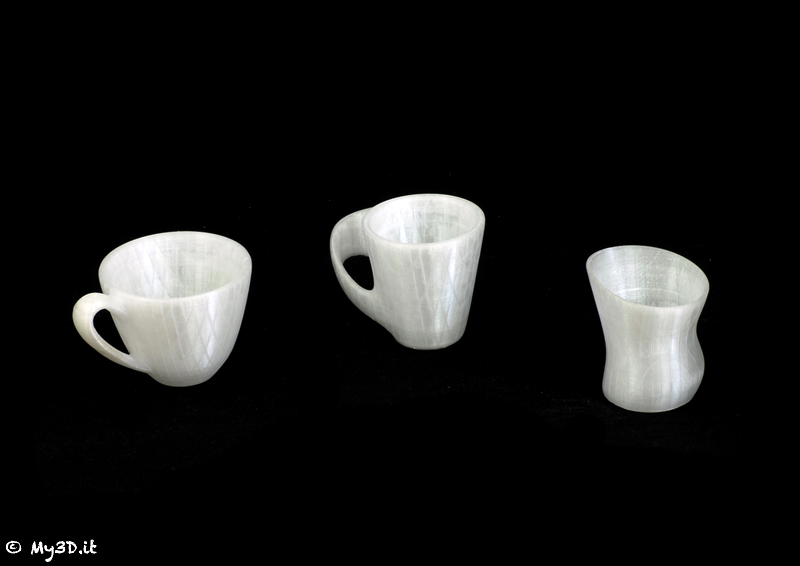
Je suis en train de chercher un bon modele pour faire des espresso cups. J'en ai trouve deux ou trois pas mal.
La meilleure est peu etre:
http://www.thingiverse.com/thing:87907
et puis (jolie mais moins ergonomique que l'on pourrai croire a la regarder):
http://www.thingiverse.com/thing:650695
et
https://www.youmagine.com/designs/abstract-cup
Je suis aussi en train de dessiner la mienne, bien moins jolie de celles ci, mais c'est la mienne
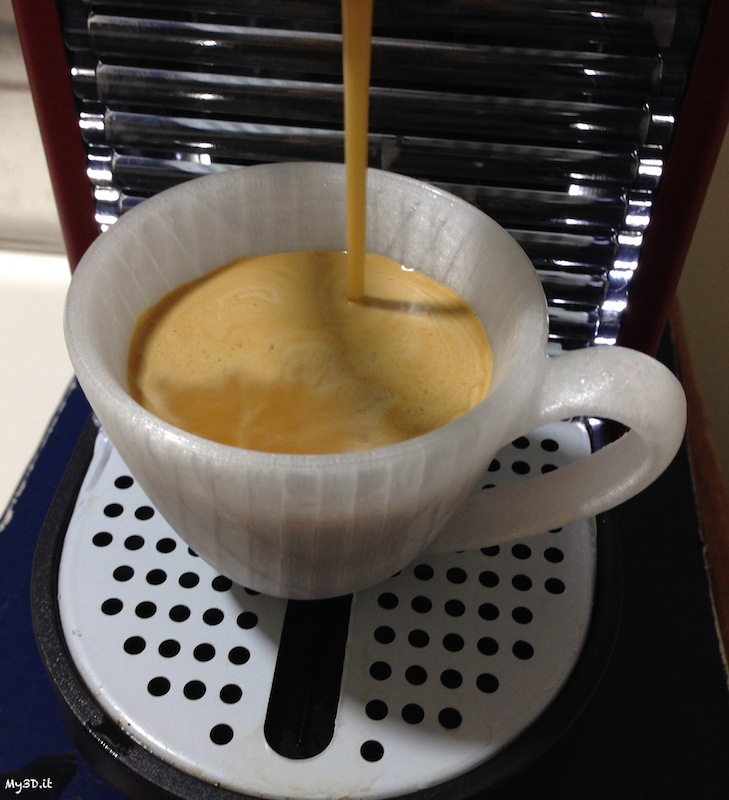
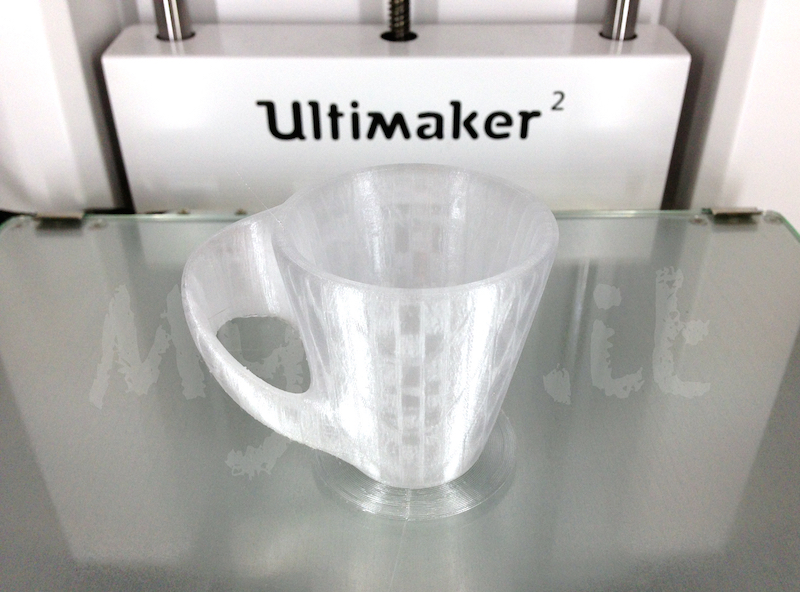
Imprimés en Colorfabb XT. Ca devrai etre resistant a la temperature et etre "food safe" aussi, si je comprends bien.
Outer shell 20
Inner shell 35
infill 35
brim
temp 237
bed temp 70
Layer 0.1
Fans 50% starting 1mm from bed
J'imprime tres tres lentement parce que les overhangs en XT, quand ca vient mal, ca vient terrible. Donc je prend mon temp, mais ca vaut le coup. Ca prend 8-9 heures pour une tasse.
-
C'est tres bien, c'est ton dessin? Bonne idée le billes
Le projet du week-end: des roulements de butée

(Pour faire une table tournante :rolleyes: )
-
Je me disait ben que l'angle n'était pas parfait
Maintenant c'est parfait merci -
Et voilà. Mon coupleur teflon remercie. C'est en absolu la mod avec un meilleur rapport cout/benefices. Ca fait drole de prendre la piece du plateau d'impression et, en un seul geste, la monter sur l'hot end. Merci pour ca Darkdvd.


Possible Overhang Issue ? - Any help greatly appreciated!
in UltiMaker 3D printers
Posted
May I suggest you try the same but change the layer height to 0.1 and lower the speed to 30-40. Mind that in order to control the speed you need to go to the "Advanced" tab of Cura and set the individual speeds for the various part of the print. I would set inner shell-outer shell-infill to 30-40 max and leave the other speeds as they are.
Overhangs get better by lowering the speed and possibly the temperature of the print. So if you go down to a speed of 30, it should be safe enough to lower the temp to 205 or slightly less.