


I've seen this hundreds of times. On my own prints as well. Your nozzle is too far from the glass. So the first layer is barely sticking at all. So as it prints those circles on the bottom layer sometimes they become triangles or other shapes. What kind of printer is this? If this is an Ultimaker then just turn the 3 bottom screws a half turn CCW to move the glass up a bit.
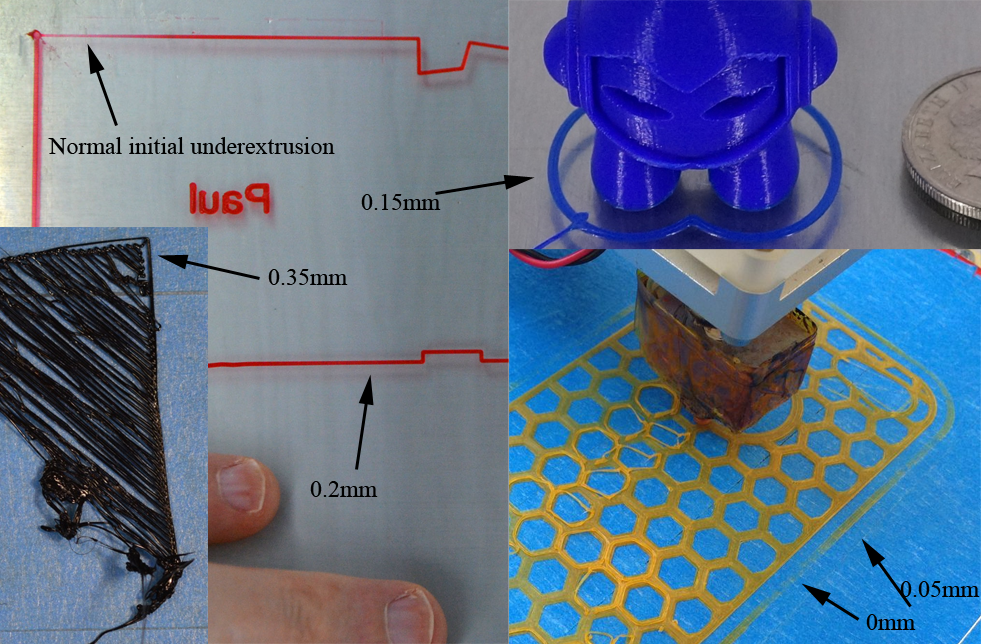
examples of how bottom layer should look. These pictures are from the internet mostly and I am just guessing that the bottom layer height for all of these is 0.3mm (cura defaults to 0.3 or 0.27 depending). The numbers below indicate my best guess as to how far the nozzle was from the bed (again assuming .3mm is nominal).
The blue one is about perfect if you want it to stick really well. the yellow one is a bit too squished but at least the part WILL NEVER COME LOOSE! lol. The black one is similar to what you are printing but even worse than what you did. The red one is okay for small prints but for large prints they may come loose. I aim for red or blue depending on my goals. If I want it to stick better I squish a little more. If I don't want the bottom layer to have a tiny brim I usually just set initial horizontal expansion to -0.2 or so but sometimes I instead go with what you see in red below.
Thanks, would you say that's definitely the case if I don't have any issues on larger objects? It's a creality cr-10. I only have this is issue on this part only but I'll definitely re adjust the bed
All I can say is your bottom layer was severely underextruded but the layers above are fine. That is always a leveling issue.
Does cr10 have auto leveling? If so a bit of filament on the tip of the nozzle can mess that up. I am not a fan of auto leveling.
No its manual. I'll give that a go and let you know. Thanks
-
Our picks
-

UltiMaker Cura 5.8 beta released
ArunC posted a topic in UltiMaker Cura,
Another Cura release has arrived and in this 5.8 beta release, the focus is on improving Z seams, as well as completing support for the full Method series of printers by introducing a profile for the UltiMaker Method.-
-
- 1 reply

Picked By
MariMakes, -
-

Introducing the UltiMaker Factor 4
ArunC posted a topic in UltiMaker 3D printers,
We are happy to announce the next evolution in the UltiMaker 3D printer lineup: the UltiMaker Factor 4 industrial-grade 3D printer, designed to take manufacturing to new levels of efficiency and reliability. Factor 4 is an end-to-end 3D printing solution for light industrial applications-
-
- 3 replies
Picked By
MariMakes, -
-


Recommended Posts
comyz 0
I've attached some more images after adjusting the hex size and thickness. Seems like the printer is printing triangles on the first layer?
Link to post
Share on other sites