

And i just had a brief visit to your stream, looking good! 

And i just had a brief visit to your stream, looking good!
Alright, here is my first question. How does it look behind the z-stage cover (if this cover is removable easily). I am asking because I am curious to see if the design of the brass nut holder changed/improved.
Another question - I read that the UM2 homes at the bottom. Is it true? When you prepare->auto home (or something like this), does the bed lower to the bottom?
Thanks.
I would love to see a picture of the electronics or at least one of the bottom of the printer.
Is the arduino gone or are they still using one? And what about the servo controllers?
( did you solve your layer shift problem yet? )
A closeup-shot from the new feeder would be cool,too! (Even better if taken apart)
How did you put the tape on the print platform? Can you undock it somehow or did you have to fiddle around to get the tape on it?
And last but not least: is their anything behing the motot covers? (Except the motors  )
)
Did not see too much in the pictures you posted in an other thread.
Thanks !
ji
hi nancy,
could you please print this thing:
http://www.thingiverse.com/thing:43910/#files (only the 1CC-Body.stl), and please scale it down to 0.5;)
in a dark color (black/blue) and give some macro pics?
thanks
Franz
Oh shoot! I didn't subscribe to this thread apparently so I haven't been getting the notifications. :( I'm printing the Nervous System bracelet right now. That one seems like a good challenge.. so many overhangs!! You can watch it livestreamed here: http://iama3dprinter.com
After that's done I'll try to answer some of the questions in this thread.
could you please print this thing:
http://www.thingiverse.com/thing:43910/#files (only the 1CC-Body.stl), and please scale it down to 0.5;)
in a dark color (black/blue) and give some macro pics?
Hi Franz.. I don't have a macro lens (just an iPhone 5), and I only have white and translucent PLA--I was planning on painting some of these prints, so I just got the light colors. Do you still want this printed?
When I do autohome, only the XY axis are affected.
Here are some photos of the innards.
Some photos behind the white panel of the motors
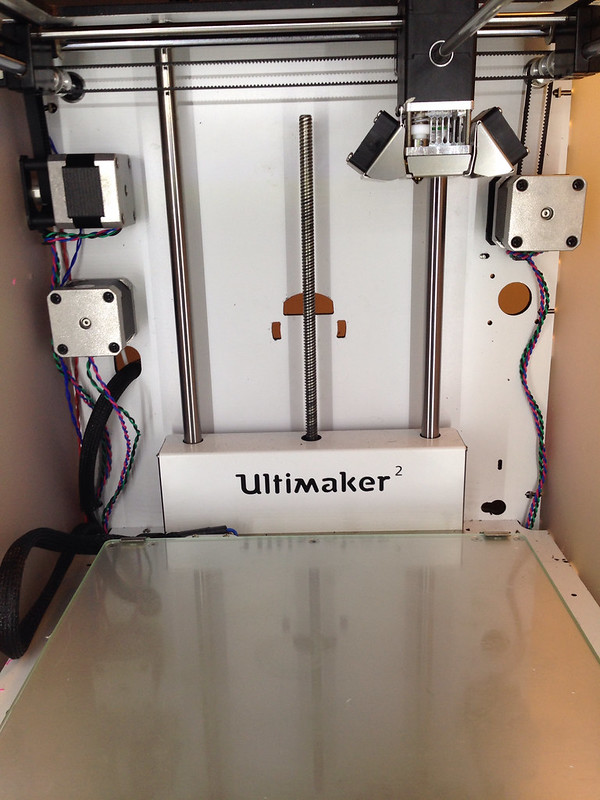
The lower motor on the right drives the extruder. The four screws at the corners of the extruder actually goes into the four corners of this motor. So if you're taking apart the extruder, please also mind the motor. I used blue painter's tape (I have a lot I don't need that now for the build platform) to hold the motor for the extruder up while disassembling the feeder.
Feeder (had to take this apart as well to clean out debris after the ABS print)
All of these inner organs kind of pop out, so be careful when you disassemble the feeder. The screw in the photo is used to adjust the tension. The filament goes through a hole in the white L shaped thing and into the bowden tube, which is inserted through the top.
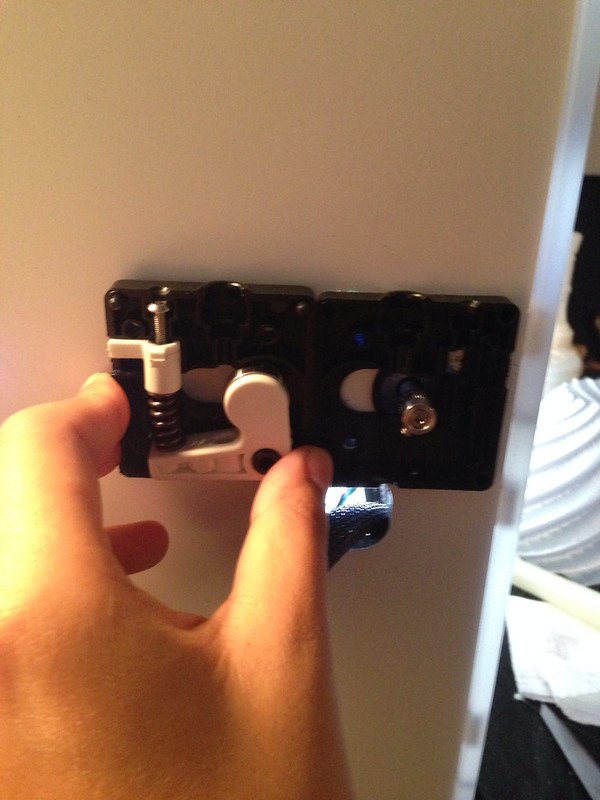
You can kind of see how the two pieces fit together here:
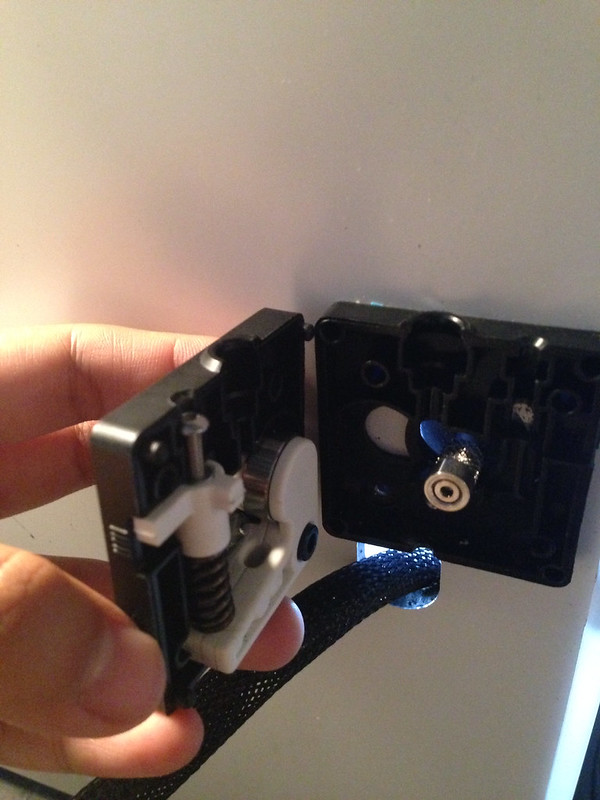
Here's one with the material inserted.

Undocking the build platform, tape, etc.
I don't think I can undock it. Maybe one of the UM guys can tell me if I'm wrong and how to do it. I'm borrowing this printer so the tape is to prevent the platform from being scratched when I remove my parts while I'm getting used to the machine. Now I print directly on the build platform. You can see some of my recent builds here: http://iama3dprinter.com
Enjoy!
Please, please, please post a whole bunch of pictures of the bed, the leveling screws, and the z-axis carriage! They said they won't be releasing any schematics for months. I'm about to build a new one and I would love to Incorporate the new bed style into our printer.
You can remove the glass plate, the front clips can be opened up (turn them sidewards) and then you can slide the plate out.
The aluminum plate under that is the heated platform. It could be removed after removing the glass plate by unscrewing the 3 leveling screws. However putting it back in can be a bit of a pain, and you need to level again if you take this out.
As for the Z platform itself. It's a thick plate with flanged bearing screwed on them. You can see an early prototype here: http://daid.eu/~daid/IMG_20130930_085809.small.jpg (this is a prototype machine, it has lots of odd bits and pieces that you cannot see on the photo. It's by no means an indication that we will add this bed to the UM-Original!)
Thanks for the great pics !
Wonderful that you took the feeder apart! Really interesting what ultimaker did!
And amazing that we got some fotos of the new z screw setup
Great Job iam a new follower o you!!!
Can you make a test, printing some at 0.02 mm please, let on your hands to choose the model.
Would really appriciate if you could print something at 0.02 like NachoKaoS allready ask.
Unfortunately, I don't have the printer anymore. But I did take some photos from under the printer before I returned it. The motor on the right side looks like it's the z-axis motor. The right side is the front of the machine.
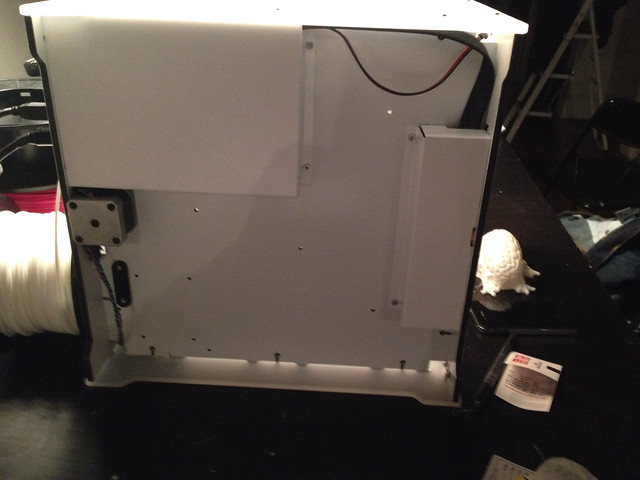
Behind the big panel towards the back..
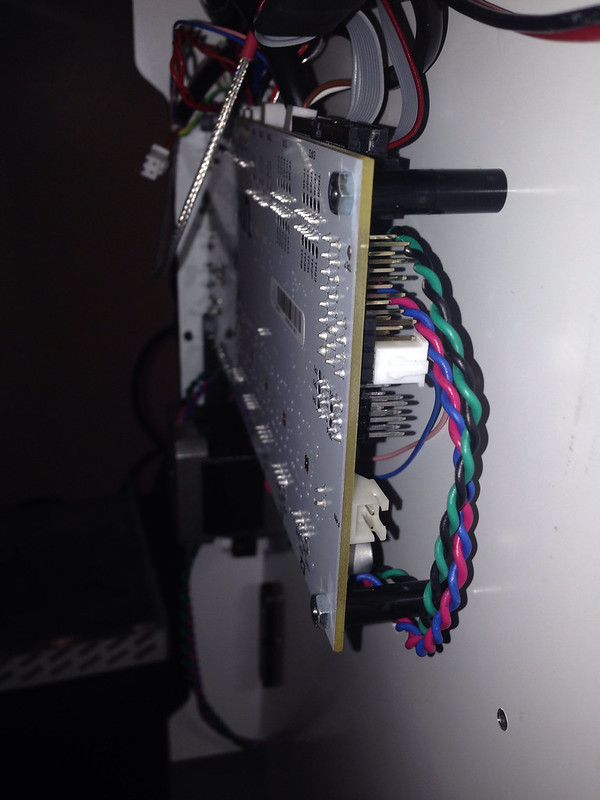
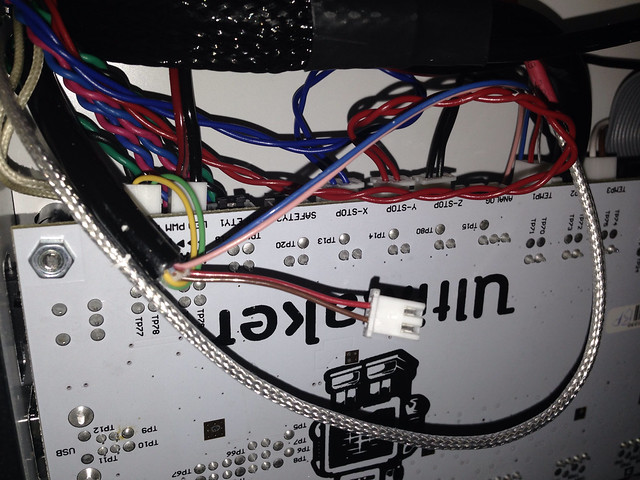
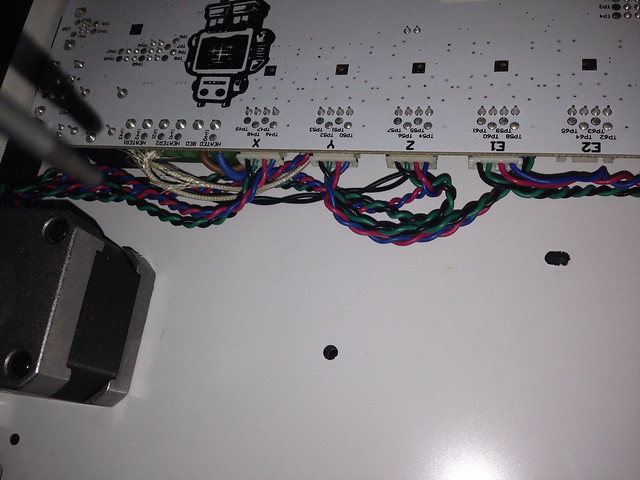
The other panel I had some trouble removing, and since I don't own the printer I didn't want to force it too much. It looks like the other panel hides the display panel.
The printer worked great during the week. The only downside is the price, for US customers, it's pretty high and I don't even want to think about how much it'd cost shipping it overseas. Eek! I loved how accurate it was with the factory default settings. That was pretty awesome. There are some minor issues like print bumpiness that I can work out if I figure out the optimum settings (speed, acceleration, temperature). I tried to push the limits in terms of speed, printing at 100 mm/sec minimum. I know there are ways to print that fast (or faster) and maintain the print quality, but I didn't have time to test all the variations.
Ok. Thanks for the ride, UM2. I hope you guys enjoy these photos.

ArunC posted a topic in UltiMaker Cura,


ArunC posted a topic in UltiMaker 3D printers,


Recommended Posts
SandervG 1,521
nice topic! curious to read what will come out of it.
Link to post
Share on other sites