
Thanks maht. It seems like a complicated process, I hoped for something simpler for chaining a series of hinges with multimaterials.
Any hits as for:https://community.ultimaker.com/topic/31493-merging-models ?
Edited by thorsenrune
Thanks maht. It seems like a complicated process, I hoped for something simpler for chaining a series of hinges with multimaterials.
Any hits as for:https://community.ultimaker.com/topic/31493-merging-models ?
Edited by thorsenruneYou could edit the setting top/bottom angles and Infill Angles. Those relate to the stiffness in a specific direction.
What? I don't understand. If you have overlapping volumes in one model they will be combined automatically.
If you have multiple models you can combine them into one by saving to STL and importing that again.
You don't need to repeat this process. You can just open the saved STL again.
Thanks, if you see the question:
the slicing is different for two parts than for one part, even if the two parts are physically one, sharing a wall. Sorry I don't understand the part of saving from cura .
What's not to understand? Just follow these steps in Cura:
- Export the models on your build plate to STL
- Delete all models from your build plate
- Load the exported STL onto the build plate.
In order to export you do:
File > Export > Choose file type STL.
Thanks, so if I understand correctly when exporting from cura as an stl and then reimporting it models will be merged?.
TPU seems to be strong along the extrusion direction whereas it breaks between extrusion lines. In the experiment with two cubes above for TPU.
However what really interest me is to make a bonding between TPU and PLA.
In the slicing below I've made some stitching (even layer to the left and uneven to the right). Yellow is TPU and blue is Tough. I intuitively think that a strong slicing would be continuous lines maybe going from the rim towards the centre. So far the TPU seems to break along the wall. I'm looking at the infill patterns but ha no clue what would do best.


Any hints are greatly appreciated.
Actually I am currently working on some features to automatically generate interlocking structures for making TPU-PLA bond better.
Currently a good strategy might be to just model the models with an overlap. Cura already generates an alternating structure where the layers of TPU and PLA are interwoven within the region covered by both models.
I'm not 100% sure what you mean by 'strong slicing'. Are you referring to the problem that the Tough PLA is inside the hole and outside the model, but it is disconnected from each other?
Any criteria to take into account for generating the best kind of interlocking are welcome!!
 1
1
 1
1
Thanks bagel-orb. I have used the alternating and its really a good step ahead. I've done some tests if you are interested. 
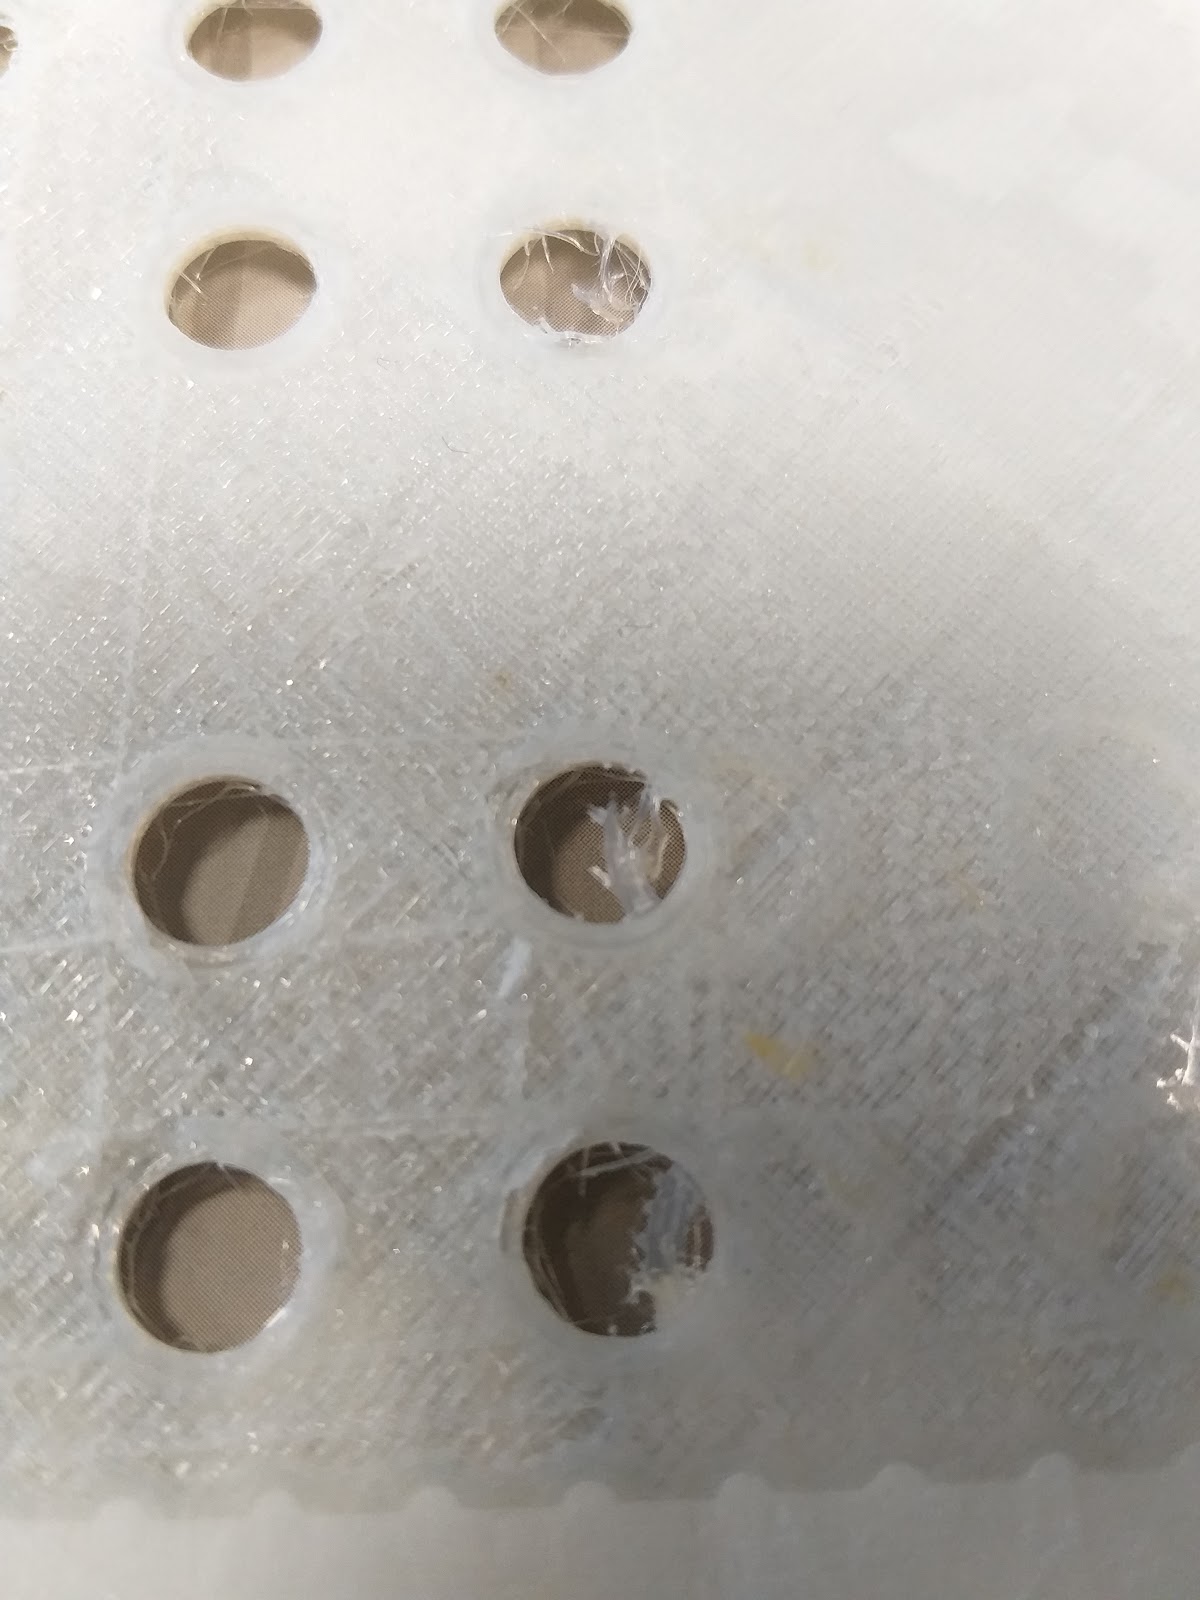
The first issue is that the simple overlap creates layers that does not adhere one to another so it becomes like slate stone. Hence I work with the 'stitching' I create the TPU part with holes (the small ones long the border) and the PLA part will overlap the holes. Then the layered slicing gives a solid 'nail' through each hole.

It works fairly good for producing a 'trampoline' (left) and a living hinge (right). The hinge tends however to break at the border PLA-PTU coinciding with this border in the slicing: 
Therefore I think the problem is the yellow lines (TPU) are parallel to the border.
Now im 'sliced' between two threads so my idea of interlocking is here:

Maybe If you are or know dev people a criterion could be something like: following the normal vector to the edges.
Id like to give it a go on the experimental side. How can I 'force' the slicer to follow the trajectories that I layed out above?
Just to present a milestone using the default engineering setting on the above object: TPU sheet within a Tough PLA frame:
Turns out pretty well. The TPU appears to be solid with the frame. On the back it's almost perfectly smooth. The top of the TPU is somewhat ‘fluffy’

You can force the slicer to do almost exactly what you want if you use surface mode and extrude that drawing into 3D walls.
I must say I don't really understand your drawing, though. I'm not sure what the circle is.
It's better to not generate vertical protrusions. You can generate horizontal protrusions and right above it horizontal protrusions in another direction so that those protrusions connect to each other so that they cause interlocking.
I can share some figures of this idea later.

ArunC posted a topic in UltiMaker Cura,
.thumb.jpeg.0b7a05eafc09add17b8338efde5852e9.jpeg)
Dustin posted a topic in Firmware,

Recommended Posts
Guest maht
Assigning different slicing properties to a section of a part can be achieved with a modifier mesh in per model settings.
This guy made a tutorial:
Link to post
Share on other sites