1 hour ago, glx said:Edit: You didn’t specify your printer, so I wildly guessed it’s an S-line ;).
Ya, its a Pro5 bundle. thanks for telling me about the 3 dots. I'll try it but honestly I think I'll be replacing the whole carriage...
1 hour ago, glx said:Edit: You didn’t specify your printer, so I wildly guessed it’s an S-line ;).
Ya, its a Pro5 bundle. thanks for telling me about the 3 dots. I'll try it but honestly I think I'll be replacing the whole carriage...
The image you tried to attach somehow doesn't work :(. If you haven't already, I'd disconnect the printhead from the printer, so you can work at it on its own.
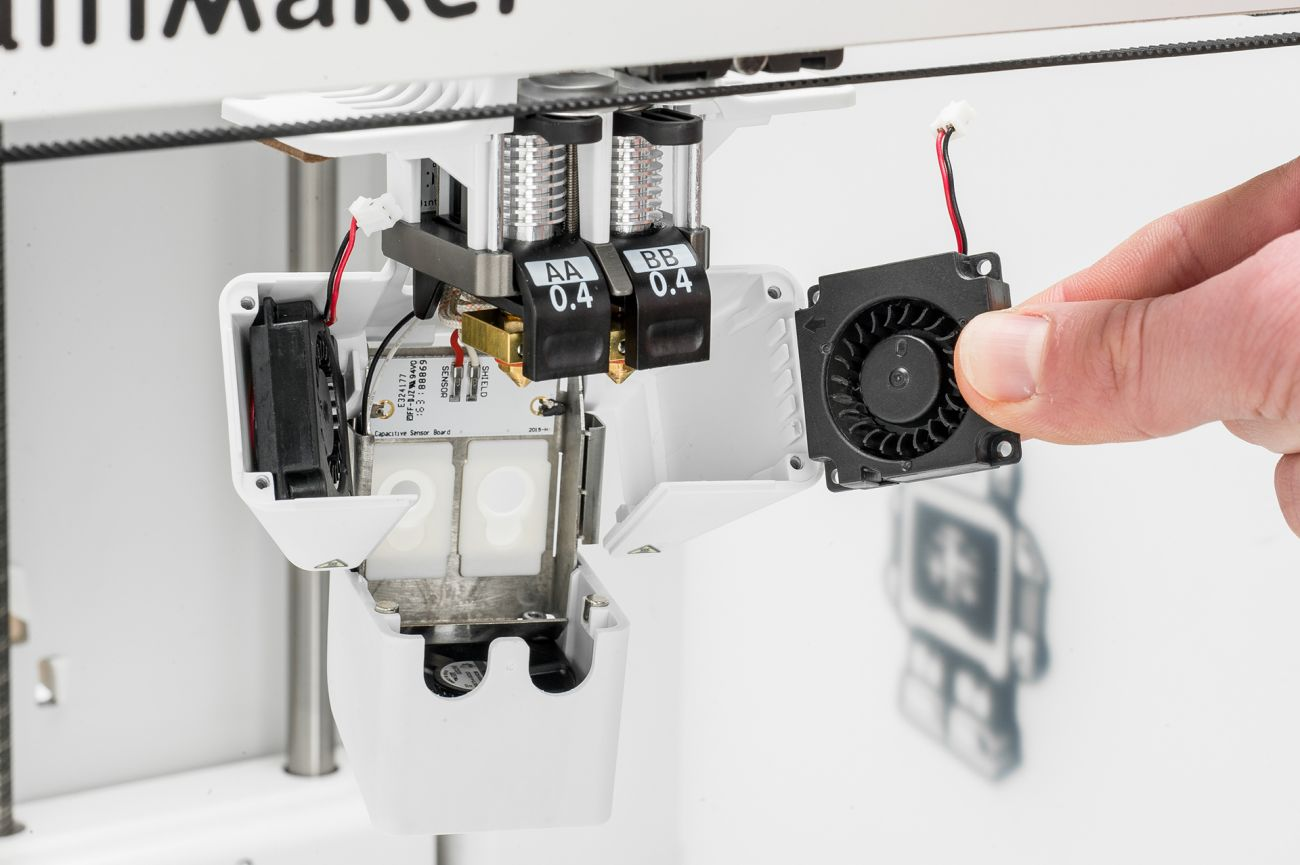
The wires are going into the back of the printhead and are accessible from there, the outer plugs are for the part cooling fans, the inner ones go to the door, the red/white one is for the leveling sensor, the other for the front fan. you can unplug them without disassembling the head but to remove them you'll have to take the printhead apart. You can do that with the printhead attached, but for cleaning up I'd probably remove it from the printer (I haven't done a cleanup, just regular maintenance like replacing fans and a sensor wire tho). To take the lower part off, you have to remove the outer screws (above the part cooling fans), you can then carefully flap the lower part down and backwards, that should (depending on how much material is in there) give you enough room to remove the door (the sensor wire is likely to break but is rather cheap to replace, like 5-ish €).
My printer is currently busy so I just googled some images that give you an idea how it looks:

The connectors on the back are on this PCB: (try not to break it, it's rather expensive)

The large white connector goes to the main cable, the Y rod is going through the hole in the PCB. On the other side are the spring-connectors for the Printcore contacts.
If something breaks, all parts are available on their own through most resellers (if they don't have them listed, you can usually ask them and they can obtain them).
 1
1
2 hours ago, glx said:The image you tried to attach somehow doesn't work :(.
Dont know why, other can see it.. hmmm
anyway, I followed advice from monroe7 and used a solder iron to melt the mess little-by-little until it was gone. turns out the only thing the plastic was adhered to was the silicon membrane so it only took 15 minutes or so to clear it.
Now I gotta remember how to put a new membrane in it 🙂
On 4/19/2024 at 10:06 AM, JTMD said:Now I gotta remember how to put a new membrane in it 🙂
Easy, Old one pushes out, new one snaps back into place.
Went looking for the part number, found this instead.
https://support.ultimaker.com/s/article/1667417570859
1 hour ago, Andrew_F said:Easy, Old one pushes out, new one snaps back into place.
Went looking for the part number, found this instead.
https://support.ultimaker.com/s/article/1667417570859
Easy for you, Difficult for me with my fat fingers, but I got it.
There's actually a much better video on youtube:
Recommended Posts
glx 27
Yes, you can tap on the material-tab (the one where you can change materials and printcores), tap on the desired core, tap on the three dots on the top right corner and then tap "set temperature".
Edit: You didn’t specify your printer, so I wildly guessed it’s an S-line ;).
The UM3 does have that option too, if I remember correctly in the preferences section.
Edited by glxLink to post
Share on other sites