

valcrow
-
Posts
732 -
Joined
-
Last visited
-
Days Won
4
Content Type
Forums
Events
3D Prints
Posts posted by valcrow
-
-
I can't seem to find the article now. But there was one guy who printed a 1 layer thick box as a top surface over everything. This obviously filled in the holes, but gave a nice enough consistent top finish with a bit of exacto work required to cleanup. (not sure if it's practical since you're mass producing these things)
I know you'll wanna hit me for suggesting it, but vertical print?

Hear me out! So you can print like 4 of these on a buildplate at a time right? vertically, you could run 10 or more stacked per printer. Optimize for ~16 hr runs overnight and you may get around the same number of prints per day with better quality.
In some cases, (the image included) the print times are not dramatically different from vertical to flat.
Want me to take a look at the STL?
-
Hey Krys,
Shop3d.ca here, we can get you that sticker if sander hasn't already sent it out. It will be faster coming local in Canada and we likely have you on file if you got the Kit from us.
If Sander hasn't already resolved it, send me a pm!
Hi Valcrow.
I did not know/remember that you were Shop3d.ca. Cool! (Beautiful wind turbine, btw.)

I will pm you shortly. I was not sure if resellers would have extra stickers/parts, or I would have gone to shop3d.ca first.
Thanks so much!
I Pm'ed ya. Thanks, We're all things Canadian & Ultimaker.
We weren't really provided extra stickers, we just happen to have one extra due series of crazy circumstances, so you just happen to be really lucky. And I happened to just be subscribed to this thread to see it!
We do stock almost all parts though.
-
 1
1
-
-
Let me know if you have really lost it and I'll see what we can do to make sure you still get one!
Hi SandervG,
I finally was able to get back to this. I have now quadruple checked. I do not have them. Either I did not get them, or Gremlins/Cats ate them.
Thanks so much for helping me out. Please let me know what I need to do to make this happen.
(I really should not be this excited by stickers, but... I am!)
Hey Krys,
Shop3d.ca here, we can get you that sticker if sander hasn't already sent it out. It will be faster coming local in Canada and we likely have you on file if you got the Kit from us.
If Sander hasn't already resolved it, send me a pm!
-
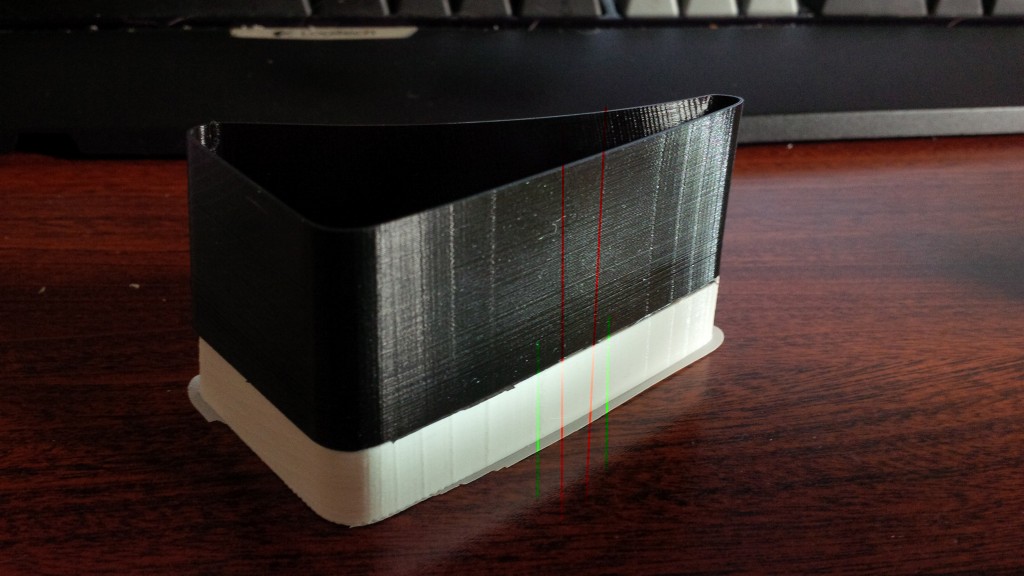
I believe this is caused by the top/bottom thickness. If you set it to 0, you will notice this goes away. (but obviously that's not really an option unless you want an open top, but try to slice it with that setting to 0 to see if it's what's affecting it).
There is a reason for this though, it places material under the next layer's inner perimeter. While annoying, it serves quite an important function IMO. On larger details it will be lines which makes sense, but if you have a gradually sloping side, it will appear to 'vibrate' because the lines are small.
Anywho, that's what I think it is, and if your object looks good it's working as intended.
*edit, I just had another thought after I posted... It could also be that your object has way too many polygons.
-
If you haven't already, check the little gear on the extrusion motor. You can undo the feeder without messing with anything else, you can even leave filament in there. Take off the 2 screws top and bottom of the feeder and check the gear that's attached to the feeder motor. If this isn't flush with your motor, you'll need to press it in with a small dab of glue. If this gear is off, it will cause the symptoms you describe.
-
I saw these guys at CES and makerfaire (they were relatively close to UM booth Gr5)
Their print quality on display is usually consistently great! Like most dual extruder printers on display at trade shows didn't have a lot of dual samples.
I especially like their wifi, screen, build volume, enclosure and purported ability to continue a print after failure/power outage. Pretty good price too! However bed level makes me a little worried like Labern said.
Probably one of the better KS machines out there. I think they just used KS as marketing and pre-orders and not so much to start production like a lot of startups.
-
I've tried innoflex 45 on UM2+ and I was quite impressed. It is flexier than UM PLA flex and prints substantially better/easier in my experience. (but then I was using a 2+)
This is also the only flex I've had success with using retraction. But I did experience a bit of underextrusion as you describe where the lines weren't touching. slowing it down to about 20mm/s and increasing temperature to about 220 seemed to do the trick. You can also increase flow a little bit. But the danger here is if you increase it too much, if you bunch up too much of the material at the head it will outright fail eventually during a later part of the print.
For the bunching in the feeder. Take out your bowden tube on the feeder end and see if it has the taper. The older UM's didn't have a taper on the interior of the bowden and it caused the filament to sometimes hit the edge of the bowden and then curl up.
-
Hey Colin,
If you're having print problems with the two parts connecting you can try to print with some infill (15%) I recommended 0 for weight and surface quality, but infill will prevent the wings from moving too far apart in the wrong direction.
Are you printing PLA? Other materials may warp more and be more difficult in general.
On a side note, they were spinning on their own during makerfaire with the air conditioner
-
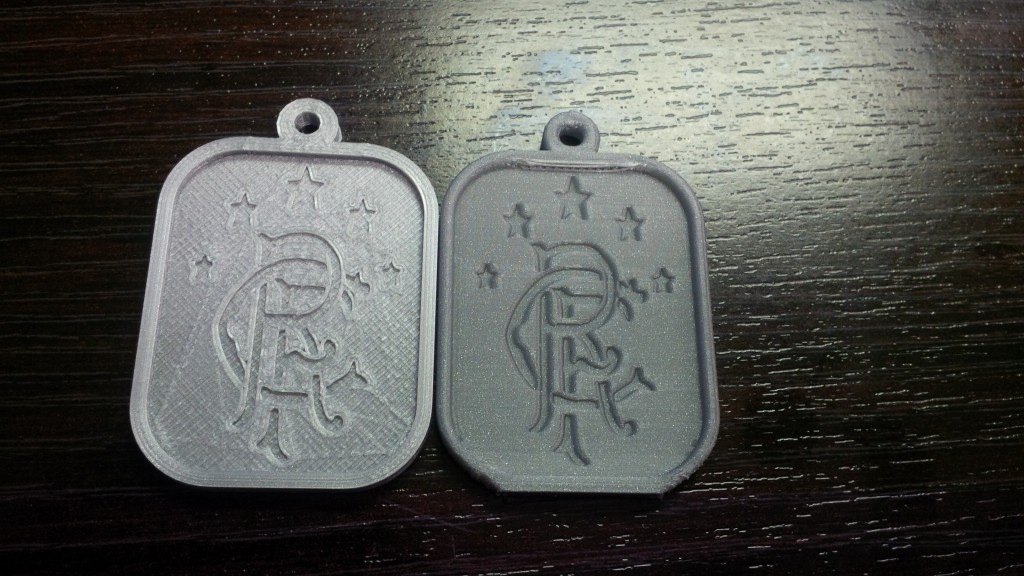
I also printed Valcrow's «curve-test-print», to see how this print will be. However, I never printed this before this change, so I have no idea what to expect.
Those are nice curves and steps not present
-
1
-
-
Wouldn't it be weird if both machines, from different manufacturers show the same occurrence?
I have also tried this on a UP plus, Upbox, and the problem occurs on there as well. I also tried a UMO(non+) which has a different board and it happens there as well.
I made a few specific test pieces for this issue specifically https://www.youmagine.com/designs/curve-test-print
-
+1 for clean bare glass. No cleanup and easy removal + sticking is the way to go. You just need to be fairly good at bed leveling and clean glass cleaned with alcohol occasionally like stehpan suggested will do wonders.
Even works for PET, PETG, some copoly. ABS, Nylon and the weird stuff usually requires more work though...
-
I think Chrii has a hack to correct this. We chat on chat about it sometimes. pinging @chri
-
I find different brands of PLA do have different properties. You will notice this even between different colours. Even with a perfectly squished and flat first layer, it could peel off with enough head movement over time.
I notice this especially since I print a lot of small footprint parts. Some PLA absolutely requires a brim, and others are fine without. UM filament sticks really well to glass without anything, clear/natural colour tends to stick more than heavily pigmented ones.
I usually clean my glass with a sprits of some isopropyl alcohol and then a light wipe with a damp cloth.
-
1
-
-
Did you recently change your brand of PLA? some PLA's stick better than others on plain glass.
-
I've just been looking into problems with under extrusion on my UM2. I'm using 220C at the head and 60 at the bed. What I did notice while printing (after very much adjusting and fiddling of the temps etc) was that there was a little buzz, every 5 seconds or so, from the back of the machine. Only by coincidence did I find out that this is the filament slipping in the feeder, and that this causes (strangely!) under extrusion! I have now adjusted the tension on my feeder, and the prints have improved, without changing the temps or speeds. It seems counter intuitive to me, but has actually made a difference.
The other thing that I have observed, is that the same settings do not necessarily work for PLA from another manufacturer. I have now tried two, but the second was not successful, and I could not get as good prints from it, despite changing many settings to try to compensate.
I hope these insights help. I would highly recommend http://support.3dverkstan.se/article/23-a-visual-ultimaker-troubleshooting-guide#underextrusion as a great source of solutions.
I think OP has a UMO, the UMO has a geared feeder already so it's pretty strong, and doesn't quite click. It tends to grind filament rather than click if there is excess friction.
I think the main cause of the feeder clicking on the UM2's is speed to temperature ratio. The more volume of material you need to extrude the hotter your nozzle needs to be. There's a few things that affect the extrusion volume, nozzle size, layer height and print speed. If you increase any of those, you need to increase temperature to compensate or it won't melt fast enough.
The infil speed defaulted in Cura was really high way back when compared to the shell speed which caused all sorts of extrusion problems. I think they dialed it back now.
-
at 60mm/s 220C is OK. After it fails, check your filament to see if it's grinded down. (a semi circle?)
Also another thing to check, stick filament in by hand without the bowden tube to feel if there is some excess friction.
-
Another try with print speed @ 25 ...same problem but a bit later. I mean not at the begining of the print.


[material]
name=INNOF45
temperature=255
temperature_0.80=255
bed_temperature=30
fan_speed=50
flow=110 (recomended flow for this material is 100-130)
diameter=2.85
Layer height 0.20
Print speed 25
Nozzle size 0.8
Infill speed 0 (zero)
What kind of settings are you using for flexible printing?
I've used the innoflex 45, it's quite good, can even do retractions.
Your settings don't look too far off from mine, but maybe you have a bloackage somewhere if there is resistance at the head then it could cause the curl in the feeder.
I use this:
[material]
name=INNOF45
temperature=240
temperature_0.40=240
bed_temperature=50
fan_speed=100
flow=100
diameter=2.85
Layer height 0.20
Print speed 25
Nozzle size 0.8
Infill speed 0 (zero)
So not too far off from your settings. Basically PLA settings with a bit more heat. You may be just hitting the extrusion volume limit of the material. maybe drop the layer height down to 0.1, or your speed down to 15?
Also clean your nozzle super well before using flex!
-
Hi' Valcrow, Checked today and was listed as"+" but I had to update the firmware 3 times before it accepted the update and I had checked USB connection and the lead,all OK. It is now working fine. Thanks again for your help. Oldtimer.
No problem! glad it worked out!
-
1
-
-
No because then the fan shroud will hit the next print and cause all kinds of bad noises.
-
You can do it, but you'll have to print in "all at a time mode" which you can get to under the tools tab. So instead of printing one at a time like it is in the picture it will print the whole bed at once.
There's a few disadvantages of doing this, one failure may cause your whole bed to fail. Whereas 1 at a time will usually be salvageable. And also more stringing will occur between parts, but depending on the specific piece, it might not matter, and it might not happen.
The advantage is that you can place almost double the parts if not more on the same bed.
-
Did you accidentally upgrade the firmware with the Extended+ setting? This will give the wrong Zheight value, and since 0 Z is from the bottom it would explain why it would hit the nozzle.
I would update cura, and reinstall the firmware again making sure its UM2+ and then do a factory reset after the firmware update and try again.
-
2
-
-
Did you mix the direction of the bowden tube? The one on the feeder end has a 45 degree bevel on the inside of the tube so the filament is guided into it. The nozzle end of the tube is just straight. If you mixed them up there's a chance that the filament will just hit the edge of the tube and stop.
-
Which innoflex? 45 or 60? also increasing the temperature to about 230 would be best and slowing it down a smidgen. around 35-40 mm/s (make sure your infill speed isnt set to 80)
-
Hi!
I designed the turbine, did you print with these settings? this goes through the printing and assembly.
https://ultimaker.com/en/resources/19639-vertical-axis-wind-turbine
This IS a difficult print because of the connection, so you'll need to use our settings exactly. And you need to make sure your bed is well leveled and it has good adhesion.
to answer your questions though, the wings should join together, you shouldn't be getting the big gap. There usually is a little bit of artifacts, but not that huge. Again refer to the settings on the guide.
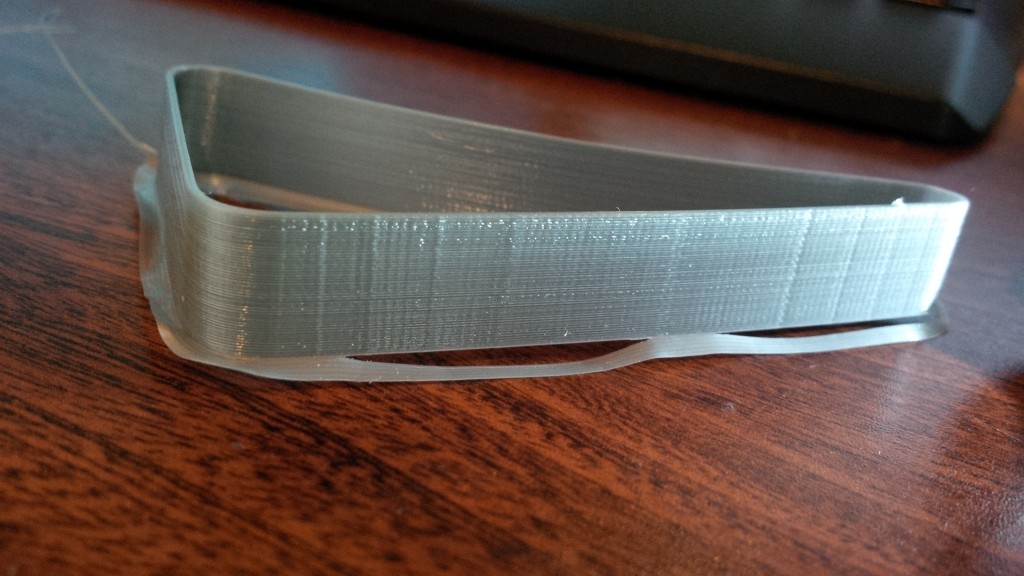
The kind of flaws I was getting is shown here:

When assembling the turbine, you need to follow the guide to the letter as well. The 3 blades should be joined first by the circle nut. Followed by a partial insert of the pins. Once ALL the pins are partially inserted, tap them in.
As for the bearing choice, sorry I couldn't get something more common, I had a bunch of these at the time. The stand can be easily modified to accommodate other size bearings in mesh modelling software.


Are my fans dead?
in UltiMaker 3D printers
Posted
You can check by going to maintence -> advanced -> fan speed and set to 100, if it doesn't spin something's up.
I would check the connection of the fan wires at the head first, it's under the black wrap near the head, just check to see that everything is connected.
Secondly, I would check to back to see if there's any pinching of the wires between the print head pieces. If you did maintenance recently, you might have pinched a fan wire.
Lastly, is the 3rd fan running? when your nozzle is 60+ degrees? The fan in the back blowing forward.