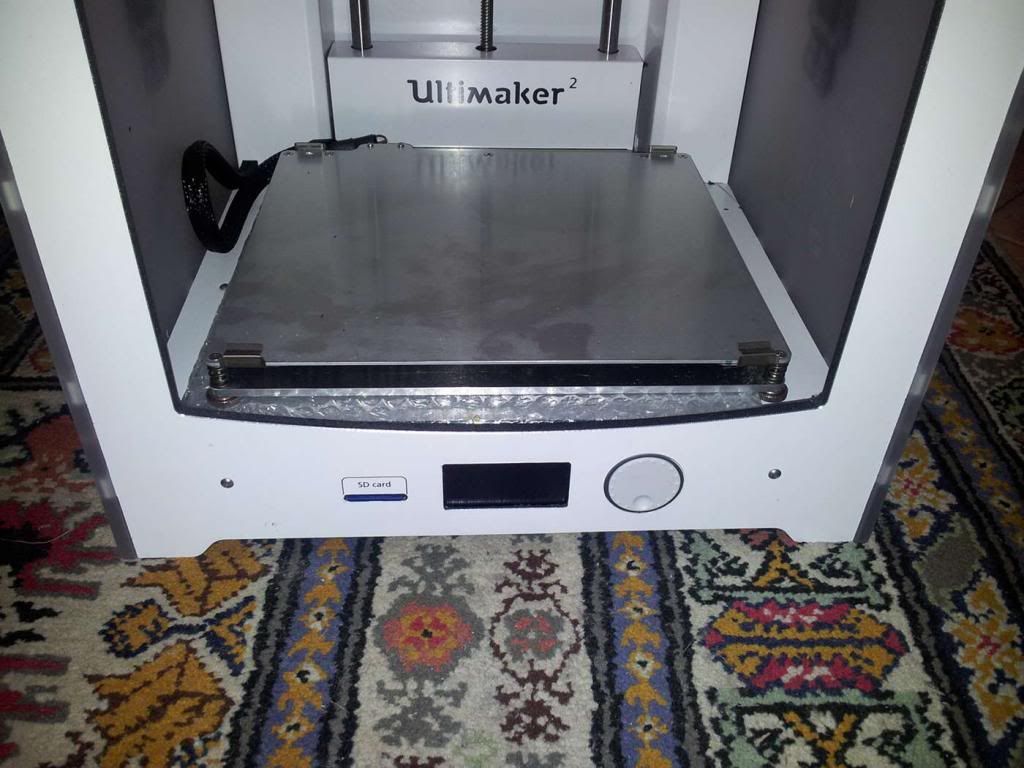
Jump to content

Unpacking UM2


mcmarkus

Recommended Posts

Posted · Unpacking UM2

Hi,

finally my UM2 arrived today, awesome machine!

But, unlike the manual, the packaging is a little different, so before making mistakes and damage, I need some infos to proceed.

1) I've found two carton frames that locked the head and I removed them (one of them was really difficult to take out), no other items, is it correct? Or I need to look for something else to unlock the head?

2) The glass basement is located under the moving plate; at the moment I didn't connected the UM2 to the power supply, but I figured that I need to move the plate. Is it correct?

Waiting impatiently... :-)

Thanks in advance,

Marco.


  • Link to post
    Share on other sites

    Posted · Unpacking UM2

    make sure your glass plate is carefully clicked into place on the metal heated bed.. there are 4 little metal clips on the heated bed that should be clicked onto the glass.

    Also please check if there are cable ties around the axis blocks.. if you see the black bag ties... carefully remove them.

    Any other packaging you find... just carefully take it off..

    Then power on your new baby and go through the inital setup... ie... plate height and leveling and loading material.

    You should be happily printing in about 5 minutes :smile:

    Ian :-)


  • Link to post
    Share on other sites

    Posted · Unpacking UM2

    You can manually turn the screw to move the bed up (beware, it's greasy :) ).

    Or you can carefully grab the bed towards the back of the printer and pull on it upwards. If you grab it at the front you put unnecessary torque on the bed and bend it upwards.

    I guess you could also power the machine up and use the Maintenance menu to move the bed up but I'm not sure how much room is left under the bed so I don't know if it will hit the glass when it tries to home the bed. Therefore I can't recommend it.


  • Link to post
    Share on other sites

    Posted · Unpacking UM2

    Just turn the screw man :) It's no big deal.


  • Link to post
    Share on other sites

    Posted · Unpacking UM2

    Well,

    I will follow your suggestion.

    Thanks,

    Marco.


  • Link to post
    Share on other sites

    Posted · Unpacking UM2

    The um2 is very tough. Don't worry so much.

    Before powering on I recommend you push the black print head around. If it doesn't move then look for cable ties holding it in place.

    Pretty much all the servos and mechanism is designed to run uncontrolled and slam into the end and nothing should get damaged (other than anything you might stick in there like your hand).


  • Link to post
    Share on other sites

    Posted · Unpacking UM2

    Just turn the screw man :) It's no big deal.


    It's no big deal as long as you have access to soap and water to clean your fingers after.


  • Link to post
    Share on other sites

    Posted · Unpacking UM2

    UR right, but...

    I'm a watchmaker and I've a lot of finger protections, and I'm so used to swim in the grease... :-P

    M.


  • Link to post
    Share on other sites

    Create an account or sign in to comment

    You need to be a member in order to leave a comment

    Create an account

    Sign up for a new account in our community. It's easy!

    Register a new account

    Sign in

    Already have an account? Sign in here.

    Sign In Now
    • Our picks

      • UltiMaker Cura 5.7 stable released
        Cura 5.7 is here and it brings a handy new workflow improvement when using Thingiverse and Cura together, as well as additional capabilities for Method series printers, and a powerful way of sharing print settings using new printer-agnostic project files! Read on to find out about all of these improvements and more. 
         
          • Like
        • 18 replies
      • S-Line Firmware 8.3.0 was released Nov. 20th on the "Latest" firmware branch.
        (Sorry, was out of office when this released)

        This update is for...
        All UltiMaker S series  
        New features
         
        Temperature status. During print preparation, the temperatures of the print cores and build plate will be shown on the display. This gives a better indication of the progress and remaining wait time. Save log files in paused state. It is now possible to save the printer's log files to USB if the currently active print job is paused. Previously, the Dump logs to USB option was only enabled if the printer was in idle state. Confirm print removal via Digital Factory. If the printer is connected to the Digital Factory, it is now possible to confirm the removal of a previous print job via the Digital Factory interface. This is useful in situations where the build plate is clear, but the operator forgot to select Confirm removal on the printer’s display. Visit this page for more information about this feature.
          • Like
        • 0 replies
    ×
    ×
    • Create New...