
Hello,
Sorry about the pictures, I have some troubles finding the right way to get them in the forum. I hope this works:

Hello,
Sorry about the pictures, I have some troubles finding the right way to get them in the forum. I hope this works:
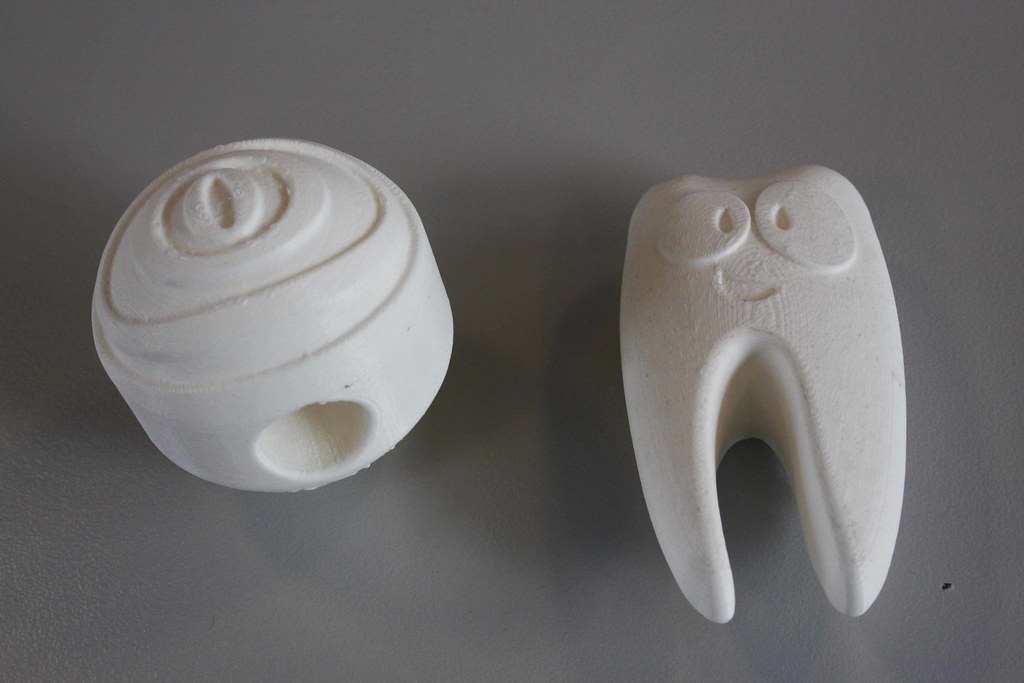
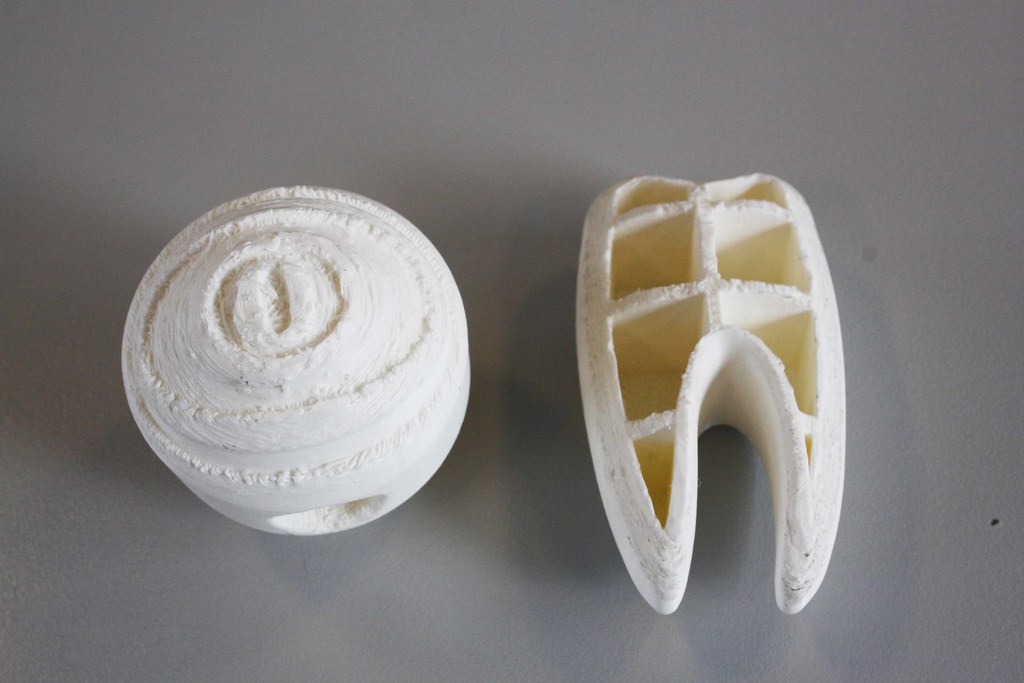
The reason the surface is rough is because it's partly printed in air, just barely resting on the support structure underneath. Imagine taking a few strands of cooked pasta and laying them across something, what happens? They sag down under gravity. The same thing is happening with the plastic as it gets laid down by the printer if there's nothing underneath. Also think about what would happen if you laid down a freshly painted piece of wood on top of something, what happens to the paint? It gets stuck partially to whatever you put it on and the surface will be rough and ugly. Basically the same thing happens with the plastic as it gets stuck on the support structure.
You can tweak the support settings to make it more dense to give more support (less air to traverse) but you will never get a surface quality that matches the top side. Well, at least not until we can get dual extrusion perfected and a support material that can be washed away.
For your tooth (at least that's what it looks like to me  ) there you could try printing it standing up on the roots. But the contact area will be very small and it might get knocked over. So what you could try is sinking it into the platform slightly in cura so that there's a bigger foot print to grab onto the bed. The downside then would of course be that the bottom of the roots will be flat but maybe some sanding could take care of that?
Failing that, splitting into parts and gluing together is the best compromise IMHO.
Hey, thanks for the reaction.
I understood why it happend and I already tried differnent support structures to come to this result.
If I understand correct, there is no easy solution for it and I have to experiment some more with printer setting and suport structures to get is as smooth as possible. The prints on the pictures are made with standard Cura support settings.
PS: The tooth is indeed a tooth  . It is a design for a dogsnack, I am going to try to print it upstanding. I want to avoid splitting it it in half as much as possible.
It`s a very tricky problem to overcome, but actually splitting parts into two is not much of a hassle, as PLA sticks very well and quick with normal type super glues. Aligning the two parts perfectly can be an issue, but if careful and with patience glue and sticking two parts together will probably yield the best results.
Come on washable support material & dual extruder
Hi
I have the very same problem with even a flat surface. I would really like to solve this issue somehow because sometime it's not an option to divide the model into sections. This worked quite well with my previous printer (MakerBot 2) so I was quite surprised that this is even an issue...
Thanks in advance
This worked quite well with my previous printer (MakerBot 2)
As far as I know, the Makerbot and the Ultimaker are not very much different in the fundamental details. If you print the same material at the same temperatures at the same rate, I don't know why they would behave much differently. Could it be that you are printing different things or using different materials, or temperatures?
I was getting a little bit better performance on overhangs with a MakerBot 1 than my new UM2 but there were some differences. For example the MB1 had a larger nozzle, and it was extruding more slowly in mm/s (because it could not reliably go faster), and I was using ABS then, and now I'm using PLA.
With the higher extrusion and solidification temperatures of ABS, I guess it will cool and harden more quickly for a given ambient temperature, which might help overhang behavior. And in fact, according to this thread: http://forums.reprap.org/read.php?262,117402,120058
some people do report ABS works better for overhangs than PLA.
The fans would probably cool more quickly if they weren't fighting the heated bed. One thing I've been thinking about is pausing the print after the first few layers are stuck, turning off the heated bed, and manually gluing the part down around the edges with PVA glue (regular white glue for paper). I tried stopping and manually gluing a tricky part last night and it did prevent parts from getting knocked off that were knocked off on the first attempt, I did not turn off the bed though but since the glue seemed to work, I will try that next. Of course, the white glue is not that strong and can be peeled off later, or I suppose dissolved in water.
Update: I just tried changing tip from 210 to 205 C, slowing print speed to 75% and turning off the heated bed completely after the first few mm (pausing print to add some white glue around the edges, to help adhesion). With this set of parameters, I would say my print quality is definitely improved.
By the way, I think only the left-hand fan near the print head has any use. The right-hand fan, by the unused slot for an optional second print head, would only help that head, because the air doesn't really reach the other side. I notice some problem spots during the print (curled up edges on overhangs) and they are always on the right-hand side of a completely symmetrical model. The matching edge on the left-hand side is perfect. This points to the lack of airflow from that side. What I need is an alternative fan shroud that ducts the right-hand fan air over to where it is needed.
I can see I'm not the first to have that idea:
https://www.youmagine.com/designs/fanduct-another-idea
http://umforum.ultimaker.com/index.php?/topic/5176-updated-um2-fan-mount/
I tried your settings and printed at 200 °C at a speed of 75 %, fans 100 % and only heating the bed in the beginning and let it cool down after a few millimeters. The quality definately improved, it is not perfect yet but it gives certainly a more consistent look.
I tried your settings and printed at 200 °C at a speed of 75 %, fans 100 % and only heating the bed in the beginning and let it cool down after a few millimeters. The quality definately improved, it is not perfect yet but it gives certainly a more consistent look.
(75% or 100% "speed" means nothing untill you specify some value with speed units like mm/s)
(75% or 100% "speed" means nothing untill you specify some value with speed units like mm/s)
Ok, it depends on the initial speed of the printer, I have only used the default setting and varying it in persentages on the printer. The speed of my printer was set at 50 mm/s so 75% of that will be 37.5 mm/s.

ArunC posted a topic in UltiMaker Cura,


ArunC posted a topic in UltiMaker 3D printers,


Recommended Posts
skint 61
I cant see your images
Link to post
Share on other sites