Jump to content

Problem with Bed Leveling


Edel

Recommended Posts

Posted · Problem with Bed Leveling

Hi

everytime i have really big problems with leveling...

my first problems are the different thickness...

Normal Copypaper ist 0,10mm

Ulitmakercard is 0,12mm

other Copypaper 0,12mm

Which i correct?

So when i do the Bed Leveling procedure with ulitmakercard, and push it back and forth and then i feel a frist small contact of the nozzle on the paper, then i do a little more down that the pushing is stronger between paper and nozzle...

But then its still to high, the frist layer is only a single printlane....

if go more down, its sometimes ok....

but if i want do this exactly this way the next time.......no....nothing works like that here and i must do the complete research of leveling again.......

The second big problem is after the print.... I understand it very well ;) if i pull a 3d print of the warm glass plate, that the leveling is then gone....

But when i push it 4 or 5 hours later a very loose part of the plate its the same here, the next print has no correct leveling....

I never can do a secound print on a leveled plate....

and i do not understand were the problem is...

i hope somebody can help me a little

  • Link to post
    Share on other sites

    Posted · Problem with Bed Leveling

    Some tips for leveling..

    When leveling the print bed.. pre-heat the bed to the temperature you would normally print at and let it stay there for a couple minutes to let the metal and glass do whatever expanding or warping it might do.. Then start your leveling processes..

    As for how high to level the printer this really depends on the layer height your trying to print at.. the Ultimaker Card should be fine for .2 prints and probably .15 prints but doing .15 and down I would recommend using the paper.

    Also another tip.. when running prints set some brims that are off set from the print a little bit (not touching it) and print like 2-6 brims (pending how big the print is) and watch it as its printing each brim and you can quickly make slight adjustments to the knobs under the bed while its going around to get the right levels that your happy with all the way around the bed before it moves in a step and starts the real print.

  • Link to post
    Share on other sites

    Posted · Problem with Bed Leveling

    Hi,

    How old is your printer? Do you have an old firmware? There was an issue with one firmware with bed levelling maybe this is the cause? I would advise to update to the latest firmware if ou didn't update it recently.

    Normally your bed should not be relevelled every time, i leave mine for several weeks and i have no problems. Also make sure that the springs are not too loose when you level the bed

  • Link to post
    Share on other sites

    Posted · Problem with Bed Leveling

    I m not sure which information is now the firmware....

    on the UM2 i can read:

    Jul 23.2015

    10:31:27

    Version 15.04.2


    Normally your bed should not be relevelled every time, i leave mine for several weeks and i have no problems. Also make sure that the springs are not too loose when you level the bed
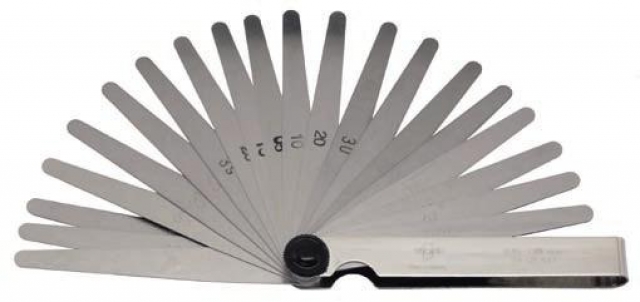
    Which spring do you mean, the 3 unter metal plate? no no the are tight...

    but the case, i wrote, when the bed is still hot, and i want to get the print ot the glass plate and is so tight on the plate, and i pull with more force, then is gone the leveling, correct or?

    But this i dont do...

    But which is now the correct nozzel and glassplate 0.10mm, 0,11mm or even less then 0,09mm?

    i want to order today this 103_0.jpg

  • Link to post
    Share on other sites

    Posted · Problem with Bed Leveling

    I think it should be at 0.1mm

    The firmware you have should be ok

    When you remove a print, wait for it to cool down, it only takes a couple of minutes and the print will come out easily. Of course if you push or pull on the bed it might cause the level to be wrong... as i said i barely relevel mine and have no problems. I even transport the printer and don't need to relevel...

  • Link to post
    Share on other sites

    Posted · Problem with Bed Leveling

    As for how high to level the printer this really depends on the layer height your trying to print at.. the Ultimaker Card should be fine for .2 prints and probably .15 prints but doing .15 and down I would recommend using the paper.


    Hi @JATMAN I am wondering what your logic is for the above recommendation; could you explain a bit please.

  • Link to post
    Share on other sites

    Posted (edited) · Problem with Bed Leveling

    JATMAN!!! that like BATMAN? lol I like that.. (its actually an abbreviation :p )

    @yellowshark, when printing the first layer regardless of thickness your slicer software (I presume cura is used in this case) will -over- extrude the first layer to help with sticking to the bed as well as compensate for any out of alignment of the bed leveling.  

    So lets consider a scenario for a moment.. say we level the bed with a Ultimaker card specified in the first post which measured in at .12 and we want to print at .2 layer height.  presuming cura default (at least on mine it did this) to do a .3 first layer would be okay because (generally a even multiplayer of your set layer thickness  at around 100 - 150%) but basically your trying to force .3 worth of material in a gap of .12 this will force the layer to be bold. But will help it stick as well as compensate for any warp in the bed that might make the gap larger or small than .12

    Considering above.. Now we want to print at .1 layer (or ever .050!).. well .12 is quite high and we will need again to use a .3 first layer to get a good first layer and stick well. But this could make for a ugly first layer due to the rest being .1 (or .050) so lets level with .10 paper now..  this brings the gap down considerably across the surface of the bed. Remember if there is any up warps (all printers have some sort of warp in the bed) we just potentially caused the nozzle to get closer than intended to the surface. Pushing .3 into this now smaller gap would cause lots of over extrusion as well as back pressure on the extruder depending how hot your printing. So lets use a .2 first layer for our print now.. should get a nice clean first layer with minimal over extrusion and it wont look as noticeable compared to the other layers printing at .1 (or .050)

    Just how I look at it.. I always level with thin paper I think mine is actually thinner than .010 and I always print .1 to .15 layer height rather than the norm of .2 so I have my first layer set to .2 with a faster print speed to prevent too much over extrusion.

    Sorry that was sorta extreme explanation.. :O

    Edited by Guest
  • Link to post
    Share on other sites

    Posted · Problem with Bed Leveling

    ok but now i did still a update, i didnt know thats so easy :)

    the trick with leveling on the 60°C glaseplate was great, now the leveling works the frist time, and all lanes were great..........but then i let the print (UM Robot) nealy 1 hour after print finish on the plate and pull them so easy off....

    then i started a 2nd print.......and the leveling was gone.... the nozzle was to near....

    please see here the photo5a33173e4c0fc_Foto27_01.16204117.thumb.jpg.c8adc6206cc7fb749c2e605e06f532ab.jpg

    you see the bottom side of the UM Robot, where all printlanes are ok, and now you see the start of a other part were the lanes are not together, and all leveling ist away....

    :(

    5a33173e4c0fc_Foto27_01.16204117.thumb.jpg.c8adc6206cc7fb749c2e605e06f532ab.jpg

  • Link to post
    Share on other sites

    Posted (edited) · Problem with Bed Leveling

    Here are my thoughts, maybe something is helpfull.

    The best accessory I ever printed for my UMO with heated bed upgrade is the YAZA (yet another z-stage adjuster) here. It lets me adjust the nozzle gap very accurately. But first:

    I make sure that the springs are compressed about half way. If they are too tight - not good. If they are too loose - not good. Half way is good.

    Then I level the bed, back center first, then front. Usually twice, first to get close, 2nd time to get really close. Makes no difference whether you use paper or credit card, as long as the gap is the same in all three positions. And then I use the yaza to set the gap overall.

    (Actually I bought a fairly simple analog depth gauge on ebay, printed a bracket so it attaches to the printhead with  neodyme magnets. Have a custom gcode for the levelling routine. Takes 2 minutes. But thats luxury.)

    I adjust / tune my printbed maybe after 20 or so prints.

    Also I use a cheap long very sharp knife, gently pry up one corner of the print and pop it off. Doesnt mess up the bed levelling.

    Edited by Guest
    • Like 1
    Link to post
    Share on other sites

    Posted (edited) · Problem with Bed Leveling

    Hi @JATMN , or was that BATMN, sorry.  Thanks for taking the time to reply, appreciated. Well firstly your 2nd para is, as I understand it, wrong, or I am misunderstanding what you are saying, you did not type what you were thinking, or I am wrong.

    If you are using the bed levelling wizard then the firmware assumes that you have then set the bed at the z=0.1mm height (width of paper)  and calibrates itself accordingly so that its z=0 position has the bed 0.1mm closer to the nozzle - i.e., just touching it.

    Before printing the 1st line of layer 0 (ie Cura’s "1st layer” ) the gcode sets the z position to the measurement of your “1st layer thickness”, in your example .300. So the gap that you have to extrude your 1st layer into is 0.300, not 0.12, or to be absolutely accurate in your example, 0.320. I would add that if UM have now issued a card that measures 0.12 I assume they have changed the firmware accordingly.

    Not that material really; if I change the z-offset by 0.04 I can always see a change in quality of 1st layer but if I change it by 0.02 I cannot see a difference; sometimes I think I do but it is so marginal that the reality means it really makes no difference. I make my changes in the gcode rather than twiddling the knobs so I know my stated figures are accurate.

    If you choose a 1st layer height of 0.1mm then gap you have for printing that is 0.1mm. In essence therefore I think what you are saying in paragraph3 is not valid. Also as I have just said a change of 0.02 in the gap will have no noticeable difference on a  layer height of 0.300. I know, I have been there, done it. If I have to re-level the bed, e.g. nozzle change, I will always go that final 0.02 change and it never makes a difference.

    NOW perhaps what you are saying, except  you did not, is that the thinner the 1st layer used the closer the bed needs to be to the nozzle to improve adhesion. Whether or not that is true, I have no idea. But I am going to test that today and report back :)

    Also you said in para. 4 “with a faster print speed to prevent too much over extrusion”. I am not convinced on this. Changing the speed over a given distance does not change the volume of filament extruded – check your gcode; it just means your printer has to extrude the filament faster – which is why, unless there is a good reason, it is always better to use the same speed for every movement on a given layer, i.e. do not run you wall speed at 40 and you infill at 80 - and yes sometimes there are reasons, if you can get away with it.

    Edited by Guest
    • Like 1
    Link to post
    Share on other sites

    Posted (edited) · Problem with Bed Leveling

    - Sorry not sure why it double posted a edit.. -

    Edited by Guest
  • Link to post
    Share on other sites

    Posted · Problem with Bed Leveling

    Thanks for giving an actual response and not just blasting me. lol

    Not had my UM2 but a couple of months and getting use to this firmware


    Hi @JATMN , or was that BATMN, sorry.  Thanks for taking the time to reply, appreciated. Well firstly your 2nd para is, as I understand it, wrong, or I am misunderstanding what you are saying, you did not type what you were thinking, or I am wrong.

    LOL!

    If you are using the bed levelling wizard then the firmware assumes that you have then set the bed at the z=0.1mm height (width of paper)  and calibrates itself accordingly so that its z=0 position has the bed 0.1mm closer to the nozzle - i.e., just touching it.

    Honestly didn't know this. Mine didn't have a card at all if I recall correctly.. But it also does not have a hole in the back on the right side for a second extruder motor either. Thanks.

    Before printing the 1st line of layer 0 (ie Cura’s "1st layer” ) the gcode sets the z position to the measurement of your “1st layer thickness”, in your example .300. So the gap that you have to extrude your 1st layer into is 0.300, not 0.12, or to be absolutely accurate in your example, 0.320. I would add that if UM have now issued a card that measures 0.12 I assume they have changed the firmware accordingly.

    Not complete convinced of this but ok.. because at .3 and .2 my printer is starting at the same level from the glass as it was when I leveled at.. This is evident because at .3 it is massively over extruding so much that it causes the extruder to skip and the 2nd layer the nozzle is grinding across the surface of the first layer. Which looking at S3D would make sense for my thoughts because it does first layer by a % of your layer height. So if im printing at .150 layer.. and first layer is 150% of layer height would make since why .3 is way too much. as that would be 200%

    Not that material really; if I change the z-offset by 0.04 I can always see a change in quality of 1st layer but if I change it by 0.02 I cannot see a difference; sometimes I think I do but it is so marginal that the reality means it really makes no difference. I make my changes in the gcode rather than twiddling the knobs so I know my stated figures are accurate.

    I try not to adjust z-offset, but good to know

    If you choose a 1st layer height of 0.1mm then gap you have for printing that is 0.1mm. In essence therefore I think what you are saying in paragraph3 is not valid. Also as I have just said a change of 0.02 in the gap will have no noticeable difference on a  layer height of 0.300. I know, I have been there, done it. If I have to re-level the bed, e.g. nozzle change, I will always go that final 0.02 change and it never makes a difference.

    Very interesting.. Honestly not tried .1 first layer I figured that's what it would due do to the massive change from .3 to .2 in my tests.

    NOW perhaps what you are saying, except  you did not, is that the thinner the 1st layer used the closer the bed needs to be to the nozzle to improve adhesion. Whether or not that is true, I have no idea. But I am going to test that today and report back :)

    Totally where I was going with this.. which I guess while not true with the UM2 and Cura.. it is however completely accurate with my Duplicator 4 (sailfish firmware) and S3D.. .050 prints I have done lots of on that printer.

    Also you said in para. 4 “with a faster print speed to prevent too much over extrusion”. I am not convinced on this. Changing the speed over a given distance does not change the volume of filament extruded – check your gcode; it just means your printer has to extrude the filament faster – which is why, unless there is a good reason, it is always better to use the same speed for every movement on a given layer, i.e. do not run you wall speed at 40 and you infill at 80 - and yes sometimes there are reasons, if you can get away with it.

    I understand your infill vs wall speed part.. but as for my reasoning for faster print speed for over extrusion.. I have tested this part extensively.. I had a VERY noticeable difference in my first layer with running at about double first layer speed than what was default while at .2 first layer height.


    ;)

  • Link to post
    Share on other sites

    Posted (edited) · Problem with Bed Leveling

    Hey it is great that you have a positive/constructive view on it - it is always tricky if you want to "challenge" something. I did not know how the levelling worked either when I was a newbie a couple of years ago but kindly illuminarti and gr5 explained it to me.

    Quote by JATMN

    Thanks for giving an actual response and not just blasting me. lol

    Not had my UM2 but a couple of months and getting use to this firmware

    Quote by yellowshark

    ...

    Not complete convinced of this but ok.. because at .3 and .2 my printer is starting at the same level from the glass as it was when I leveled at.. This is evident because at .3 it is massively over extruding so much that it causes the extruder to skip and the 2nd layer the nozzle is grinding across the surface of the first layer.

    Lol I am almost bound to say It can’t be!!. Are you able to look at your gcode. I have just copied this, Firstly with 1st layer set to .300

    ;Layer count: 132

    ;LAYER:0

    M107

    G0 F9000 X122.200 Y112.200 Z0.300

    ;TYPE:SKIRT

    G1 F1200 X157.800 Y112.200 E0.66966

    G1 X157.800 Y147.800 E1.33931

    G1 X122.200 Y147.800 E2.00897

    and with 1st layer set to .100

    ;Layer count: 134

    ;LAYER:0

    M107

    G0 F9000 X122.200 Y112.200 Z0.100

    ;TYPE:SKIRT

    G1 F1200 X157.800 Y112.200 E0.22322

    G1 X157.800 Y147.800 E0.44644

    G1 X122.200 Y147.800 E0.66966

    Look, when Cura creates the gcode (or maybe it is done by the firmware, I have no idea on that one)( @SandervG ?) it has to, and it does, set the z-axis position for the layer to be printed – it does this for every layer.

    I think what you have done is that when levelling you have either used a piece of paper that is thinner than 0.1mm or you have done your setup with too much friction present. Both will leave the nozzle to close to the print bed. In your case too close so that a layer of.0.300 just does not have enough room but a layer of 0.200 does have enough room. Do your levelling again and it will resolve itself.

    Totally where I was going with this.. which I guess while not true with the UM2 and Cura.. it is however completely accurate with my Duplicator 4 (sailfish firmware) and S3D.. .050 prints I have done lots of on that printer.

    My first thought is that this would be consistent across all slicers. Let us see what my test results are.

    I understand your infill vs wall speed part.. but as for my reasoning for faster print speed for over extrusion.. I have tested this part extensively.. I had a VERY noticeable difference in my first layer with running at about double first layer speed than what was default while at .2 first layer height.

    Hmn what do I say? What I will say is that generally the slower you print the better the quality you will have – I am referring to the entire model, not just the first layer. If you have a small intricate model then if you go too slow (for it) the nozzle can overheat the plastic causing melting and a poor finish. But the general rule is correct. 9 times out of 10 20mm/s will be better than 30mm/s.

    Buy hey if doubling the 1st layer speed works for you then good on you :)

    Edited by Guest
  • Link to post
    Share on other sites

    Posted · Problem with Bed Leveling

    Hi,

    ok after the tipp with the springs, not to tight not to loose, i had better results!!!

    but only in the center ....

    5a3317672ce37_Foto29_01.16122628.thumb.jpg.950fa9ecaf45ca3926344d66589d2de6.jpg

    so i checked my glass plate on my table, and i dont find any crowning or so...

    so i really dont unterstand, why leveling is on the side bad, when its in center perfect is.

    5a3317672ce37_Foto29_01.16122628.thumb.jpg.950fa9ecaf45ca3926344d66589d2de6.jpg

  • Link to post
    Share on other sites

    Create an account or sign in to comment

    You need to be a member in order to leave a comment

    Create an account

    Sign up for a new account in our community. It's easy!

    Register a new account

    Sign in

    Already have an account? Sign in here.

    Sign In Now
    • Our picks

      • UltiMaker Cura 5.7 stable released
        Cura 5.7 is here and it brings a handy new workflow improvement when using Thingiverse and Cura together, as well as additional capabilities for Method series printers, and a powerful way of sharing print settings using new printer-agnostic project files! Read on to find out about all of these improvements and more. 
         
          • Like
        • 18 replies
      • S-Line Firmware 8.3.0 was released Nov. 20th on the "Latest" firmware branch.
        (Sorry, was out of office when this released)

        This update is for...
        All UltiMaker S series  
        New features
         
        Temperature status. During print preparation, the temperatures of the print cores and build plate will be shown on the display. This gives a better indication of the progress and remaining wait time. Save log files in paused state. It is now possible to save the printer's log files to USB if the currently active print job is paused. Previously, the Dump logs to USB option was only enabled if the printer was in idle state. Confirm print removal via Digital Factory. If the printer is connected to the Digital Factory, it is now possible to confirm the removal of a previous print job via the Digital Factory interface. This is useful in situations where the build plate is clear, but the operator forgot to select Confirm removal on the printer’s display. Visit this page for more information about this feature.
          • Like
        • 0 replies
    ×
    ×
    • Create New...