Jump to content

U2 Extended upgrade to +


Recommended Posts

Posted · U2 Extended upgrade to +

Has anybody out there undertaken the upgrade to 2+ yet and achieved the same results as those shown in the video installation tutorials?

My printer, which was purchased in June 2015, bears no resemblance to the one shown on the videos and is really causing me issues when working on the main board. First and foremost mine is 180 degrees from the video view!

The video shows the plugs being removed from the card with a simple tug, but I can't budge mine and I'm afraid of breaking something.

Am I missing something, like a catch of some sort on the plug/socket, or am I being too cautious?

I'm seriously worried about breaking the board.

Any help or comment would be appreciated, ideally before I throw it out of the window!!

  • Link to post
    Share on other sites

    Posted · U2 Extended upgrade to +

    Hi @ChipBart,

    thank you for your post.

    Could you upload a picture of your Ultimaker and the part you have questions about?

    On the plug should be like a small edge that you could grab with your nails to pull it out.

    If you do not tilt during pulling but pull it in a straight line out, you should be fine.

    Good luck!

  • Link to post
    Share on other sites

    Posted (edited) · U2 Extended upgrade to +

    Hi, I am still unable to remove the plugs from their sockets. They seem to have some sort of catch that is gripping the plug when assembled. It looks like an extraction tool should be used in some way. (I can't see how to attach an image) I'm terrified of breaking the board, they are really tough to move! My eyes are not too good either :)

    Regards

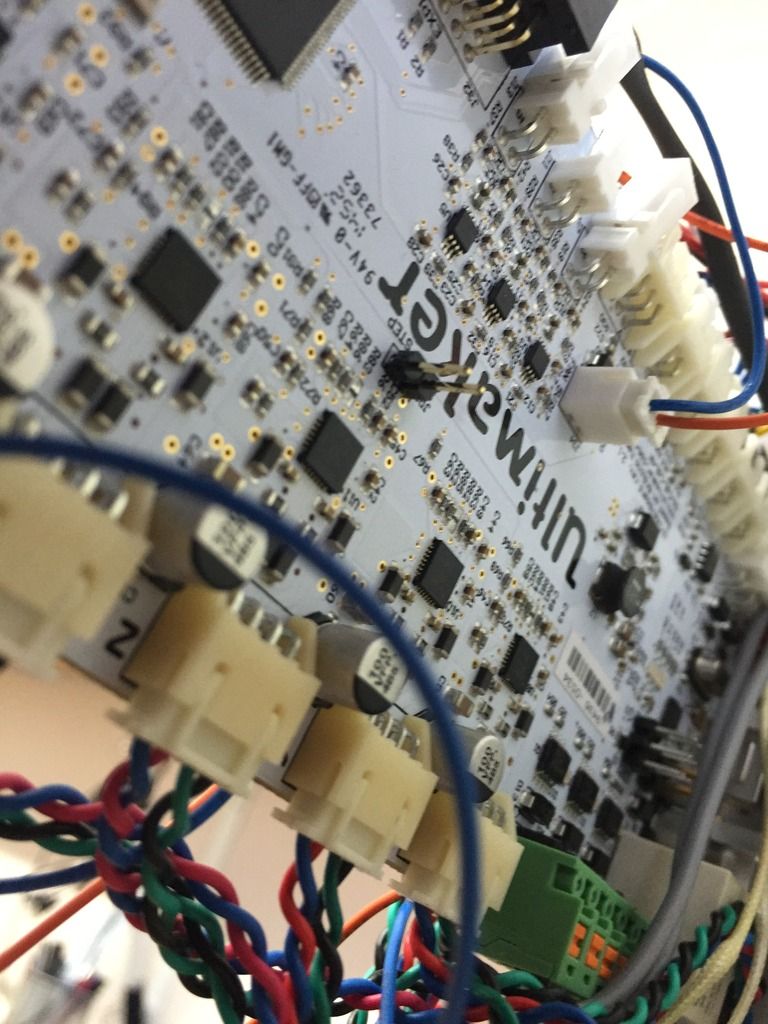
    John - URL - http://i1360.photobucket.com/albums/r660/johnbartram/UM2_zpsegpsn5tj.jpg

    Edited by Guest
    added url
  • Link to post
    Share on other sites

    Posted · U2 Extended upgrade to +

    If you follow this link you should be able to add images to an album.

    Once you have you can use the second right icon in this text editor to select your uploaded image and paste it in your reply.

    It is hard to give you any further pointers without knowing what you are struggling with.

  • Link to post
    Share on other sites

    Posted (edited) · U2 Extended upgrade to +

    pull.thumb.jpg.fe214afd10eba80d2da5530e2ca685a4.jpg

    I used my best trackpad-photoshop skills to illustrate how you should pull out those plugs.

    If you grab them by that 'edge', you can't really break anything. Just pull it out.

    Edit, by the way, I don't think you have to pull out all the motors, just the Extruder.

    But I couldn't tell, and I didn't remember by heart, which one that was on this picture. But you get the idea, right?

    pull.thumb.jpg.fe214afd10eba80d2da5530e2ca685a4.jpg

    Edited by Guest
  • Link to post
    Share on other sites

    Posted · U2 Extended upgrade to +

    I did the upgrade on mine this morning. It took me a little over an hour as I took the opportunity to do some maintenance and re-lube the z-azis while I was at it.

    You're correct that the plugs were all tight and that there is a lot less room to move than the videos imply.


    • The orange/blue wire in the middle was tough - I resorted to pliers and was extremely careful to only grab the plug, not the wire, when pulling. It's the only one I needed a tool for.
    • The stepper driver plug will come out if you wiggle it side to side.
    • The heater and fan wires along the edge have a catch that you'll have to move to get them out - I just used a fingernail.
    • The heater wire was what gave me the most issues - 3 hands would be better.
    • The hardest part was dealing with those nuts on the PCB cover, so I replaced them with some generic M3 nuts.
    • Aligning the X/Y axis was the most time consuming part as the screws can be tough to get to.


    All in all the instructions were pretty comprehensive and the videos gave enough additional info to figure out alignment, etc. I've got a test print running at the moment using some cheap PLA I got from Frys and I can easily spot the difference in quality the upgrade made.

  • Link to post
    Share on other sites

    Posted · U2 Extended upgrade to +

    I did the upgrade on mine this morning.  It took me a little over an hour as I took the opportunity to do some maintenance and re-lube the z-azis while I was at it.

    You're correct that the plugs were all tight and that there is a lot less room to move than the videos imply.  


    • The orange/blue wire in the middle was tough - I resorted to pliers and was extremely careful to only grab the plug, not the wire, when pulling.  It's the only one I needed a tool for.

    • The stepper driver plug will come out if you wiggle it side to side.

    • The heater and fan wires along the edge have a catch that you'll have to move to get them out - I just used a fingernail.


    • The heater wire was what gave me the most issues - 3 hands would be better.

    • The hardest part was dealing with those nuts on the PCB cover, so I replaced them with some generic M3 nuts.

    • Aligning the X/Y axis was the most time consuming part as the screws can be tough to get to.


    All in all the instructions were pretty comprehensive and the videos gave enough additional info to figure out alignment, etc.  I've got a test print running at the moment using some cheap PLA I got from Frys and I can easily spot the difference in quality the upgrade made.


    Hi - I actually grew a pair this morning and cut through all of the cables mentioned and set about the plugs with my pliers! I finally realised that I won't be needing the old wiring anyway!

    I've just installed the build clamp plates and am about to start on the Print Head.

    Thanks you for the other tips, I am sure they will come in handy.

    This forum is great! I work alone in my home office so it's easy to feel isolated. I'm so glad I gave it a try.

    I'll be back!

    Thanks again to all concerned.

    John

    • Like 2
    Link to post
    Share on other sites

    Posted · U2 Extended upgrade to +

    How did the upgrade go?

  • Link to post
    Share on other sites

    Posted · U2 Extended upgrade to +

    just did the upgrade, a bit daunting but I got through it. I forgot to do the Firmware upgrade when I was done and the new feeder motor was reversed. Updated and it's working beautifully.

    • Like 1
    Link to post
    Share on other sites

    Posted · U2 Extended upgrade to +

    Update completed Thanks. Only a couple of issues. I found I couldn't get the underside PCB cover back on so have left it off. Also I have had two prints to date that have just stopped completely, mid-print! Has anyone else experienced this issue? I need to know if it is just me!

    Cheers

  • Link to post
    Share on other sites

    Posted · U2 Extended upgrade to +

    What happened that made it stop mid-print?

    Did the power drop? Did it just stop moving, did it fail?

  • Link to post
    Share on other sites

    Posted · U2 Extended upgrade to +

    There was no power drop, it just stopped dead mid-print leaving a small blob of material below the nozzle. I re-homed the print head and started another print, which seems to be working OK. The screen changed but I didn't catch what it said. I had noticed a lot of beeping going off during the print. Not really noticed it before the upgrade.

  • Link to post
    Share on other sites

    Posted · U2 Extended upgrade to +

    The most common cause for "mid print halting" is that the power cable isn't all the way on the board. If you didn't get the 4 screws in or if it was skewed a little when you tightened them it's really hard to get the power connector completely on. Try pulling gently on the calbe - not the connector (maybe 1 pound or 1kg force) - iit should stay locked on (there is literally a lock on the cable that slides and keeps it from coming off by accident).

    My guess is it is rubbing against the wall of the printer - loosen the 4 screws that hold the pcb (just one turn), then plug in power properly, then tighten the 4 screws.

  • Link to post
    Share on other sites

    Posted · U2 Extended upgrade to +

    Oh - if it's caused by power then the screen will reboot to the normal start up screen. But if it's some other failure it will have a message for example "heater error". Let us know what you find out.

  • Link to post
    Share on other sites

    Posted · U2 Extended upgrade to +

    Hi, and thanks for your input. I did quickly check the cable was connected OK but will check again more thoroughly. It hasn't happened since so I'm hoping it may have got better!!

    If it does happen again I will check the screen to see what it says.

    I'll get back to you after I have re-checked everything.

    Thanks again.

  • Link to post
    Share on other sites

    Posted · U2 Extended upgrade to +

    I have just discovered why the printing stopped - entirely my fault - definitely not an Ultimaker issue!

    I had purchased the Simplify 3D software to give it a try. I've been tinkering with it on and off

    over the past few weeks but decided to try it again today whilst printing a part from the card. As I have it set up to work over the USB if required, as soon as I started it, it obviously connected with the printer and took control from the memory card.

    What a pillock!

    Sorry to have bothered you guys - again :(

  • Link to post
    Share on other sites

    Posted · U2 Extended upgrade to +

    Well, its good that we have figured out what caused it and you can continue 3D Printing again. We have all learned something, a possible alternative cause for such behaviour which is never wasted :)

  • Link to post
    Share on other sites

    Create an account or sign in to comment

    You need to be a member in order to leave a comment

    Create an account

    Sign up for a new account in our community. It's easy!

    Register a new account

    Sign in

    Already have an account? Sign in here.

    Sign In Now
    • Our picks

      • Introducing the UltiMaker Factor 4
        We are happy to announce the next evolution in the UltiMaker 3D printer lineup: the UltiMaker Factor 4 industrial-grade 3D printer, designed to take manufacturing to new levels of efficiency and reliability. Factor 4 is an end-to-end 3D printing solution for light industrial applications
          • Thanks
          • Like
        • 3 replies
      • UltiMaker Cura 5.7 stable released
        Cura 5.7 is here and it brings a handy new workflow improvement when using Thingiverse and Cura together, as well as additional capabilities for Method series printers, and a powerful way of sharing print settings using new printer-agnostic project files! Read on to find out about all of these improvements and more. 
         
          • Like
        • 26 replies
    ×
    ×
    • Create New...