Jump to content

Evaluate my print (IKEA LED HOLDER)


LePaul

Recommended Posts

Posted · Evaluate my print (IKEA LED HOLDER)

These strands are support material. I guess the default/quick mode adds these by default when it detects evil overhang :) I'd suggest that you _never_ use the quick mode and go for the full settings. There is so much stuff that you can change, especially when you want high(er) quality prints.

By the way, I added the IKEA Dioder led strips just yesterday to my printer. I printed the same models but ditched them afterwards because on the left/right sides the sliding blocks were hitting the lower area of the long part. Turns out it was a user error. Check out the comments on thingiverse:

http://www.thingiverse.com/thing:130530/#comments

I printed these instead:

http://www.thingiverse.com/thing:88190

Now I can mount all four led bars.


  • Link to post
    Share on other sites

    Posted · Evaluate my print (IKEA LED HOLDER)

    Thanks for the screen shot.

    So...how slow? 40? 30? I'm downloading the files :)

    210 seems good


  • Link to post
    Share on other sites

    Posted · Evaluate my print (IKEA LED HOLDER)

    50 is fine. I would try 50 at 200° (maybe 205°).

    Right now I am printing the famous trilobite at speed 40 and temperature 190°:

    http://www.thingiverse.com/thing:28259

    Besides the IKEA Dioder holder ist a - I call these kind of objects "duty parts" and doesn't need to be perfect. It should do its job. I usually start to get picky about quality for stuff I want to give away or that I use daily (like the iPhone stand).


  • Link to post
    Share on other sites

    Posted · Evaluate my print (IKEA LED HOLDER)

    Nice...!

    Well I have the set on the platform in Cura...but I want more clips to put on the front...but it won't fit on this print.

    Here we go!


  • Link to post
    Share on other sites

    Posted · Evaluate my print (IKEA LED HOLDER)

    Really? Remember that you can rotate objects on the platform in Cura. If you fiddle a bit with them, you should be able to fit them all in one print.


  • Link to post
    Share on other sites

    Posted · Evaluate my print (IKEA LED HOLDER)

    Well let's see how the set prints. My first "big" print


  • Link to post
    Share on other sites

    Posted · Evaluate my print (IKEA LED HOLDER)

    Well these look awful

    Trying one arm at 225, let's see how that comes out

    gallery_536_202_170128.jpg


  • Link to post
    Share on other sites

    Posted · Evaluate my print (IKEA LED HOLDER)

    Well here's one part at 225

    gallery_536_202_30266.jpg


  • Link to post
    Share on other sites

    Posted · Evaluate my print (IKEA LED HOLDER)

    Hmm

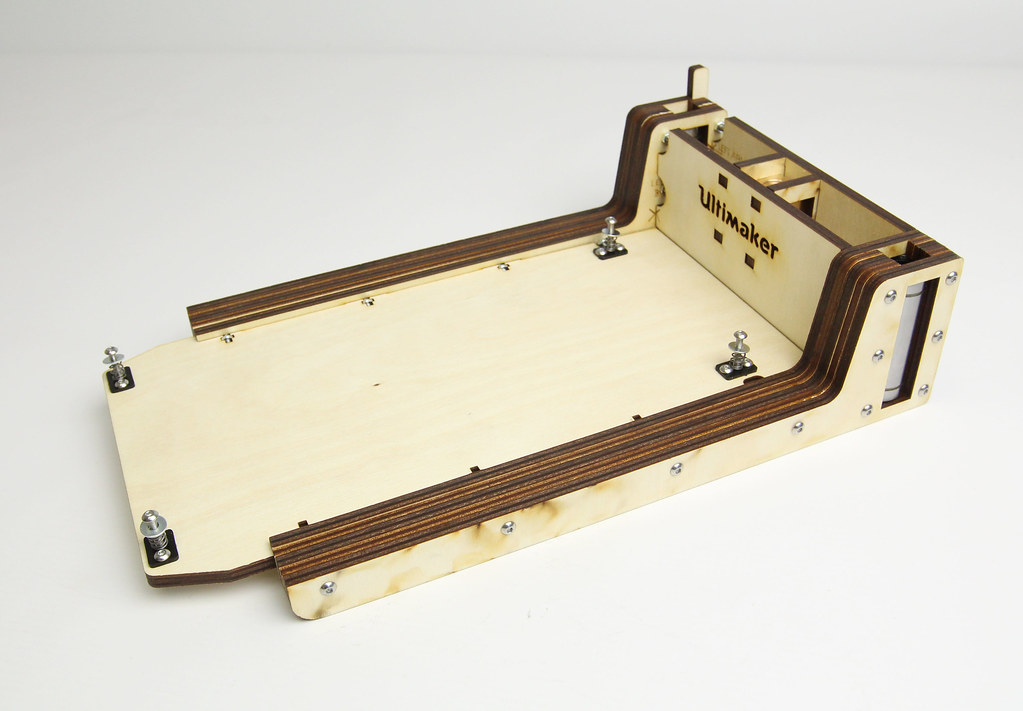
    I was wondering why the right side always seemed too high on the Z despite my gentle twisting...

    gallery_536_202_15275.jpg

    Tomorrow, after a good night's rest, I'll add washer to all of those areas where the spring touches on the bottom!


  • Link to post
    Share on other sites

    Posted · Evaluate my print (IKEA LED HOLDER)

    1) Your initial problem was you simply had support turned on.

    Now you should turn on .8mm thick shell thickness (minimum 1.2 possibly but .8 should be fine).

    Also .4mm top/bottom thickness.

    Also - and this is the key here! - go to expert settings and check "solid infill top" as well as bottom. I think maybe you left off the top. Or maybe your print didn't finish.

    2) You are now also underextruding a bit. Tighten the screw on your extruder a few turns. The spring should be compressed to around 11 to 11.5mm. You are printing at a moderate speed that should not experience underextrusion. You can fix this by slowing down another 30% but you should be able to print easily at 50mm/sec .2mm layers and 200C or hotter. Which seems like that is what you are doing. So your extruder isn't pushing hard enough. Most likely you need to tighten that spring. If that doesn't help send us a photo of your extruder in closed position. It should be able to pull 22 pounds on the filament before slipping.


  • Link to post
    Share on other sites

    Posted · Evaluate my print (IKEA LED HOLDER)

    Doesn't that black thing needs to be top down, so basically the other way around - and yes, I've added washers.

    Check image here: IMG_0777


  • Link to post
    Share on other sites

    Posted · Evaluate my print (IKEA LED HOLDER)

    Thanks for those tips

    At the lower temps (190) I see no flow...warm it up, I do.

    I had a zip tie on the extruder clamp/spring to make it tighter and removed it to see if it was needed...not sure it is but i will put it back on. It seemed to be helping

    Got home really late tonight so tomorrow I'll remove the acrylic plate and unscrew those mount screws, This time washers on the bottom and top :)


  • Link to post
    Share on other sites

    Posted · Evaluate my print (IKEA LED HOLDER)

    I have tightened the extruder to the 11mm distance.

    I have removed the silver PLA and put in the nice blue stuff I bought with the kit.

    When I pre-heat the PLA, it flows

    When I try to do a sample part (robot) to check things out, I can see the distance to bed is a bit too high...but no material is flowing.

    So it looks like I am stuck back at the basics, bed leveling and now getting the PLA to flow properly on even the basic robot test print.


  • Link to post
    Share on other sites

    Posted · Evaluate my print (IKEA LED HOLDER)

    Back to this part....

    Here's the extruder picture you asked for

    gallery_536_202_43657.jpg


  • Link to post
    Share on other sites

    Posted · Evaluate my print (IKEA LED HOLDER)

    The extruder is not locked - this is intentional right?

    Also on one of the previous images the springs for the acrylic plate are at an odd angle. You could add a wide washer beneath the springs so it doesn't push on one of the nuts and possible slip up or down when the machine vibrates.


  • Link to post
    Share on other sites

    Posted · Evaluate my print (IKEA LED HOLDER)

    Locked?

    I just added washers to the bottoms

    Heating the head now to level...again.


  • Link to post
    Share on other sites

    Posted · Evaluate my print (IKEA LED HOLDER)

    Still nothing extrudes....but this time, I put a zip tie around the feeder and turned it manually a few times...and got a nice blob

    Trying a print now @220 with the suggestions GR5 made


  • Link to post
    Share on other sites

    Posted · Evaluate my print (IKEA LED HOLDER)

    I mean the extruder is not locked. The small black handle should be pushed down. Take a look at my extruder:

    Extruder

    Sorry for the bad image quality. I had to add a sheet of paper in order to provide some contrast.


  • Link to post
    Share on other sites

    Posted · Evaluate my print (IKEA LED HOLDER)

    No! Good !

    I wasn't fully pressed in (re-watched the video)

    Also, when I feed in the PLA, its a struggle to get past that coupler!

    Now I thought I would tighten belts while I had the tools handy My test print is all shifting to the left side. Checking the X pulley now


  • Link to post
    Share on other sites

    Posted · Evaluate my print (IKEA LED HOLDER)

    Pulleys and motors checked

    Test printing the robot now.

    Maybe this is from the extruder not being locked in all the way...but now...I have a very noisy printer...lots of creaks and so on...

    (Blue PLA on Blue tape...hard to see....but listen...)


  • Link to post
    Share on other sites

    Posted · Evaluate my print (IKEA LED HOLDER)

    Here's how this one came out...

    gallery_536_202_35034.jpg

    So now that we have the basics working (again!)....I want led light holders!


  • Link to post
    Share on other sites

    Create an account or sign in to comment

    You need to be a member in order to leave a comment

    Create an account

    Sign up for a new account in our community. It's easy!

    Register a new account

    Sign in

    Already have an account? Sign in here.

    Sign In Now
    • Our picks

      • UltiMaker Cura 5.7 stable released
        Cura 5.7 is here and it brings a handy new workflow improvement when using Thingiverse and Cura together, as well as additional capabilities for Method series printers, and a powerful way of sharing print settings using new printer-agnostic project files! Read on to find out about all of these improvements and more. 
         
          • Like
        • 18 replies
      • S-Line Firmware 8.3.0 was released Nov. 20th on the "Latest" firmware branch.
        (Sorry, was out of office when this released)

        This update is for...
        All UltiMaker S series  
        New features
         
        Temperature status. During print preparation, the temperatures of the print cores and build plate will be shown on the display. This gives a better indication of the progress and remaining wait time. Save log files in paused state. It is now possible to save the printer's log files to USB if the currently active print job is paused. Previously, the Dump logs to USB option was only enabled if the printer was in idle state. Confirm print removal via Digital Factory. If the printer is connected to the Digital Factory, it is now possible to confirm the removal of a previous print job via the Digital Factory interface. This is useful in situations where the build plate is clear, but the operator forgot to select Confirm removal on the printer’s display. Visit this page for more information about this feature.
          • Like
        • 0 replies
    ×
    ×
    • Create New...