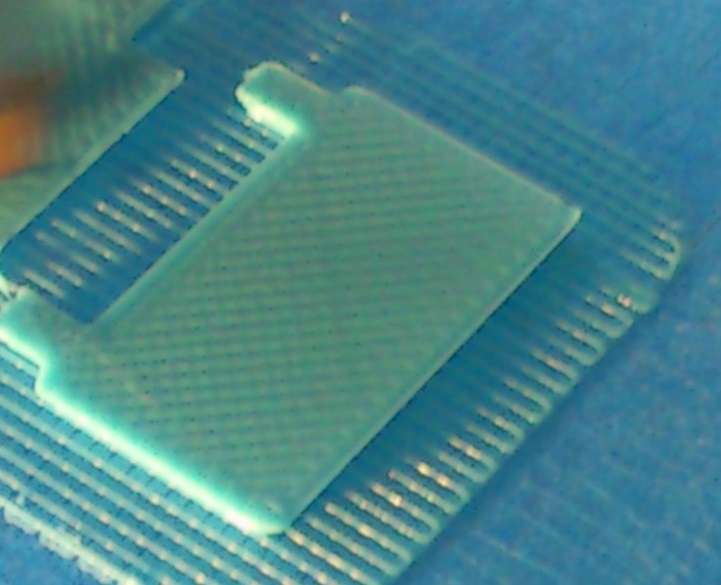
@0235 - please post a picture of these "tops and bottoms". But it sounds like underextrusion. What is your:
1) print speed
2) layer height
3) print temperature
4) PLA?
@0235 - please post a picture of these "tops and bottoms". But it sounds like underextrusion. What is your:
1) print speed
2) layer height
3) print temperature
4) PLA?
Those perimeters (aka skirts) in that photo I posted are probably .2mm thick. That's what they look like to me.
On a UM1, the head should exactly touch the bed when it's leveled.
[...]
But only if the head is hot... in the (clean!) cold state which is usually used during the (first run of the) bed leveling wizard, it should be 0.1mm higher (that's the amount of thermal expansion between room temperature and around 200°C).
@0235 - please post a picture of these "tops and bottoms". But it sounds like underextrusion. What is your:
1) print speed
2) layer height
3) print temperature
4) PLA?
i will see about posting some images.
1) usually around 60mm/s
2) usiualy 0.1mm
3) 200-205
4) yes PLA
from the looks of things it is likely that i just let the print start to soon and don't let enough filament out. it is almost perfect on any vertical, and honestly the top and bottom surfaces are pretty much perfect anyway.
apologies for AWFUL image. phone camera, poor lighting etc. by a mesh i mean ever so slight, notice the tiny tiny black dots on the print top surface

i believe that that image is actually before i lowered the height (or should i say moved the bed up slightly) so its not quite as pronounced, and i think my x motor was having tiny amounts of backlash (again i believe gr5 you did a fantastic explanation on it!)
OMG indeed a nice picture :wink:
I don't see much wrong in your picture, perhaps the tiny spots you mention,
I think you can solve that with more top layers. when you have a layer thickness of 0.1mm you can set Bottom/Top at 0.6, with less infill (Larger squares) you might need 10 toplayers.
The hot air in the squares is expanding and wants to pop out, so you could also try more fan (cooling)
.
The toplayers might have underextrusion, so you could slow down.
I rarely print faster than 50mm/s (some people like the speedrace on this forum :( )
Temperatures are hard to compare between machines, might be 20° off.
So.. I don't see why you need bed levelling help. You are using a Raft, you cant get anything more level than that to put the first layer on...
You could use the brim option, than you have a nicer first bottom layer.
When you use 10brimlines you have more than enough time to level while printing.
More toplayers, temperature from 205 to 215, speed from 60 to 50mm/s. should do the trick..... I think
Im curious why you're using a raft? It should really never be needed, especially for PLA.
im using raft as it was my second print and i didn't know what a raft was haha!
but as always some great tips. i understand that my 220 may be someone else's 210 or 230!
also print speed, thankfully im not to concerened about the crazy 300m/s and regularly set it on 60, and sometimes slow certain elements to 80%
i never thought about increasing the thickness of the top / bottom layer to help this, however it makes complete sense!
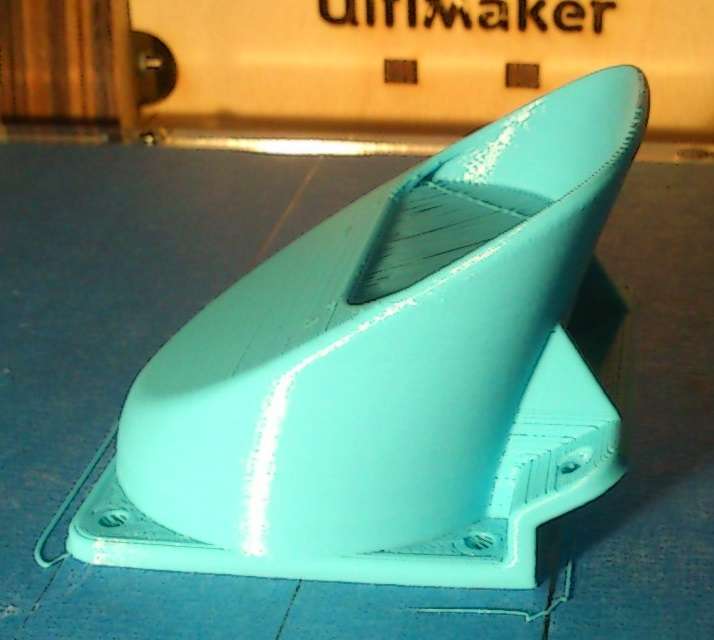
either way, its printing amazingly well, the picture isn't doing it justice. some of the errors lower down are due to temperature being too low, and using a layer thickness of 1.8 for speed!

however the stringing on the inside was very odd, it did it near the bottom (you can see the screw holes are covered slightly) and near the top, might be a bug with the new today version of cura, not sure, either way that's why i have model making chisels!
Did you have retraction enabled? This helps eliminate stringing:
1) Make sure retraction is checked on basic/quality
2) In expert settings set minimum travel to 0mm or at least something small like 1mm.
3) In expert settings set "minimal extrusion..." to 0mm. I hate this setting right now.
In the lower right edge of that fan duct I see some underextruded lines - that's the worst thing - it looks so bad it might separate. That may be due to tangling filament. Or perhaps your extruder spring needs tightening a little - it should be compressed to about 11.5mm.
thanks for the tips. to me 11.5mm seems so short! i think that tiny amounts of under-extrusion are present, however i believe that was due to slightly low temperature. however after the new version of cura, with much further retraction, stringing just isn't happening any-more, at all!
didn't even know those settings existed to do with adjusting when retraction happens. thanks for the advice, as always.
Recommended Posts
illuminarti 18
On a UM1, the head should exactly touch the bed when it's leveled.
On a UM2, the wizard specifically asks you to use a piece of paper, and assumes that the head will end up 0.1mm from the bed as a result, and adjusts accordingly.
If tops and bottoms are a mesh, then you are probably under-extruding a little bit. Is this on a UM1 or UM2, I forget...?
Link to post
Share on other sites