

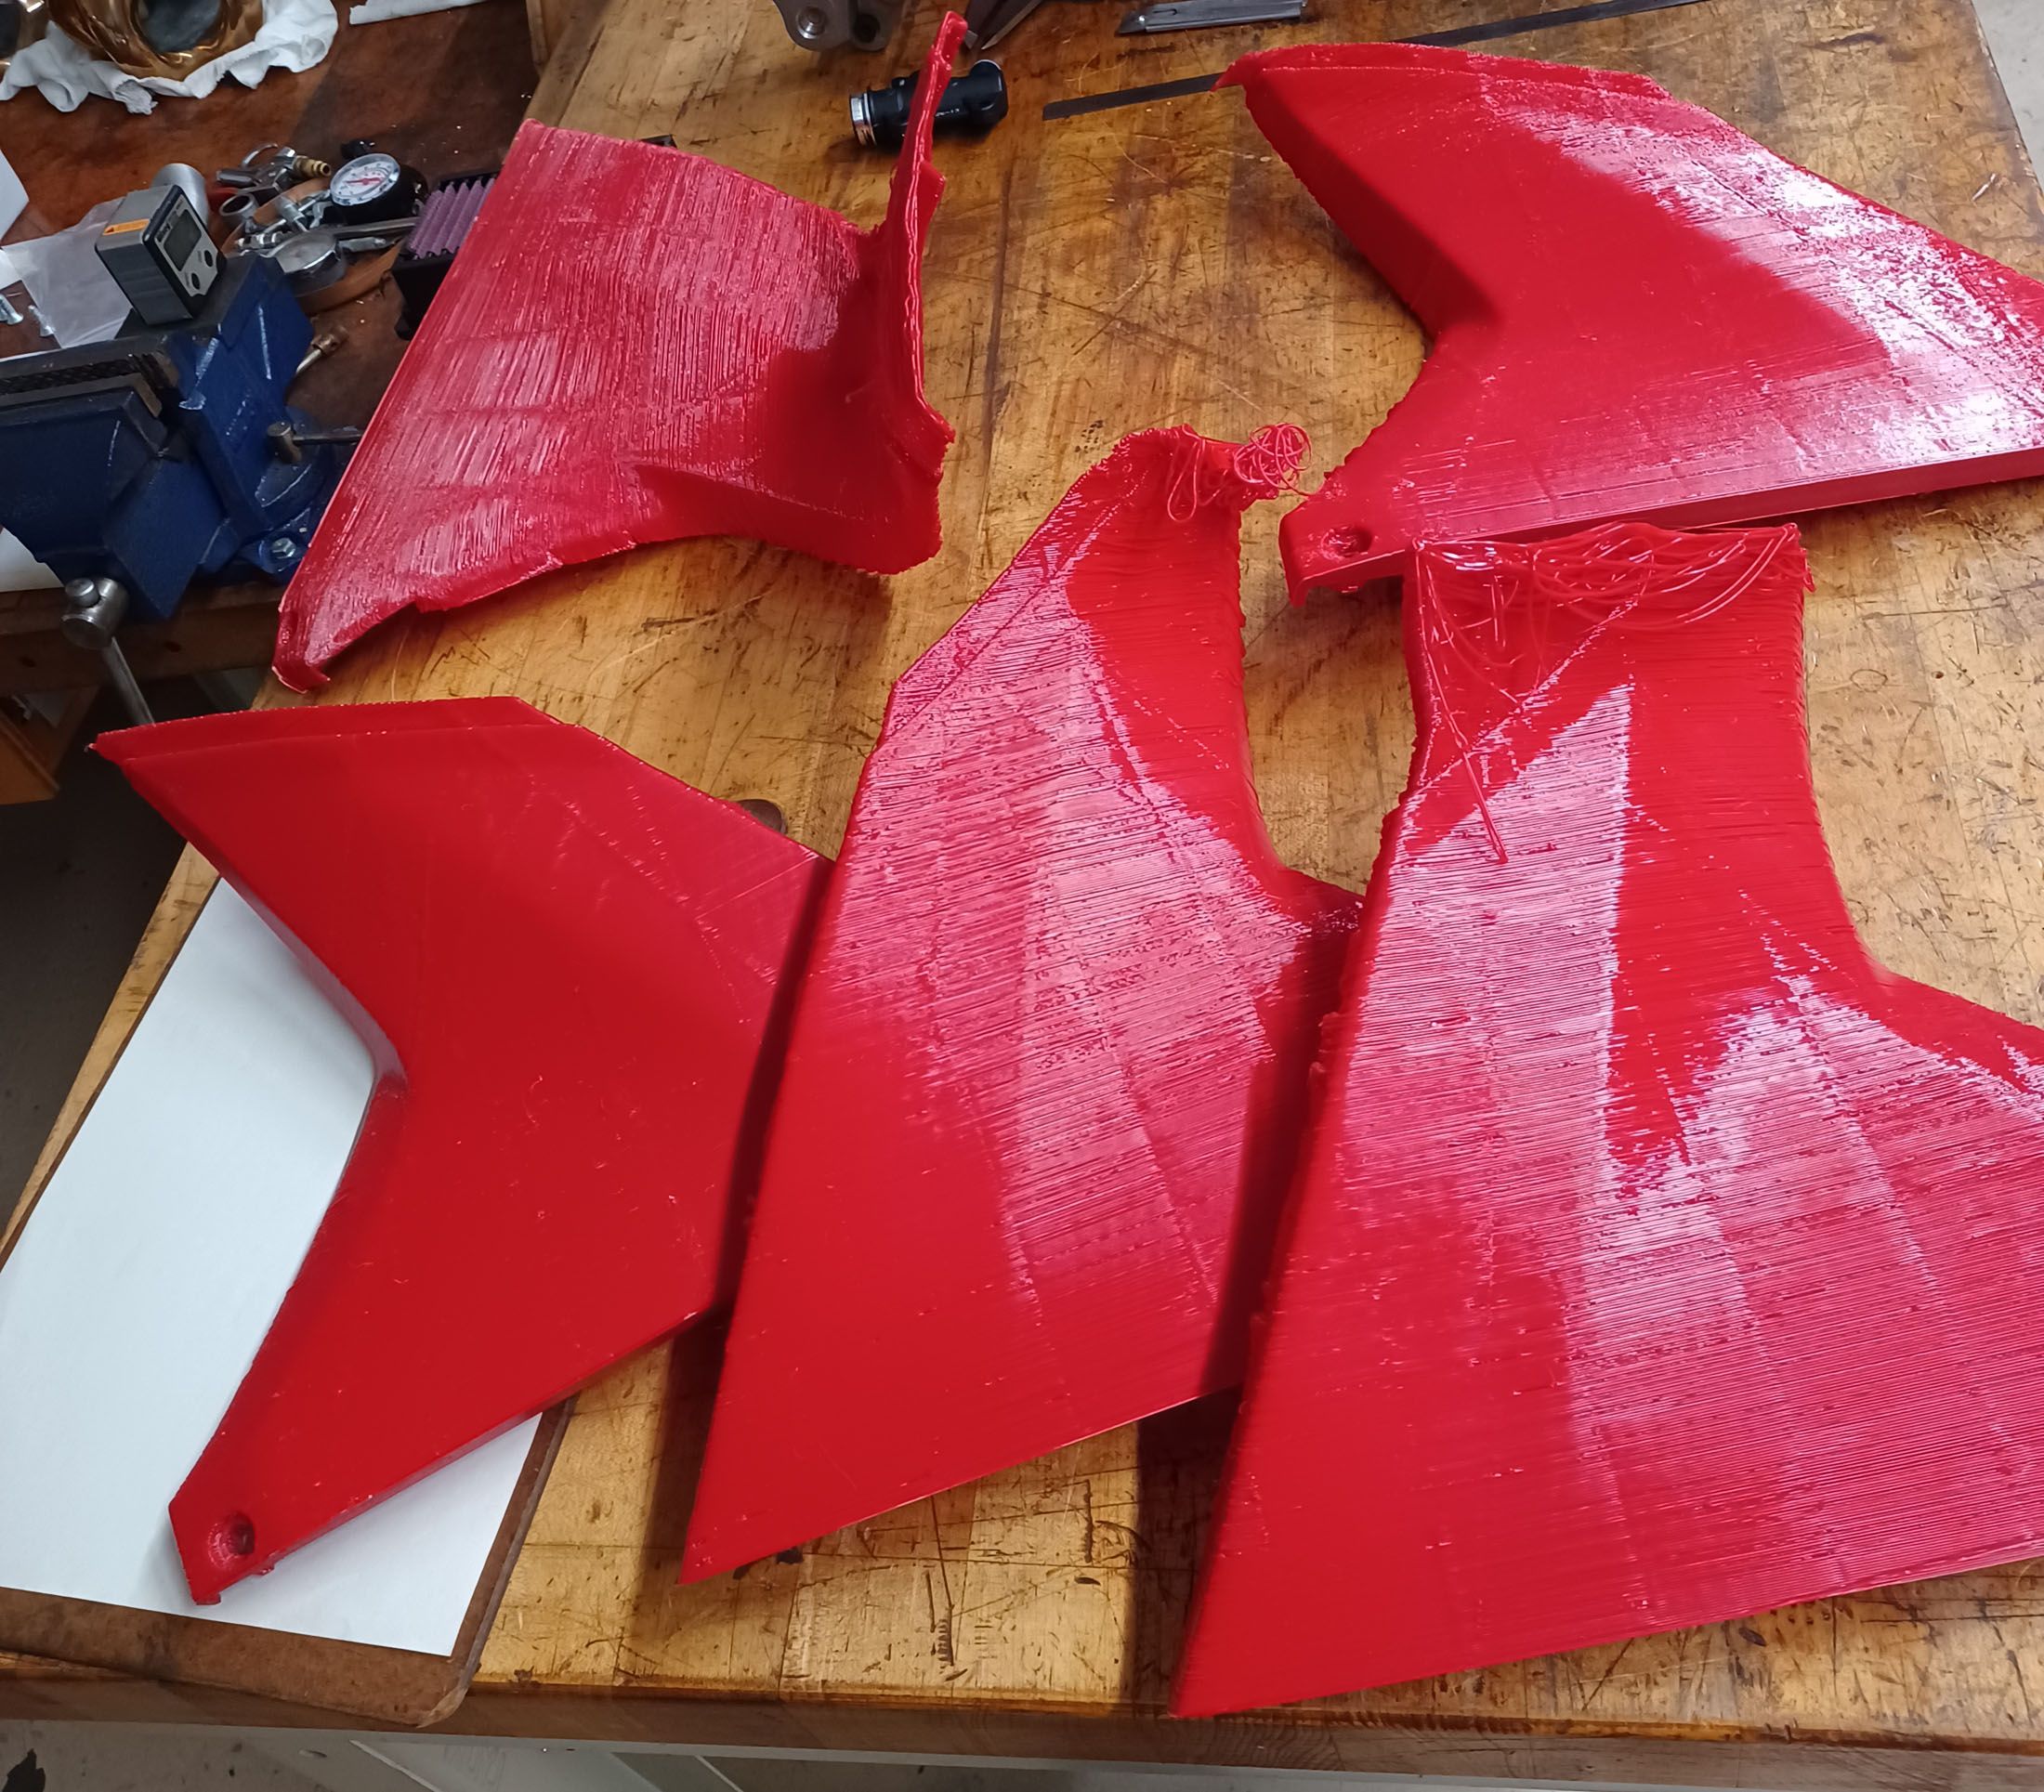
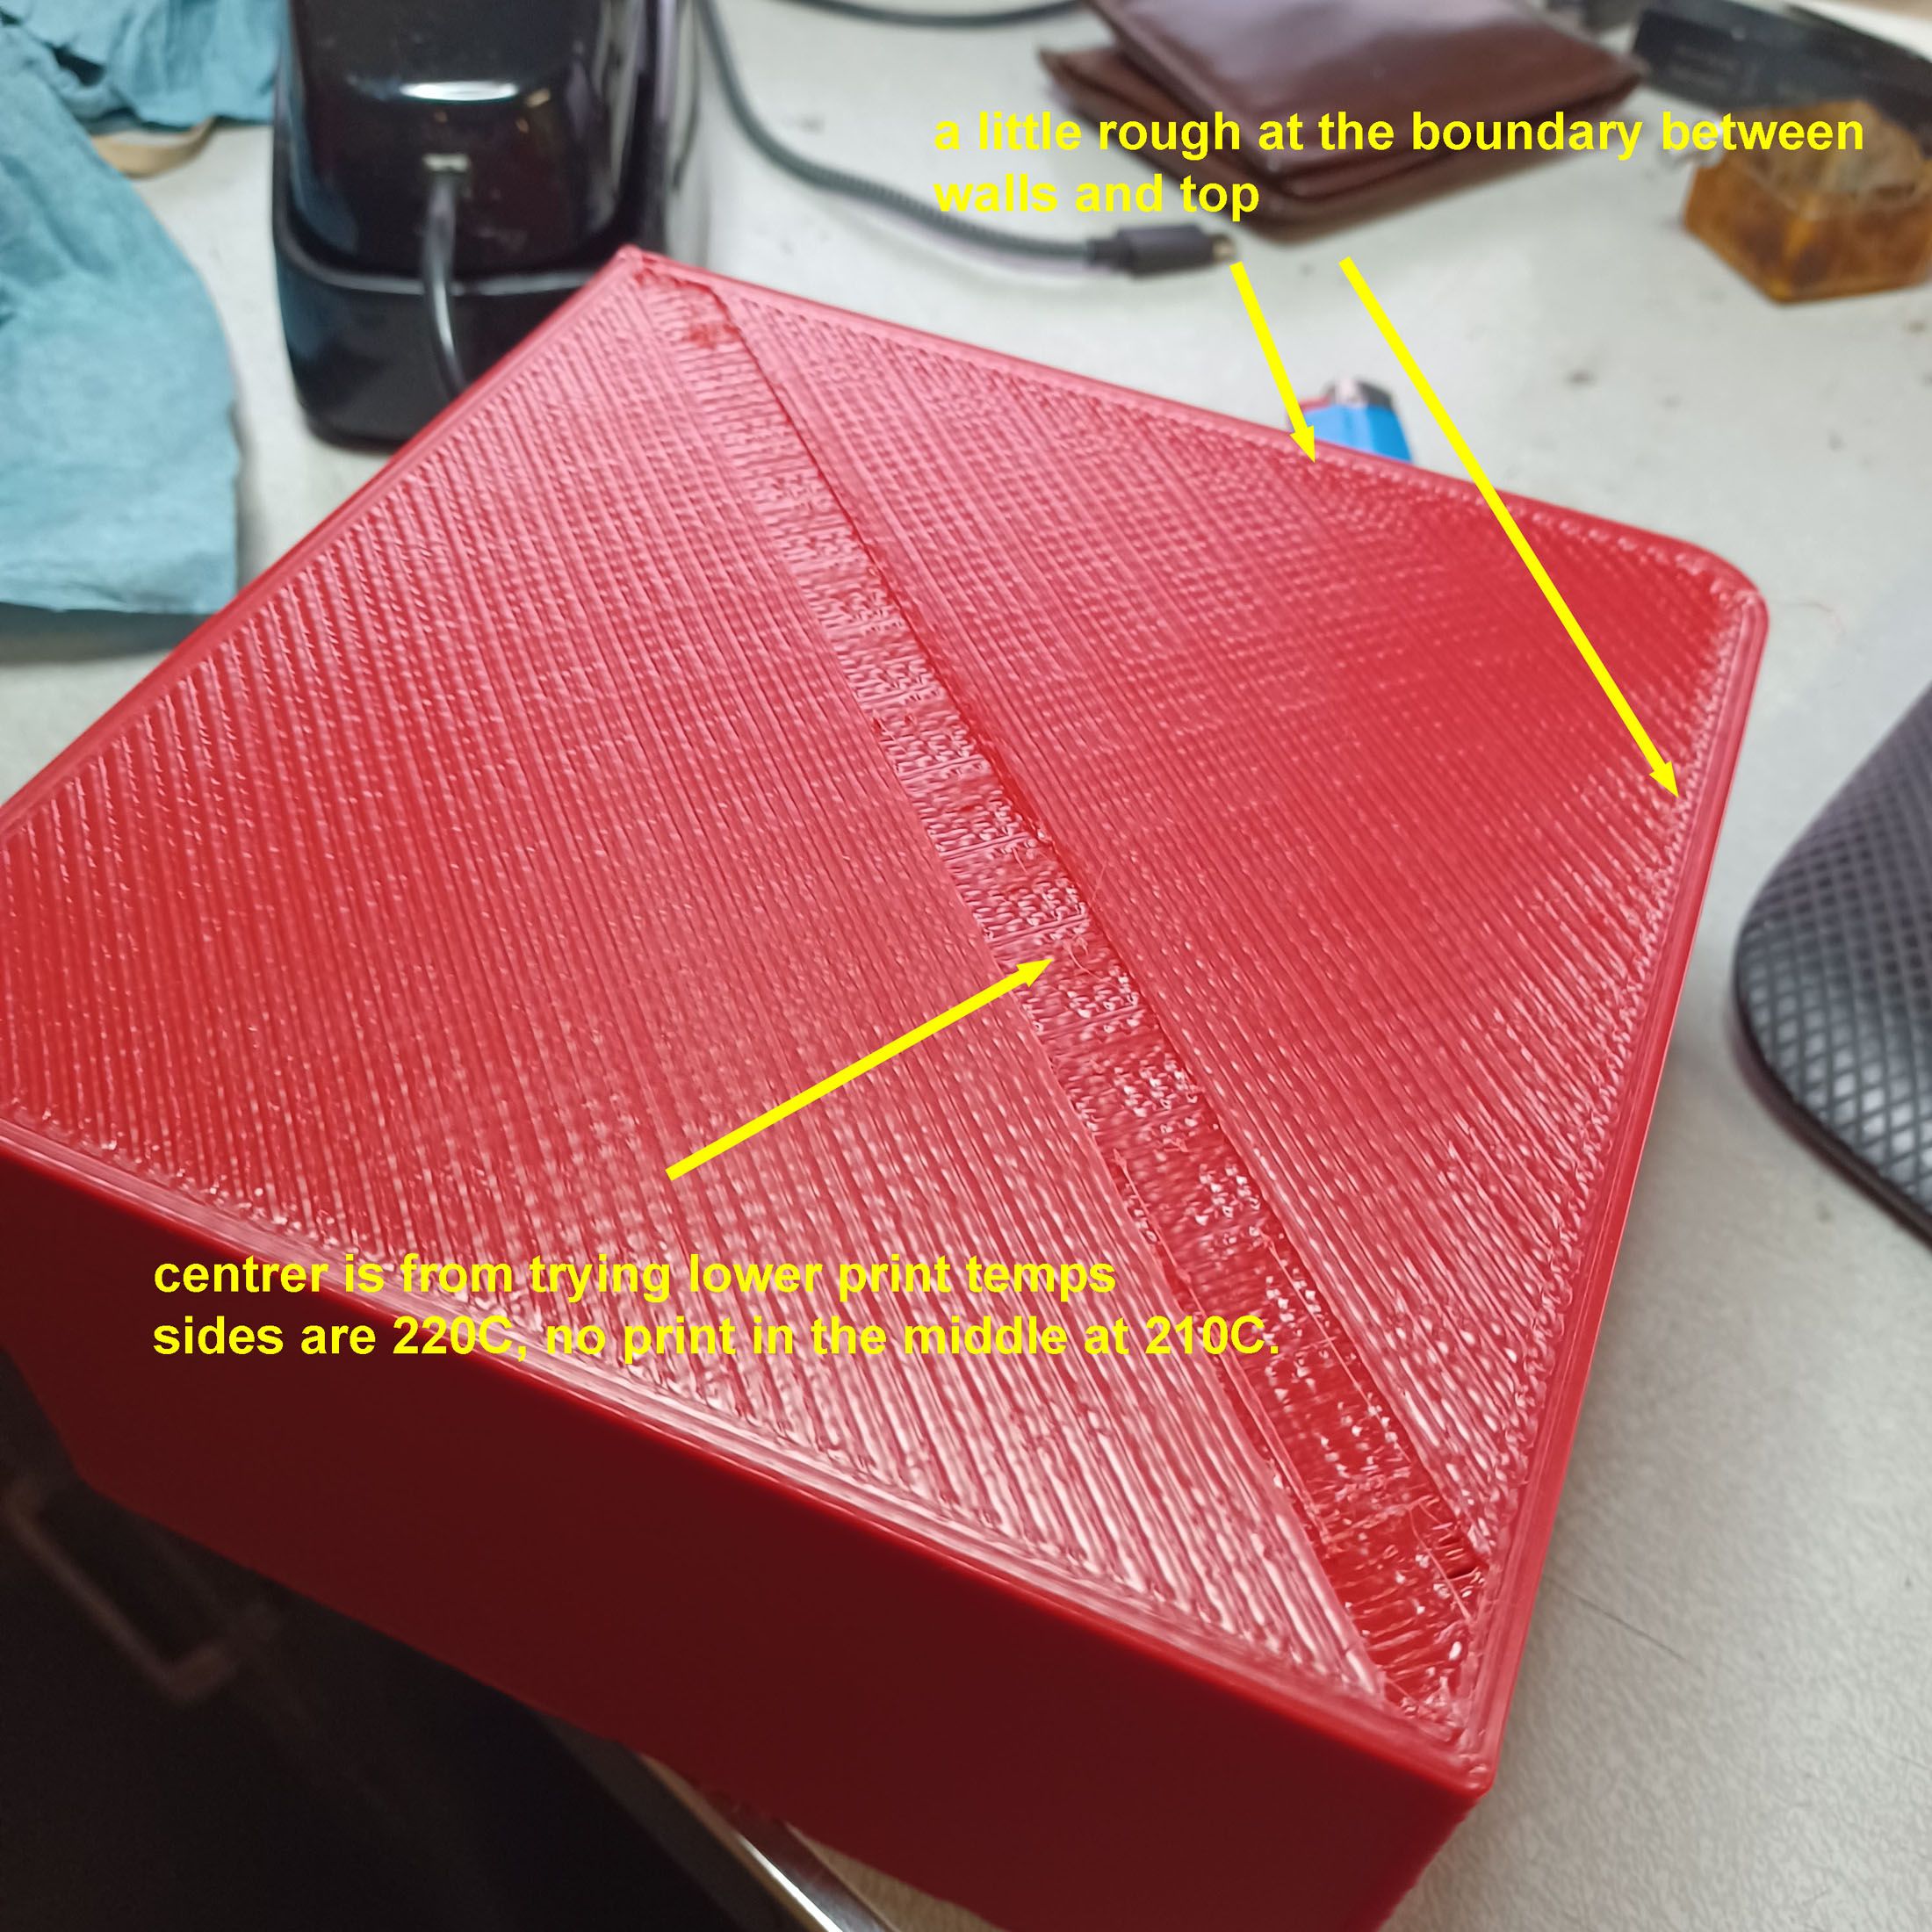
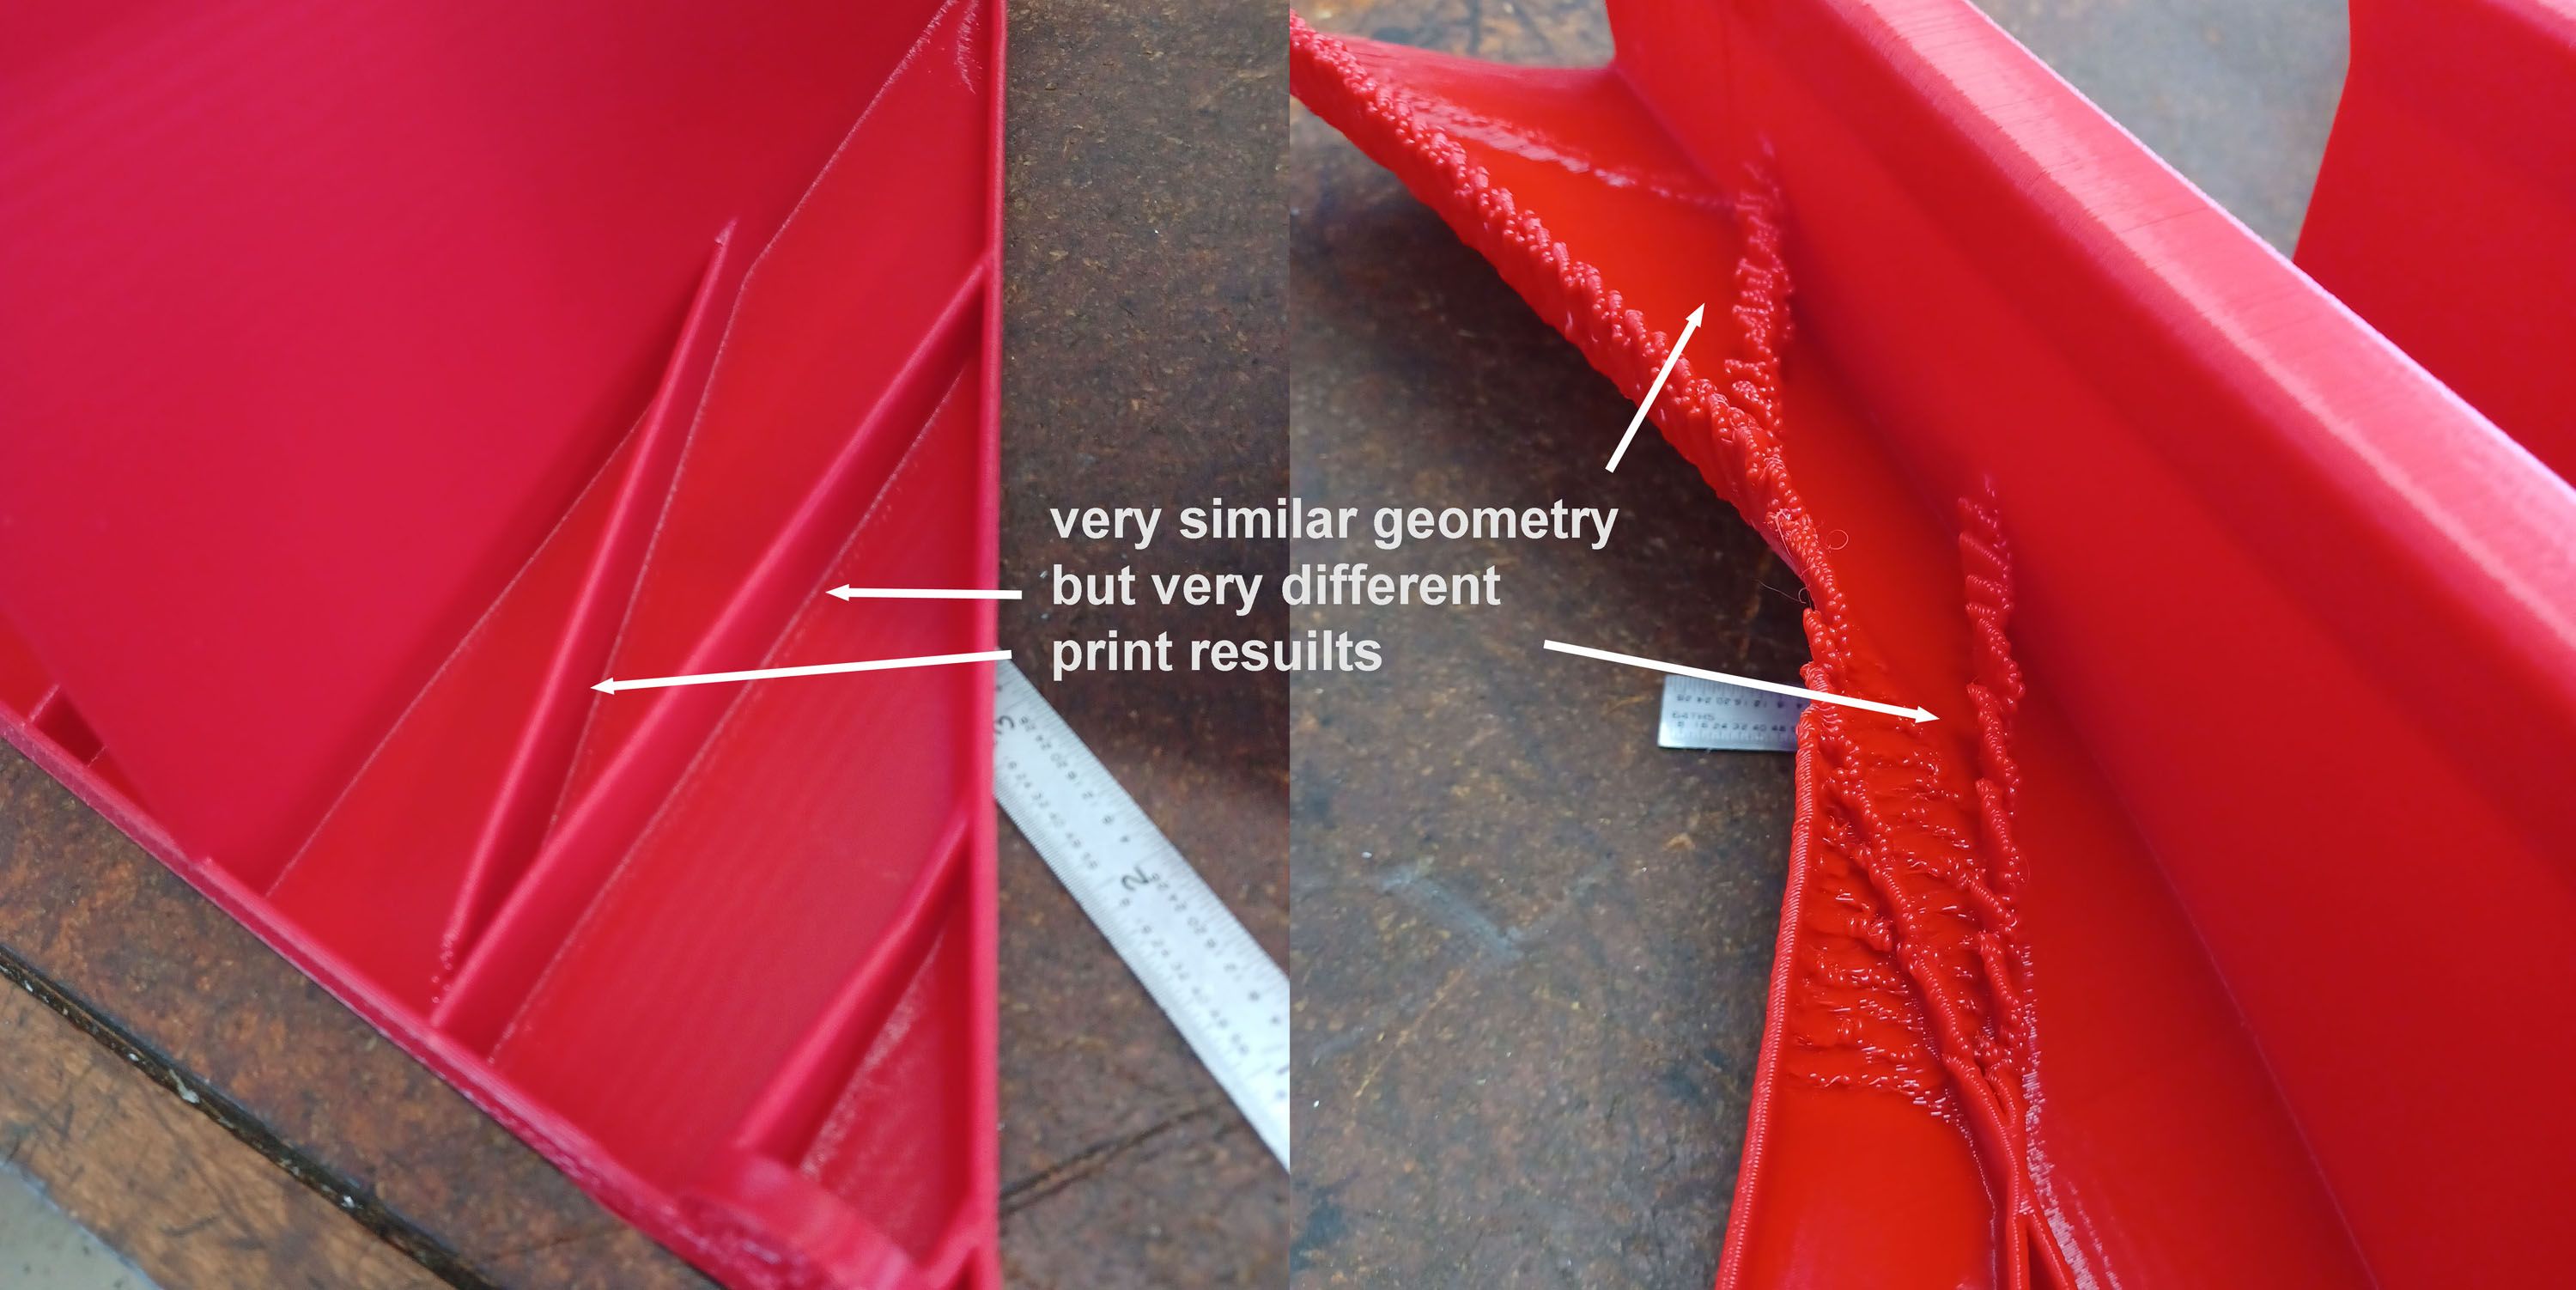
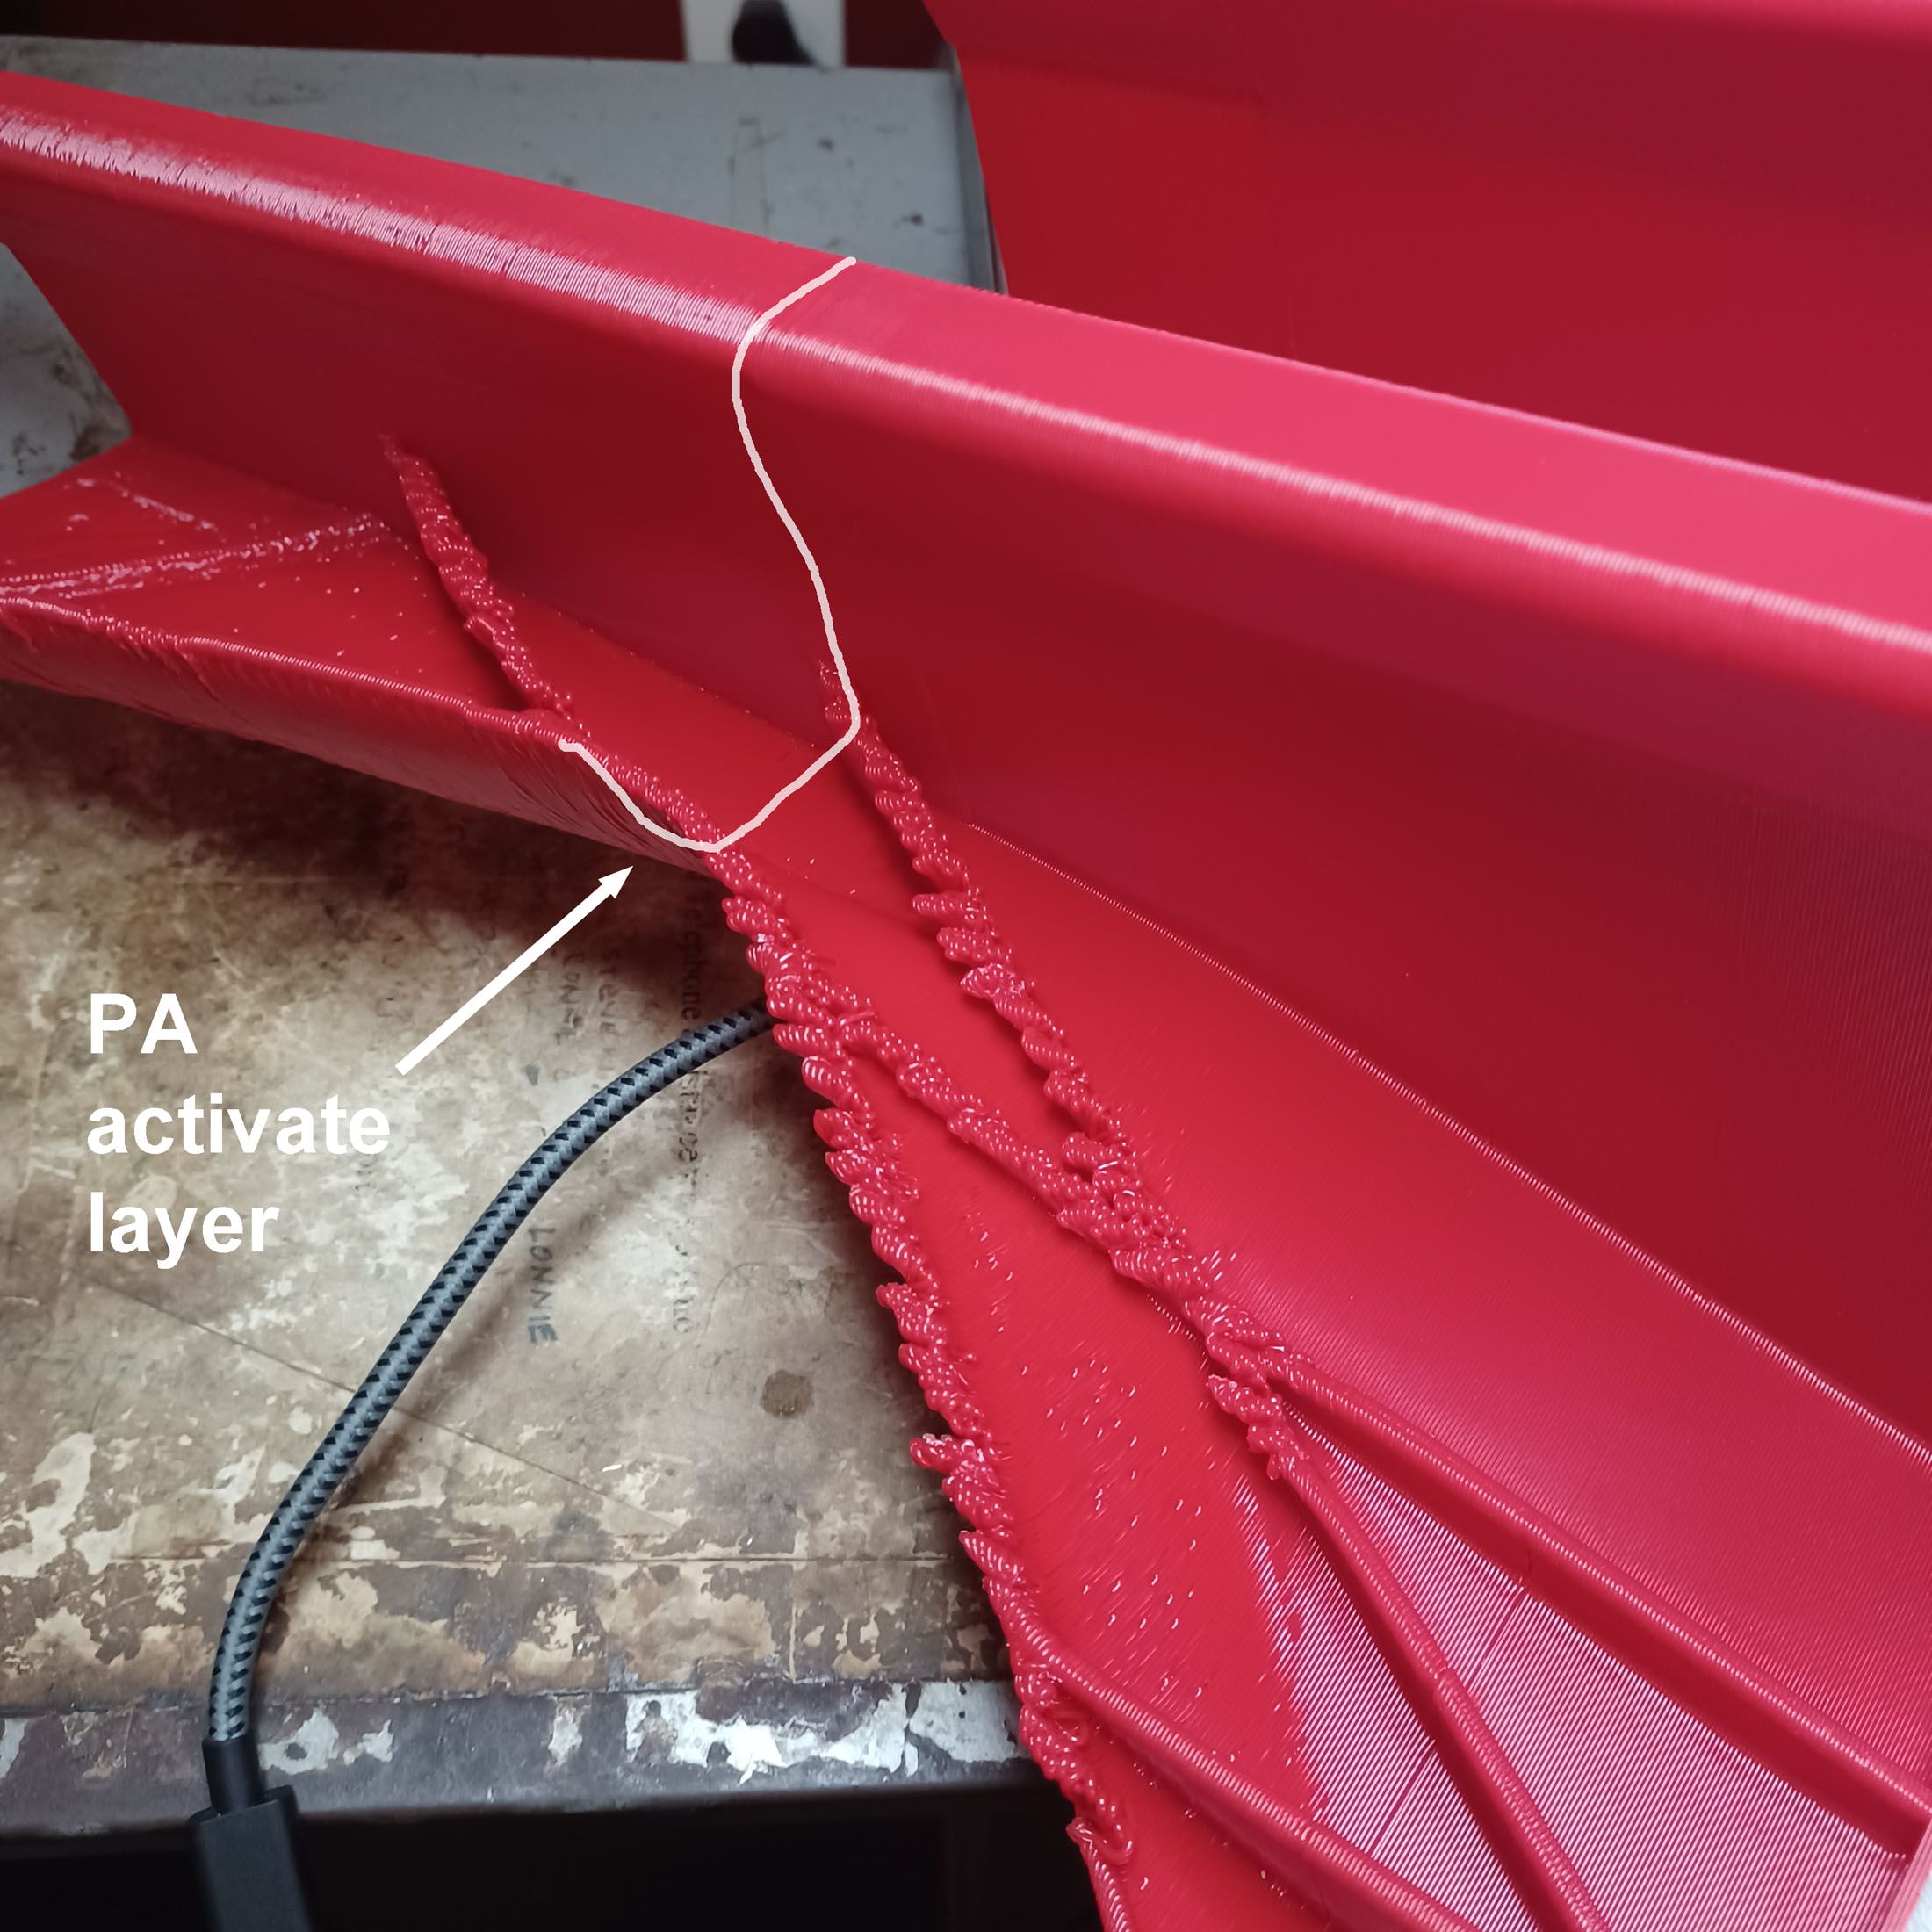
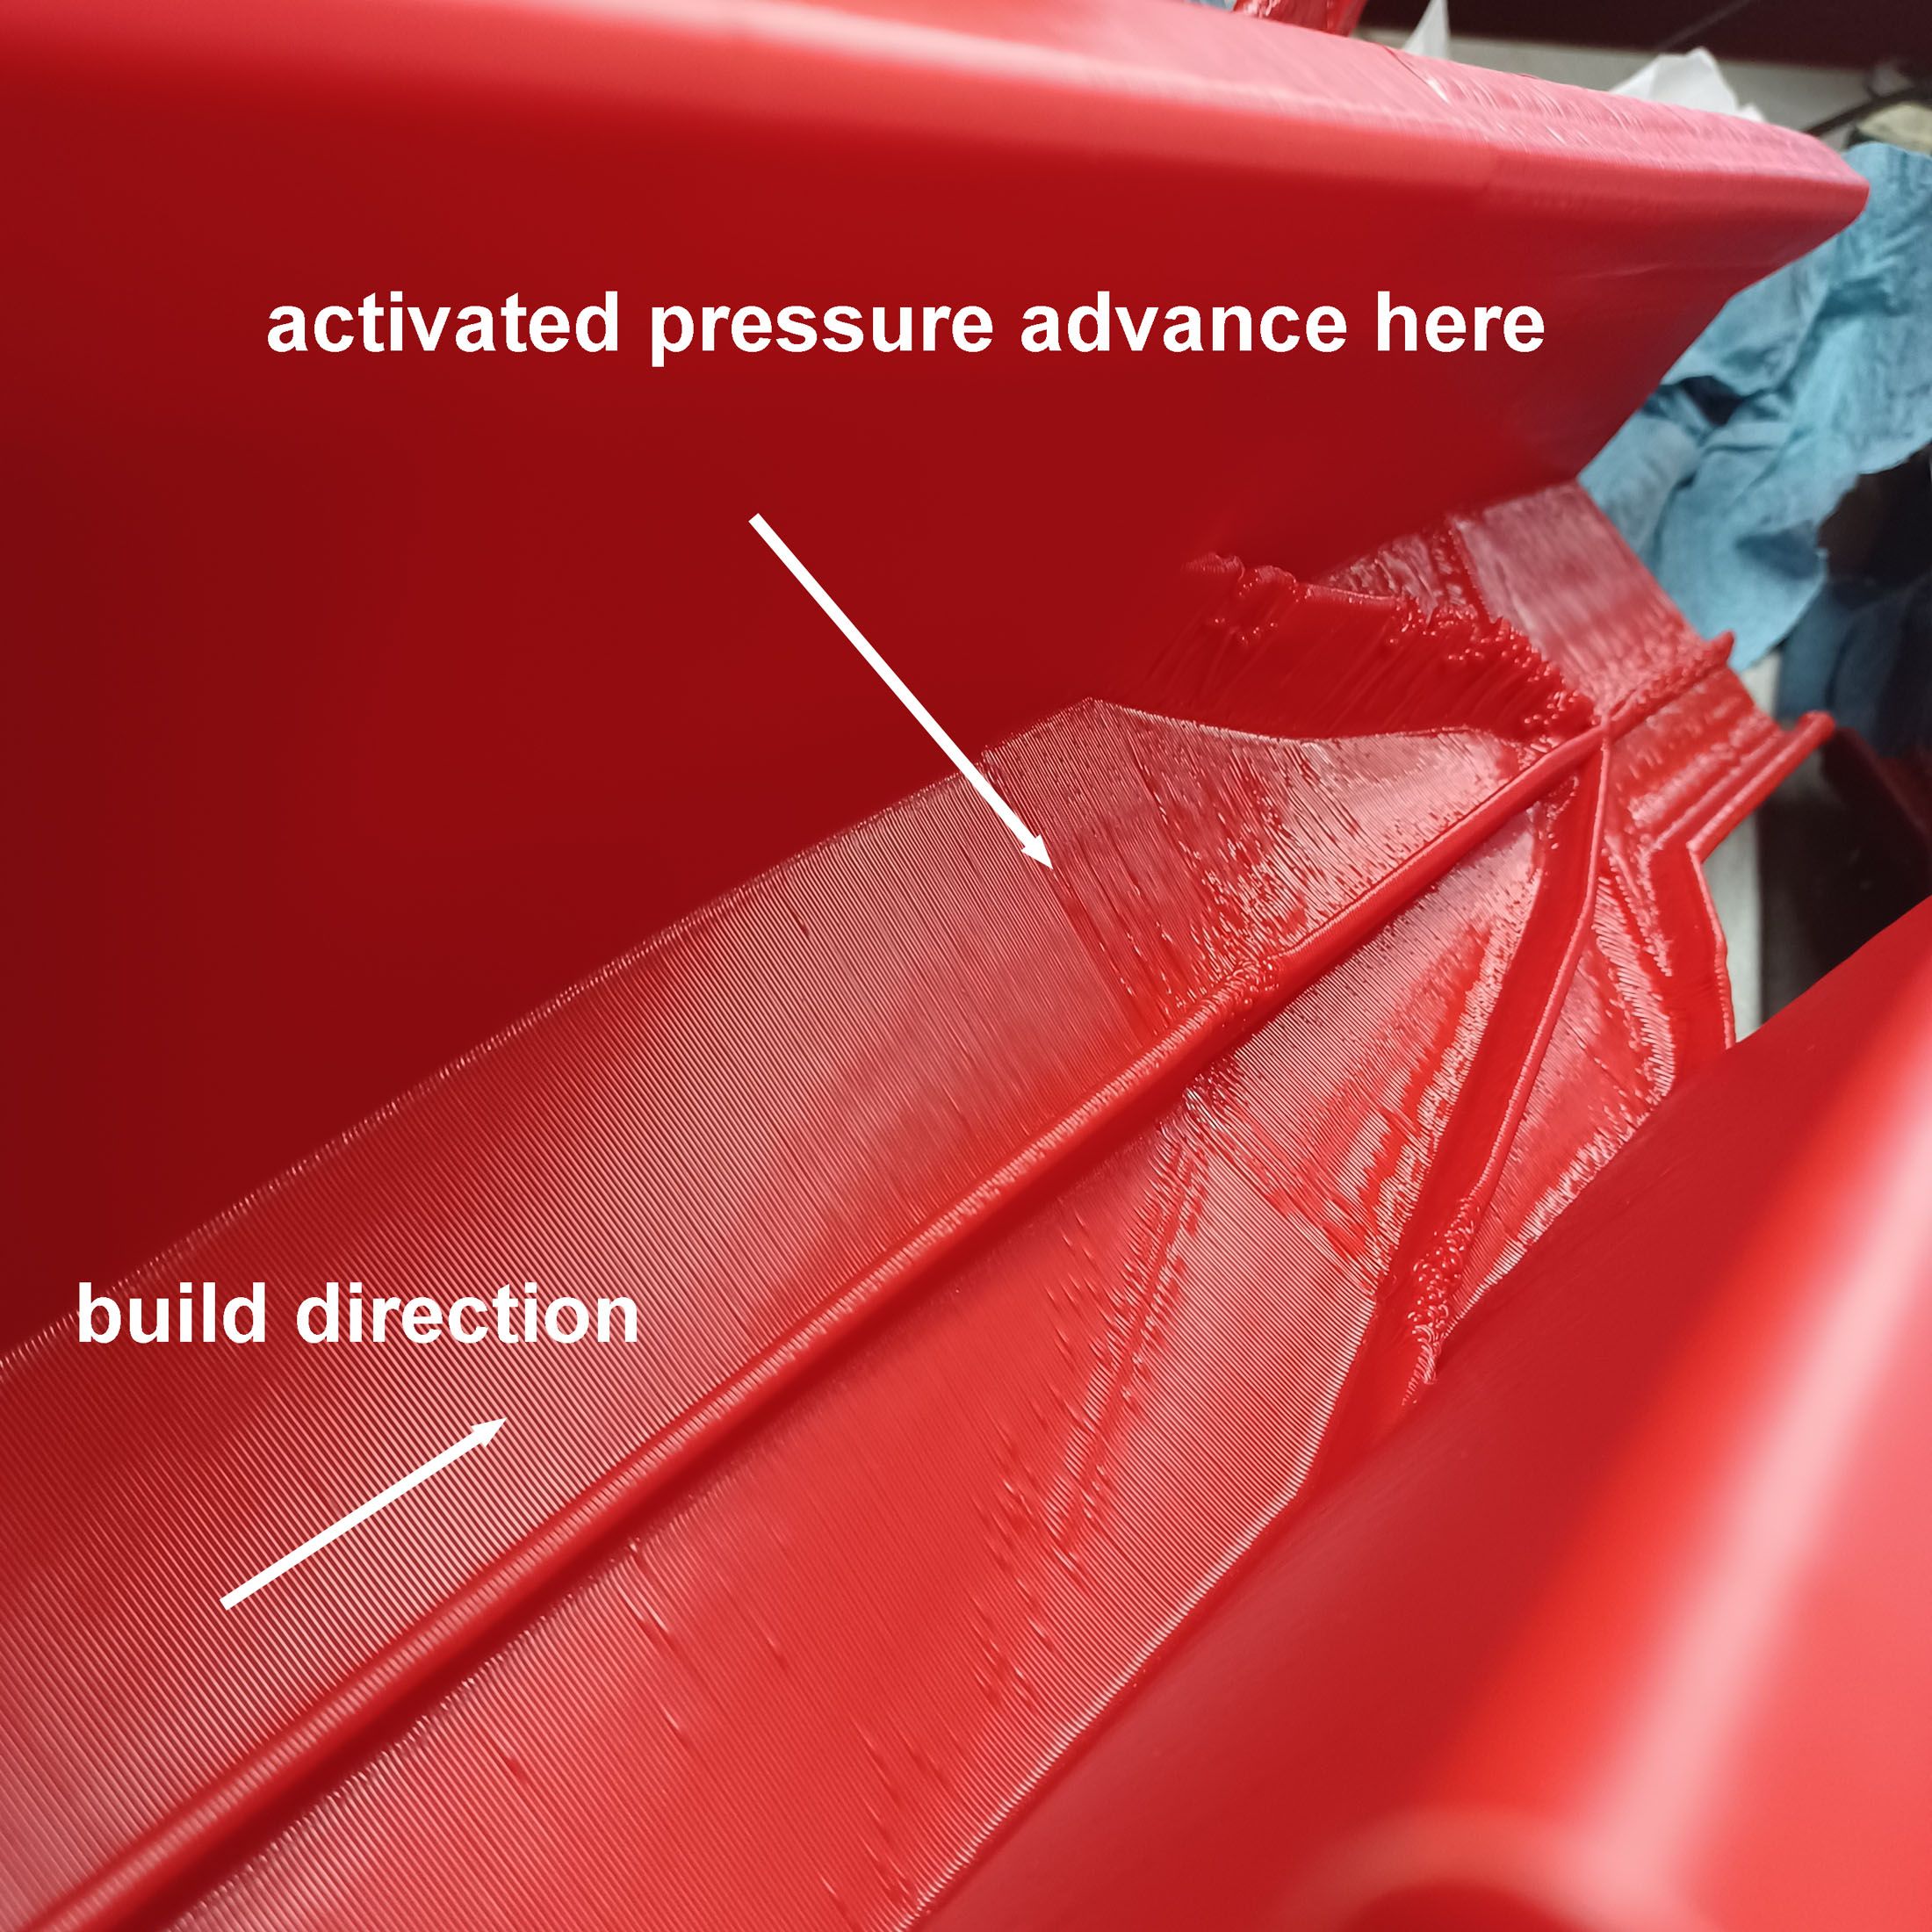
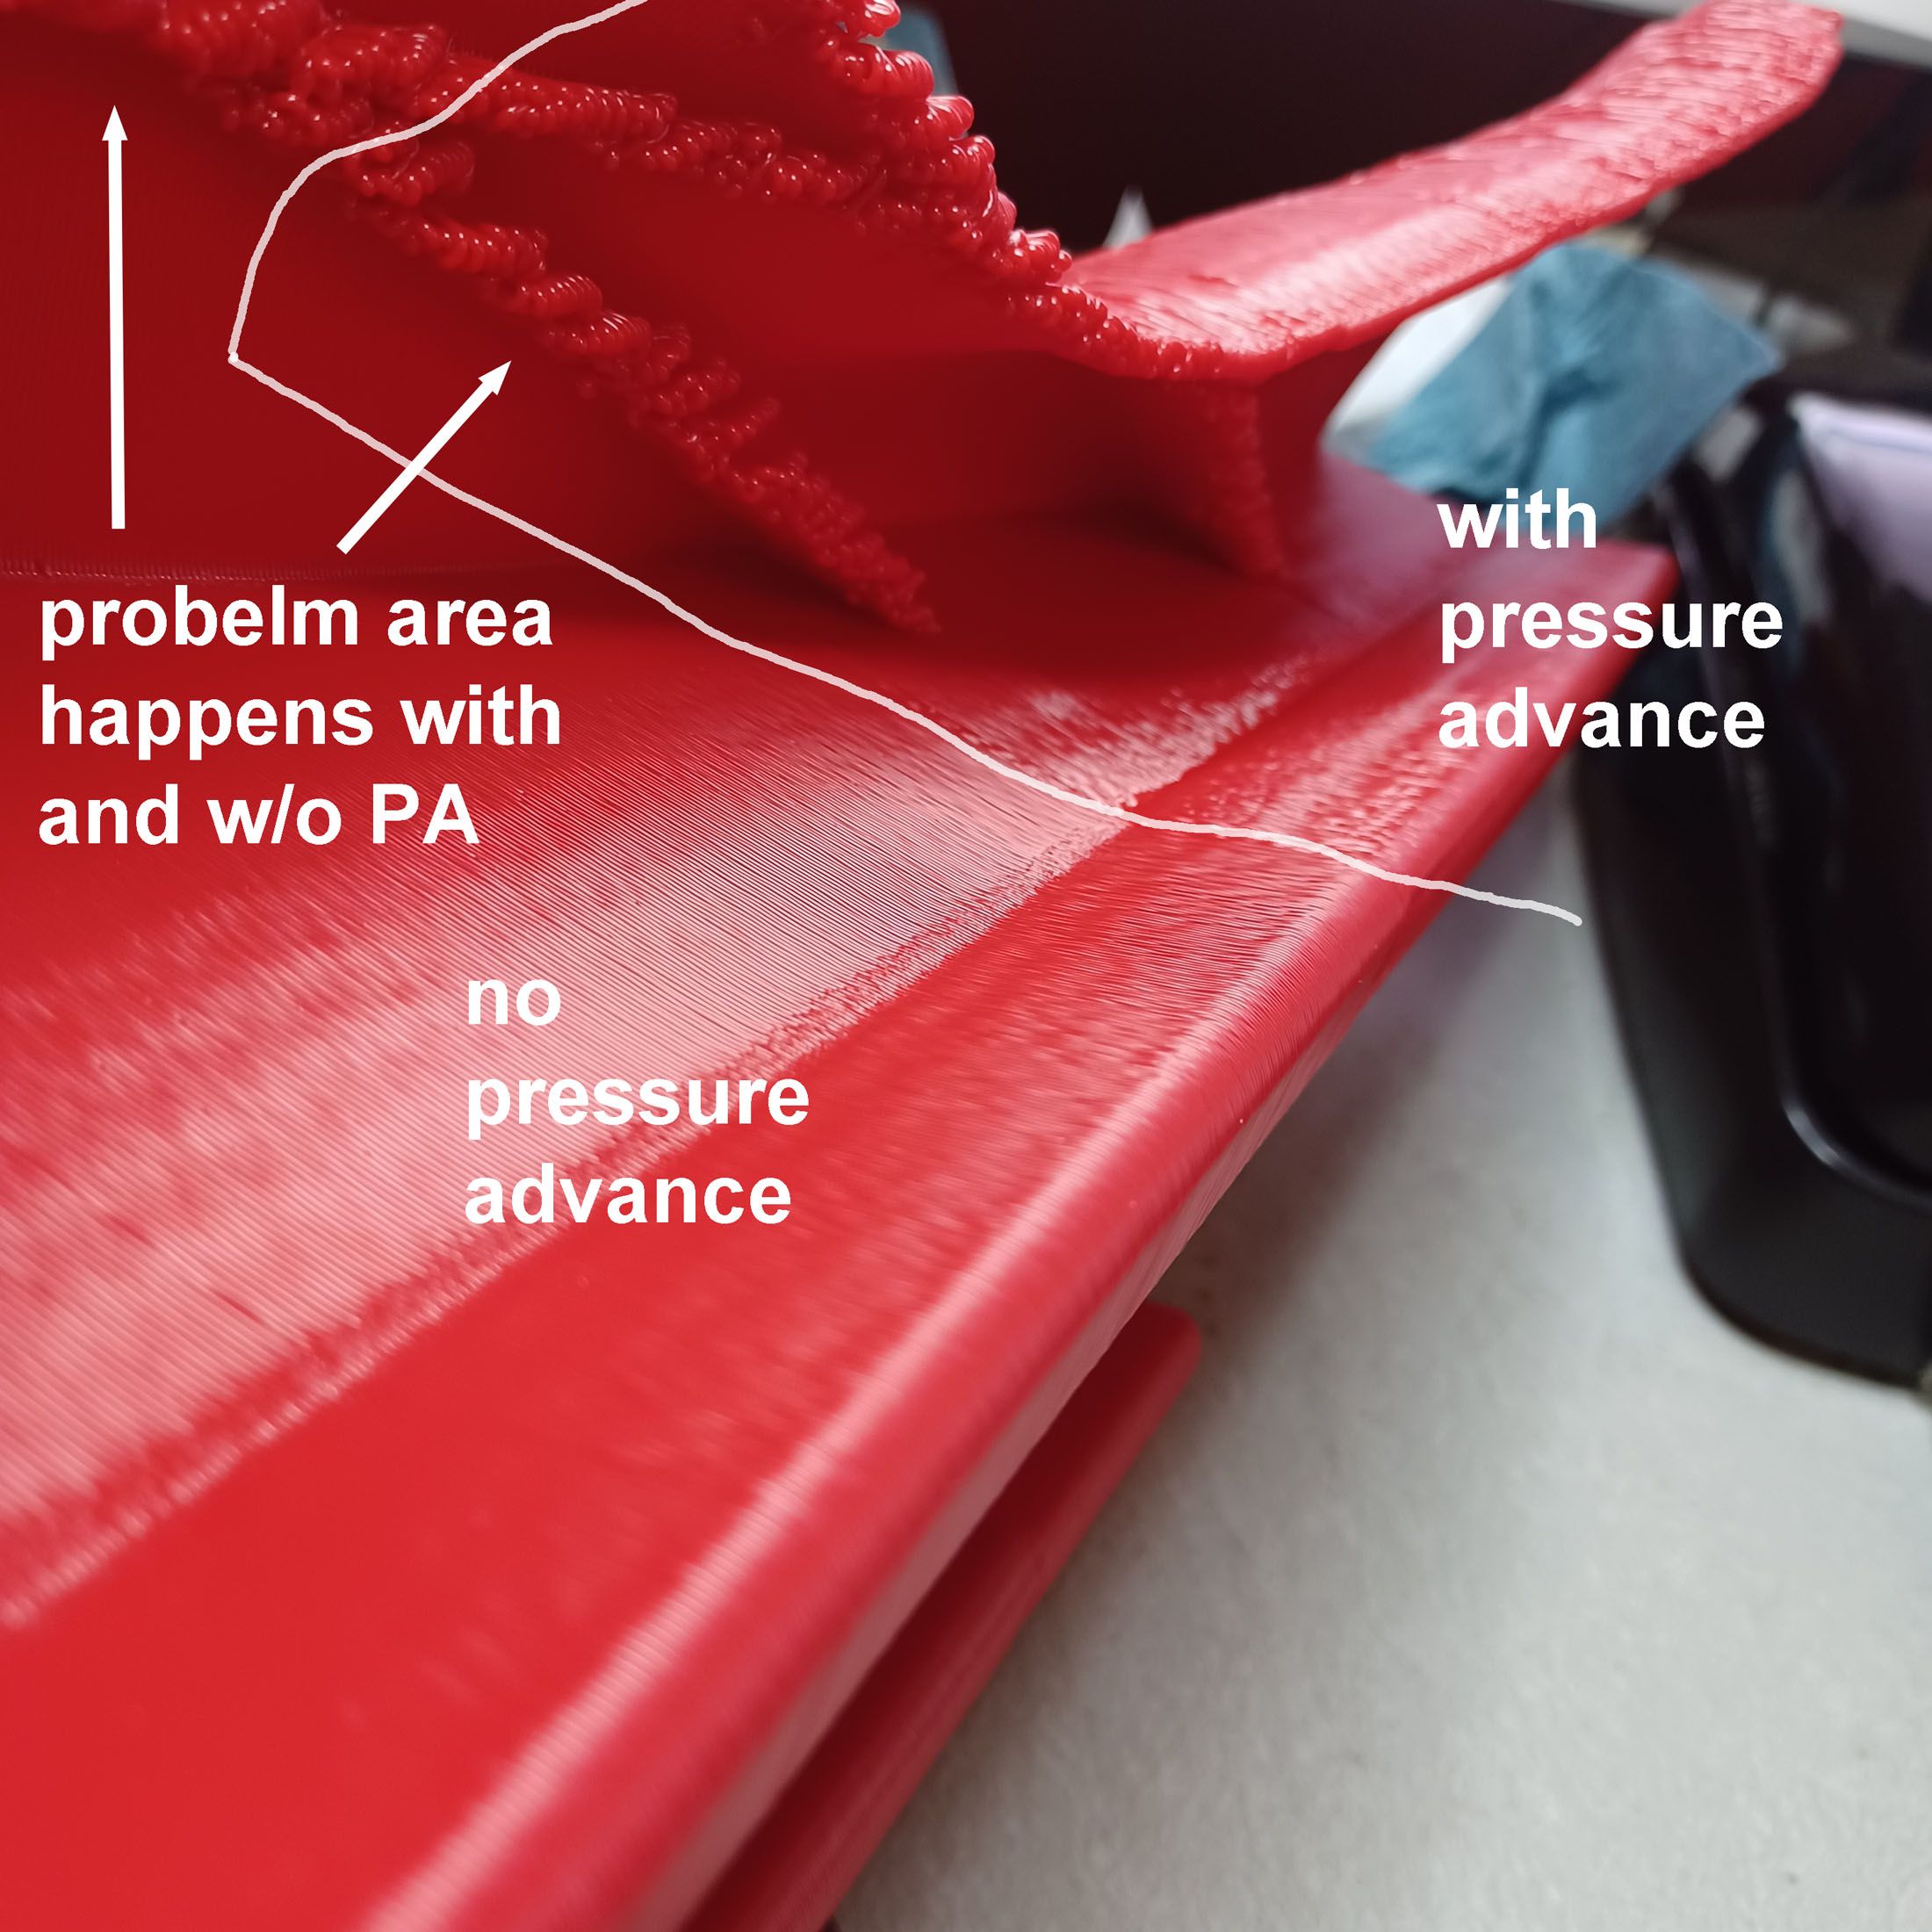
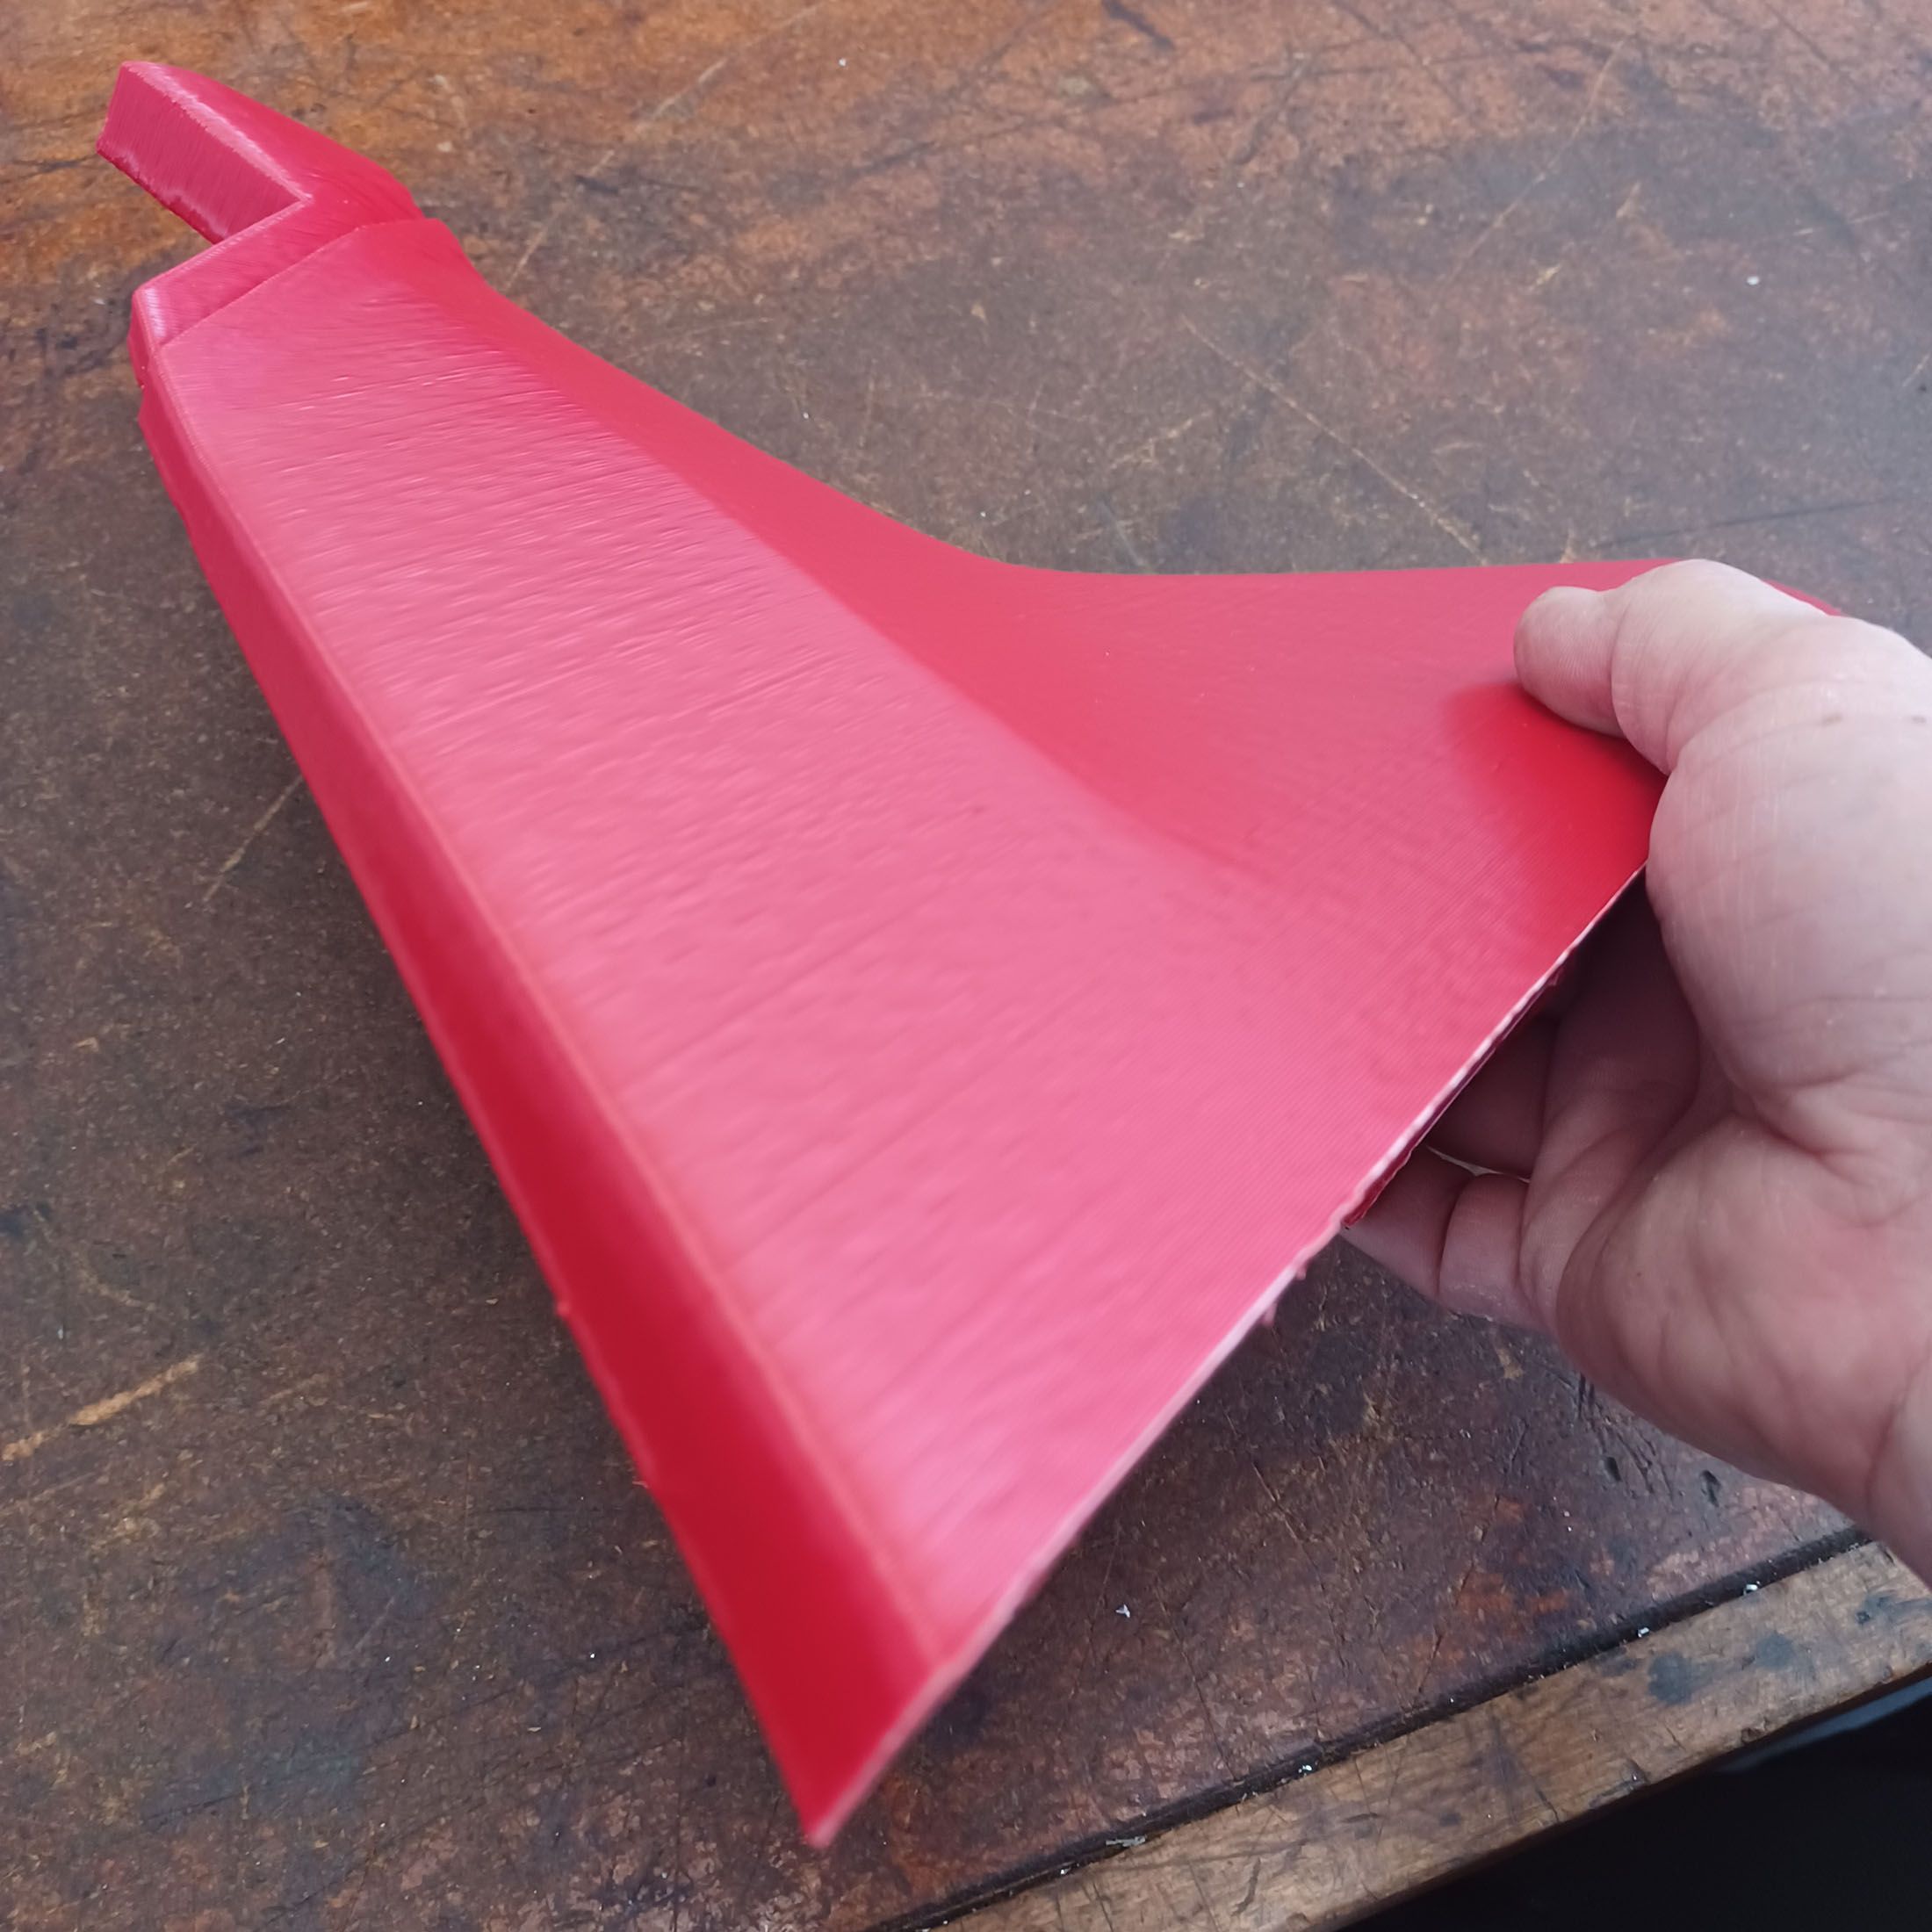
Thanks for the comments. There mechanicals are pretty solid without any play and the huge clearpath motors could stop the printhead on a pence so don't think it is mechanical. I had Tecnik's help tuning the stepper/servos and lots of mechanical issues can be seen through the diagnostic tools and he was pretty impressed with how good the XYUV axes were. I think the bad layer stacking alignment was due to one part of the bellows sagging when hot and rubbing back and forth on the freshly printed area. At least there was some print residue only on one area of the bellows that was above the bad area, so hopefully that is it. That area was near the chamber blower, so think the blower was blowing very hot air directly on the bellows, softened it, and it sagged and rubbed back and forth in Y on the part.
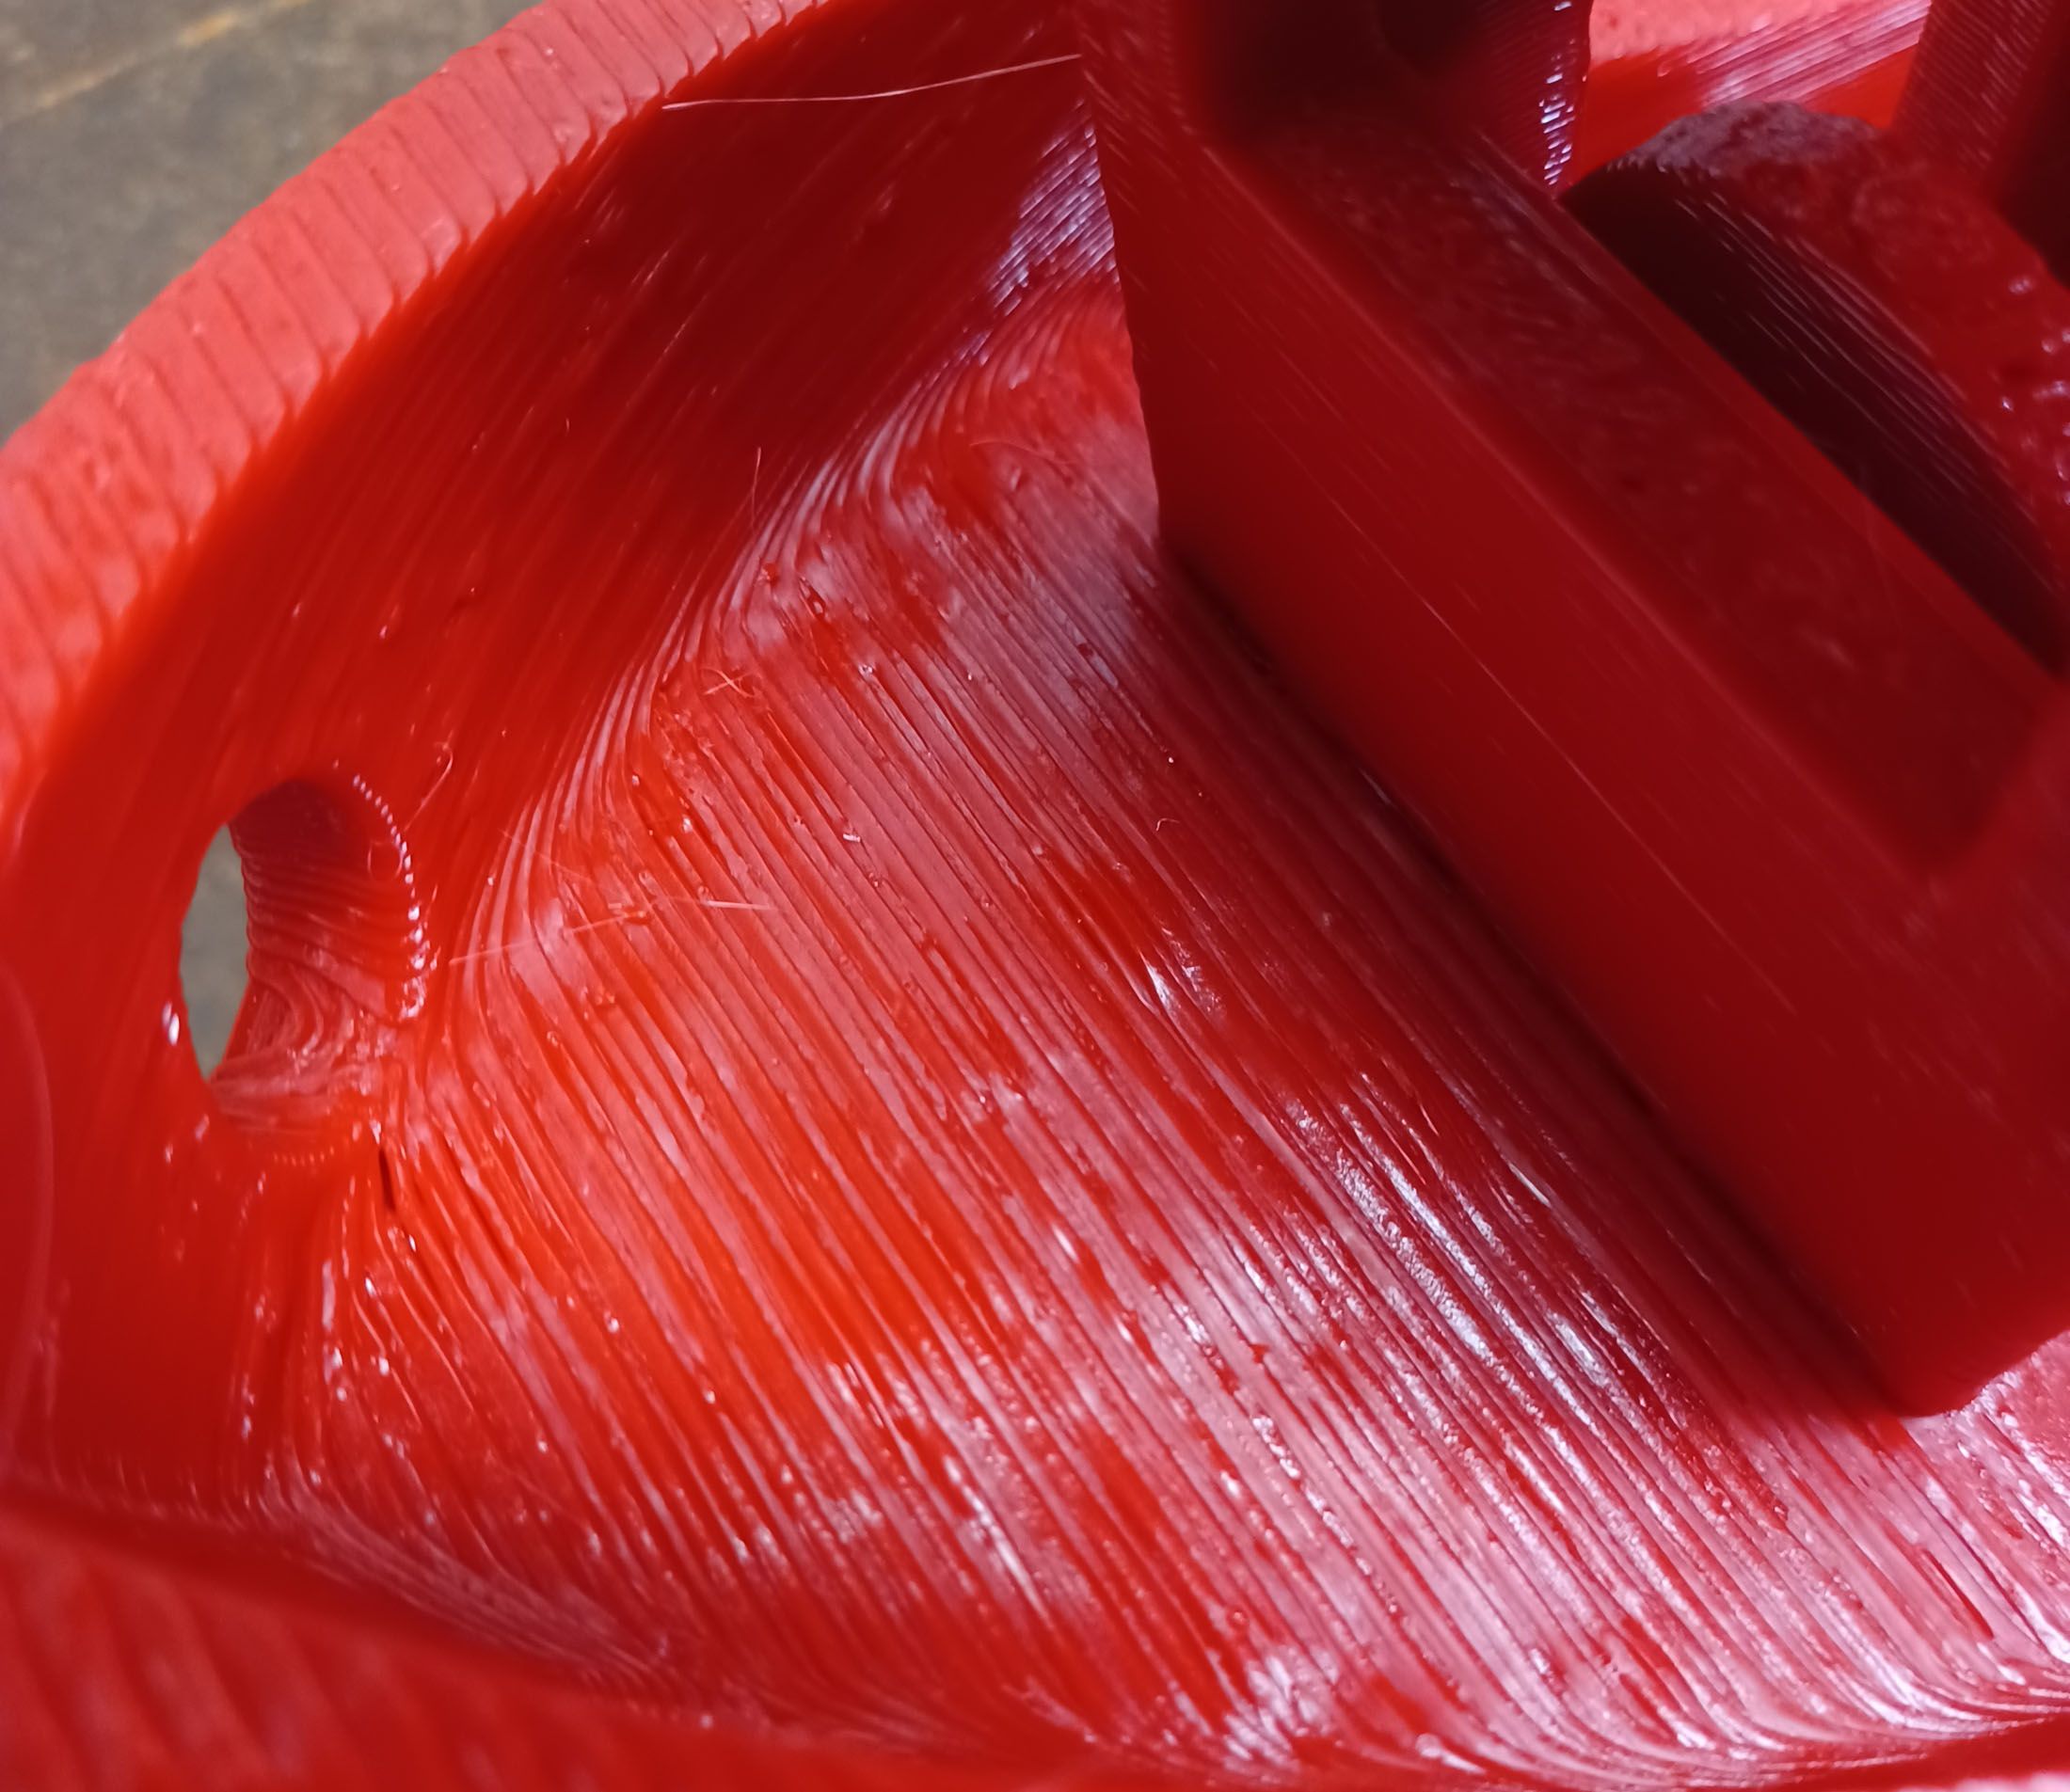
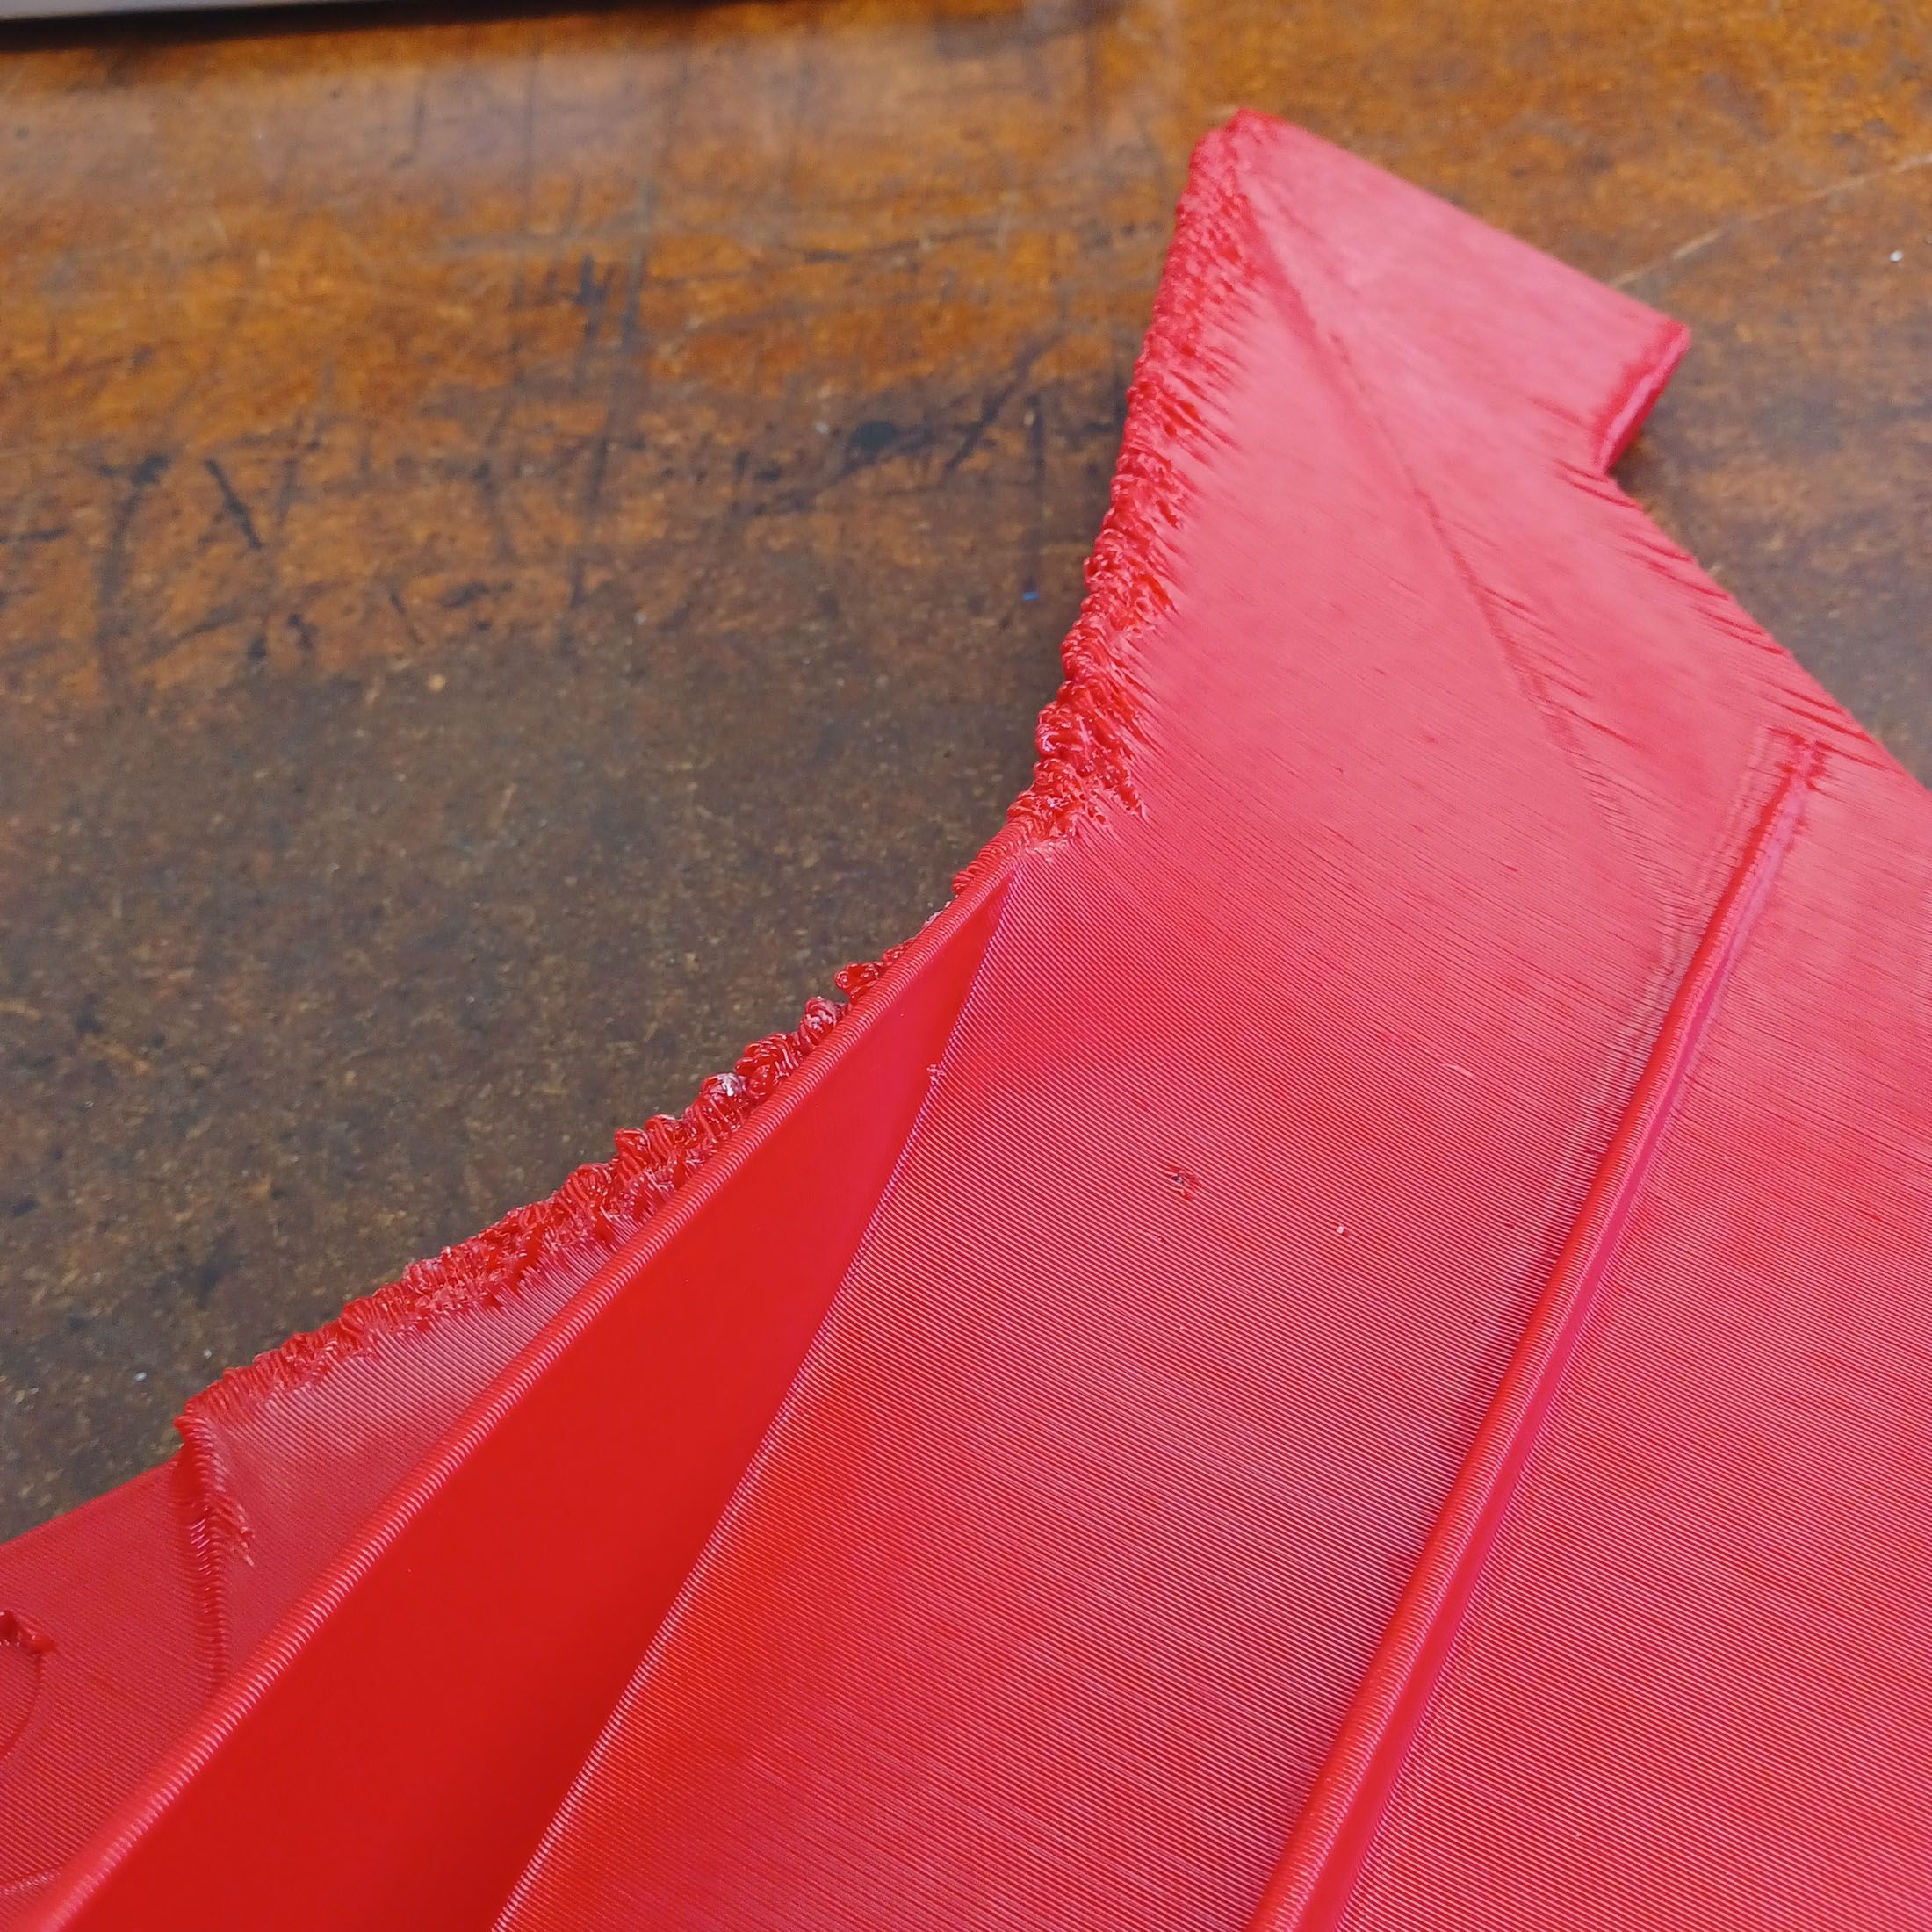
>> Zooming in to image #2 it looks like some under-extrusion is going on every few layers.
Is that caused by slippage at the extruder pinch?
>>I don't like it and it's really not good for overhangs
Agreed, I will reverse the wall printing order. Should infill be before or after walls? There is not much infill in these parts. Would setting infill to 0% or 100% be best if trying to get the part to be build using profiles only?
>>Cura doesn't support additional axes. You may have to make other adjustments.
That's what I get for making assumptions! Thought their printers were IDEX but they are just dual printheads.
>>And for that bit of advice you owe me a Vesco Rabid Transit fairing to fit a 1978 Honda GL1000 with a 7" headlight. If you want to throw in the lowers I won't complain.
These days a Vesco fairing would cost more than the bike! 😉


Recommended Posts
Top Posters In This Topic
43
21
4
Popular Days
Jun 9
8
Jun 2
8
Jun 3
5
Jun 10
5
Top Posters In This Topic
coseng 43 posts
GregValiant 21 posts
gr5 4 posts
Popular Days
Jun 9 2022
8 posts
Jun 2 2022
8 posts
Jun 3 2022
5 posts
Jun 10 2022
5 posts
Popular Posts
GregValiant
How are you powering the bed and hot end? Are they separate from the mainboard (other than control wiring)? Going back through all your photos, I think I'm seeing a persistent problem with extru
coseng
I'm reluctant to start trimming prints since then the tests are not really representative of the thermal operating conditions. I'm in this project about $6k so far and have wasted more filament with
coseng
I love the embedded nut idea! The multiple pauses is dedication! Great idea and flag choices, 😉 I'm going to test the parts on track as-is. There is a lot to be tested for rider ergono
Posted Images
GregValiant 1,330
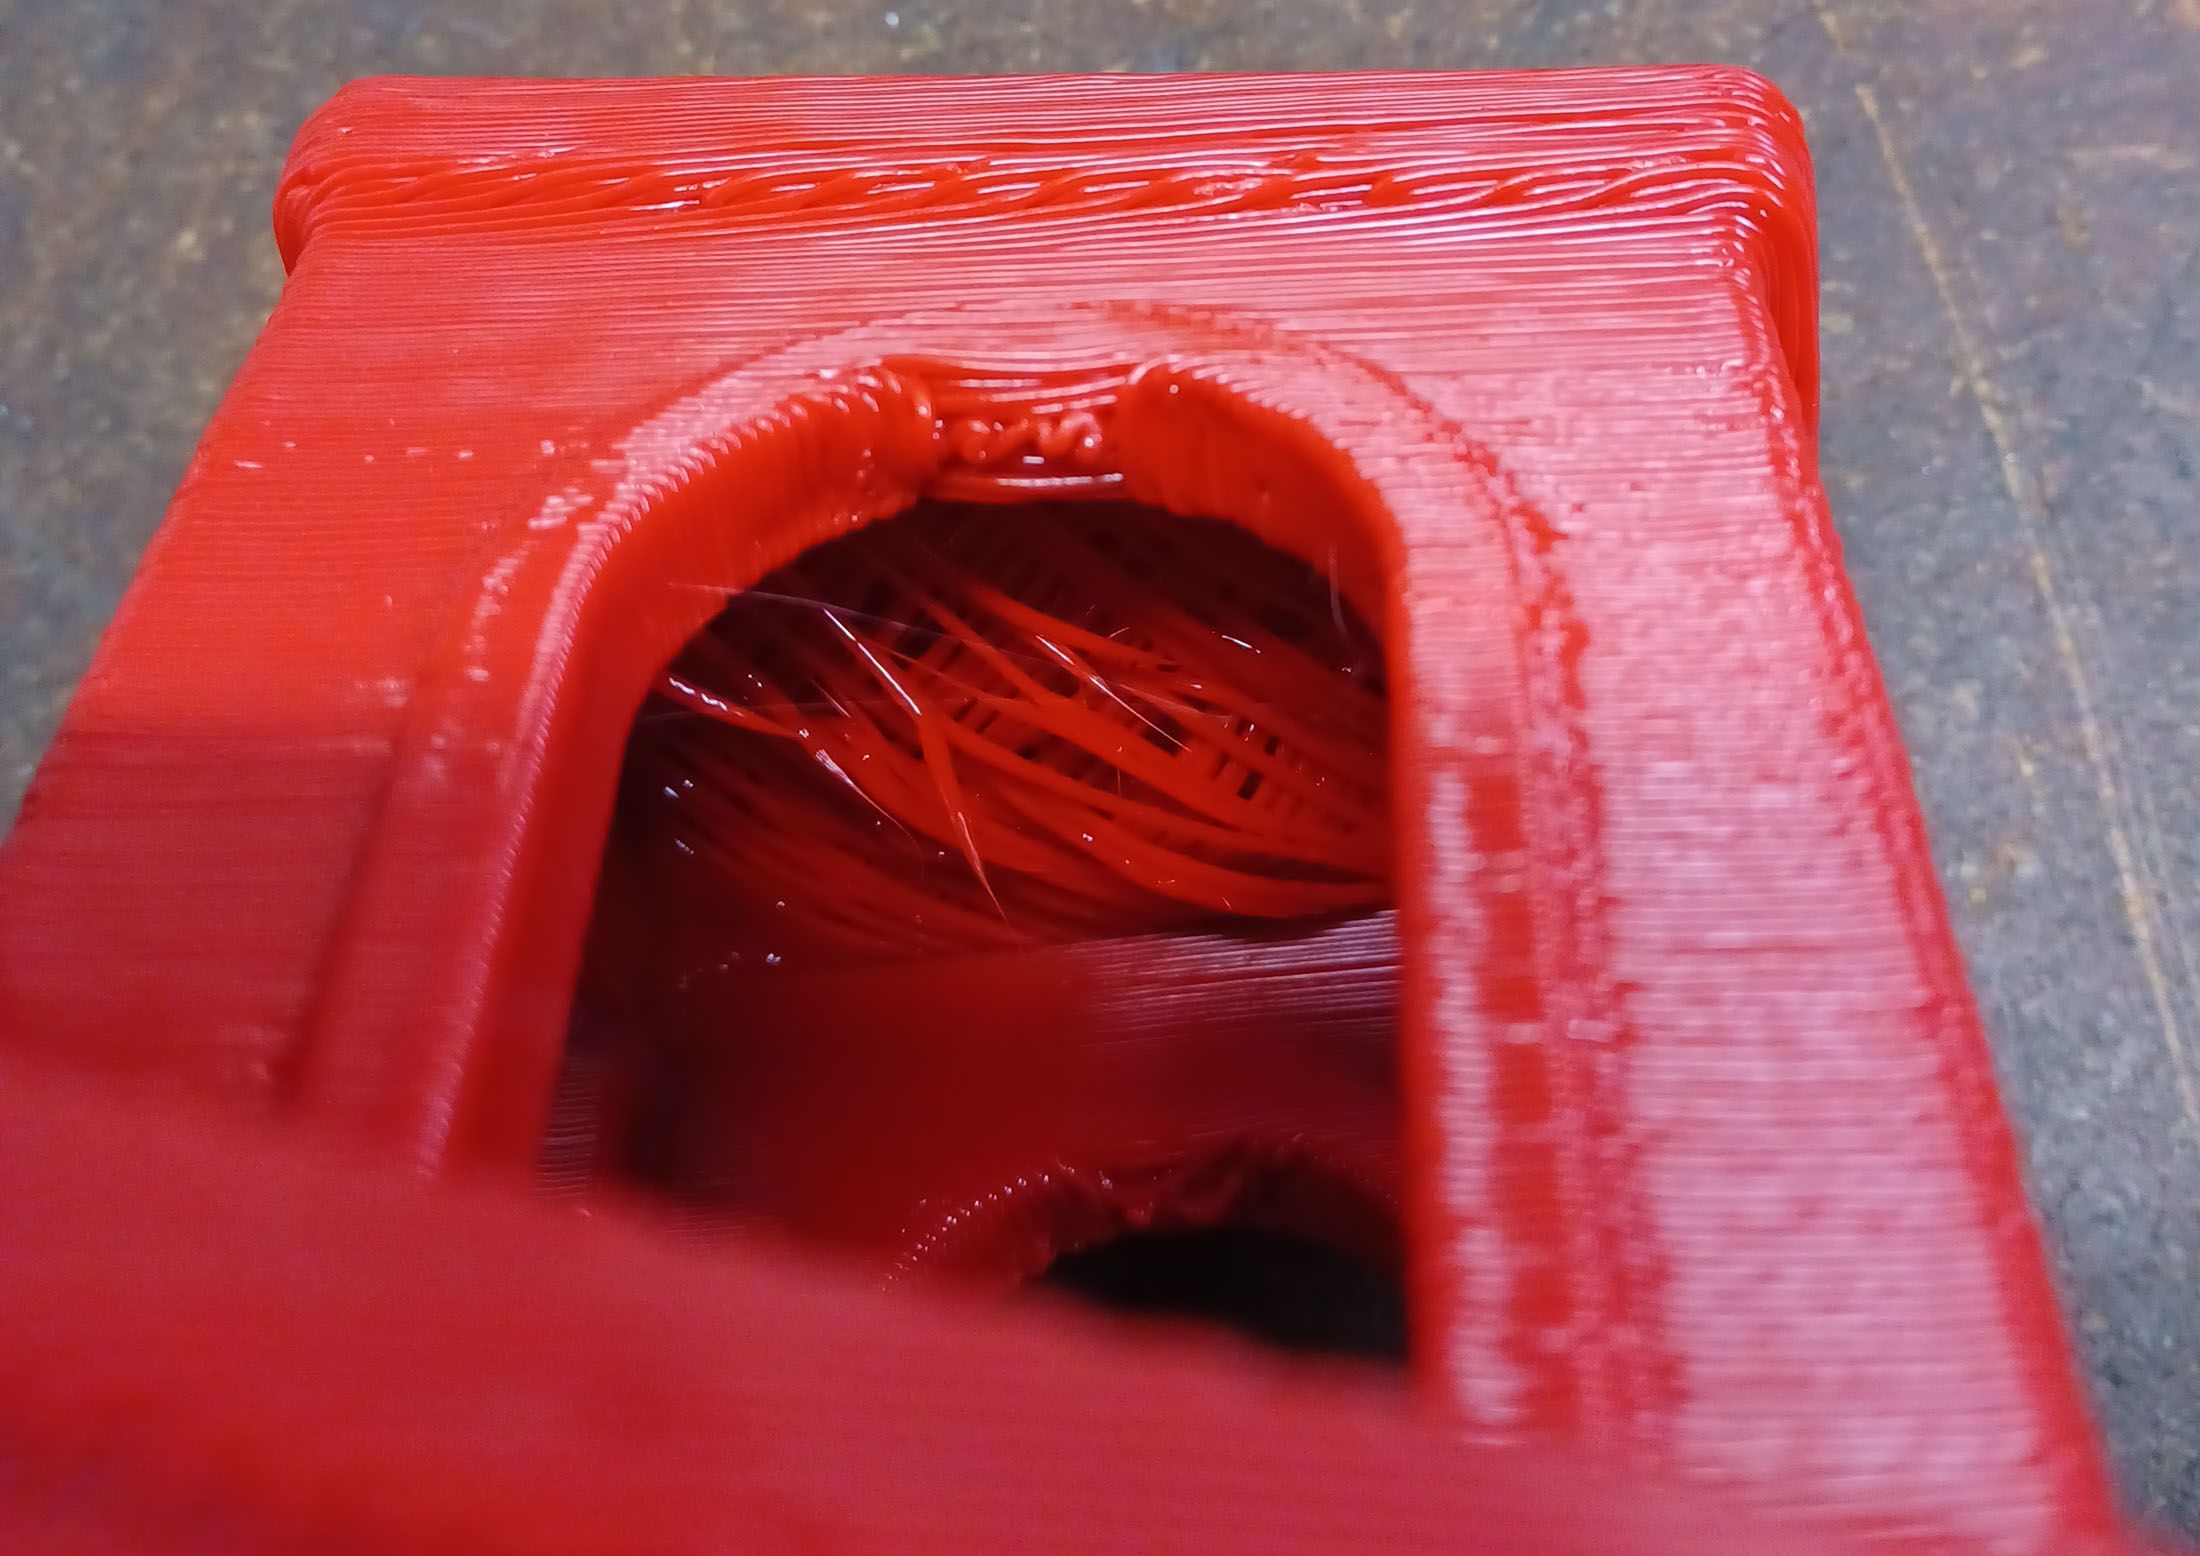
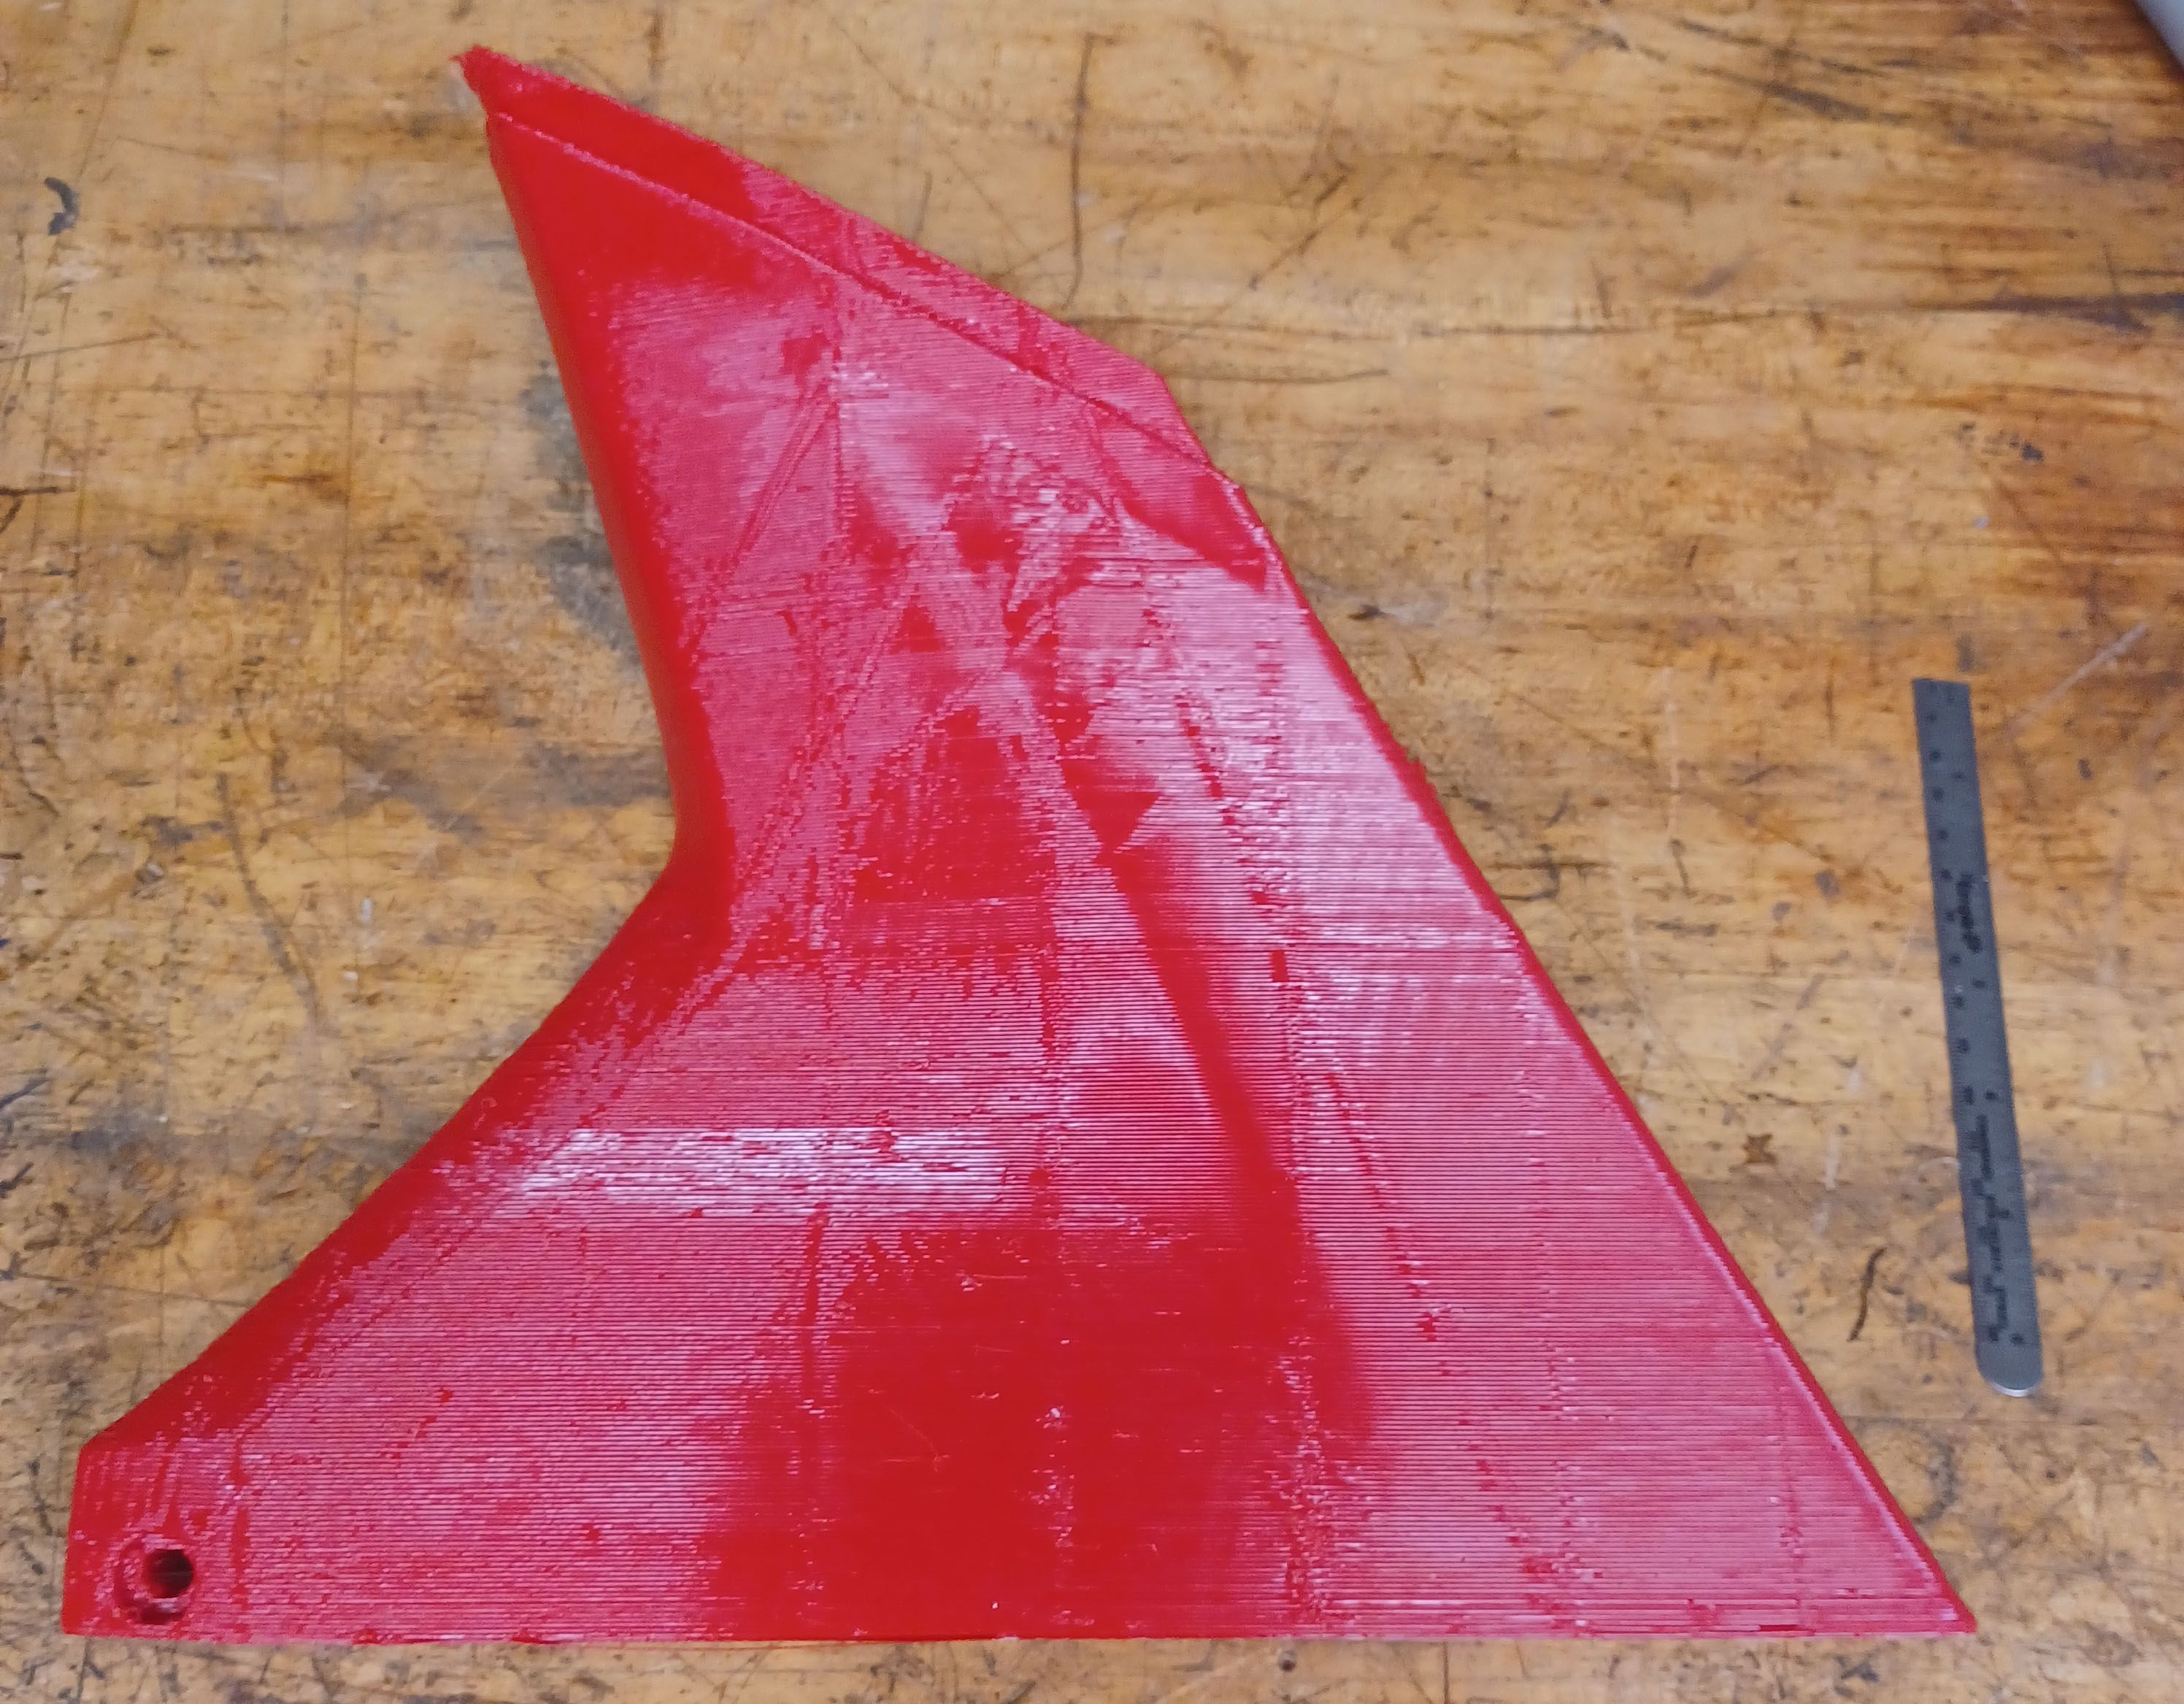
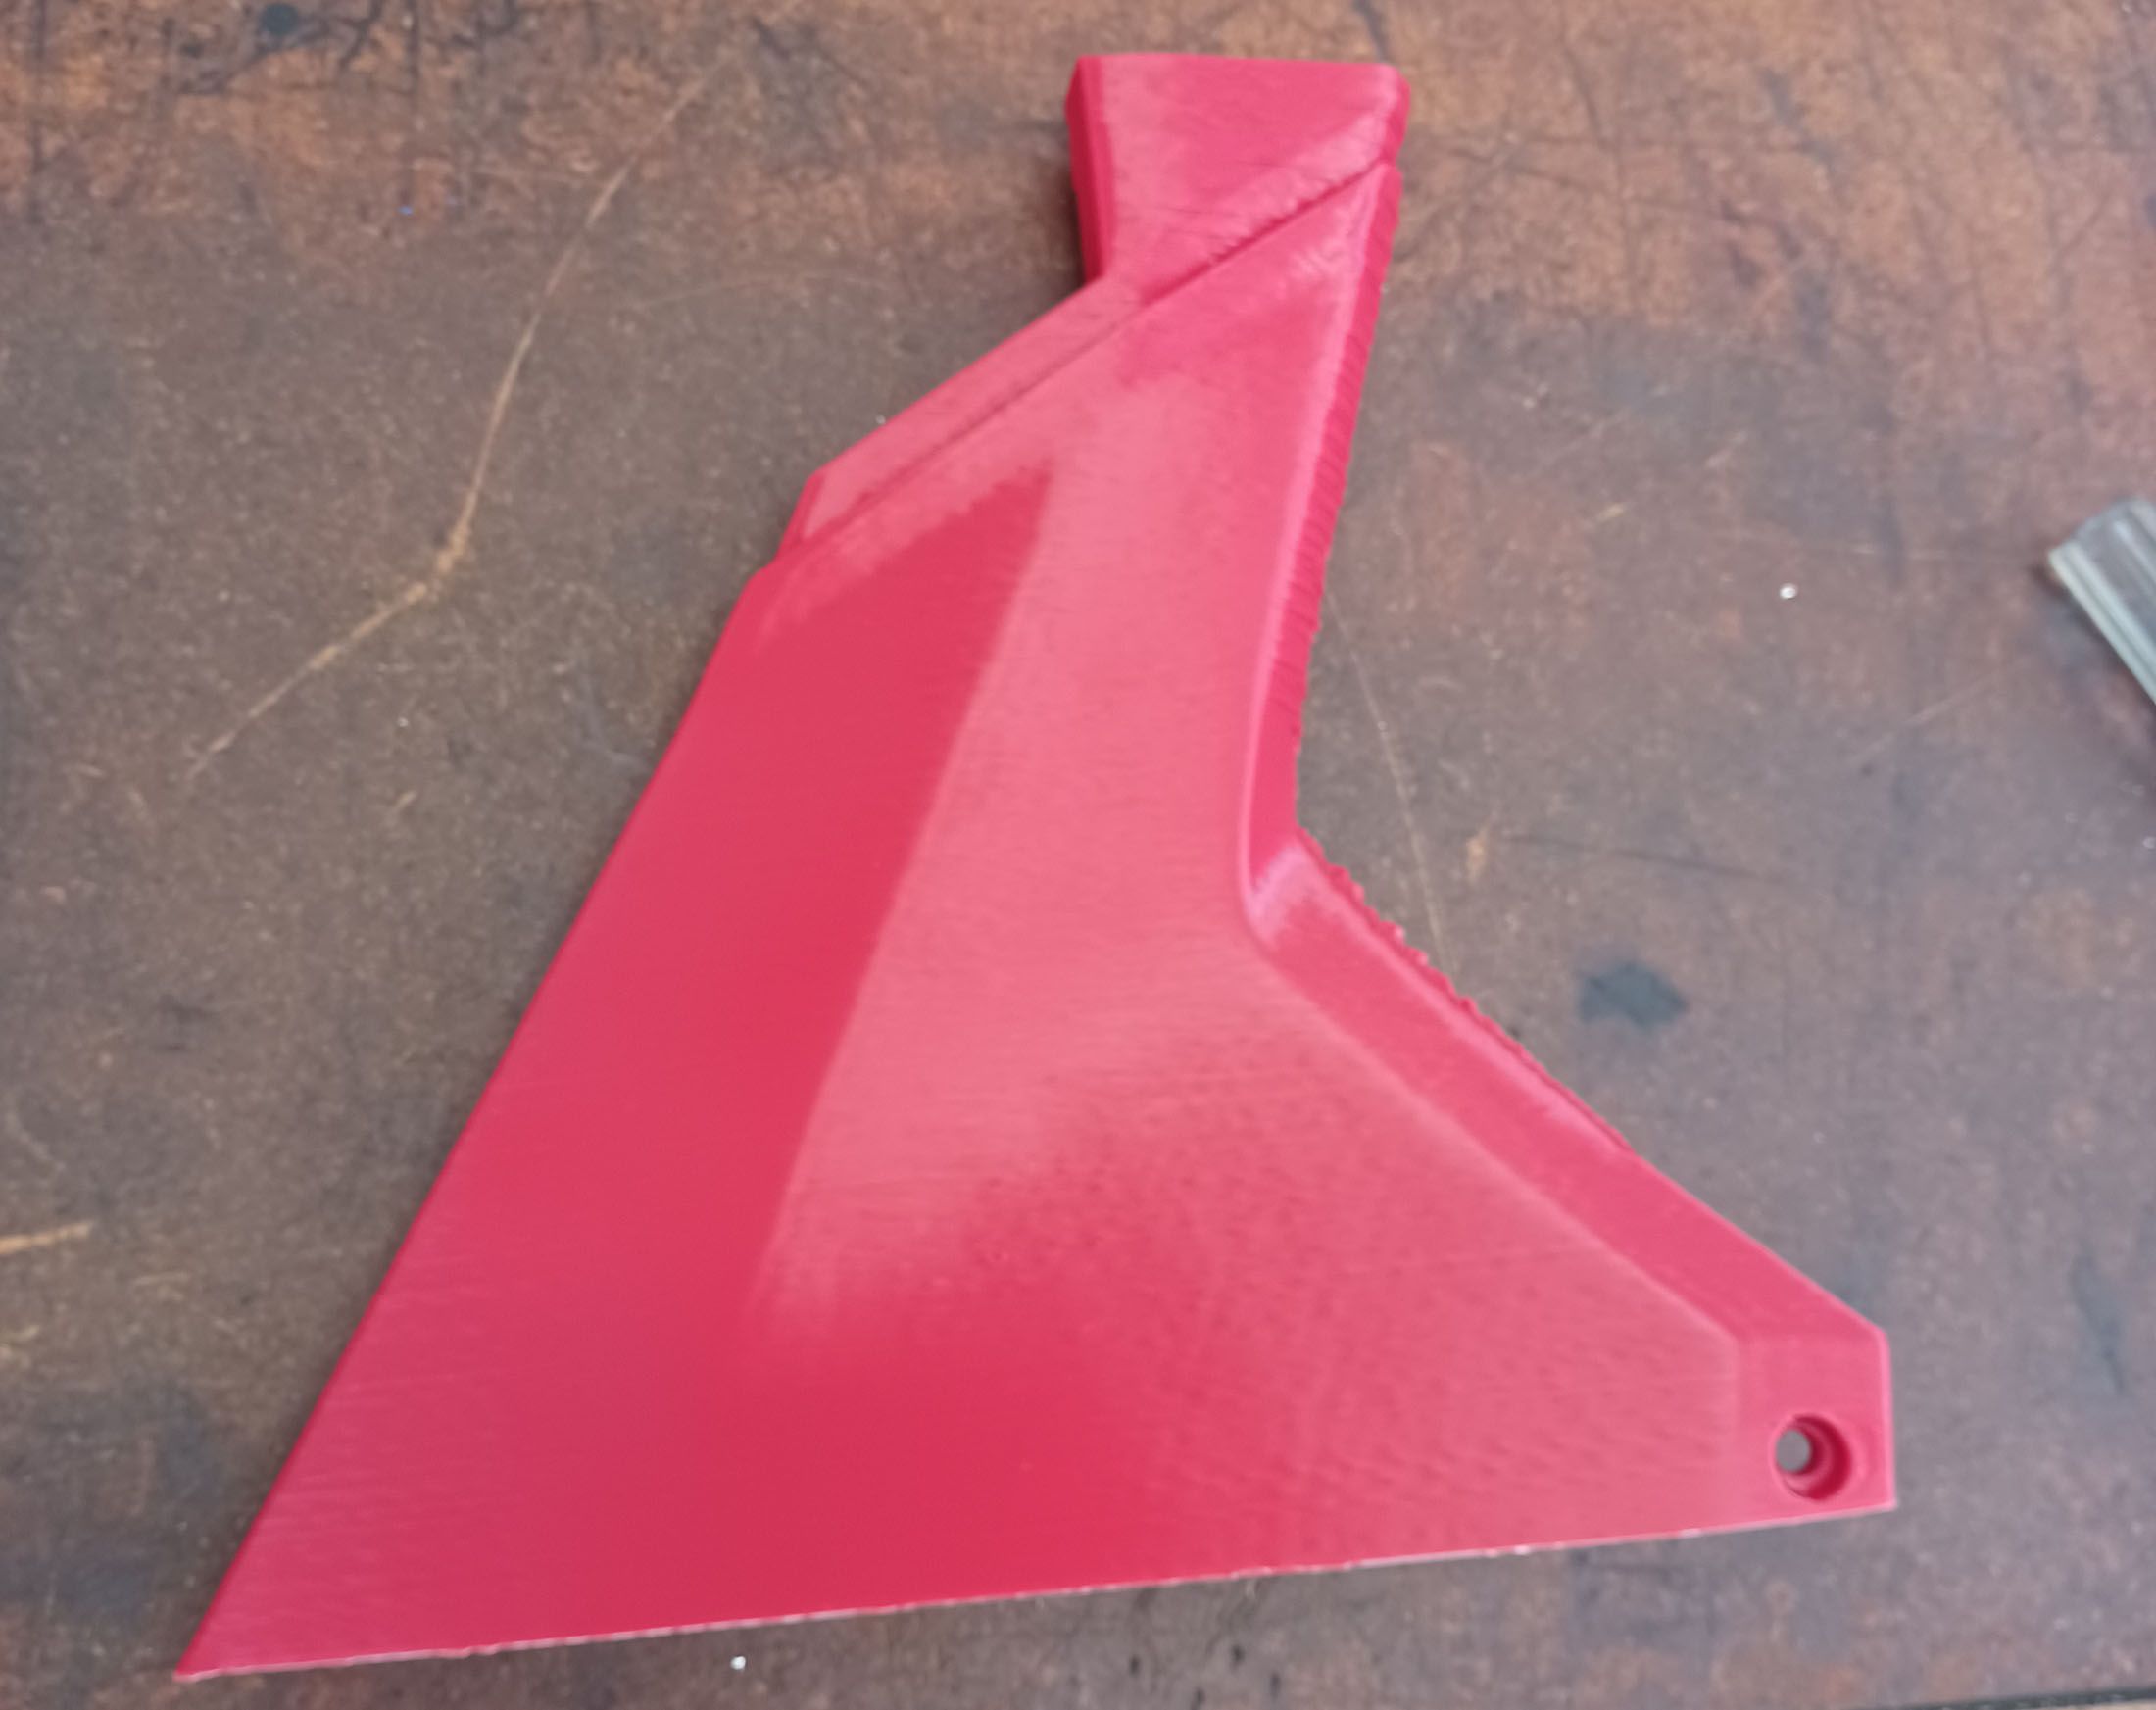
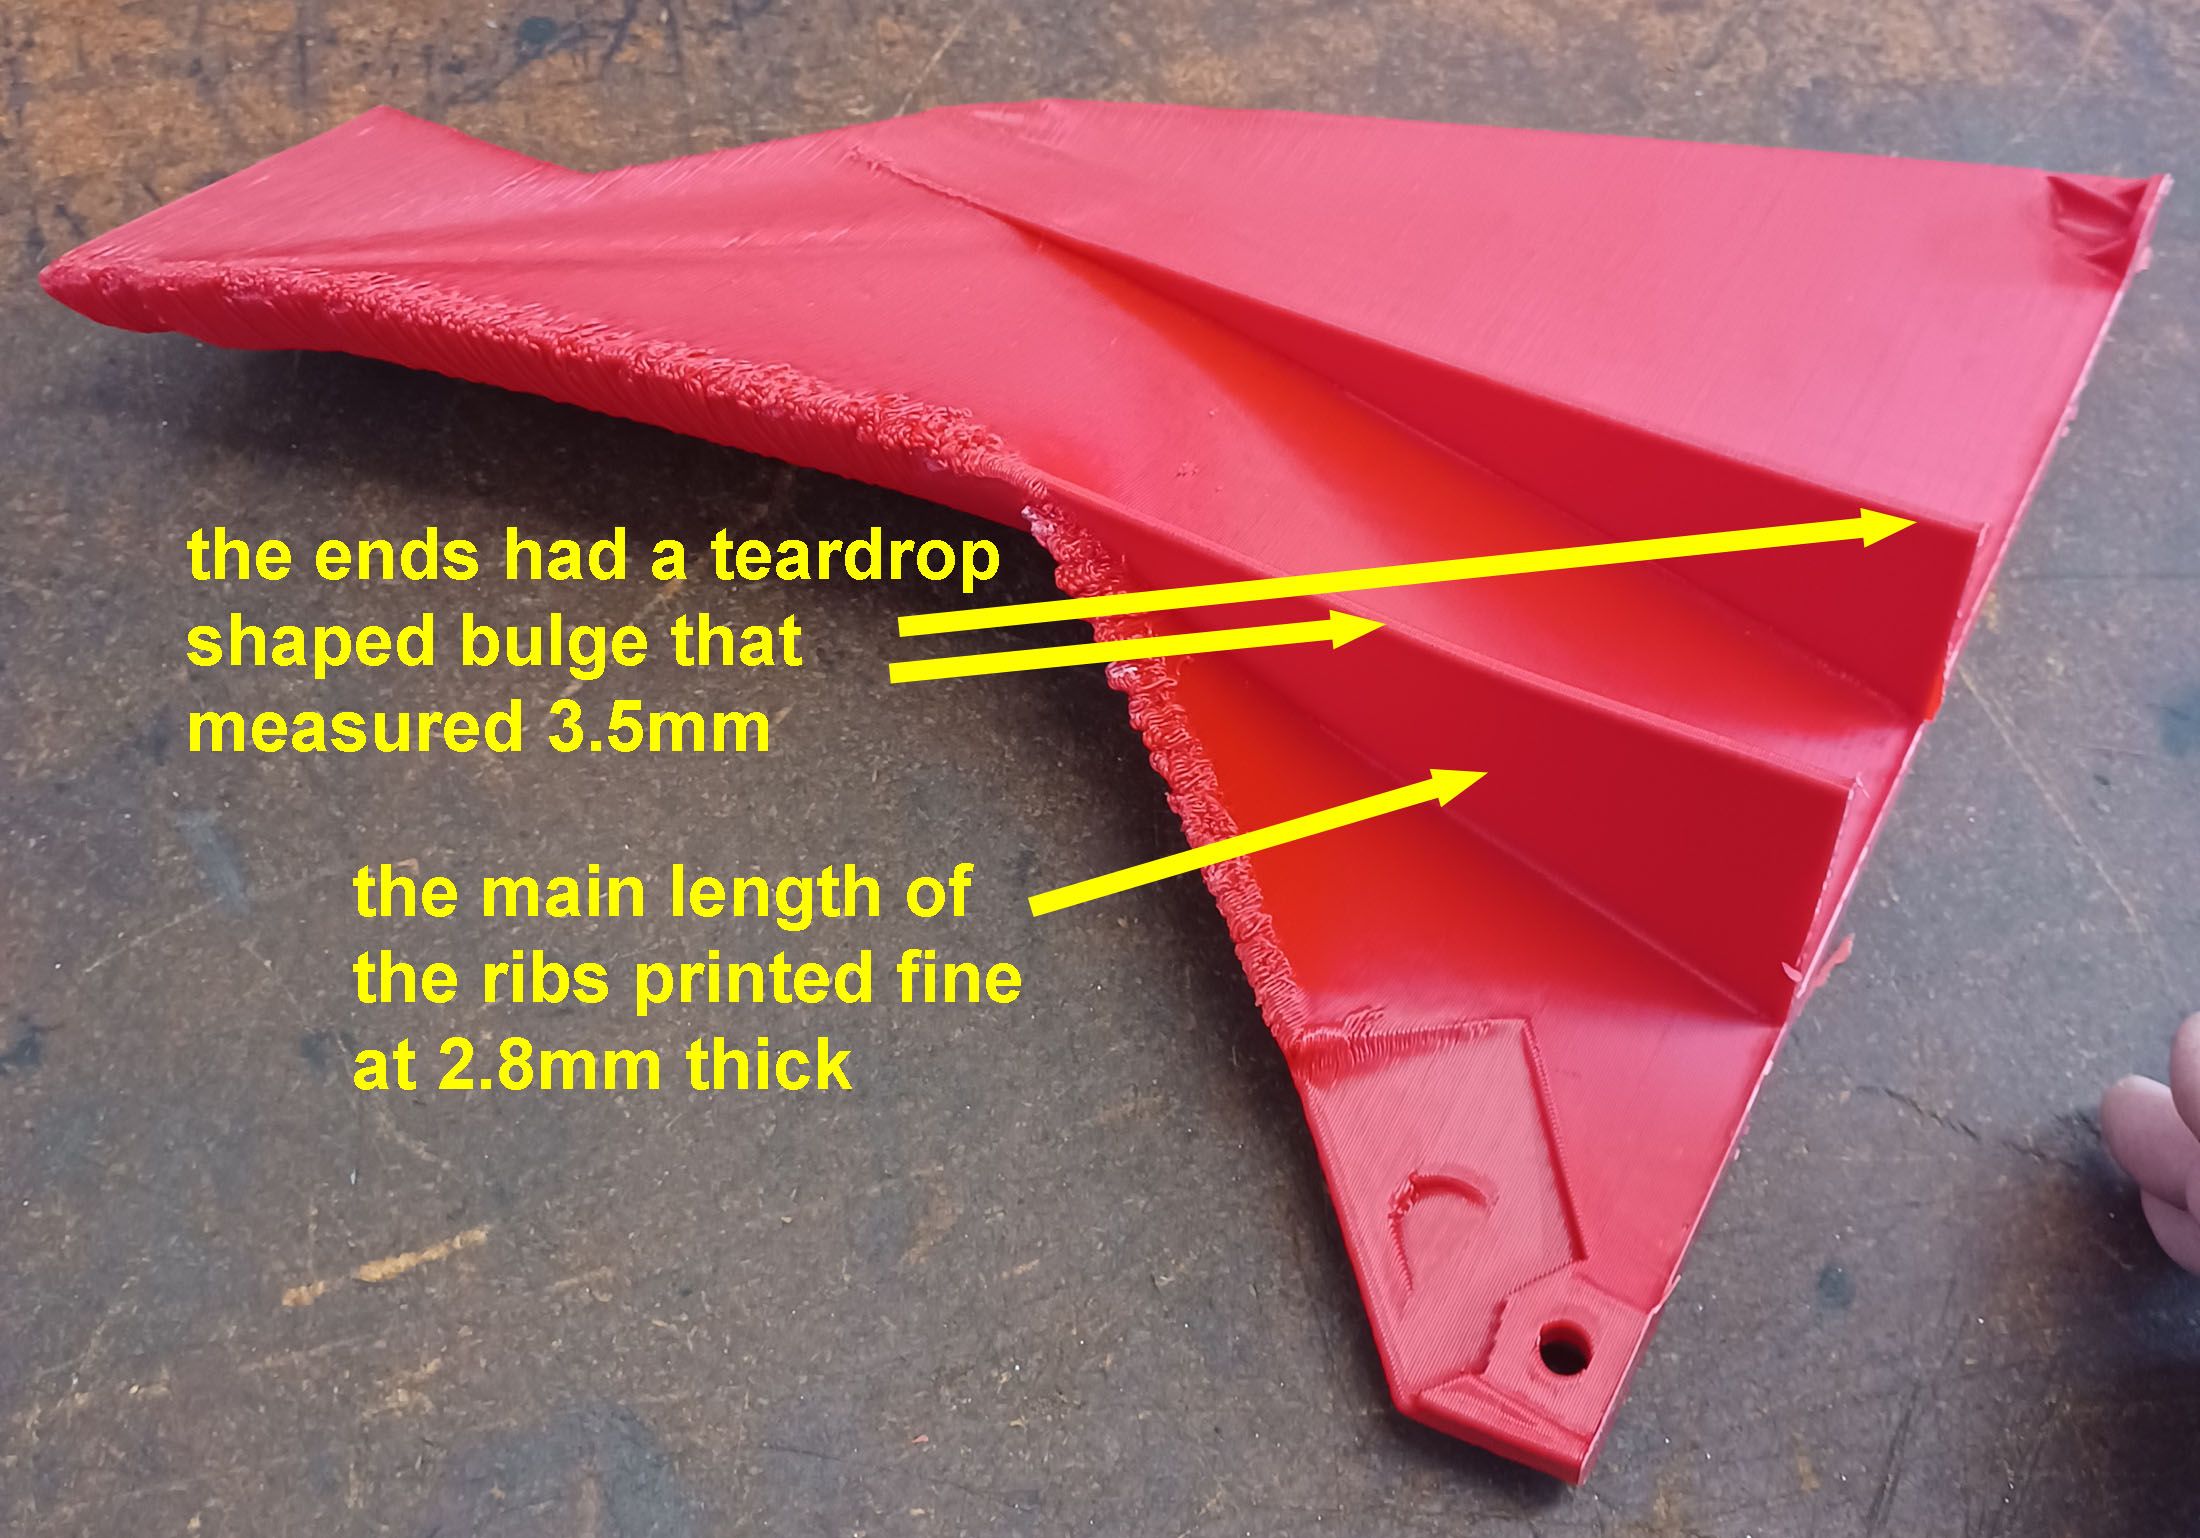
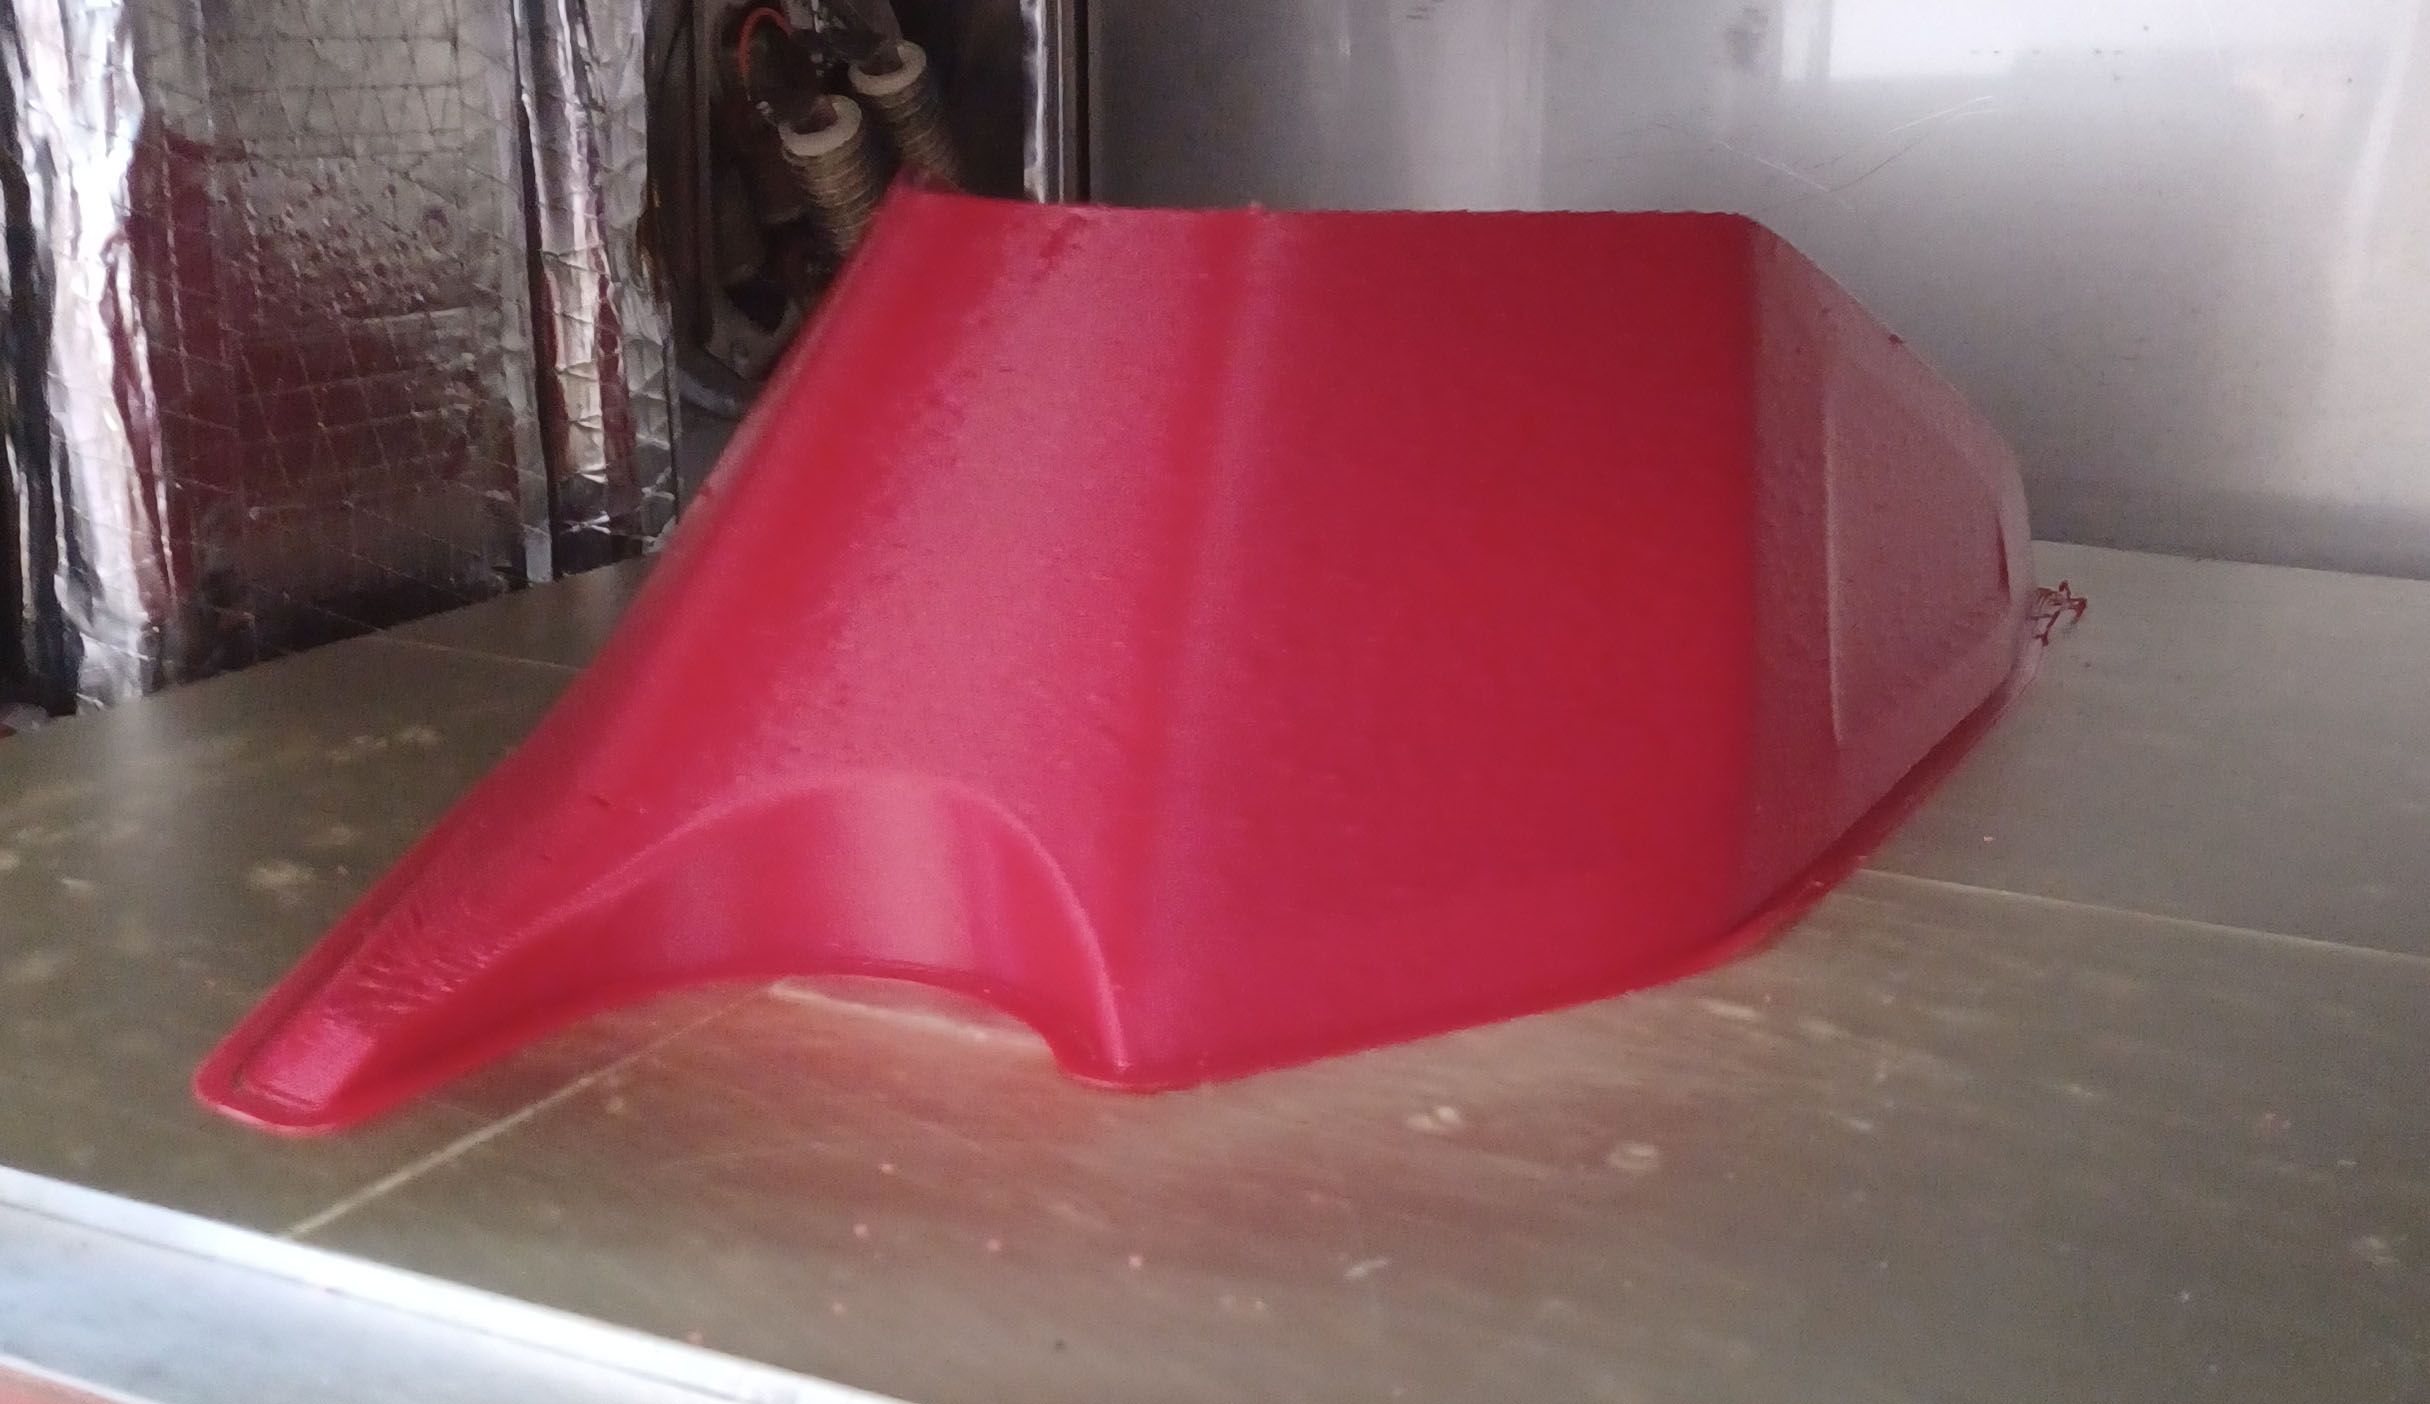
Zooming in to image #2 it looks like some under-extrusion is going on every few layers. That will make for weak parts.
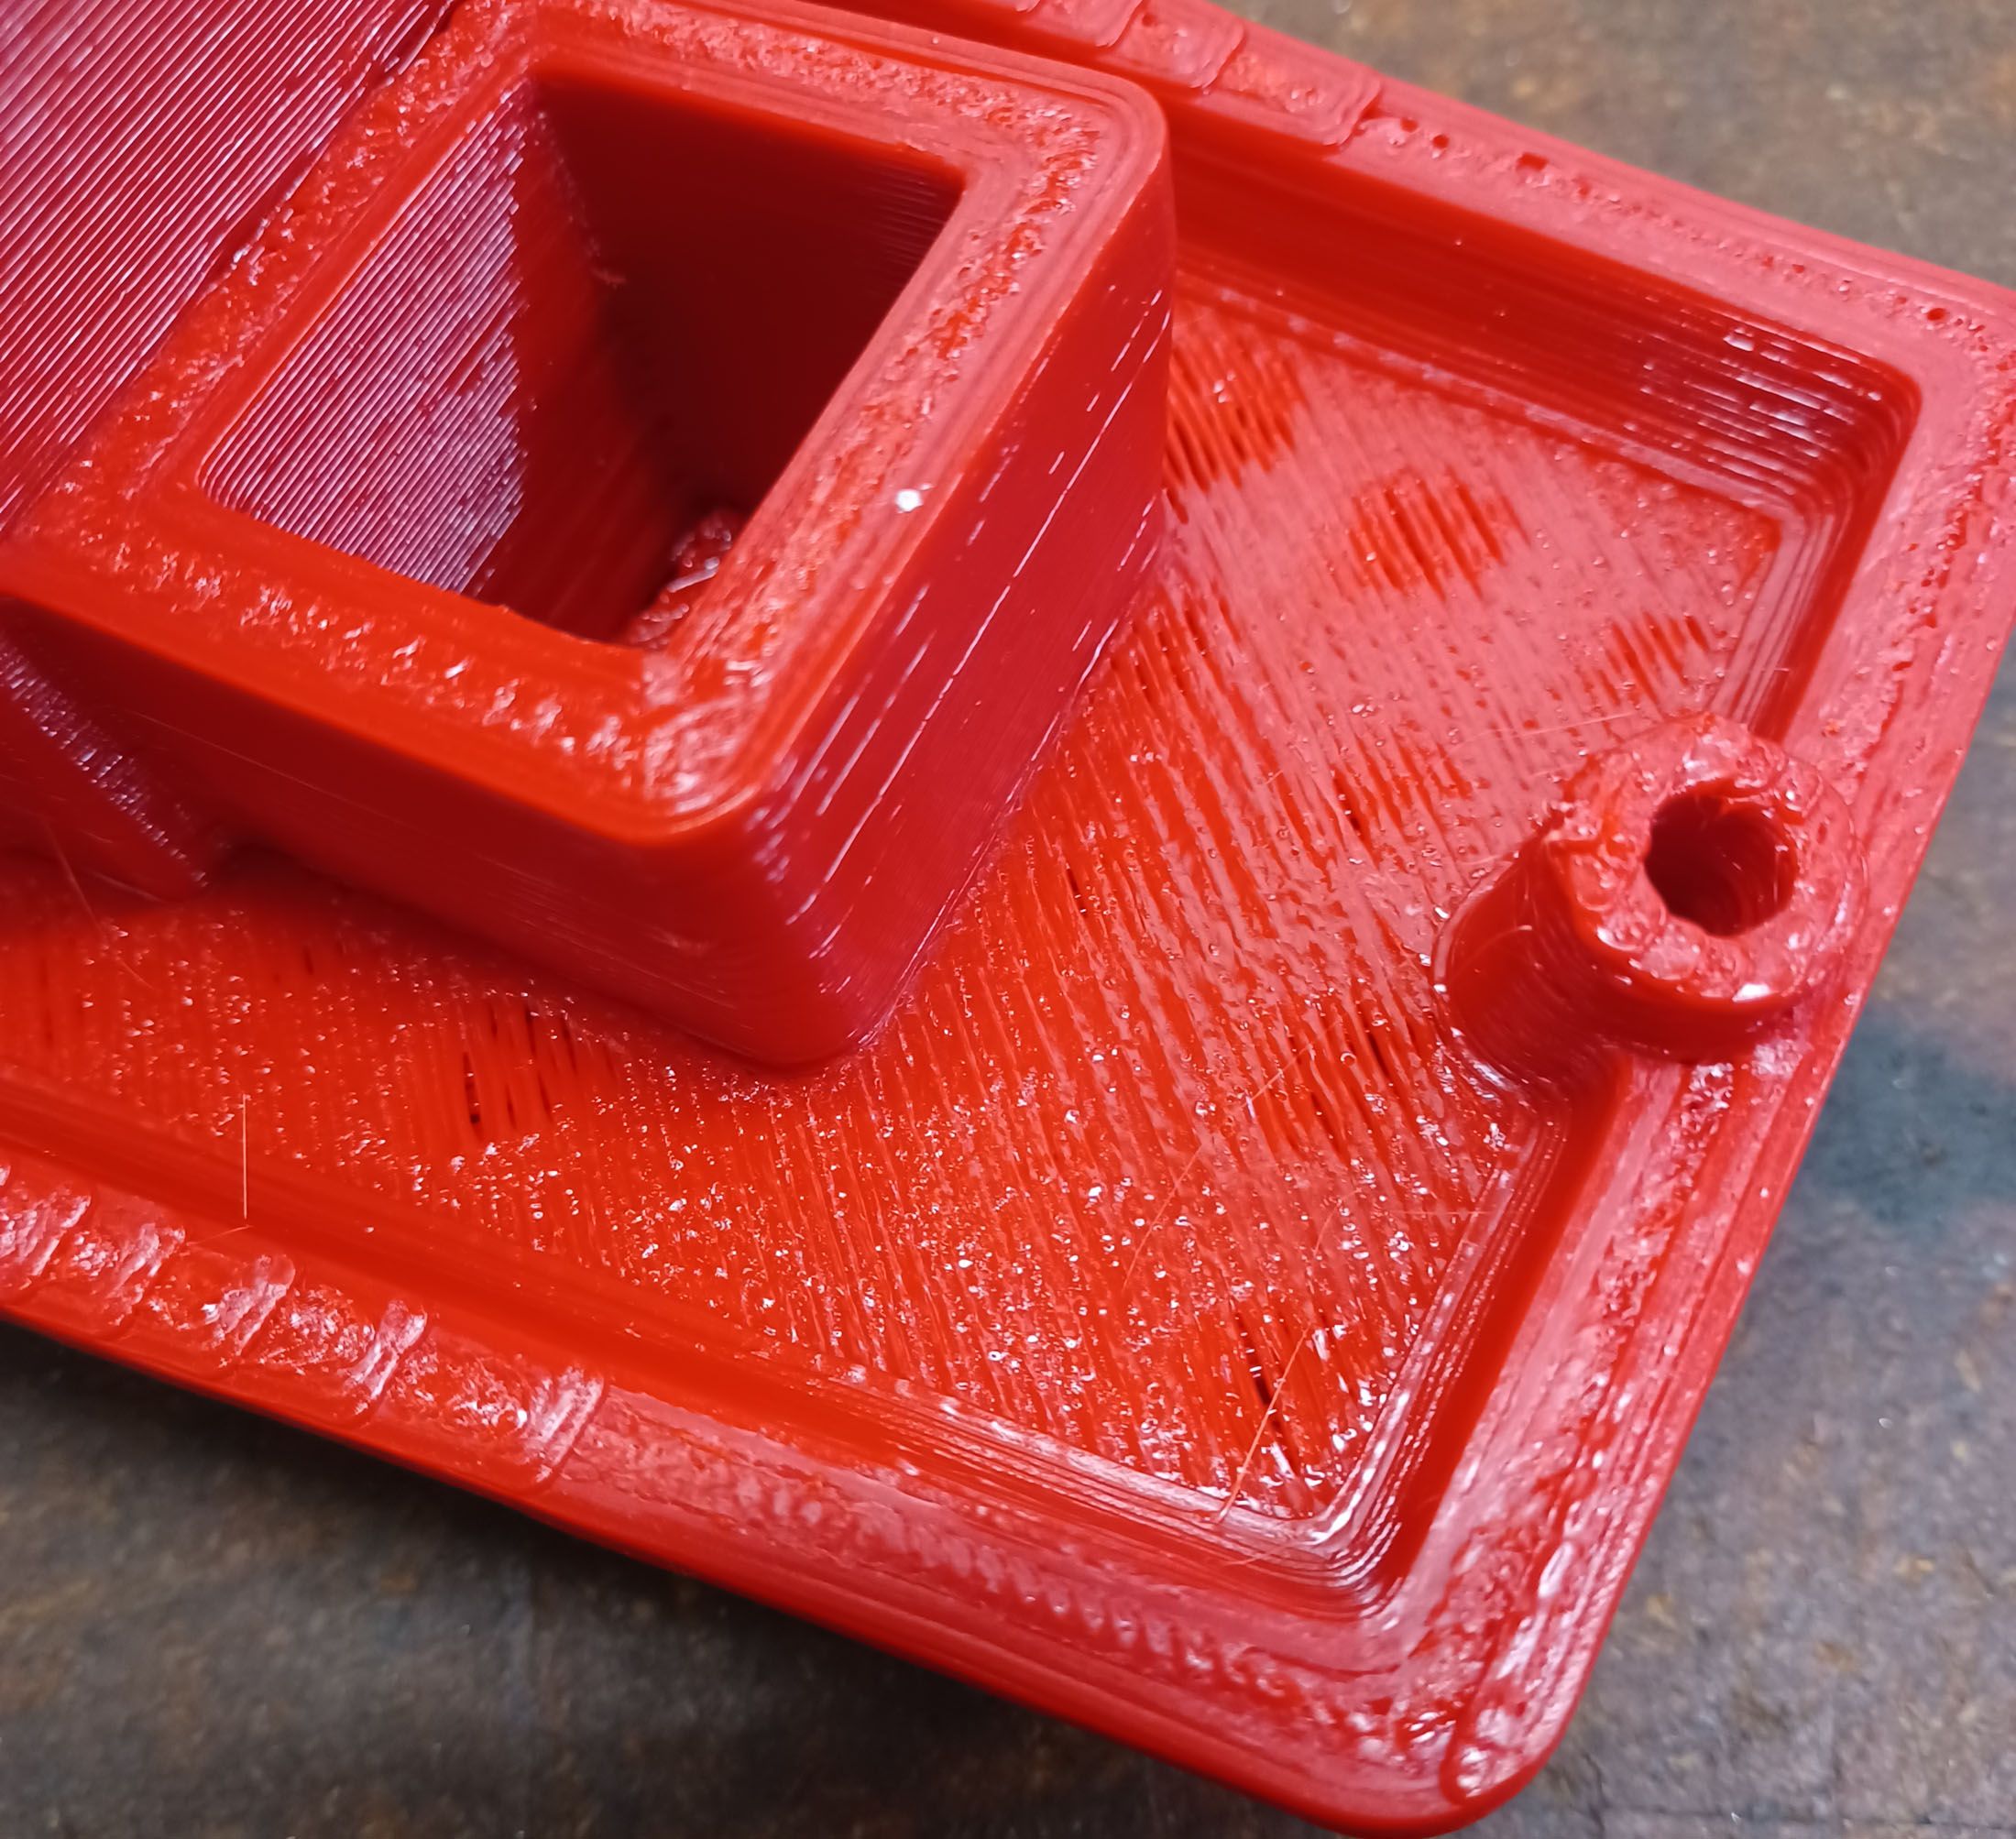
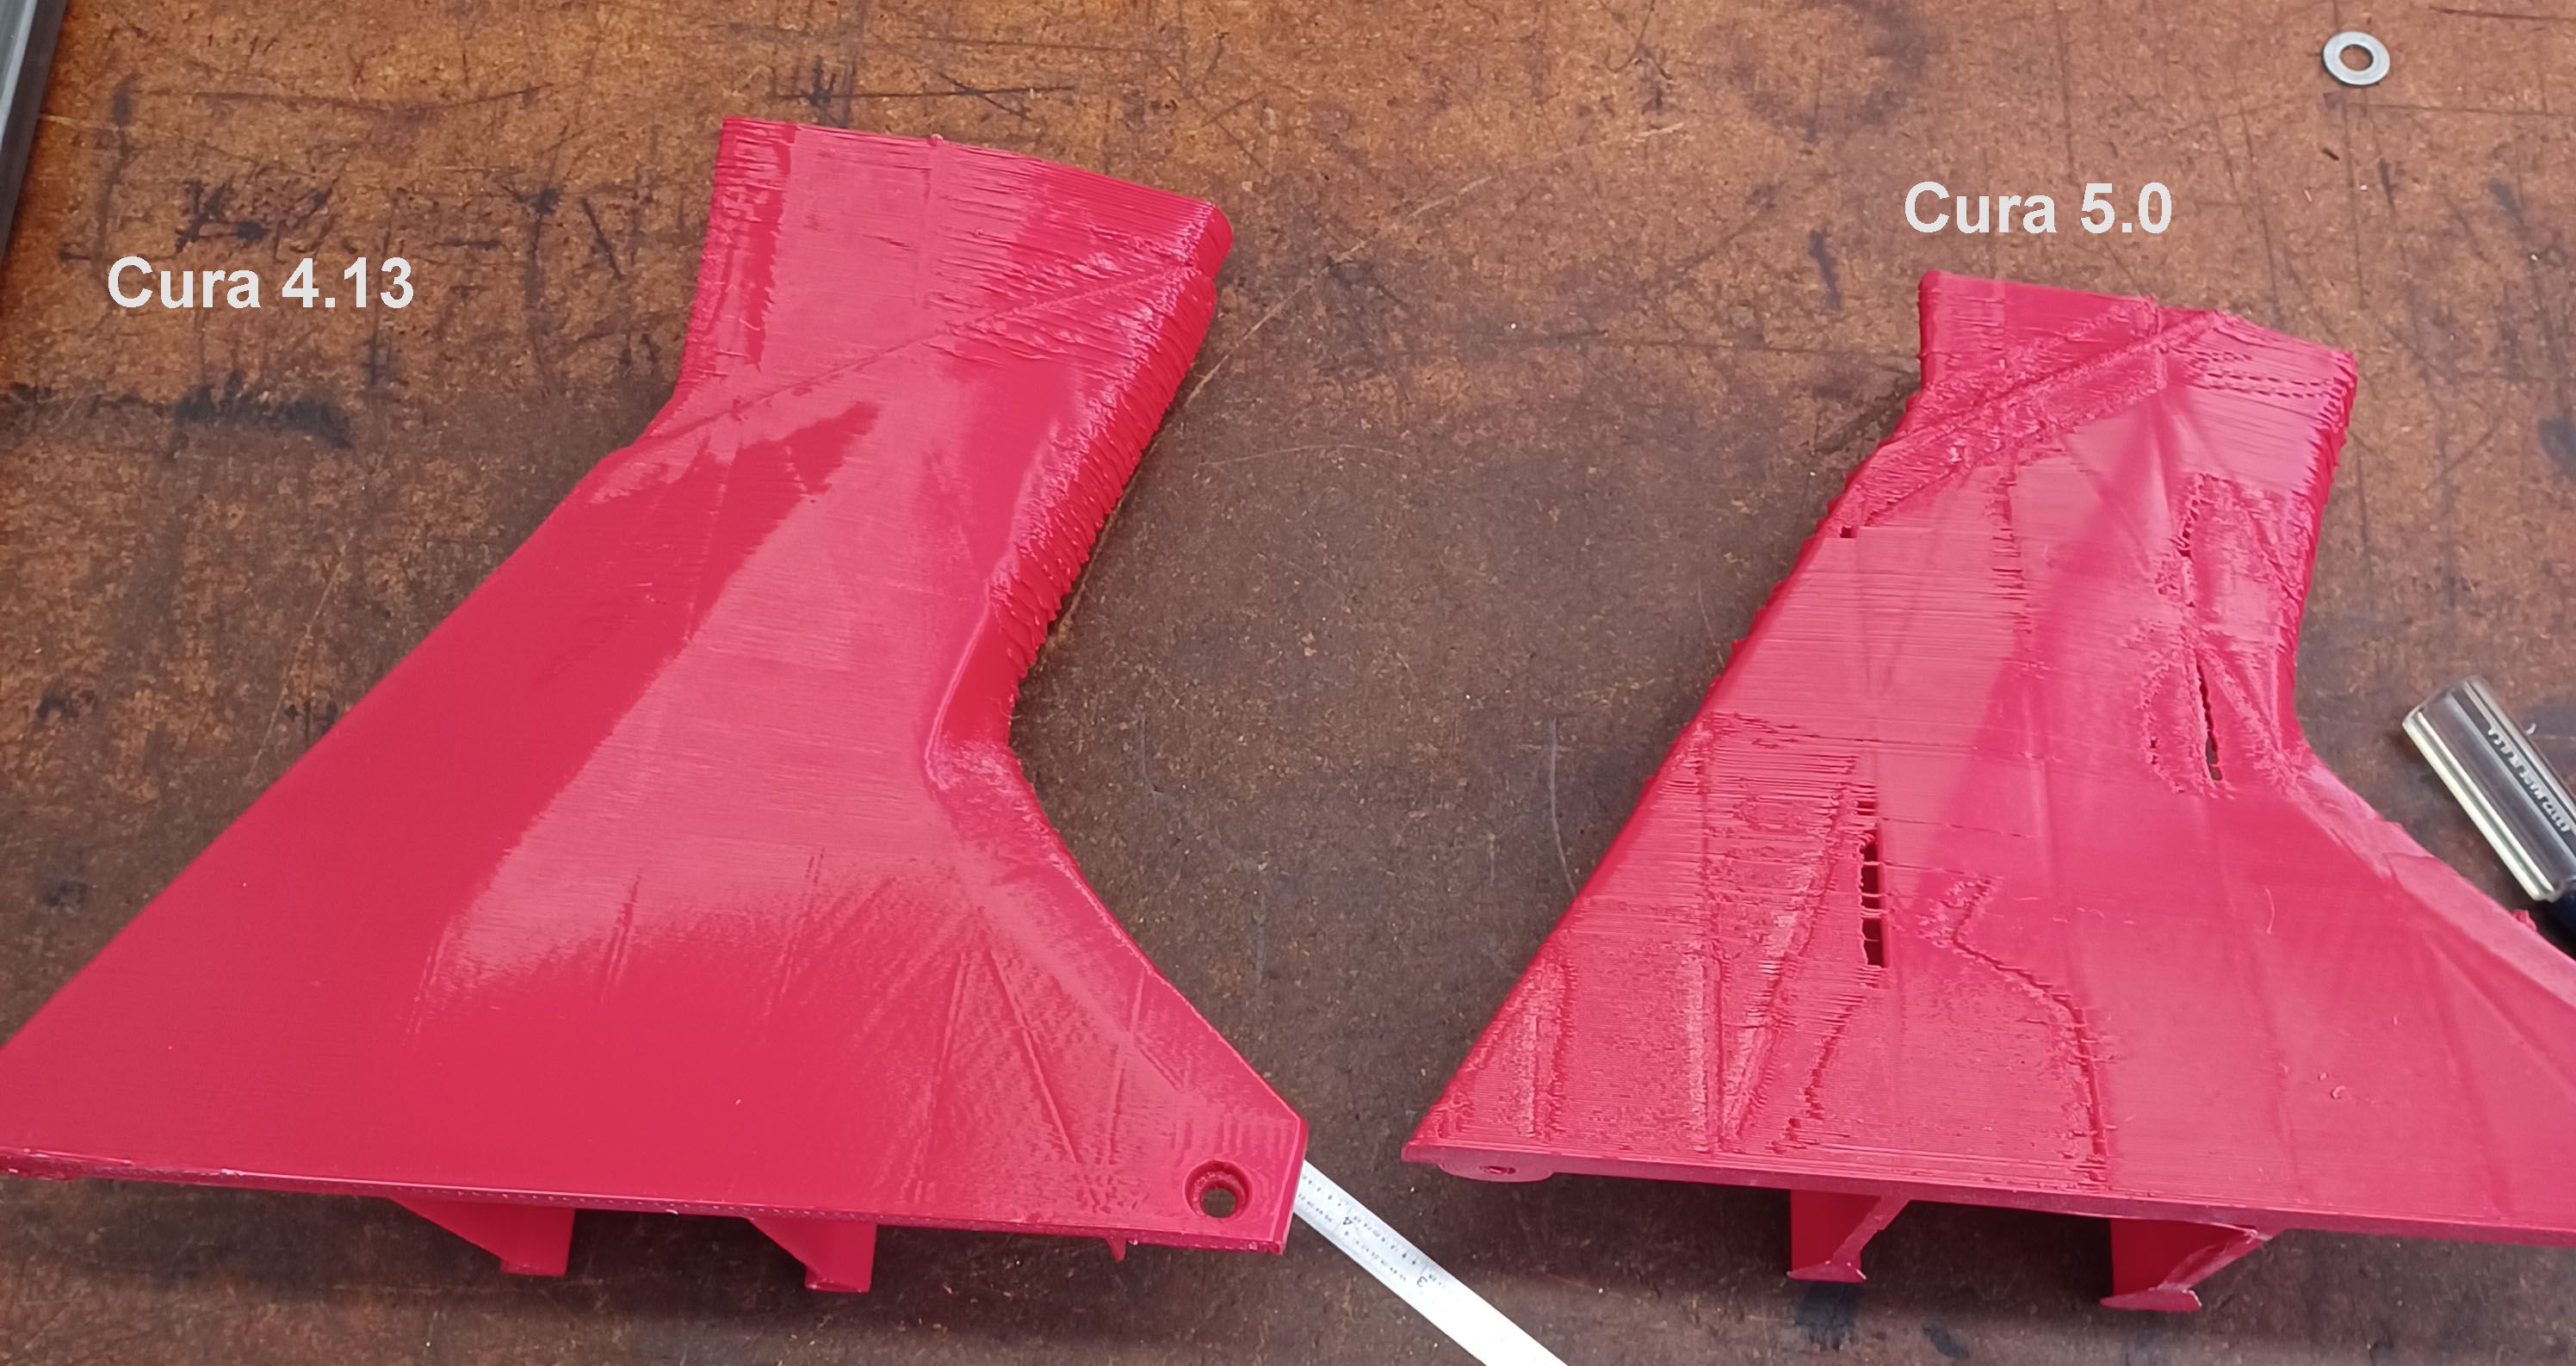
Outside to Inside is the new default in 5.0. I don't like it and it's really not good for overhangs. Change the Wall Order to Inside to Outside. Until you do that you really won't know how the overhangs will work out.
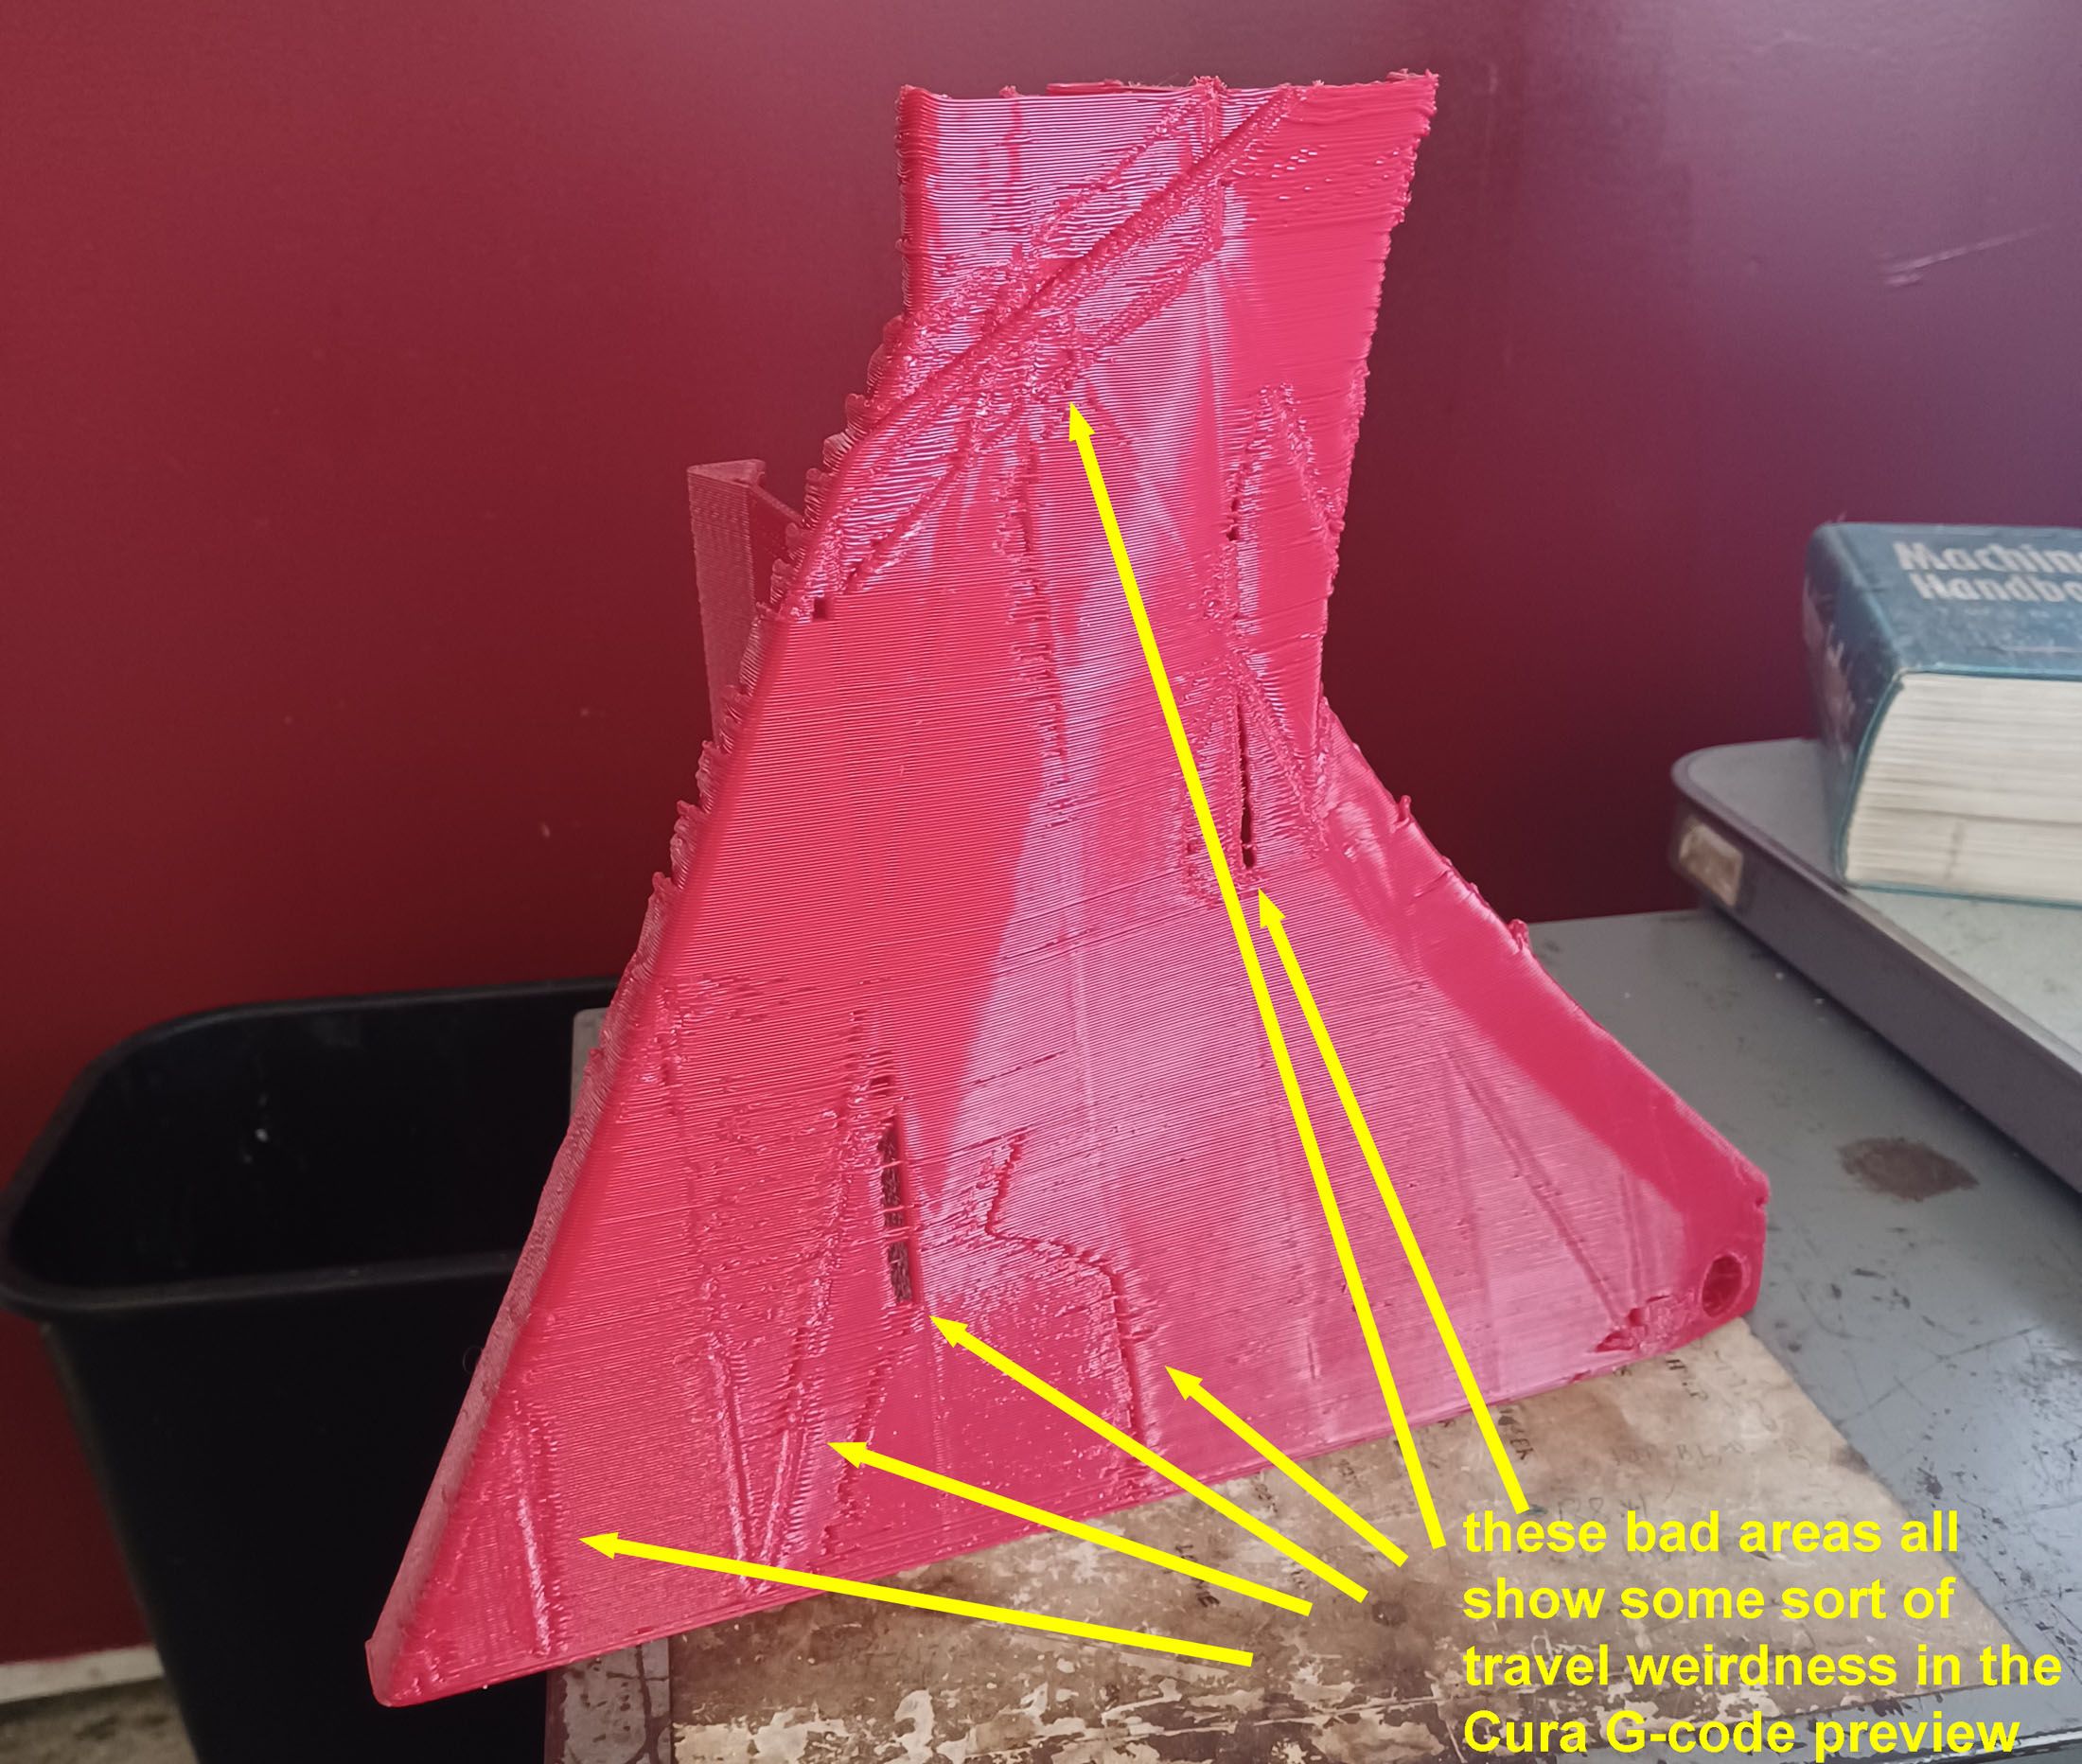
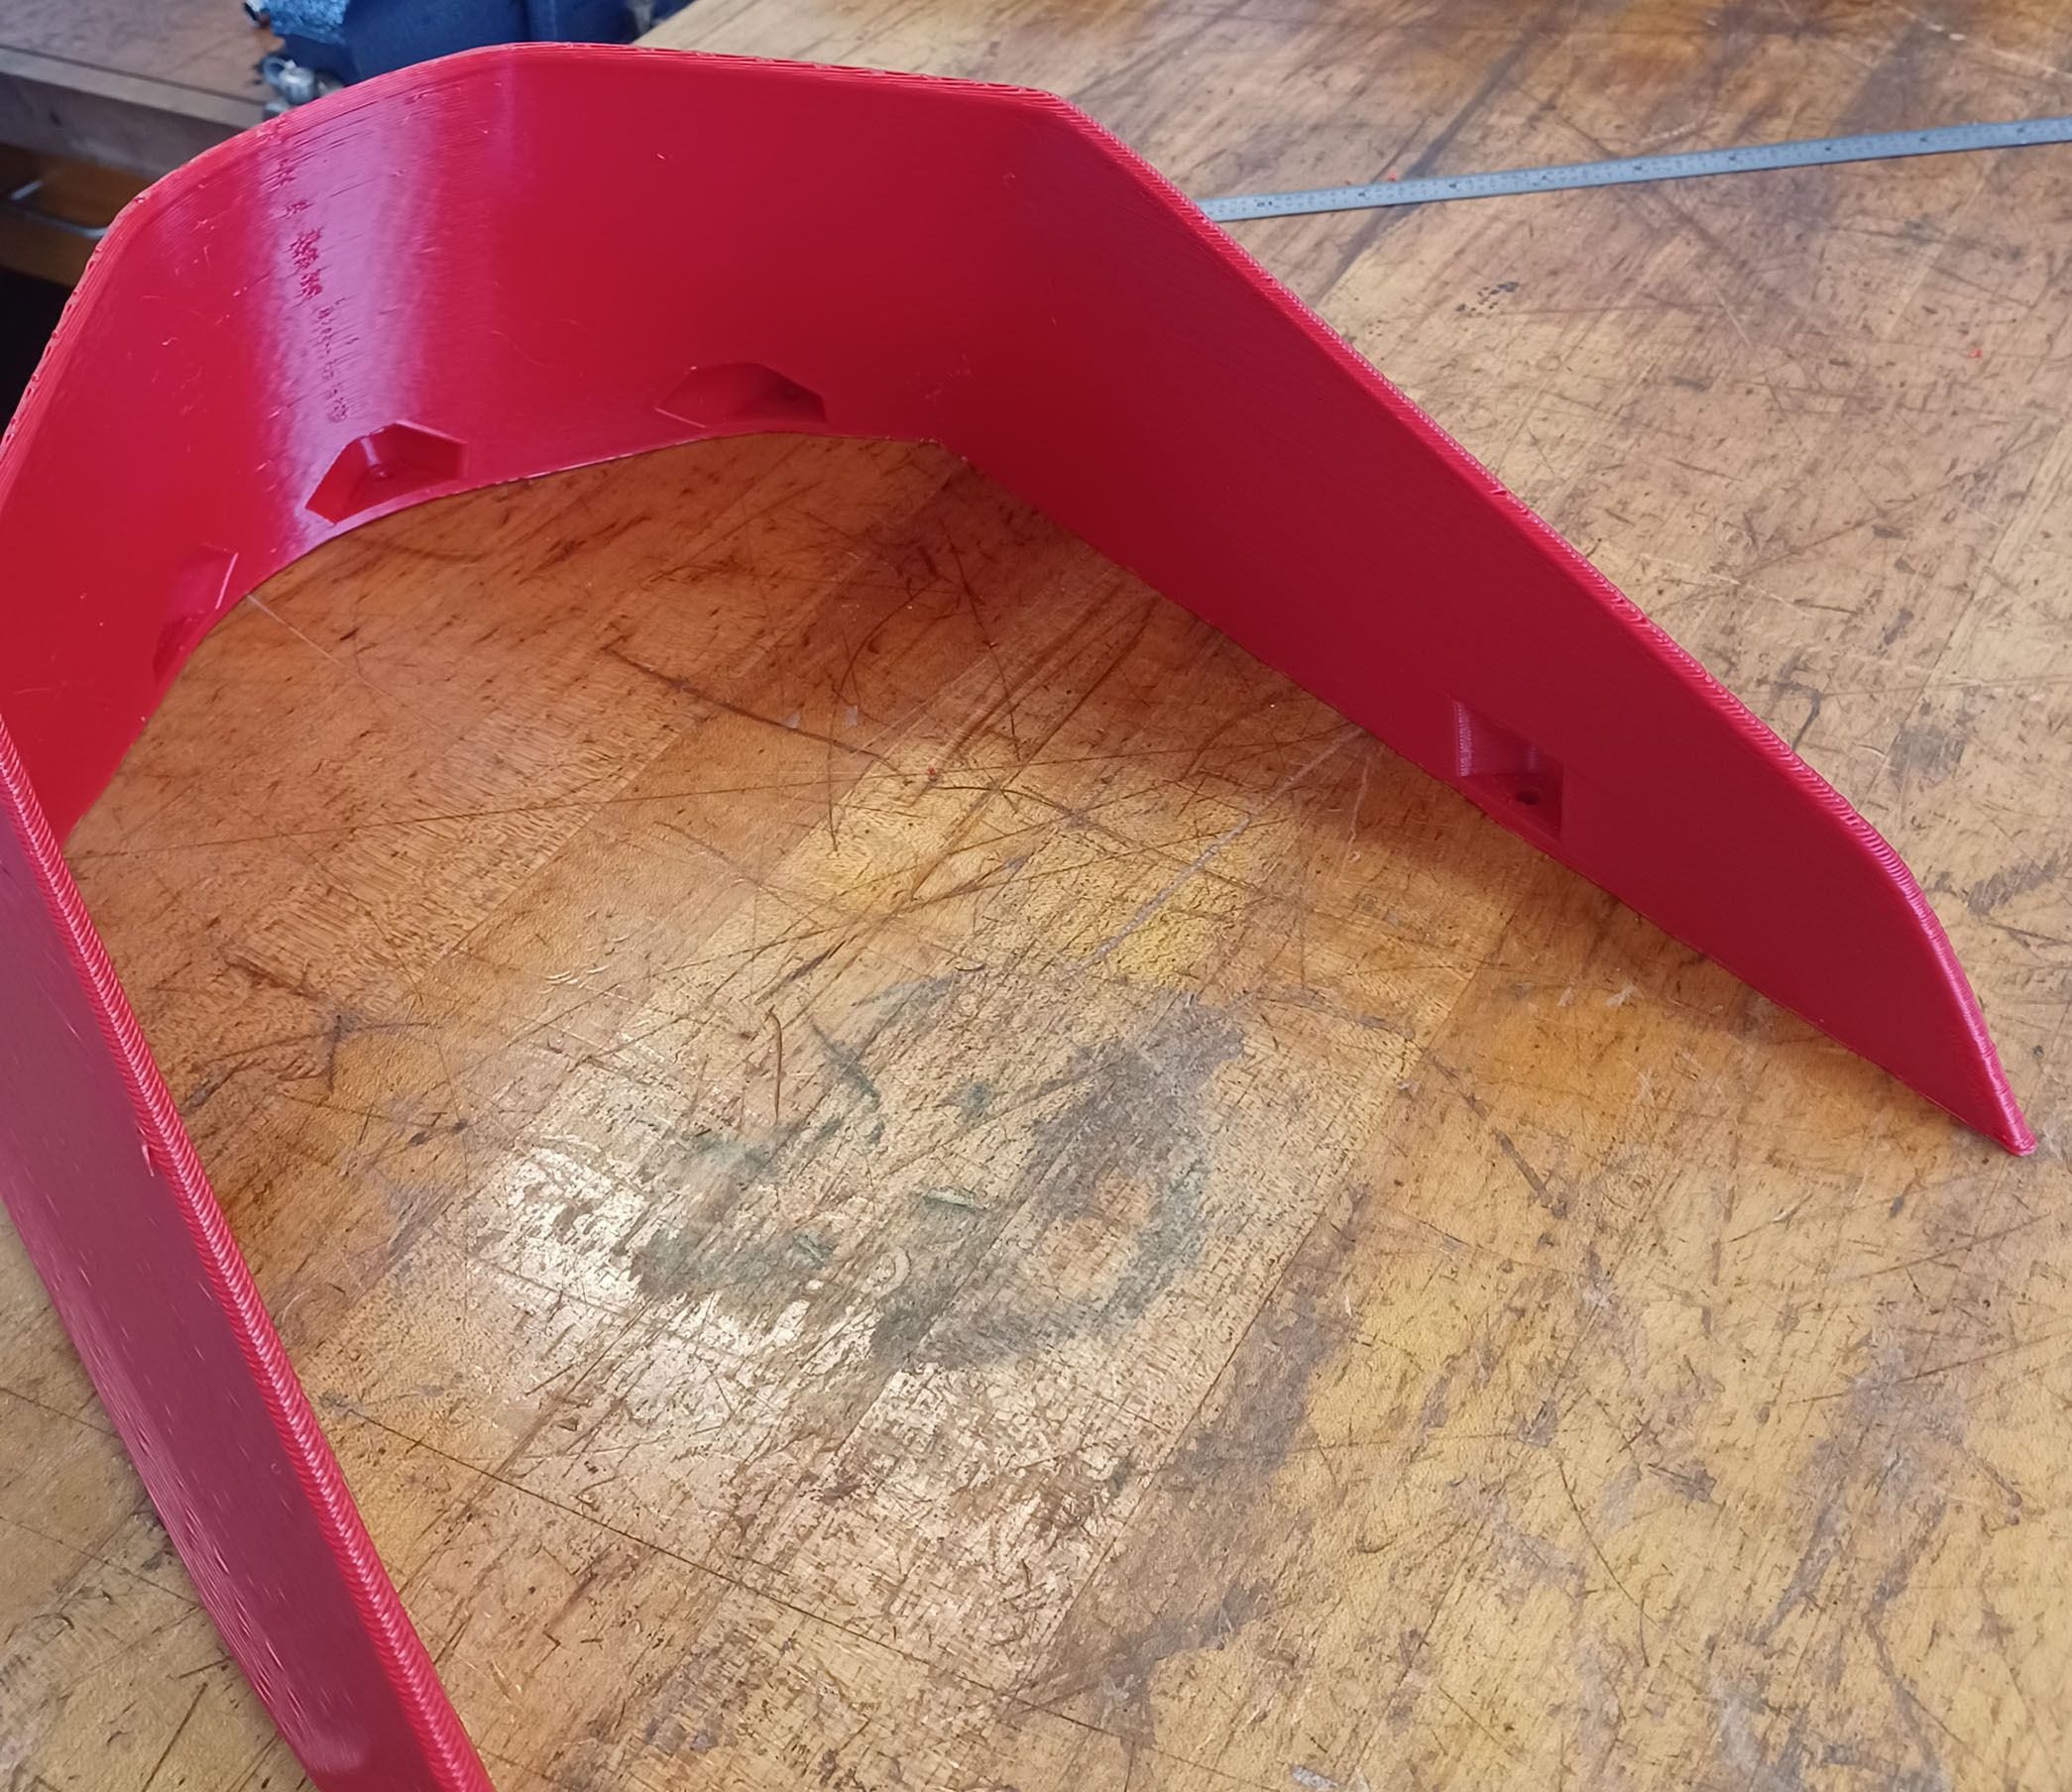
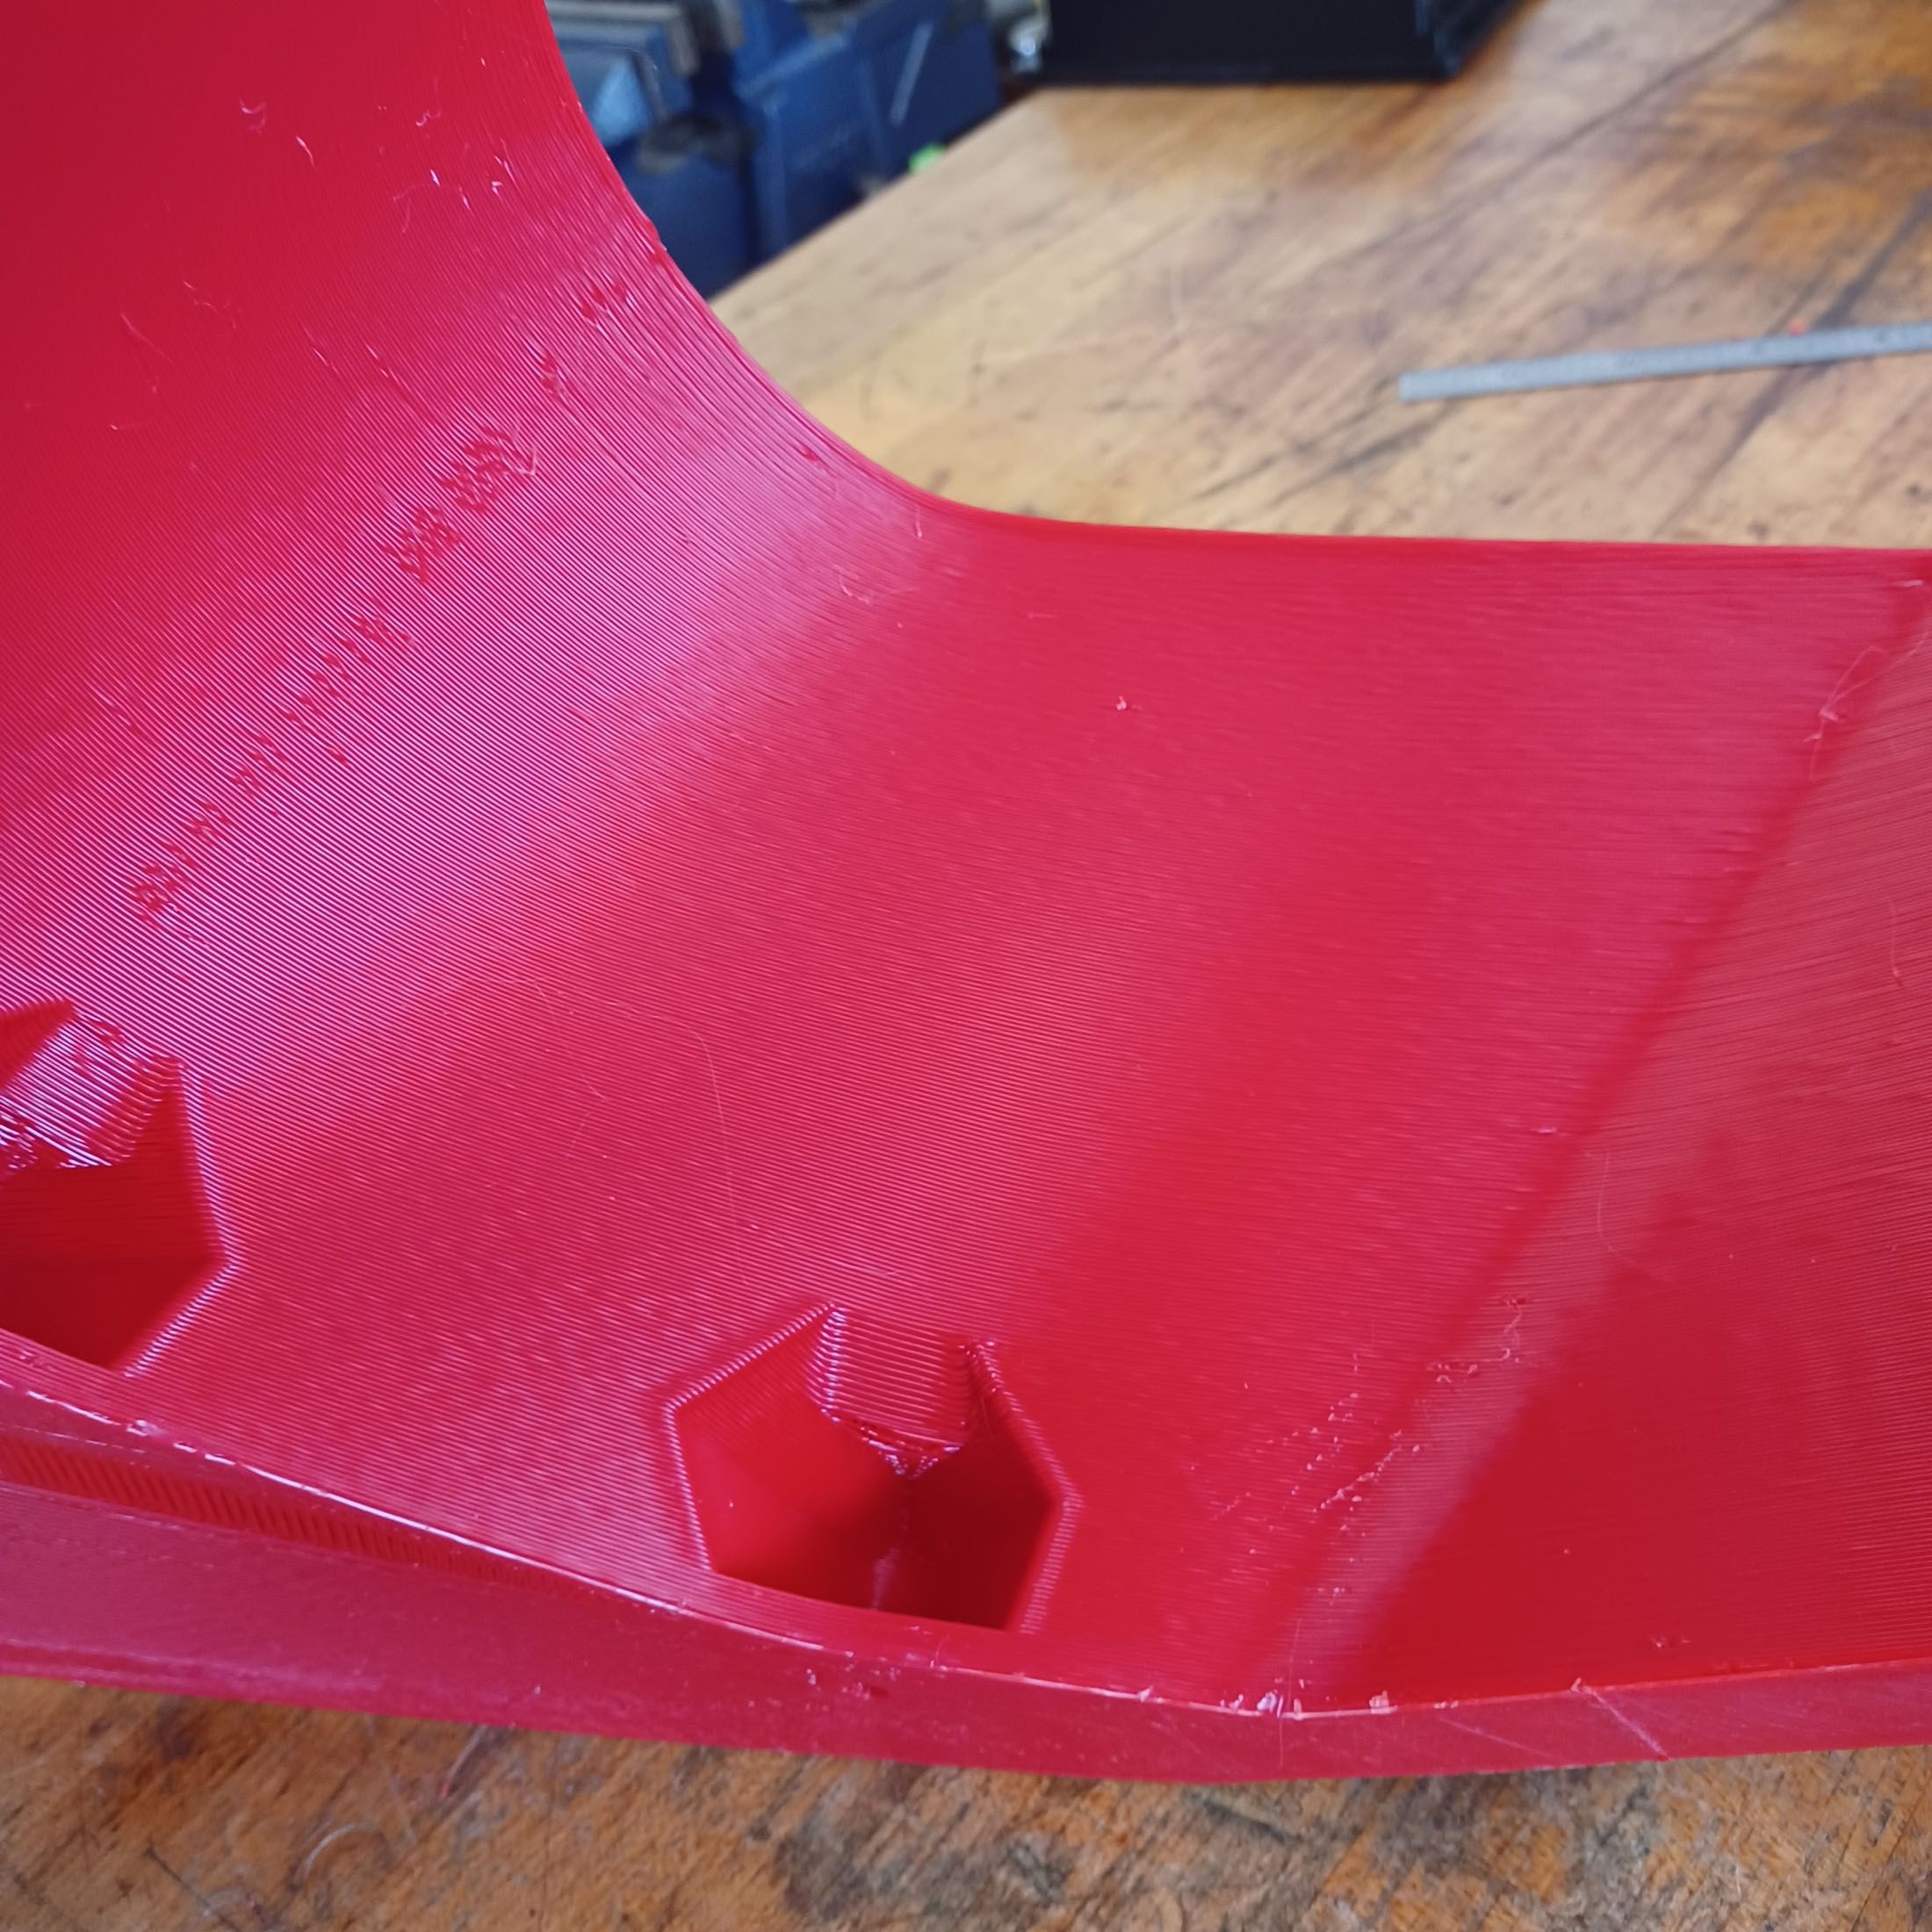
The problem at the ribs may be some sloppiness in the mechanicals. It's a big printer and the print head won't stop on a dime. It wouldn't take a lot of over-shoot to affect the outside finish. Another clue there is that the finish in one direction is OK but when the print head is going the other way the layer stacking is a little inconsistent.
You mentioned "UV soon". Cura doesn't support additional axes. You may have to make other adjustments. The IDEX printers that do work with Cura (like Raise3D) all seem to have commands that go in the StartUp Gcode and then the printer-processor decides how to handle the calculations (normal, duplicate, mirror). In those cases Cura works. In others (like with U and V) you will need to find out.
And for that bit of advice you owe me a Vesco Rabid Transit fairing to fit a 1978 Honda GL1000 with a 7" headlight. If you want to throw in the lowers I won't complain.
Good luck with this.
Link to post
Share on other sites