Jump to content

Building from scratch my own Ultimaker not building kit


airgraphix

Recommended Posts

Posted · Building from scratch my own Ultimaker not building kit

I want to build my own ultimaker 2 I have access to a laser cutter so can cut out my own ply parts.

I have been looking at drawings and downloads from thingerverse, github etc and cant seem to get a definative set of drawings, there seems to be different versions with different dimensions. files called ultimaker, ultimaker 2 master, ultimaker laser cut files all seem different.

I want the ultimaker 2 version but the only list of materials I can see is really geared towards the kit of parts supplied by ultimaker. i.e an alum plate 1157 with a thickness of 6.1mm??

Is there a difference in phisical size between the origional and the UM2?

I thought there would be loads of threads on guys building (not assembling kits) the ultimaker printer, especially when drawings are available but cant find any.

Can someone point me to a set of dawings will let me cut the complete plywood parts.


  • Link to post
    Share on other sites

    Posted · Building from scratch my own Ultimaker not building kit

    The ultimaker 2 isn't necessarily any better than the UMO. The printing quality is the same as far as I can tell. Were you planning to buy the electronics for the "2"? I would concentrate on that detail first.

    There is another guy on the forums who built the frame of the 2 on a laser cutter. It looks really nice but now he has to figure out about the electronics. He decided to go with UMO electronics. He posted just a few weeks ago. You guys should talk. Here he is:

    http://umforum.ultimaker.com/index.php?/topic/9729-um-pcb-v157-vs-v2x/

    The UMO isn't called the "1" because it is constantly evolving and getting the best innovations incorporated back into it.


  • Link to post
    Share on other sites

    Posted · Building from scratch my own Ultimaker not building kit

    I don't think anyone has tried building an Ultimaker2 from scratch. There are a lot of custom injection molded parts that will be a pain to replicate. The Ultimaker Original is another story, that one has been built from scratch by people. I doubt you'll get away much cheaper than just buying from Ultimaker in the end though.

    "the only list of materials I can see is really geared towards the kit of parts supplied by ultimaker"

    That shouldn't really surprise you since that's the parts they use to build the printer... They have open sourced their own design files, they haven't gone out of their way to make it easy to build your own.


  • Link to post
    Share on other sites

    Posted · Building from scratch my own Ultimaker not building kit

    By there way there are tons of parts for the Ultimaker's (either one) on thingiverse.com - such as custom heads, feeders, sliding blocks, etc.


  • Link to post
    Share on other sites

    Posted · Building from scratch my own Ultimaker not building kit

    Really IMO you don't want to build an Ultimaker (UMO OR UM2) down to every detail...

    You want to look at the design, be inspired by that and then go from there... Building an exact replica would be both very hard and expensive.

    While it true what Robert said, that you probably wont come out much cheaper than an UM+ kit, building from scratch allows you to customize from the start and get rid of some of the less impressive UM parts.

    I would say you need to first decide on a material, you mention plywood which is what the UMO is made of... The UM2 uses dibond amongst other things. You can build both printers of both materials + a range of others...

    Then you need to decide on parts... Choose stuff that is easy to find and don't compromise on critical areas like the hotend (e3d are a popular quality choise), axis, pulleys etc. For electronics, any marlin compatible with SD reader and LCD should do (there are alot of reprap options, like ramps, Rambo, rumba, sanguino etc.)

    Look in the Modications and Hacks section of the forum, for interesting mods you want to implement right away...

    Once thats settled, mod the drawings to accommodate your parts, and build...

  • Link to post
    Share on other sites

    Posted · Building from scratch my own Ultimaker not building kit

    I am not really sure what the substantial difference between UMO+ and UM2 is. Both have the same z carriage, same motors, same xy carriage structure, same heated bed and same electronics. If you are building a UM variant, it would be pretty hard to tell which UM it came from.

    Main differences I am aware of are the following.

    - UM2 structure is not wood.

    - UM2 xy carriage switches which rod is on bottom and which is on top.

    - UM2 has a slightly different hot end design with two fans.

    - UM2 stock feeder doesn't have enough torque to print fast and rough.

    - UMO+ has more mods developed for it, though there has been a lot of activity from UM2 users lately.

    - IIRC, the UM2 comes with GT2 belts and sprockets.

    I have a hard time understanding the UM2 appeal. It is a great looking machine, but for the less than the $1000 price difference, I could do a lot to make a UMO+ as good or better. The only difference that is not so easily corrected is the wood frame, but I haven't seen evidence of it being an issue.

  • Link to post
    Share on other sites

    Posted · Building from scratch my own Ultimaker not building kit

    In summary, I wouldn't focus on copying the UM2 specifically. Just copy the design points you like from both machines. Besides construction materials one is not supremely better than the other.

  • Link to post
    Share on other sites

    Posted · Building from scratch my own Ultimaker not building kit

    There's lots of other unimportant or minor differences. From the perspective of building your own - the electronics is a big deal.

    You might even want to go beagle-bone instead of ramps. I want to upgrade my UMO (or UM2) to beagle bone controller some day.


    Why beagle-bone over smoothieboard?

    The thing that confuses me about bone's description is that the implementation didn't sound that different from having an Octoprint feeding an Arduino running Marlin. Isn't it just an ARM chip pushing gcode or similar commands to a microcontroller? That was the basic impression I got, but it was pretty hard to separate the product from the crowdfunding hype.

    Edit: I am actually thinking of the T-Bone cape for BeagleBone. Regardless, I would hate to be in the market for a new controller right now. Just too many options and too hard to tell what platform will be successful in the long run.


  • Link to post
    Share on other sites

    Posted · Building from scratch my own Ultimaker not building kit

    Thanks guys for replies, I am new to the forum so still under approval, lots of great help and suggestions, I do like the all wood of the UMO as I mentioned I can get stuff laser cut at local fablab so that is not a problem.

    I think I will start now with the UMO setup and make changes and incorporate mods as suggested.

    Also seen on ebay you can get a set of sliding blocks with bushes for £15 which is good.

    Just wondering would linear bearings not be better than the bronze bushings, My real aim is to build a zero slop setup if possible, What does the factry supplied ones use?


  • Link to post
    Share on other sites

    Posted · Building from scratch my own Ultimaker not building kit

    You can't use linear bearings in places where the rod is also rotating. So in the 4 blocks you need brass bushings but for the head itself you can use linear bearings.

    The guys who designed the UMO were pretty damn smart - be careful if you think your idea is much better. But there are certainly things that can be improved upon.


  • Link to post
    Share on other sites

    Posted · Building from scratch my own Ultimaker not building kit

    Slop is really negligible on a factory UMO+ or UM2 (though UMO+ would benefit from GT2 belts and sprockets). The bronze bushing seem 99% fine. A design that used proper linear rails might last longer,but it adds cost and, more importantly, weight to the xy carriage. The Type-A Series 1 printer has a carriage along these lines.

  • Link to post
    Share on other sites

    Posted · Building from scratch my own Ultimaker not building kit

    The standard UMO xy slide blocks are crap, and overly complicated to assemble... Not sure about the injection molded ones for the UM2 be aware that the two machines house different types of belts and pulleys, which can have an effect on what type of slide block to use... You want the bronze bushings regardless (E3D sell these as well) and then put them in something like the reptar blocks found on thingiverse I believe...

  • Link to post
    Share on other sites

    Posted · Building from scratch my own Ultimaker not building kit

    The um2 can not be lasered. It can be milled with a CNC mill. If you want something that can be done with a laser cutter, use the UMO files.

    The UM2 blocks tend to break if you try to disassemble them.


    Hi,

    I will say you are right Dibond and PMMA are very fragile, but you can still build a UM2 with some other materials.

    It take's time and some work but you can use a laser cut to do some carving in PMMA or MDF.

    I started to build a "UM2 like" fiew weeks ago with laser cut and to be honest it's not so easy.

    I had to redraw all the assembly as they are rounded instead of square.

    And it took's me some time and many tests with the laser cut.

    I found a way to do it as i really like the UM2 look and also the lightning and the white PMMA aspect. (not only :) )

    For the front panel i used painted MDF (2 layers of 3mm + some laser cut carving) I wanted to use trespa but the laser cut didn't like it. (It's wood and resine but very hard and i could cut it with the trottec 300 as it's not fiber laser cut).

    Also PMMA is nice but fragile.

    For me what is good on the UM2 (Original one):

    Nice looking,

    The Z motor with lead shaft

    The aluminium plate with 3 screws

    The heated bed with glass.

    The lightning.

    The printing head with 2 fans and the bowden extruder.

    The software

    The printings quality.

    And the silent and compact size, compare to my RepRad Ordbot.

    So as gr5 said, the electronic is a good question.

    If i had the money, i wouldn't think about it and i will buy a UM2 mother board (this is the best way).


    The ultimaker 2 isn't necessarily any better than the UMO. The printing quality is the same as far as I can tell. Were you planning to buy the electronics for the "2"? I would concentrate on that detail first.

    There is another guy on the forums who built the frame of the 2 on a laser cutter. It looks really nice but now he has to figure out about the electronics. He decided to go with UMO electronics. He posted just a few weeks ago. You guys should talk. Here he is:

    http://umforum.ultimaker.com/index.php?/topic/9729-um-pcb-v157-vs-v2x/

    The UMO isn't called the "1" because it is constantly evolving and getting the best innovations incorporated back into it.


    Then you can make the "box" as you like. The linear bearings and shaft can be easely find in a local store or internet.

    I'm actually using an Arduino with Ramp and it took's me fiew days to configure the firmware...and I'm not done yet.

    Need more information concerning the Z home and Z : 0 (for printing start).

    Here is a picture of a broken PMMA test and of the MDF front panel.

    IMG 4367

    IMG 4386


    and of the printer now...not ready yet. I need to understand how the Z : 0 work

    I used a j-Head extruder with a laser cut support, just for test, i will soon change it for the original one.

    UM2 Like JLG


    PS : I would like to thank's the Ultimaker team to allow people like me to use there sources and by being help-full in this forum.


  • Link to post
    Share on other sites

    Posted · Building from scratch my own Ultimaker not building kit

    Wow!! Very Nice!

    1) How did you do the orange label on the side? Did you print on some kind of peel-off label? Please link to the product or technology.

    2) How did you get those black sliding blocks? Did you steel those from the J-head also? Did you laser cut those blocks somehow?


  • Link to post
    Share on other sites

    Posted · Building from scratch my own Ultimaker not building kit


    Cool! and I like it that you tribute its dutch design origin with a orange logo ;)


  • Link to post
    Share on other sites

    Posted · Building from scratch my own Ultimaker not building kit

    Wow!! Very Nice!

    1) How did you do the orange label on the side? Did you print on some kind of peel-off label? Please link to the product or technology.

    2) How did you get those black sliding blocks? Did you steel those from the J-head also? Did you laser cut those blocks somehow?


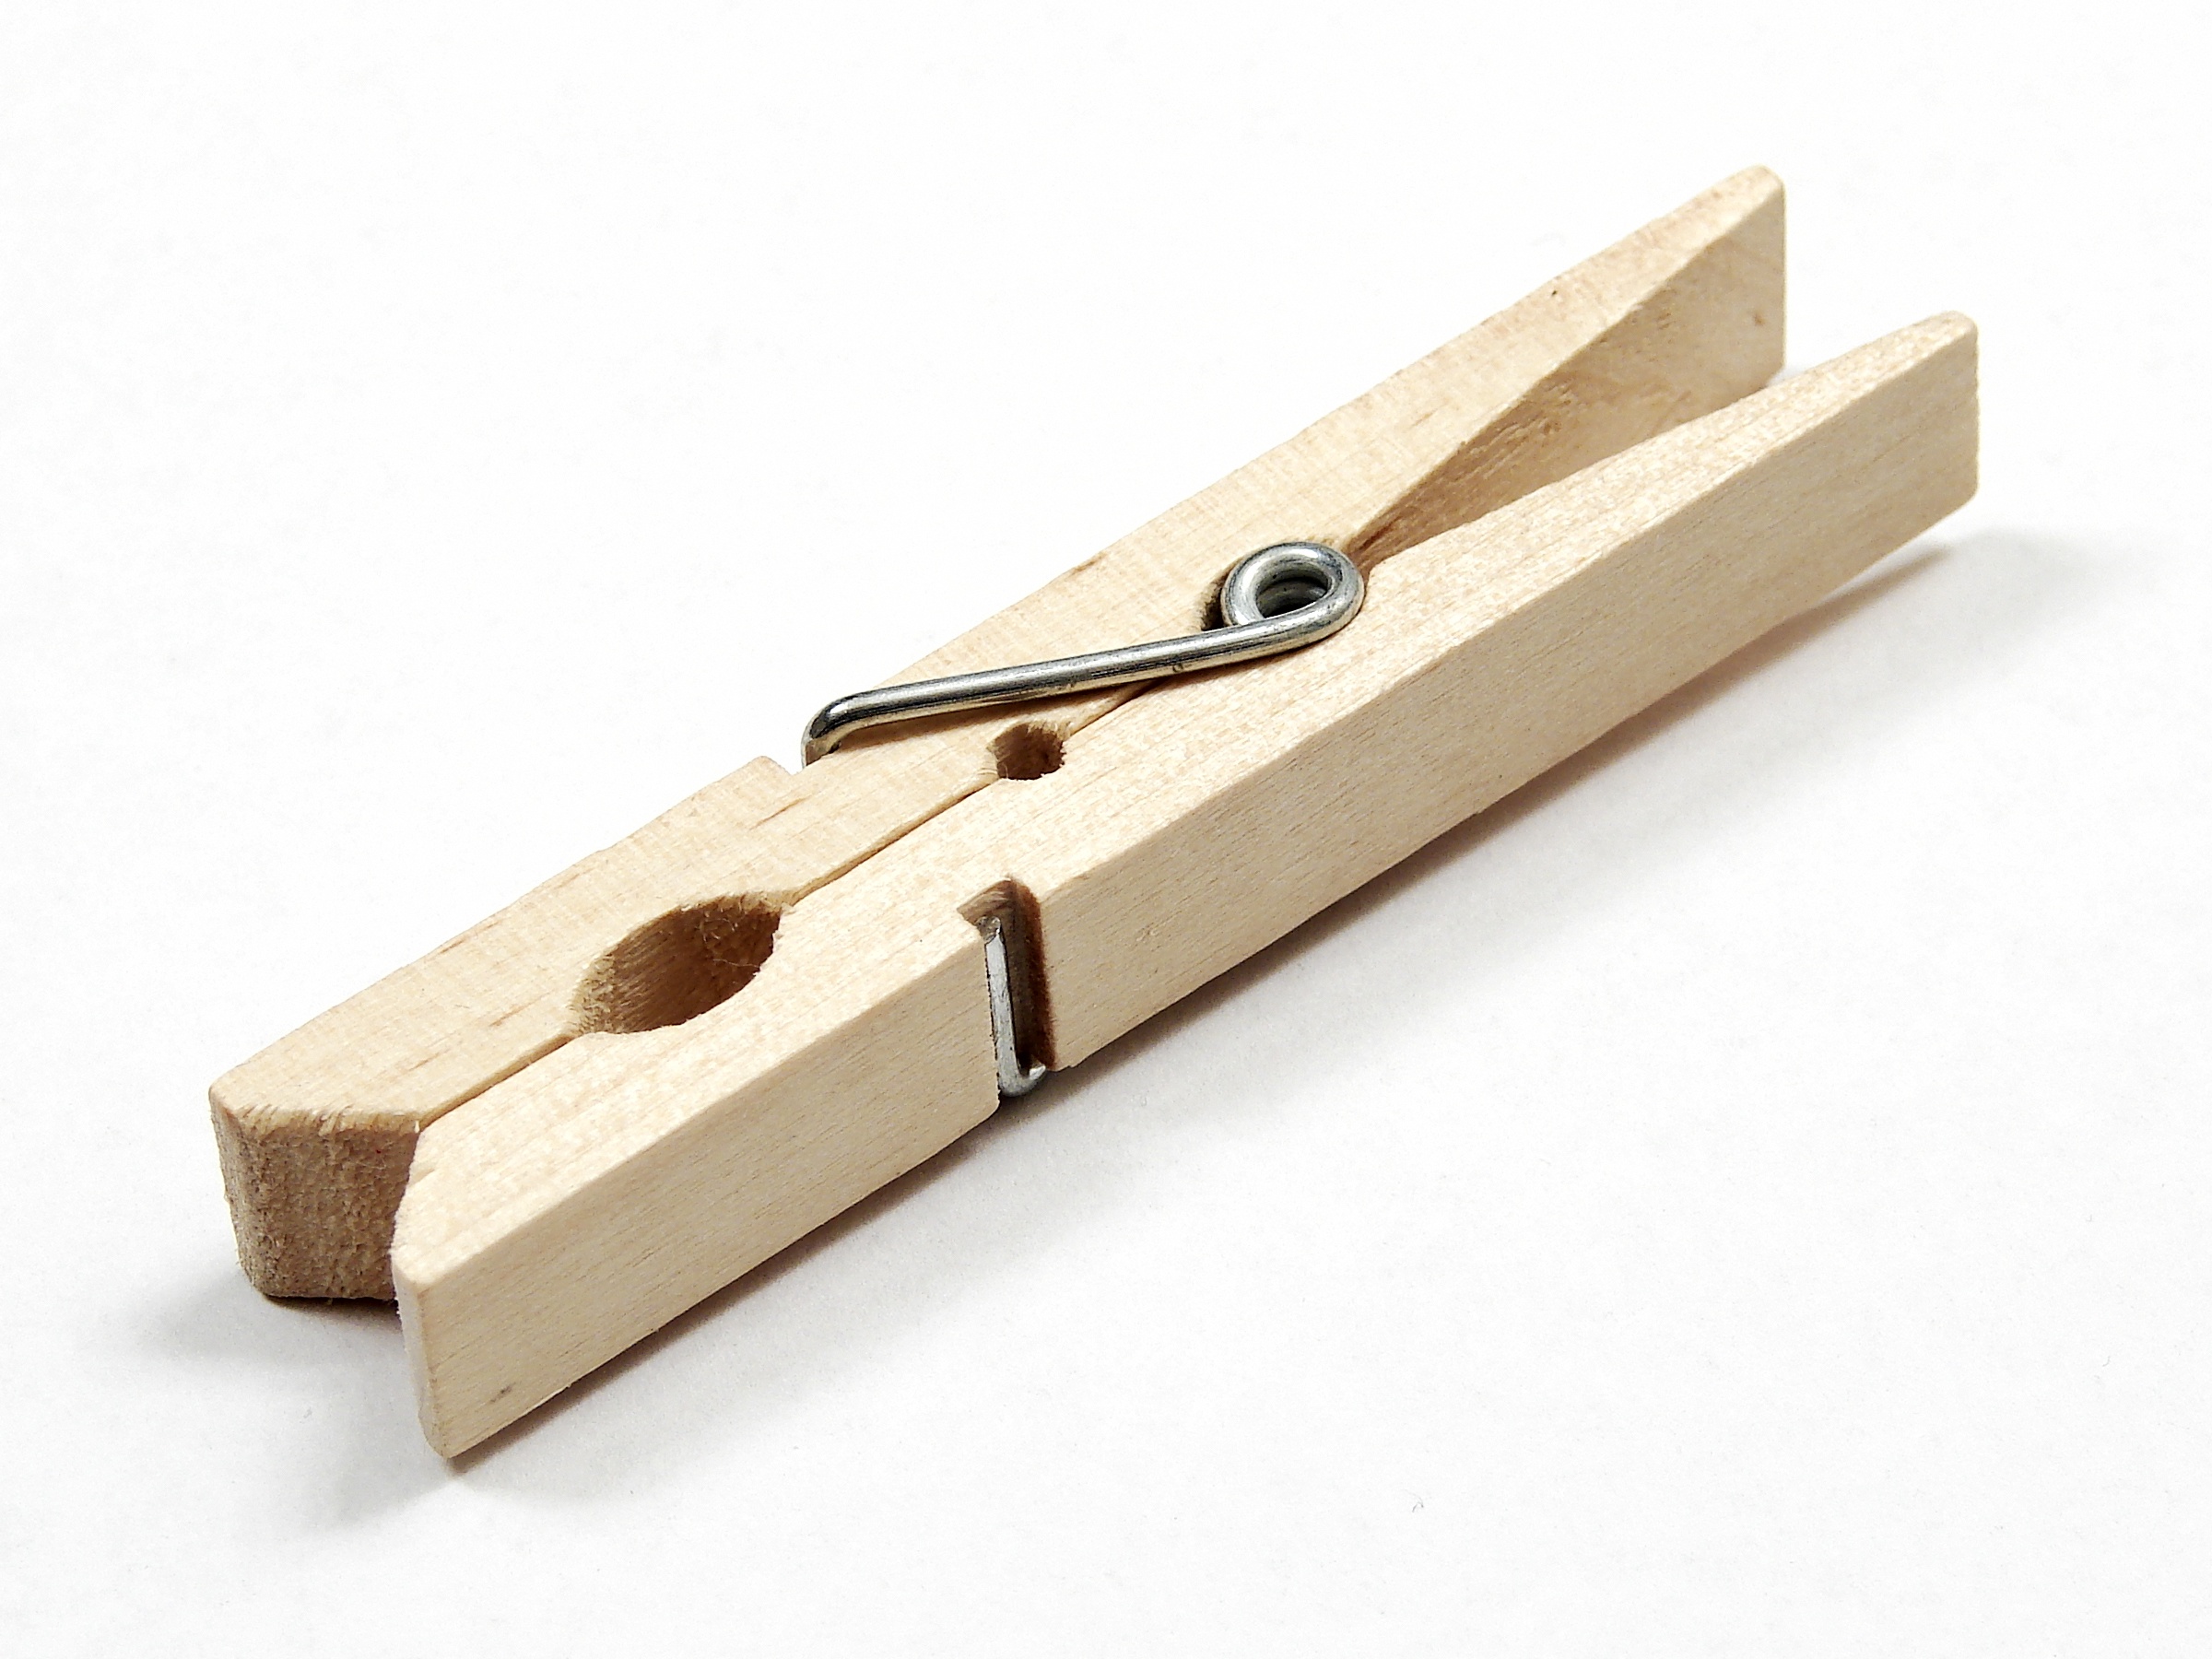
    I have seen those black blocks somewhere before. If they are what I think they are, they also hold a clothespin spring inside, to help with tension.


  • Link to post
    Share on other sites

    Posted · Building from scratch my own Ultimaker not building kit

    Wow!! Very Nice!

    1) How did you do the orange label on the side? Did you print on some kind of peel-off label? Please link to the product or technology.

    2) How did you get those black sliding blocks? Did you steel those from the J-head also? Did you laser cut those blocks somehow?


    Thank you

    1) It is a "Decoupe Vinyle" in French, Vinyle cutter ? The Vinyl Printer Cutter (BN 20) you just need a vectorial file.

    2) I found them in internet. The central one is an aluminium block (UMO size) and the side one are a perfect copy of the UM2 original side block.


    I have seen those black blocks somewhere before. If they are what I think they are, they also hold a clothespin spring inside, to help with tension.


    But i couldn't find the right spring yet and i think that i will really need 4 of them (i tried with plastic belt tensionner but i'm not sure it will work).

    The spring are 5mm inner diameter and 1mm thick.


    Cool! and I like it that you tribute its dutch design origin with a orange logo ;)


    Yes i like it to ;)


  • Link to post
    Share on other sites

    Posted · Building from scratch my own Ultimaker not building kit

    Thank you

    1) It is a "Decoupe Vinyle" in French, Vinyle cutter ? The Vinyl Printer Cutter (BN 20) you just need a vectorial file.


    In the United States, there is a device called the Silhouette Cameo that is similar. There are more heavy duty devices than the Cameo, but they are more expensive. Also, the Cameo has a mechanism to detect index markings on prints, so you can precisely cut out printed work. I love using mine to cut out papercraft stuff.

    http://www.amazon.com/Silhouette-Electronic-Cutting-Starter-Bundle/dp/B00NAX7H78/ref=sr_1_1?ie=UTF8&qid=1426480014&sr=8-1&keywords=silhouette+cameo


  • Link to post
    Share on other sites

    Posted · Building from scratch my own Ultimaker not building kit

    I believe the springs come from wooden clothespins. They should fit perfectly. Something like this:

    Clothespin-2459e.jpg


  • Link to post
    Share on other sites

    Posted · Building from scratch my own Ultimaker not building kit

    Oh yeah, the springs pretty much look like that. The first prototypes even used clothespin ones (we had to bend them manually...).


  • Link to post
    Share on other sites

    Posted · Building from scratch my own Ultimaker not building kit

    I have decided to build the UMO but still struggling to find a definative set of drawings, I have downloaded about three sets with all different names, but dont know which ones I should use ? is there different versions of the UMO ?

    I was going to use these blocks

    http://www.ebay.co.uk/itm/4x-UM2-Ultimaker-2-DIY-Injection-Molding-Sliding-Block-Copper-Sintered-Bush-3D-/161508024619?pt=LH_DefaultDomain_3&hash=item259aa0e12b


  • Link to post
    Share on other sites

    Posted · Building from scratch my own Ultimaker not building kit

    Some of them might have minor changes. I'm not into the hardware, so I can't help you with that.


  • Link to post
    Share on other sites

    Posted · Building from scratch my own Ultimaker not building kit

    I have decided to build the UMO but still struggling to find a definative set of drawings, I have downloaded about three sets with all different names, but dont know which ones I should use ? is there different versions of the UMO ?

    I was going to use these blocks

    http://www.ebay.co.uk/itm/4x-UM2-Ultimaker-2-DIY-Injection-Molding-Sliding-Block-Copper-Sintered-Bush-3D-/161508024619?pt=LH_DefaultDomain_3&hash=item259aa0e12b


    What area are you from? Maybe you can get someone to print some Reptar XY blocks for you. Also, if you are building from scratch, you might as well use 303 tooth GT2 belts for long belts, which don't require tentioning.

  • Link to post
    Share on other sites

    Create an account or sign in to comment

    You need to be a member in order to leave a comment

    Create an account

    Sign up for a new account in our community. It's easy!

    Register a new account

    Sign in

    Already have an account? Sign in here.

    Sign In Now
    • Our picks

      • UltiMaker Cura 5.7 stable released
        Cura 5.7 is here and it brings a handy new workflow improvement when using Thingiverse and Cura together, as well as additional capabilities for Method series printers, and a powerful way of sharing print settings using new printer-agnostic project files! Read on to find out about all of these improvements and more. 
         
          • Like
        • 20 replies
      • S-Line Firmware 8.3.0 was released Nov. 20th on the "Latest" firmware branch.
        (Sorry, was out of office when this released)

        This update is for...
        All UltiMaker S series  
        New features
         
        Temperature status. During print preparation, the temperatures of the print cores and build plate will be shown on the display. This gives a better indication of the progress and remaining wait time. Save log files in paused state. It is now possible to save the printer's log files to USB if the currently active print job is paused. Previously, the Dump logs to USB option was only enabled if the printer was in idle state. Confirm print removal via Digital Factory. If the printer is connected to the Digital Factory, it is now possible to confirm the removal of a previous print job via the Digital Factory interface. This is useful in situations where the build plate is clear, but the operator forgot to select Confirm removal on the printer’s display. Visit this page for more information about this feature.
          • Like
        • 0 replies
    ×
    ×
    • Create New...