


fbrc8-erin
-
Posts
700 -
Joined
-
Last visited
-
Days Won
13
Content Type
Forums
Events
3D Prints
Posts posted by fbrc8-erin
-
-
Have you recently disassembled anything on the printer? Do the motors move okay by hand?
-
Are both your X and Y motors seized up, or just one?
Can you try unplugging them from the electronics board and see how they move by hand when not plugged in?
-
I know that it sometimes automatically does the auto leveling. Is there a way to turn it on or off all the time? I haven't noticed it do an active leveling procedure in a few prints now that you mention it.
In the menu, you can choose how often the active leveling occurs. It's recommended to leave it on Always/Every print.
I don't have a printer in front of me right now but I believe this is how you choose the settings: System --> Maintenance --> Build Plate --> Leveling Frequency.
-
Are your side fans running?
-
If it's getting blocked midway through a print, I'd say the humidity is your most likely option. I had some PVA that had been left out for quite a while (weeks) that I was testing with. On Friday I successfully ran a 24 hour print. By Monday it it had finally reached the point where it had absorbed enough humidity that my next print failed.
As far as disassembling it goes, I think it's really easy to damage with disassembly and not see it--it doesn't take much to twist the double heat break just enough to disturb the flow of the filament. However, I think if that was the case, you'd be seeing the print fail sooner.
-
Are you using the active leveling? It can add a little height to the Z axis because it does corrections on the first 10mm for leveling, and then phases out the corrections over the second 10mm.
-
Judging from the first photo, the filament insert guide is not upside down. The spring looks like it shifted in the lifting switch and worked it's way loose. It should be a pretty straight forward fix. Since you're in the US, please reach out to Support@fbrc8.com so we can get you what you need.
-
It looks like it's not supported with PVA according to the latest table on the compatibility chart: https://ultimaker.com/en/resources/49799-material-compatibility
PVA only seems to be supported with CPE, PLA, and Nylon. It says TPU, PC, and ABS are considered experimental/use at your own risk, but my impression has always been that PC and ABS do not adhere well to PVA.
-
Hi,
I am having this same problem. My second print head is not able to be lowered or raised. Lift switch calibration does not do anything, no movement. Are there any other solutions for this? I've searched the forums/internet and have not found anything.
The only "solution" (more of a hack) I've found is this:
When we manually switch the lever during auto levelling (manually raise the second print head after the first calibration round), printing also works like a charm (have to make sure the head is raised of course, so the printer wont ram it into the glass bed)The problem with this is that it must be done before every print. I'm also not sure if this will work if using the second print head for support, but am about to try. Thank you for any help.
Best,
Joey
Hi, Joey,
I've got a video of the lifting switch calibration here:
Can you let us know at what part you're having problems? Are you pushing the printhead into the bay in the back right corner by hand when you run the calibration?
-
The default air gap between the aluminium base and the bottom of the heater PCB should be about 14mm. It's fairly important to not stray too too far from this as it can cause issues with the automatic bed levelling.
What I'm guessing is that you are using the screw in the back to adjust the bed during the first step? This is wrong, you should be rotating the menu knob to adjust the bed height for the back position. You only use the screws for the front two positions, not the back, always use the menu knob for that position.
my menu knob does not move the bed, should i take a video of everything the printer does and i do to it?
Your menu knob should only move the bed when adjusting the back rear point. For the front adjustments, you should be using the 2 screws on the underside of the bed in the front corners.
-
 1
1
-
-
It's definitely a filament issue, not software. It can happen when the filament is loose, or if it was spooled badly by the manufacturer.
-
Apartment flooded thanks to backed up kitchen + bathroom sinks...
What a nice day.
*sips coffee in his new swimming pool*
Oh yikes! That's rough. At least it's not winter...?
-
What is needed is a way to resume a print when one of these catastrophes happen. All the issues I ran into and that I described above were fixed once the printed was restarted and left a perfectly printed but partial model. The firmware should allow to resume the print from where it ran into the problem once restarted. The firmware should save the failure point and it should survive a restart to make it possible to resume the print from that point on. I read recently of a 3D printer that does just that but unfortunately I do not recall the brand.
While it would be great to be able to resume a failed print where it left off, realistically, it's problematic with an FDM printer like this.
For most materials, the heat of the bed is what holds the print in place. Once the bed has cooled (which can happen depending on what sort of failed print/error you have), the print can either come off the bed altogether or be sufficiently loosened from it that if you tried to resume the print, the print just wouldn't stay adhered to the bed and you'd end up with a printing mess.
-
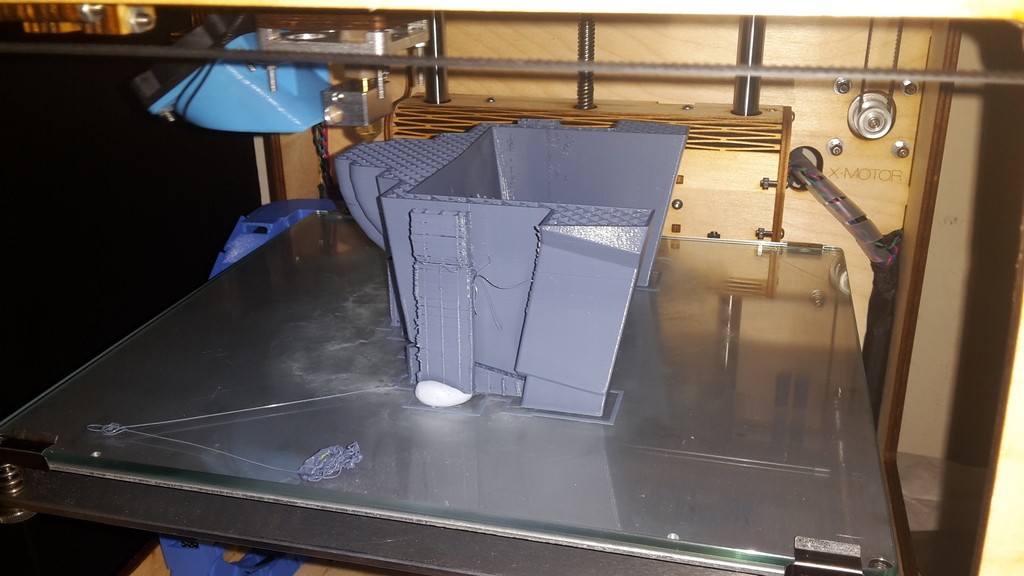
That extra object you have circled is the priming tower. Under the dual extrusion section, you will see it is checked.
True, Kmanstudios.
It's not on by default for all materials (for example it's not on by default for PLA), but for CPE, CPE+, NYLON, PC, TPU 95A, it's on by default to help create a cleaner print. PLA tends to print okay without it. You can choose to turn it on or off, but for a material where Cura has it on by default...it's probably a good idea to leave it on.
-
I am wondering what ever happened with this and if the problem was fixed.
I am having the same problem, except it is with both print cores (they are less than a month old). I first got this error for only one of the print cores, but subsequently i have gotten the error 3 more times and it says cores 1-2. I can only imagine it's something with the printer at this point.
Is your white silicone shield still in place and intact at the bottom of the printhead? If it's missing, the printer is going to have hard time maintaining the needed heat for the Cores.
-
1
-
-
Glad it's working well now. Definitely important to use the right size material for your machines with the right diameter settings.
-
I just ordered a spool of Airwolf HydroFill, which is water soluble, has a higher temp melting point and claims to work perfectly with ABS. Will report back once I give it a go.
Curious to see how this goes. I've also heard some people experimented with ABS with HIPS supports, but I got any feedback on how that worked out.
-
I'm sure we have all done it, but this is the first time i had to rescue a print, the very tall narrow support fell over, and thankfully a bit of bluetac sorted it right out!
Nice save!
-
For instance to change the AA core to BB core. And in the future 0.25mm nozzle, I use it a lot on the UM2+.
I disable auto calibration because manual leveling does a better job and I do not use wifi because I always need to be near the printer (insert filament, verify the beginning of the print).
It's interesting to have the 2 points of view.
You should only need to do the XY calibration the first time you pair up a set of Cores for a particular printer. It should remember the calibration forever. If you pull a BB Core from example from a different machine and put it in, it will require the calibration to run again, but as long as you're not creating a new pairing, it should remember the existing calibration.
-
The material should be 2.85mm. You could use a third party conversion kit to switch the printer over to 1.75mm filament, if you really wanted to, but as it comes, I would not attempt to print with 1.75mm filament.
The UM2+ can do multi-day prints, that shouldn't be an issue.
-
Impressive lights!
-
Glad to help!
-
I'm glad your printer is fixed. Most of the time an ER18 can be resolved by reseating the cable; very occasionally I've persistent ER18s that require a replacement cable.
-
It sounds like there may be special characters in the name of your file. If you have special characters (ü, é, for example), it will power cycle when you try to start the print.
-
1
-


Need help in printing with .25 3D Solex nozzle
in UltiMaker 3D printers
Posted