

Thinner layers also make it easier for the printer to print overhangs so you may consider printing .1 next time 
But this print doesn't look to bad at all

Thinner layers also make it easier for the printer to print overhangs so you may consider printing .1 next time
But this print doesn't look to bad at all
Hey gr5,
great scale models! This might be a Cura question: How do you scale down your models to 1/87? Cura has the option to scale but only shows two decimal places. You can type up to four but afterwards it shows only two. How accurate is Cura in scaling?
If you want to be precise 1/87 is around 0.0114942528735632 ![]()
Ion
It would be a better idea to already get your STL down to approx the right size before loading it in Cura. (if you want to scale models in that ratio).
If your model is 1 meter x 1 meter x 1 meter, and you only want it to be 1cm x 1 cm x 1 cm I would recommend to scale it down in whatever software you use. And let Cura just slice it.
I think that would be the best workflow..
The man and girl model was already scaled to 63mm tall. So it was only roughly 10X scaling. The guy alone was scaled to 7.46mm in sketchup (had to rotate him to vertical so I did it in sketchup instead of cura and scaled while I was at it).
I also had to modify the porsche a little so I scaled that in sketchup also and the jeep (aka land rover) I also scaled in sketchup. All of these parts were found in various places around the internet.
Two decimal places seemed plenty accurate to me for the roughly 1/10th scaling.
I think I scaled the people to be 6 feet tall as close as possible.
I only have this rather bad picture of the model with support removed...
I think setting the z distance to 0.3 mm. was a bit too much... it made the support very easy to remove but the print hangs/sacks in areas where support was highly needed:
as the guys said before.. lower layers will really help you with this mode... plus make it a little bigger... i know im a junky for big prints now... but.. it just looks cool... plus do you have any nice transparent pla hanging around... that would be amazing with this print.... :-)
Ian :-)
Hey Ian and Sander
The actual print layer height was 0.075 mm. as you can see in one of the Cura screendumps...
The 0.3 mm. I was talking about is a Cura setting for printing with support.
It basically means that it will only print support up to a 0.3 mm Z distance to the actual model...
I set it this high to prevent support and model from melting together too much, and to make it easier to remove the support, but 0.3 mm seems too high when printing 0.075 mm. layers, the print hangs/sacks in the eye sockets and on the bottom of the skull...
Made my first tall print on my Ultimaker+, it took 30 something hours.
it looks ok, but still need to work on the Z-axis, the print has gaps at multiple places.
and lots of stringing on the bottom part.
overall I'm happy with the result, but it needs some work :-P

wow zeno, nice print. I especially like the clouds at the bottom! The look real nice in that gray.
whats happening in the middle.. under extrusion ? do you have the Bertho extruder upgrade ?
Ian :-)
how fast did you print this ?
was there much wobblying ?
whats happening in the middle.. under extrusion ? do you have the Bertho extruder upgrade ?
Ian :smile:
how fast did you print this ?
was there much wobblying ?
After some testing it seems the Z-platform is not moving smoothly, maybe there is some junk in there, or my design is just plain wrong
then I would have to take drastic measures to make it stable.
and also some shaking is also not making is a smooth surface at higher places.
if you slow down the print... would it still vibrate ? I mean your structure looks good ... i mean your frame is very rigid...
why do i only have bad sex jokes going through my head right now... ? LOLLLL
Ian
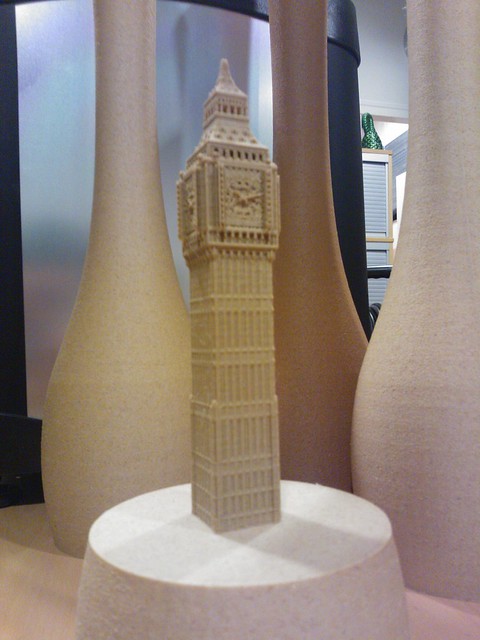
We did some more testing with our Woodfill filament, this is the 'fine' version which works with 0.4mm nozzles. Printed at 208C, minimal layertime: 8s, 50mm/s (tuned down during print to 68%) and sliced with the latest Cura 13.11. Very pleased with the result! Even the tiny pillars in the top were printed! Except for the very very top which ended up breaking off.
just finish some for my little daughter its a jet car powered with a ballon so fun for bouth :grin:
http://www.thingiverse.com/thing:30624

Looks very nice and clean. Did you post process it? How's the "jet chamber" - is it airthight?
It's not my last but my first print... :-)

If you should be interested, there is a video of unboxing my Ultimaker 2 as well:
No its just out of the printer without post procces ,it works fine ,just put the ballon on the top pipe then exaust trow the back pipe, the body was made with ultimaker filament and the weels with faberdasherys, My girls love the pink 
Looks very nice and clean. Did you post process it? How's the "jet chamber" - is it airthight?
My girls love the pink
:wub: :wub:
but i love gold..... :shock:

UM2's print quality seems pretty slick out of the box! great stuff.
Well maybe it is not directly "ouf of the box".
@NachoKaoS: Did you fine tune the printer for these prints?
Well maybe it is not directly "ouf of the box".
@NachoKaoS: Did you fine tune the printer for these prints?
well i dont use so much the basic settings...thats right,usually print at 1mm also i tune the speed and the temperatures during the print, shell thick 1.2 was give good results for middle overhangs parts,iam not hurry to get the print, so less speed usualy gives more quality.
on the machine part i check/fit every screw when arrive and not much.
A rose for my wife.....not Headache tonight... :eek:


thats a really beautiful print !
did you have to do any cleaning around the spaces between the leaves ?
Ian :-)

MariMakes posted a topic in UltiMaker Cura,


ArunC posted a topic in UltiMaker 3D printers,


Recommended Posts
Top Posters In This Topic
362
282
221
179
Popular Days
Jan 5
30
May 12
26
Jan 13
23
May 1
22
Top Posters In This Topic
ian 362 posts
cloakfiend 282 posts
skint 221 posts
SandervG 179 posts
Popular Days
Jan 5 2014
30 posts
May 12 2014
26 posts
Jan 13 2014
23 posts
May 1 2014
22 posts
Popular Posts
kmanstudios
Took me forever to do this. And it is still rougher than I would have liked. 3D concept rendering: Finished piece:
kmanstudios
I just finished this. It was a multi-part print for ease of painting. Some of it I am not sure what happened...but hey, it is purty....And, I am unanimous in that ? Test Render Parts
gr5
Bath interferometers. I have made about 20 of these for people who use them to test their telescope mirrors. They are amazingly accurate and can do better than a $40,000 Zygo PSI optical tester. Th
Posted Images
tommyph1208 55
I only have this rather bad picture of the model with support removed...
I think setting the z distance to 0.3 mm. was a bit too much... it made the support very easy to remove but the print hangs/sacks in areas where support was highly needed:
Link to post
Share on other sites