

Hi guys,
regarding Robert's chain - do you think it will fit on an UM1 too?

Do you have a custom heated bed? Then it depends how thick you cable is. The inner width of a chain element is roughly 11.6mm. Apart from that I am sure you would have to change the "bed end" part.
I guess this is the facial reaction of makerbot when they see what the ultimaker2 can do !! :wink: LOL
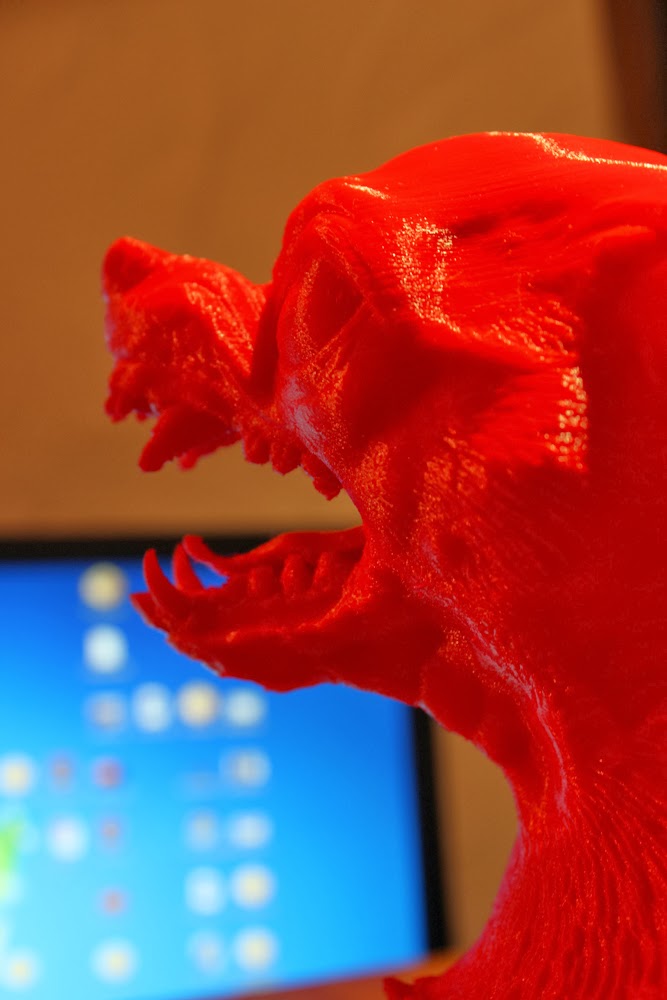
two more from this AMAZING beasty !! :-)
Wow, that's a great print, thanks for the closeups! I wasn't expecting to see a photo of it so quickly, do you have any printing tips? Did you use Meshmixer supports? I like the design in general, props for braddock's great 3d rendering; braddock are you going to paint it and such? You had better post pictures of the finished product.
Cool! nice to see it in one piece... what support did you use?
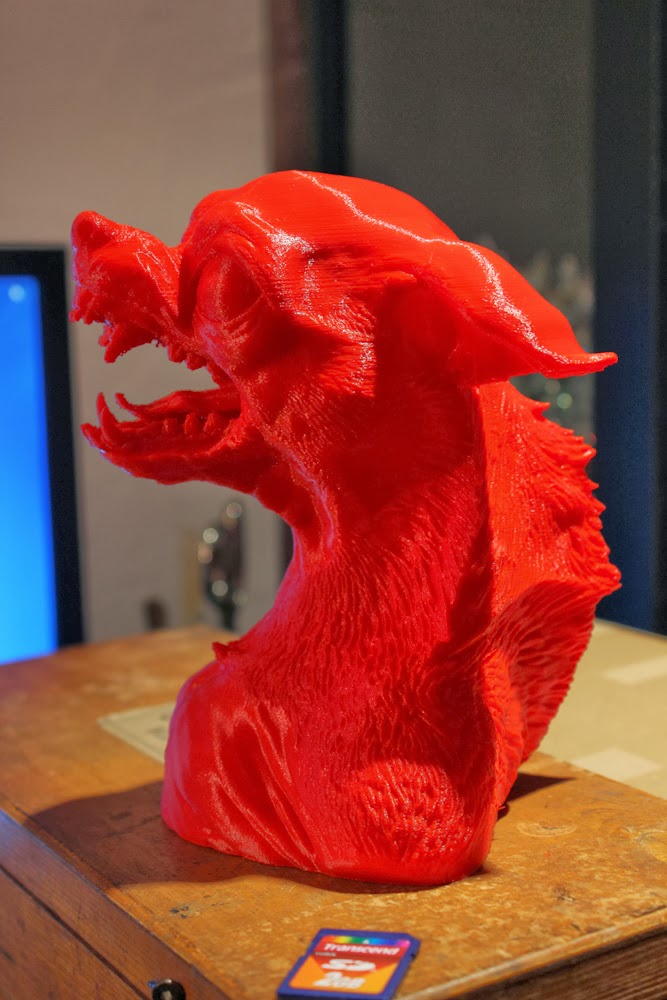
two more from this AMAZING beasty !! :smile:
Wow, that's a great print, thanks for the closeups! I wasn't expecting to see a photo of it so quickly, do you have any printing tips? Did you use Meshmixer supports? I like the design in general, props for braddock's great 3d rendering; braddock are you going to paint it and such? You had better post pictures of the finished product.
Hi Aaron ! :smile:
Happy you like the print.
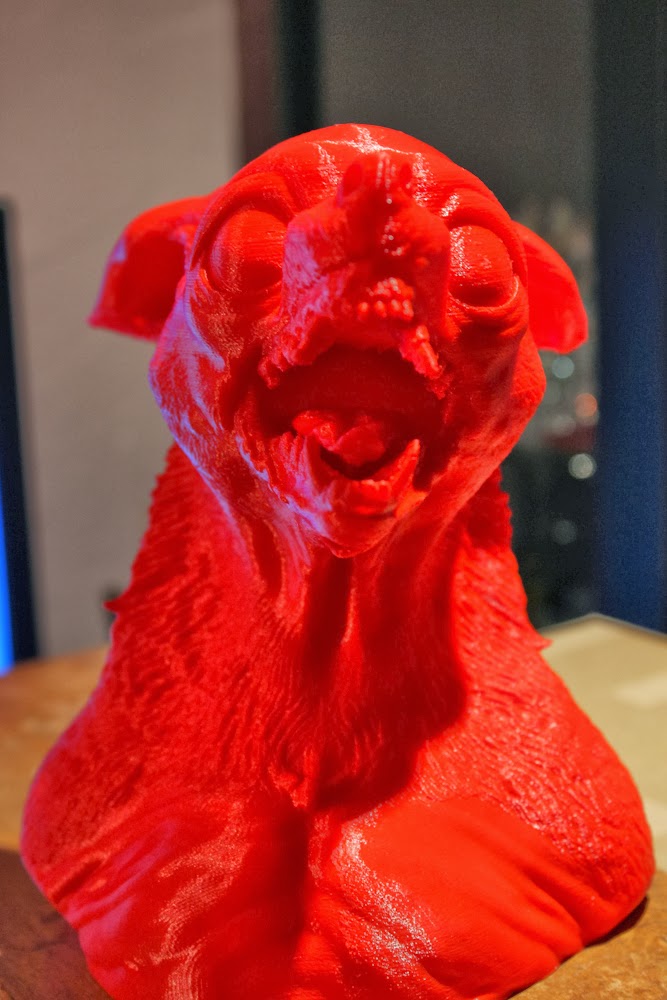
About supports I actually just added a few quick supports in cinema4d to under the ears.. chin and one small one between the front bottom of mouth and top of mouth... that was enough for a solid print :smile:
Printed this bad boy off so it fitted the print area of my ultimaker2...
Ian :smile:
Ian, your UM2 must be well tuned, or your filament is far superior to mine... lately, no matter what I do, I get under extrusion... not from the start though, often a print is half way finished, then it begins... it's driving me nuts.
What speed did you print this at? any fill?
What brand is your filament?
Cheers.
Wow, that's a great print, thanks for the closeups! I wasn't expecting to see a photo of it so quickly, do you have any printing tips? Did you use Meshmixer supports? I like the design in general, props for braddock's great 3d rendering; braddock are you going to paint it and such? You had better post pictures of the finished product.
hi Aaron, no I'll probably just hit it with grey primer. I do these sorts of characters for a living, I'll probably upload a bunch of my old models to youimagine and thingyverse at some stage, but not yet.
@IRobertI: Huge thanks for the great model. The UM2 cable chain looks fantastic. It took a few tries but in the end the whole thing looks very smooth.
You're welcome, thanks for posting pics of it. I love seeing my designs printed by other people, it makes me happy 
Do you have a custom heated bed? Then it depends how thick you cable is. The inner width of a chain element is roughly 11.6mm. Apart from that I am sure you would have to change the "bed end" part.
You're spot on, it's exactly 11.6mm. And the inner height is 10.8mm. You're also correct about the bed connector, it will not work.
@Ian: Love the dog print, if possible could you show your custom support, I think that would be interesting to see.
here are my quick supports... works pritty well :-)
Ian :-)
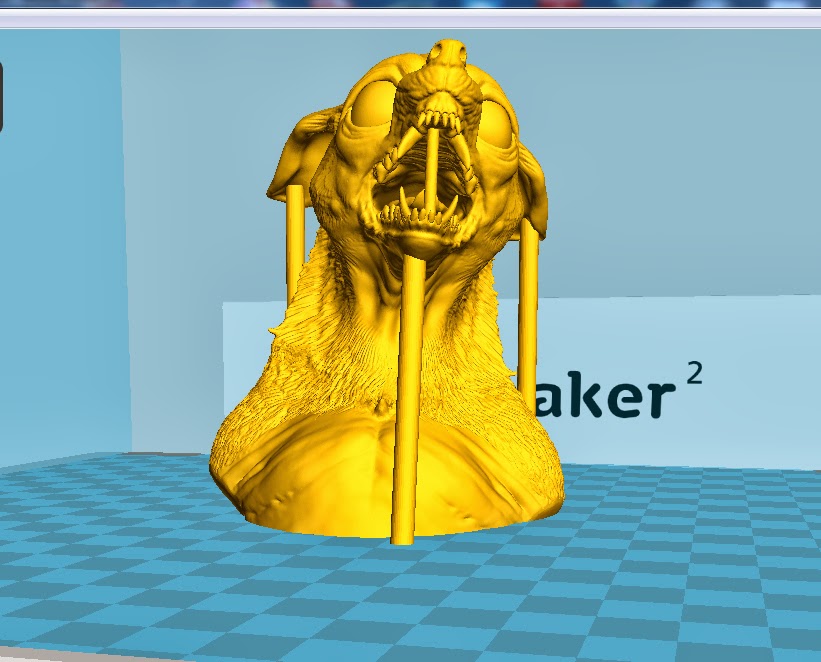
I'll say, those supports worked great! Apologies if I'm derailing here, but did you draw cylinders all the way from the build surface to physically touch the print structure or is there a little gap between the top of the cylinder and the printed object?
Thanks!
What the... but the teeth!? How are they working when you're starting them in mid air?
I haven't looked at this thread in a while, I have to say the prints I'm seeing here are blowing away nearly everything I see on Thingiverse.
Ian,
Did you you use 'support all over' on the beasty? I can't see how you got the upper fangs to print?
Ian, Illuminarti,
Do you think the prints your getting now on your UM2 are achievable on a dialed in and/or modified UM1. I suppose the key would be improved cooling. Until now I hadn't seen print examples to prove the UM2 was producing much better product than the UM1.
Obviously, I'd like to be printing at this level of quality. I think (thought) I have the machine mechanically tuned pretty well. Honestly, I need a better understanding of bridging and optimizing overhangs.
Illuminarti,
Awesome dragon print as well as video production. Am I to understand that your UM2 is successfully printing overhangs down to ~20degs?
I inspired by what I see here lately. Yes, these prints ought to be put up on Thingiverse only to show the UM's is competing if not superior to the Replicator. I think the later, but my opinion is biased. Put enough up there and see if they censor some of it...
Haha, thanks. Not sure about the video, but the print turned out pretty nicely. :-) I put the model up on thingiverse, as a derivative of the original, and included some decent photos of the print; its gotten almost 1200 views so far - and hundreds of downloads. Not sure how well it will print on other printers...
I always try to remember to upload 'I made one' photos to Thingiverse, and mention that I used an Ultimaker (2) on the descriptions.
I haven't really tested to see what level of overhang the UM2 can handle. Anecdotal evidence from the prints I've done lately says that it can get well under 20º, at least for short distances. When printing the Dragon, I added support on surfaces that were 17.5º or shallower, and didn't have any rough overhangs anywhere. But those supports are only point supports every few mm, at best, so in between the printer has to fend for itself. And is seemed to do that just fine.
Could a well tuned UM do as well? I'm not sure. My gut tells me no, but I can't quite put my finger on it. Certainly the things I have intentionally printed to a high standard on the UM2 are better than anything I ever printed on the UM1 - but then I've never really tried to print ultra-high quality standard prints on the UM1. The UM1 can print really well for detailed pieces like figurines - 3D scans, Yoda, etc - But isn't as good for parts that need lots of retraction, like the Dizingof Cells Bowl, I think. The UM2 has noticeably more precise retraction and less dripping (because of the smaller heated zone in the head, I think), so it does better on those pieces. Maybe if you tune temp and speed just right, you could get close on a UM1, but I think the retraction settings sweet-spot on a UM1 is much smaller than on a UM2, such that it's probably not practical to find and operate in it for a complex/long print.
What the... but the teeth!? How are they working when you're starting them in mid air?
Woah, yeah? The UM2s are magic.
I know I should try and answer this one with some amazingly clever answer..... but all i can say is....
ITS MAGIC !!!!.... and run away..........
You have got to be kidding....they just started printing in mid air?
guys to be totally honest... i simply g coded up with stl file you see above... watched it for 5 minutes to see that the print started off OK... then closed the door until 36 hours later... DING DONG finished......
Ian
Lol, like I said magic!
maybe my hobby room has low gravity ??....... HEHEHEHE ;-)
Could a well tuned UM do as well? I'm not sure. My gut tells me no, but I can't quite put my finger on it. Certainly the things I have intentionally printed to a high standard on the UM2 are better than anything I ever printed on the UM1 - but then I've never really tried to print ultra-high quality standard prints on the UM1. The UM1 can print really well for detailed pieces like figurines - 3D scans, Yoda, etc - But isn't as good for parts that need lots of retraction, like the Dizingof Cells Bowl, I think. The UM2 has noticeably more precise retraction and less dripping (because of the smaller heated zone in the head, I think), so it does better on those pieces. Maybe if you tune temp and speed just right, you could get close on a UM1, but I think the retraction settings sweet-spot on a UM1 is much smaller than on a UM2, such that it's probably not practical to find and operate in it for a complex/long print.
I can take some encouragement form this statement. My homemade nozzle has a hot zone about 1/3-1/2 that of the UM1 standard nozzle and I think really good performance from a GeoHagen extruder. I'm thinking another factor working in favor of the UM2 is the dual cooling fans. I'm experimenting with compressed air for that and its working pretty well. Its early to tell.
Come on Ian, how did you get those teeth to print?
I see now how the model was split turning the face vertical. The picture with the manually added supports suggests that it was all printed as one piece. Nice glue joint anyhow. How does it look straight on to the splice? Don't get me wrong, its really nice work
Regarding the second fan - I don't hink it does any good for small details. Look at first prints of the UM Robot on the UM2. The right ear is _always_ mangled. That's due to the wrong angle the right fan is aimed at.

MariMakes posted a topic in UltiMaker Cura,


ArunC posted a topic in UltiMaker 3D printers,


Recommended Posts
Top Posters In This Topic
362
282
221
179
Popular Days
Jan 5
30
May 12
26
Jan 13
23
May 1
22
Top Posters In This Topic
ian 362 posts
cloakfiend 282 posts
skint 221 posts
SandervG 179 posts
Popular Days
Jan 5 2014
30 posts
May 12 2014
26 posts
Jan 13 2014
23 posts
May 1 2014
22 posts
Popular Posts
kmanstudios
Took me forever to do this. And it is still rougher than I would have liked. 3D concept rendering: Finished piece:
kmanstudios
I just finished this. It was a multi-part print for ease of painting. Some of it I am not sure what happened...but hey, it is purty....And, I am unanimous in that ? Test Render Parts
gr5
Bath interferometers. I have made about 20 of these for people who use them to test their telescope mirrors. They are amazingly accurate and can do better than a $40,000 Zygo PSI optical tester. Th
Posted Images
ian 32
roberts thing is on my print list for tomorrow evening !! as the germans would say.. EIN MUSS !!
Ian :-)
Link to post
Share on other sites