

I put the revised Dragon files - including the version with support already added - up on Thingiverse:
http://www.thingiverse.com/thing:218026
why thingiverse ?

I put the revised Dragon files - including the version with support already added - up on Thingiverse:
http://www.thingiverse.com/thing:218026
why thingiverse ?
Ok so today is theorrectically day two of my printing life with my new life partner.. ultimaker 2 ;-)
She gets up with me in the morning... I turn her on and she does amazing work the whole day and night... wow.... ;-)
Im kinda blown away by the layer quality of the new ultimaker printer... really it just prints like butter. everything now comes flat and perfect on the heated bed and AHHH what can I say... its incredible to watch your ideas being created infront of me every day now :-)
The two little black fans left and right of the head quickly and accuratly cool the layer after it has been laid down and this removes almost all bubblying and loose stringing that happens with many other 3d printers.
So here are two photos from this morning.. from the latest print :-) HEHE :-)
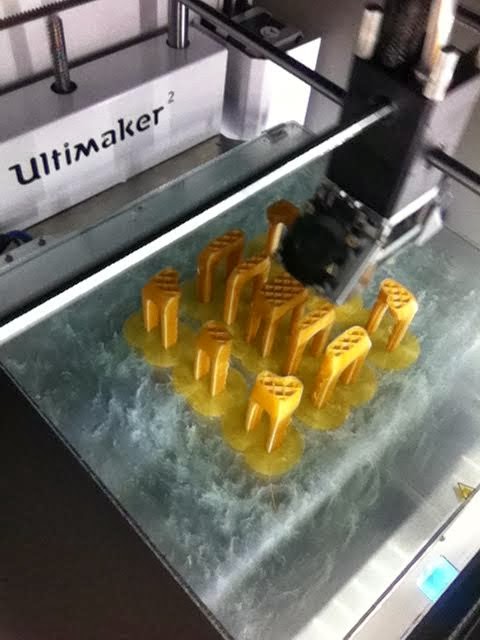
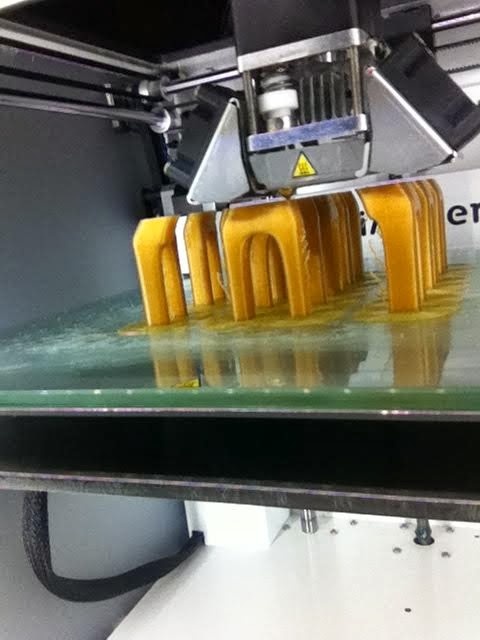
https://www.youmagine.com/designs/team-church
I've been printing at 230 to try and keep it from clogging.
Also, what speed do you print at mostly?
when im printing buildings with long straight walls. i can print zero problem at 100
if i am printing detailed seperated parts... normally 50.
if i am printing somewthing hollow with a round shape like a head... i tip the heat upto 230 and crank the speed up to 130 without problems :-)
plus an extra interesting point is ! when you are printing building models with many openings... it is normally better to up the temp 10 degrees and run about 100... because then the print nozzle will fly over the window and door openings faster and you will get much cleaner openings that if your ultimaker was printing more slowly !
Ian :-)
I put the revised Dragon files - including the version with support already added - up on Thingiverse:
http://www.thingiverse.com/thing:218026
Dat dragon
Wow.
when im printing buildings with long straight walls. i can print zero problem at 100
if i am printing detailed seperated parts... normally 50.
if i am printing somewthing hollow with a round shape like a head... i tip the heat upto 230 and crank the speed up to 130 without problems :smile:
At what layer height? I really need to do some proper speed experimenting but for me I can't seem to get up to those speeds at all, not without serious under extrusion.
why thingiverse ?
Traffic, I would assume. One of my designs: 13 downloads vs over a thousand.
why thingiverse ?
Mostly because that's where the original file that I modified came from, and so it seemed like the best place to put the replacement.
fair enough ! :-)
as i said in my blog...
Ultimaker ... converting imagination into reality ! :-)
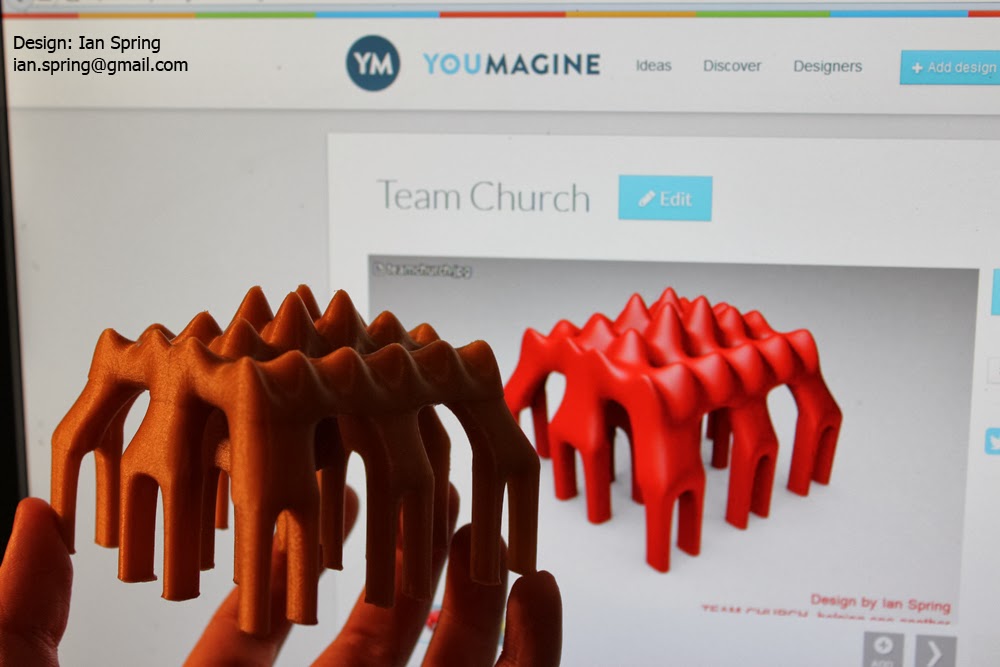
That's a nice looking print. I imagine there was a lot of retraction when making the points, and there is no noticeable stringing or blobbing. What did you use to design the model? Also, what filament type are you using?
Hi Aaron ! :-)
For this model I used Cinema4D... but to be honest this could have been created with a lot of other softwares... solidworks,,, max....:-)
I used a roll of normal ultimaker gold pla... it actually prints fantasticly well !
Ian :-)
Love the Threepio prints!
Are those files available to be shared? I'd like to print that for Hasbro R2 to have a friend 
To avoid hijacking this thread, I moved the discussion of Braddock's extruder issues into a new thread in the troubleshooting section:
http://umforum.ultimaker.com/index.php?/topic/3945-braddocks-grinding-um2-extruder-thread/
Back on track... I find the best way to print overhangs is... not to print them.


im printing your beasty at the moment :wink:
.06 layer height, speed 100, temp 220, full cooling and the largest scaling to fit into an ultimaker :wink:
only a 46 hour print ! HAHAHA :wink:
Ian
Here is my latest print - the Beefy T-Rex (I call him "John the Bling-O-Saurus" because I used the Ultimaker Gold PLA)
http://www.thingiverse.com/thing:216933
I used Meshmixer to add supports. It worked great, except for one spot where I didn't see it creating a post right through the poor guy's head...


Right after printing and cleanup I did a small "John posing on things" impression. "Who's been wiped out by evolution? Not me suckers!"


Forgot to add the print settings:
There are tons of blobs on the underside because of so many retractions. I'll try another version with tighter retraction settings to see if it helps.
i so so so so so love this site :-) and seeing what incredible creations are popping out of an ultimaker... RICHTIG TOTAL GEIL !
Ian :-)
Haha! what?! That's ambitious... as you can see, I've been cutting him up, not game to try and print anything for that duration in a single piece, I hope it works out! and at 100mm/s! I'm printing him at half that!
I will be making a base for him to mount on, so I'll send you that too.
im printing your beasty at the moment :wink:
.06 layer height, speed 100, temp 220, full cooling and the largest scaling to fit into an ultimaker :wink:
only a 46 hour print ! HAHAHA :wink:
Ian
@IRobertI: Huge thanks for the great model. The UM2 cable chain looks fantastic. It took a few tries but in the end the whole thing looks very smooth.


Here is my latest print - the Beefy T-Rex (I call him "John the Bling-O-Saurus" because I used the Ultimaker Gold PLA)
http://www.thingiverse.com/thing:216933
I used Meshmixer to add supports. It worked great, except for one spot where I didn't see it creating a post right through the poor guy's head...
Right after printing and cleanup I did a small "John posing on things" impression. "Who's been wiped out by evolution? Not me suckers!"
I love it, and it came out so good looking! I'm glad to see someone printed out that cable guard as well, I too downloaded it and was going to print it out; any printing suggestions since you said it took a couple of shots.
The beefy dude (John) didn't came out that well. The underside is full of blobs (from stringing) and marks from the support tips (should have set the post tip diameter to 0.5).
Regarding the cable chain - my issues were mostly due to layers not sticking. I printed them at 230° and everything was mostly fine. Apart from the chain elements remember to also print 14 clips. I think Robert didn't make it clear in his description.
Here are my print settings:

MariMakes posted a topic in UltiMaker Cura,


ArunC posted a topic in UltiMaker 3D printers,


Recommended Posts
Top Posters In This Topic
362
282
221
179
Popular Days
Jan 5
30
May 12
26
Jan 13
23
May 1
22
Top Posters In This Topic
ian 362 posts
cloakfiend 282 posts
skint 221 posts
SandervG 179 posts
Popular Days
Jan 5 2014
30 posts
May 12 2014
26 posts
Jan 13 2014
23 posts
May 1 2014
22 posts
Popular Posts
kmanstudios
Took me forever to do this. And it is still rougher than I would have liked. 3D concept rendering: Finished piece:
kmanstudios
I just finished this. It was a multi-part print for ease of painting. Some of it I am not sure what happened...but hey, it is purty....And, I am unanimous in that ? Test Render Parts
gr5
Bath interferometers. I have made about 20 of these for people who use them to test their telescope mirrors. They are amazingly accurate and can do better than a $40,000 Zygo PSI optical tester. Th
Posted Images
illuminarti 18
I put the revised Dragon files - including the version with support already added - up on Thingiverse:
http://www.thingiverse.com/thing:218026
Link to post
Share on other sites