Jump to content
UltiMaker Community of 3D Printing Experts

Be careful with removing objects with a knife !!


ian

Recommended Posts

Posted · Be careful with removing objects with a knife !!

Just a friendly warning from me !

Last night before I went to bed, I finished a print of old train station roof.

The roof was welded to the glass plate of my um2.

So I first heated the bed upto 100 and when it was warm enough, I was able to get a sharp swiss army knife under some of the print.

Problem was because the PLA got so soft so quick.. the movement of the blade was twisting the PLA and that did not look so so good :-(

So I decided to take the print and the glass off the um2 and wait until every thing cooled down.

Then i still had a little space at the bottom edge of my roof.

Carefully slide in my swiss army knife under the edge and started to apply force..

and like everyone... more force and more force... in a half second the roof model shot off the glass plate and my swiss army knife shot straight into the middle section of my left arm.. taking out a chunk of my arm.. about 7mm deep and the size of a 5 cent piece...

I stood there as my arm turned instantly into a river of blood.....

I was able to take control of the situation and stop the bleeding with a few minutes.. and I think it should be fine...

But just a little warning... if you try and pull and push a piece off the hotbed... remember... that energy has to go somewhere and you only have two arms...

BE CAREFUL MY FRIENDS !

Ian :-)


  • Link to post
    Share on other sites

    Posted · Be careful with removing objects with a knife !!

    It's completely irresponsible of the Swiss to produce such a dangerous device! :huh:

    Get well soon!

    P.S.: Uhm... usually train station roofs are kind of dark red to brown, aren't they...?


  • Link to post
    Share on other sites

    Posted · Be careful with removing objects with a knife !!

    That's unfortunate!

    I take the glass off after every print and run cold water over the entire piece, then I simply tap the object with a tool that has an insulated handle (Example: Kleins) with the glass laying flat on the counter. The object usually pops right off with very little force.


  • Link to post
    Share on other sites

    Posted · Be careful with removing objects with a knife !!

    That's why you keep your non-knife hand on top of the object, not on the other side of it :) Personally I use uhm... I have no idea what they're called in English. You use them to spread out spackle on your walls. Basically a very thin and flexible piece of metal. And then I took the dremel to it and made the edge sharp so that I can easily wedge it under the print. After I have a few millimeters of it under the print I start prying upwards to get air under the print and it'll eventually pop right off.


  • Link to post
    Share on other sites

    Posted · Be careful with removing objects with a knife !!

    Gotta love the Swiss army knives...

    Before my HBP upgrade I used a fixed blade that has no handle (5.11 boot knife) and is therefore very flat. It's very easy to pry off the part with that one, but usually leaves marks on the part.

    With the HBP I just have to wait for the bed to cool down, then the part pops right off the plate :)

    (Problem is, at the moment the heater doesn't work...)


  • Link to post
    Share on other sites

    Posted · Be careful with removing objects with a knife !!

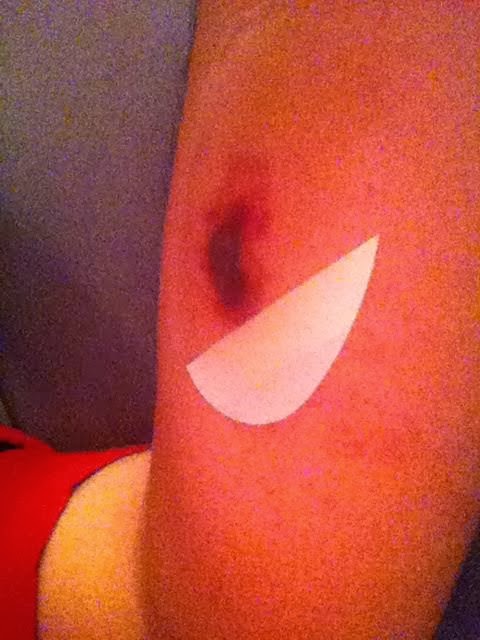
    it was great fun when we cleaned the hole up and got it sealed with a transparent bandage.. it was like watching little rivers of blood running from all sides.. about 5 minutes later my arm once again looked like a blood fountain...

    Im thinking of desigjing and printing some arm guards for heavy work with knifes and blades... atleast good for me :smile:

    unnamed.jpg


  • Link to post
    Share on other sites

    Posted · Be careful with removing objects with a knife !!

    Yikes! Be careful, Ian! My dragon print took a chunk out of my finger tip in a similar way, trying to remove a piece of support inside the mouth.

    That said, I find that on the UM2, printing on a thin layer of glue at 60ºC, once it cools to room temp, prints will pretty much always lift right off the bed.


  • Link to post
    Share on other sites

    Posted · Be careful with removing objects with a knife !!

    Those clips that hold the glass in - one of those made a small cut. Was still bleeding a little 24 hours later. Had to wear bandages for 4 days.


  • Link to post
    Share on other sites

    Posted · Be careful with removing objects with a knife !!

    Seems that we have to be aware that 3D-printing is a dangerous, bloody thing - hopefully not prohibited because of life-dangering injouries... :-)

    Honestly, I also use a kind of crocodile "that´s-not-a-knife" dundee fixed-blade knifes (bought for an outdoor trip in US) and gathered some cuts in my fingers during removing prints or cut away support...


  • Link to post
    Share on other sites

    Posted · Be careful with removing objects with a knife !!

    I guess this is the main reason why people buy a 3D printer: because they cannot handle ordinary tools... :p

    In this regard: Hi, my name is Dim3nsioneer and I have an Ultimaker... :wink:

    EDIT: Seriously, I see it as one big advantage of the 3D printer technology: People with not too much mechanical skills can create solid things... no offense to any of you!


  • Link to post
    Share on other sites

    Posted · Be careful with removing objects with a knife !!

    And it may also make those who cannot handle ordinary tools learn how to do so :) You come up with some design that will only work if you have a solid bar of metal somewhere, so you need to get yourself some metal and a saw. Then you need to connect something with bolts, so you go out and get that. Then your holes need threads so you go out and buy tools for that. Then you need to sand the surface for a better appearance. Then you make a lamp and have to figure out how to wire it up properly. The list goes on and on :D

    *takes a look at the pile of parts for the CNC he started 3 years ago that still isn't done*


  • Link to post
    Share on other sites

    Posted · Be careful with removing objects with a knife !!

    Ahmm... Dont know if a good idea to mention it now but I'm a graduated mechanical engineer :-)

    uuups...

    But I guess you know the term " if you know plastic - use steel..." :-)

    So - use steel to peel of plastic

  • Link to post
    Share on other sites

    Posted · Be careful with removing objects with a knife !!

    Check your title, now EVERYONE will know :D

    (just messing with you, let me know if you want me to remove it ;) )


  • Link to post
    Share on other sites

    Posted · Be careful with removing objects with a knife !!

    Damm Dude :-)

    Give me a second - have to grab my chair cause I felt down with it while laughing - that´s a great joke...

    God, I love this community - nevertheless - I would be happy if you could re-change before somebody start asking "mechanical questions" bout the UM design... :-)

    Sorry, still loughing....

    I guess I owe you a beer if you ever come to Graz... :-)


  • Link to post
    Share on other sites

    Posted · Be careful with removing objects with a knife !!

    Fine... :p


  • Link to post
    Share on other sites

    Posted · Be careful with removing objects with a knife !!

    Hey Ian,

    That's a bad wound! Is it better by now?

    Ironically thought that you put this post in "The Art of Printing"..

    But to be honest,

    When I printed my Rammus Figure, I also had to use a sharp knife ( because I had no other tools available)

    and Cut myself twice..

    ..within ten minutes.

    The donkey never hits himself twice on the same rock!

    (yet another dutch saying)

    Cheers,

    Lennart


  • Link to post
    Share on other sites

    Posted · Be careful with removing objects with a knife !!

    thank you for asking...

    all ym friends are killing me that i didnt go to the doctor or hospital when it happened.. I just cleaned the wound and bandaged it up as tight as possible.. then slept two nights with my arm propped up in the air...

    but now the wound is closed uo fully and the skin is slowly growing back into the whole.

    I hope I dont have too much of a bad scare... :-)

    on a brighter note... because i did hurt myself badly because i was trying my best to take a large print off the glass.. im designing one or two systems that will make this little problem go away for ever :-)

    Zero fighting to get big prints with glue stick off the bed anymore :-)

    Will post the design maybe at the weekend when I am finished :-)

    Have a good day tomorrow my friend !

    Ian :-)


  • Link to post
    Share on other sites

    Posted · Be careful with removing objects with a knife !!

    A sharp chisel is the way to go for me. Before, with my butcher knife, I had to work for like 10 minutas, carefully. And I always ended up messing the bed level. With a sharp chisel, it just takes 30 seconds, and it comes right off.


  • Link to post
    Share on other sites

    Create an account or sign in to comment

    You need to be a member in order to leave a comment

    Create an account

    Sign up for a new account in our community. It's easy!

    Register a new account

    Sign in

    Already have an account? Sign in here.

    Sign In Now
    • Our picks

      • UltiMaker Cura 5.3 stable released
        In this stable release, Cura 5.3 achieves yet another huge leap forward in 3D printing thanks to material interlocking! As well as introducing an expanded recommended print settings menu and lots of print quality improvements. Not to mention, a whole bunch of new printer profiles for non-UltiMaker printers!
          • Thanks
        • 21 replies
      • Here it is. The new UltiMaker S7
        The UltiMaker S7 is built on the success of the UltiMaker S5 and its design decisions were heavily based on feedback from customers.
         
         
        So what’s new?
        The obvious change is the S7’s height. It now includes an integrated Air Manager. This filters the exhaust air of every print and also improves build temperature stability. To further enclose the build chamber the S7 only has one magnetically latched door.
         
        The build stack has also been completely redesigned. A PEI-coated flexible steel build plate makes a big difference to productivity. Not only do you not need tools to pop a printed part off. But we also don’t recommend using or adhesion structures for UltiMaker materials (except PC, because...it’s PC). Along with that, 4 pins and 25 magnets make it easy to replace the flex plate perfectly – even with one hand.
         
        The re-engineered print head has an inductive sensor which reduces noise when probing the build plate. This effectively makes it much harder to not achieve a perfect first layer, improving overall print success. We also reversed the front fan direction (fewer plastic hairs, less maintenance), made the print core door magnets stronger, and add a sensor that helps avoid flooding.


        The UltiMaker S7 also includes quality of life improvements:
        Reliable bed tilt compensation (no more thumbscrews) 2.4 and 5 GHz Wi-Fi A 1080p camera (mounted higher for a better view) Compatibility with 280+ Marketplace materials Compatibility with S5 project files (no reslicing needed) And a whole lot more  
        Curious to see the S7 in action?
        We’re hosting a free tech demo on February 7.
        It will be live and you can ask any questions to our CTO, Miguel Calvo.
        Register here for the Webinar
          • Like
        • 18 replies
      • UltiMaker Cura Alpha 🎄 Tree Support Spotlight 🎄
        Are you a fan of tree support, but dislike the removal process and the amount of filament it uses? Then we would like to invite you to try this special release of UltiMaker Cura. Brought to you by our special community contributor @thomasrahm
         
        We generated a special version of Cura 5.2 called 5.3.0 Alpha + Xmas. The only changes we introduced compared to UltiMaker Cura 5.2.1 are those which are needed for the new supports. So keep in mind, this is not a sneak peek for Cura 5.3 (there are some really cool new features coming up) but a spotlight release highlighting this new version of tree supports.  
          • Like
        • 22 replies
    ×
    ×
    • Create New...