Jump to content

Post your latest print!


IRobertI

Recommended Posts

Posted · Post your latest print!

yeah, but what's a hollow castle gonna do when you need a rape whistle :p Would love to see pics if you print one out! Especially in those fabb colours of yours.

Proboolean is definitely a vast improvement over standard boolean which would croke after 2 objects tops. But the instant you make a mistake, it's best to delete the whole thing and not try to recover or you'll have junk connections in objects. And if you undo, you have like a 90% chance of crashing... You think they would have gotten boolean right by now after all this time.

I just watch some of those Cad videos where they boolean an object, make a perfectly fitting fillet, and chamfer the edge dynamically. Try to chamfer an edge after boolean and you'll get a nice ball of spikes in max.


  • Link to post
    Share on other sites

    Posted · Post your latest print!

    same probelm with cinema4d.

    in the perfect world, you should just select all connection components, click bolean and the bolean command combines the objects as solids into one object... but like max, try and bolean more than... 10 objects and bang... crash and try again...

    but there must be a way, because there are people bashing out complex models on thingiverse all the time and they print great.... ?

    Ian


  • Link to post
    Share on other sites

    Posted · Post your latest print!

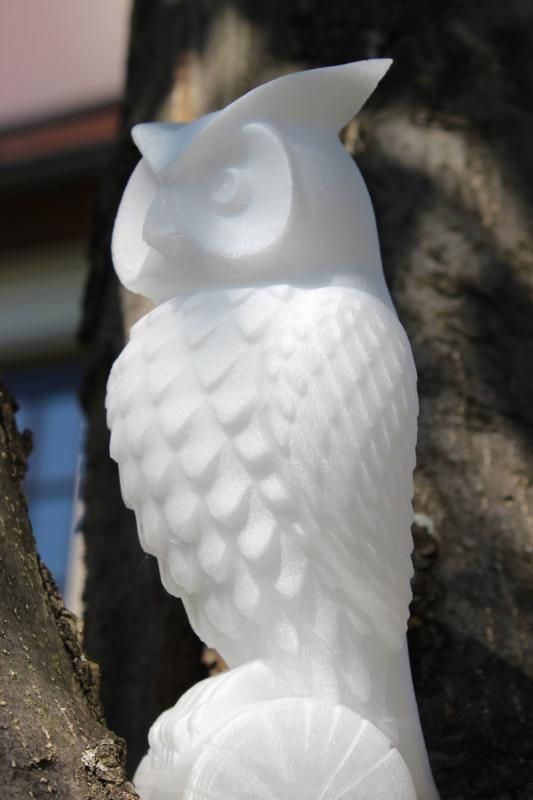
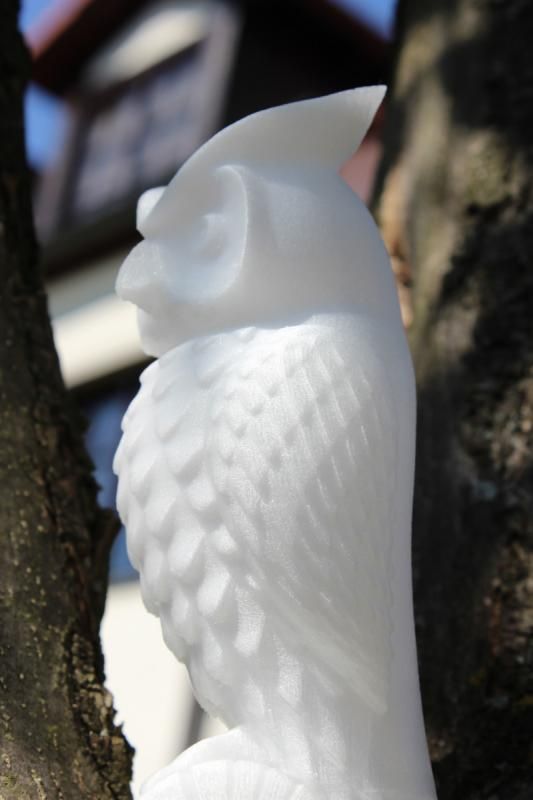
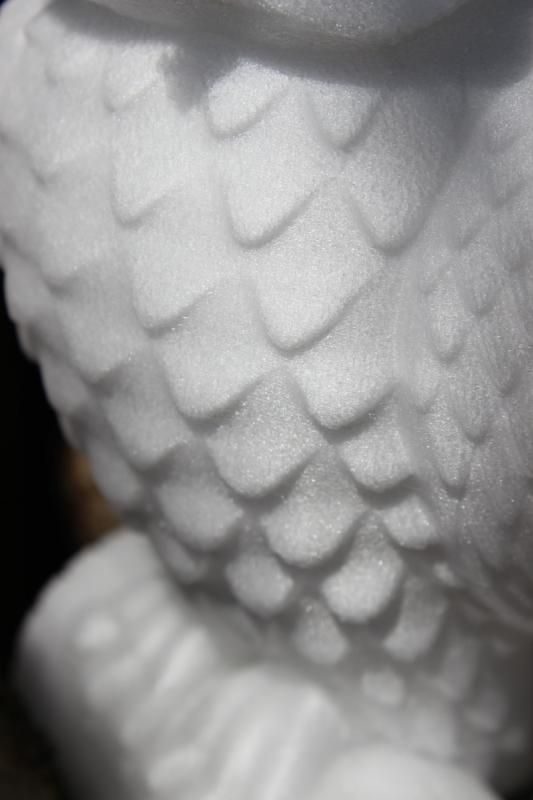
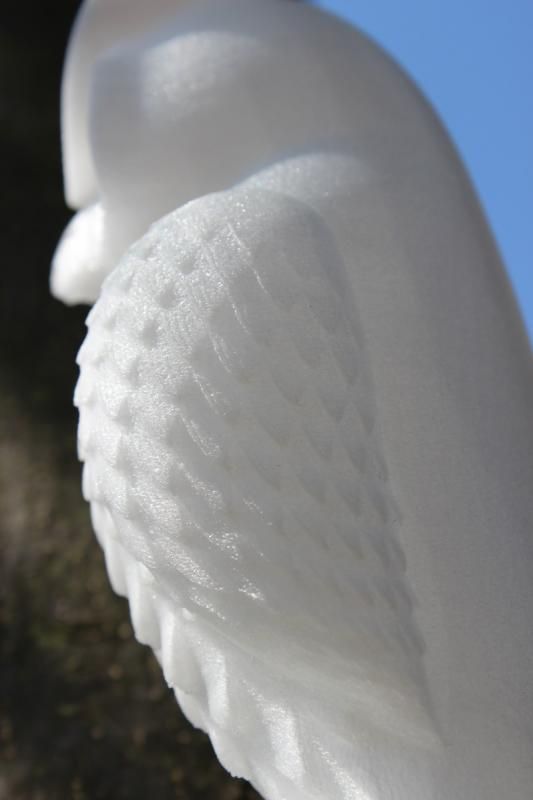
    Puppet head painted with airbrush and acrylics.The paint and sculpting are for the stage, i.e. I need to watch where shadows and highlights will be. In plain daylight this looks a little bland but takes on a life of its own under stage lighting conditions.


    Prison ward


    The Acrylic paint does not stick well to the plastic although the head has been painted with a primer.


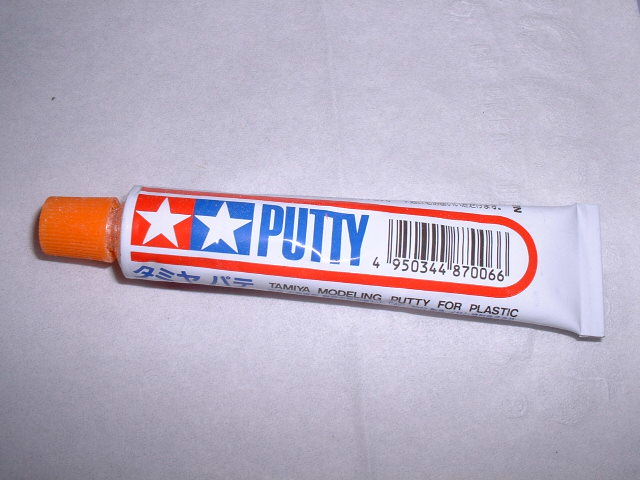
    What kind of solvent based paint could one use here on PLA without dissolving the material? I need something that "bites" slightly into the plastic to make the paint bond better to the surface.

    The head was cut in half in netfabb and then printed on two different machines.


  • Link to post
    Share on other sites

    Posted · Post your latest print!

    The acrylic paint does not stick to the plastic too well. If anyone has experience with some kind of solvent based paint on PLA let me know!


    I have very little experience painting PLA but "automobile primer" works very well as a primer. I assume you can use any type of paint you want on top of the primer.


  • Link to post
    Share on other sites

    Posted · Post your latest print!

    I have continued to experiment today.

    Without a primer on the pla you can scratch the acrylic paint off the surface with a fingernail.

    With the primer it gets slightly better.

    I have tried thinning acrylics with a tiny amount of white spirit instead of water. This might work but it takes a long time for the paint to finally harden. So I can't say yet if it is a fix to the problem.

    In this week I will also try oil paints just to see what that will do. It might be necessary to go back to some more classic techniques. Luckily we have a warm and dry weather spell so I can do these tests outdoors.

  • Link to post
    Share on other sites

    Posted · Post your latest print!

    Taking up the subject you had before, I use ProBooleans in Max all the time because I love that you can go back and change parameters or move elements after the boolean has executed. I have fewer crashes since I have adopted the strategy to finely subdivide the elements of the boolean. If you subtract a cylinder form a cube to make a hole in it there might be a crash if the cylinder has 12 sides, if I go to 60 sides it works better.

    A really great program for booleans is RHINO. It uses nurbs curves and therefore does all kinds of booleans much better than a polygon based modeller. Nice chamfers and bevels with varying radiuses are also simple to do. RHINO only makes a polygon model after construction is finished and then it approximates the nurbs surfaces really well without making models that are too heavy.

  • Link to post
    Share on other sites

    Posted · Post your latest print!

    some helpful tips for Modelling !! thank you !!

    Ian :-)


  • Link to post
    Share on other sites

    Posted · Post your latest print!

    Here is a print I did recently for a friend of mine, http://artbyglee.blogspot.com/ This was printed on my ultimaker at 60 microns. I posted a smaller test version of this a while back, this finished version was printed using cura 13.06


    IMG Owl 01

    IMG Owl 02

    IMG Owl 03

    IMG Owl 04


  • Link to post
    Share on other sites

    Posted · Post your latest print!

    Here is a print I did recently for a friend of mine, http://artbyglee.blogspot.com/ This was printed on my ultimaker at 60 microns. I posted a smaller test version of this a while back, this finished version was printed using cura 13.06


    Looks as good as prints get. Well done.


  • Link to post
    Share on other sites

    Posted · Post your latest print!

    Here is a print I did recently for a friend of mine, http://artbyglee.blogspot.com/ This was printed on my ultimaker at 60 microns. I posted a smaller test version of this a while back, this finished version was printed using cura 13.06

    Wooo! Amazing quality. I thought for sure those images were digital renders. What did you do to get a finish like that? Sanding, priming and more sanding and priming?

    This is one of my latest print projects.

    9382757885_bd543d8298_z.jpg

    And massive vases on the Deltatower, about 60cm tall!

    9382758057_01031c5297_z.jpg


  • Link to post
    Share on other sites

    Posted · Post your latest print!

    The finish on the owl is awesome. Did you post process it?

    @ colorfabb I like those duotone vases especially the blue/white one. What do you do? fuse filament together before printing? Feeding the new stuff through when it runs out? I can't imagine switching colours half way without ending in catastrophe. Also, tried your company's Traffic red finally. the colours are fabulous, and smells of syrup.

    My latest, made for a friend, and the little one for myself. :p

    gallery_7531_65_143564.jpg

    Testing to see how paint works with no primer... Haven't painted stuff in years.

    gallery_7531_65_301279.jpg

    Had some cooling issues on the front surface though... But the engraving came out nice.

    gallery_7531_65_324693.jpg


  • Link to post
    Share on other sites

    Posted · Post your latest print!

    wow, GUYS!! I haven't checked this topic in a little while and ALL of these amazing prints have been made!!!

    Absolutely amazing, great stuff!!!

    I have to ask, @Valcrow, is that hammer up for sharing?

    @Capn, great looking Owl. I really love the style of the modeler, went to the blogpost as well!

    The print quality is superb!

    Is that faberdasherry's stone-grey-colored PLA?

    Are you going to print more of his stuff?

    I love character design!!


  • Link to post
    Share on other sites

    Posted · Post your latest print!

    I have to ask, @Valcrow, is that hammer up for sharing?


    Yeah, I'll probably put them up after I do some cleanup. Not really sure why but I over-complicated the insides a lot just so I wouldn't have to use epoxy at all for the large one. (I know right? why does a hammer need to be so complex...)

    Forgot to mention it's based on this.. for those that don't know.. I just assume everyone knows. :p

    avengers-thor-chris-hemsworth1.jpg


  • Link to post
    Share on other sites

    Posted · Post your latest print!

    Duhhhhhh ;)

    and thanks, looking forward seeing the design. Huge Marvel-fan right here!:)

  • Link to post
    Share on other sites

    Posted · Post your latest print!

    WIP... This is a character from a movie I worked on. Once put together, the model will stand about 30cm tall. On this photo, the jacket just came out of the printer, still need cleaning. I'm very happy with the way this is coming along. The shoes, glasses and the head were printed at 0.06mm, you can't tell the difference on this photo but it's really there, big improvement on the smooth parts. I might even reprint the jacket at this resolution. It was printed with Colorfabb's "intense green". It does not look very intense on the photo but it's a lot brighter for real


    Did you finish this model? Perhaps i missed it, but i never saw it put together :)

    Looking forward to see the final results :)


  • Link to post
    Share on other sites

    Posted · Post your latest print!
    Did you finish this model? Perhaps i missed it, but i never saw it put together :)

    Looking forward to see the final results :)


    ho yes, I finished it over a month ago, I posted the photos in a separate thread. I guess I should have posted it here


    Here they are


    IMG 20130621 233009

    IMG 20130621 233024

    IMG 20130621 233153

    IMG 20130621 233208

    IMG 20130621 233220

    IMG 20130621 233241

    One of the question I got the most was "how did you get it to stick to the mirror", I used epoxy glue, that's what I use to glue print parts together too. It's slower that superglue but more flexible, it won't snap as easily


    And I'm almost done with my pyro. All the parts are printed, I'm sanding it slowly, I hope to finish it thing week end. It's huge, over a foot tall

  • Link to post
    Share on other sites

    Posted · Post your latest print!

    a.ma.zing!


  • Link to post
    Share on other sites

    Posted · Post your latest print!

    WIP. I wanted to finish it before going on holiday, but I won't have time. The missing parts are already printed and being sanded, almost done. It's still missing the air tank on his back, and three smoke grenades on his chest and I think that's it. the axe is supposed to be wrapped in barbwire. I could not print that of course, so I'm going to try to make it with electric wire.

    Yes it's big, I'm not 12 years old or have midget hands. I have to hold it because it does not stay up. Kinda saw it coming. The feet are flat and everything but the center of gravity is high and forward (especially because the torso has a higher infill rate than the legs). I'm going to have to make a base to glue it on.

    That thing was a bitch to print. The whole thing was done over three months, working only during weekends and when I felt like it. But the actual printing took about a week put together, but spread over a month. Then I probably waited another couple of weeks before I started sanding it, because you know, it's not that fun. The longest part was actually the prepping of the 3d model. It was sliced in Cura, when I was beta-testing the new version. I learned a lot during this project, I made many mistakes, I learned what my print could and could not do. If I had to do it again, it would probably look better and take only half the time

    1003374_10151762994308605_666421021_n.jpg

    1157648_10151762994313605_2126575260_n.jpg

    1170766_10151762994318605_1823615429_n.jpg


  • Link to post
    Share on other sites

    Posted · Post your latest print!

    That looks awesome! the finish looks great! is that just sanding?

    Can't wait to see it fully painted.


  • Link to post
    Share on other sites

    Posted · Post your latest print!

    the finish looks great! is that just sanding?


    I have a secret weapon:

    putty10.jpg

    It's Tamiya's putty. I remembered my father used this when he was making model kits so I gave it a try and it's perfect! First I sand the model with rough sand paper to get rid of blobs and smoothen the surface a bit, but not to much because I don't want to sand details off. Then I apply the putty in holes, print lines, support marks... Let it dry for bit. Then I send again with a thinner paper until most of the putty is gone and it feels smooth to touch. Then a coat of gray primer.It will make last imperfections visible if there are any. Repeat the putty process if necessary.

    In fact, I ended up covering some parts completely in putty and sanding them to get a very smooth surface. But be careful not cover details that are meant to be visible with putty

    It costs about 5 euros for a small tube, could not find any bigger size. I found some much cheaper on ebay from china, I might order several because it runs out fast.


  • Link to post
    Share on other sites

    Posted · Post your latest print!

    Amazing, i can't believe how cool that looks!!!

    How tall is it, 30cm?

    Can't wait for the paintjob either... I assume you are gonna paint it?

    Did you use that putty on a lot of spots to make it more smooth, or only on imperfections?

    How does it feel, structure-wise, compared to the print?


  • Link to post
    Share on other sites

    Posted · Post your latest print!

    I have not measured it yet but it's taller than 30 cm, because I brought it at work today where I have this baby and my pyro is about 5cm taller.

    Yes I'm going to paint it when I come back from vacation in two weeks.

    In fact you are right, at first I only covered holes with putty but I was so happy with the result that in the end I applied it everywhere on smooth surface like the gloves or the boots. Just a thin layer, just enough to fill the print lines. Works really well. Once sanded and painted, you can't see it

    I'm sure there are other similar products that are cheaper and that can be bought in bigger quantities, I'll have to look it up


  • Link to post
    Share on other sites

    Posted · Post your latest print!

    I have a secret weapon:

    It's Tamiya's putty. I remembered my father used this when he was making model kits so I gave it a try and it's perfect! First I sand the model with rough sand paper to get rid of blobs and smoothen the surface a bit, but not to much because I don't want to sand details off. Then I apply the putty it holes, print lines, support marks... Let it dry for bit. Then I send again with a thinner paper until most of the putty is gone and it feels smooth to touch. Then a coat of gray primer.It will make last imperfections visible if there are any. Repeat the putty process if necessary.

    In fact, I ended up covering some parts completely in putty and sanding them to get a very smooth surface. But be careful not cover details that are meant to be visible with putty

    It costs about 5 euros for a small tube, could not find any bigger size. I found some much cheaper on ebay from china, I might order several because it runs out fast.


    Great tips! Thanks for sharing! I must try that. everyone's complaining that my atlas needs filing/sanding/putty/acetone. Though I find it hard to commit to since it's got so much little details and such that might get lost from sanding... In your experience, do you think putty/sanding would work for something like this without killing the sharp edges/details? (the head is roughly 1.75 cm across.)

    I just kinda went ahead and painted it with imperfections and all. I kinda like the rawness of it, but model people freak out at that kinda thing.

    gallery_7531_65_536201.jpg


  • Link to post
    Share on other sites

    Posted · Post your latest print!

    I think this one would be hard. Because once you have applied putty on some areas, you have to be able to sand it off, meaning those areas must be easily accessible. Plus, indeed, if you get some putty in those panel lines, you tell them good bye, unless you scrape it later with a blade


  • Link to post
    Share on other sites

    Posted · Post your latest print!

    here is my first print with XT.

    the colour is very milky and not transparent.... printed at 90 wtih temp 230...

    but the quality is fantastic. printed at 0.06 layer and you just cant see the layer lines anymore...

    also another verys nice thing about this new XT is, it gives a crystal white appearence.. this would look amazing for prototypes............. :smile:

    owl1.jpg

    owl2.jpg

    owl3.jpg

    owl4.jpg


  • Link to post
    Share on other sites

    Create an account or sign in to comment

    You need to be a member in order to leave a comment

    Create an account

    Sign up for a new account in our community. It's easy!

    Register a new account

    Sign in

    Already have an account? Sign in here.

    Sign In Now

    • Our picks

      • UltiMaker Cura 5.7 stable released
        Cura 5.7 is here and it brings a handy new workflow improvement when using Thingiverse and Cura together, as well as additional capabilities for Method series printers, and a powerful way of sharing print settings using new printer-agnostic project files! Read on to find out about all of these improvements and more. 
         
          • Like
        • 18 replies
      • S-Line Firmware 8.3.0 was released Nov. 20th on the "Latest" firmware branch.
        (Sorry, was out of office when this released)

        This update is for...
        All UltiMaker S series  
        New features
         
        Temperature status. During print preparation, the temperatures of the print cores and build plate will be shown on the display. This gives a better indication of the progress and remaining wait time. Save log files in paused state. It is now possible to save the printer's log files to USB if the currently active print job is paused. Previously, the Dump logs to USB option was only enabled if the printer was in idle state. Confirm print removal via Digital Factory. If the printer is connected to the Digital Factory, it is now possible to confirm the removal of a previous print job via the Digital Factory interface. This is useful in situations where the build plate is clear, but the operator forgot to select Confirm removal on the printer’s display. Visit this page for more information about this feature.
          • Like
        • 0 replies
    ×
    ×
    • Create New...