Jump to content

Post your latest print!


IRobertI

Recommended Posts

Posted · Post your latest print!

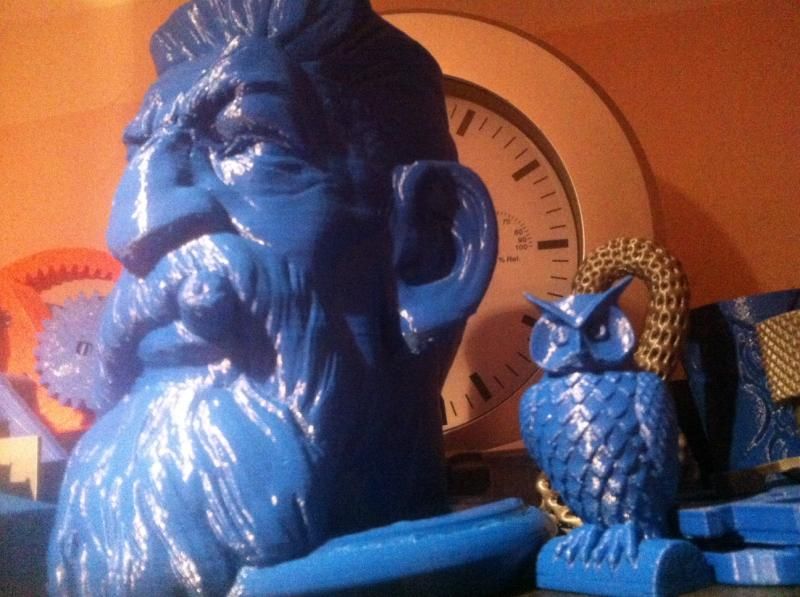
It will be glued together, not supposed to move. And then I am going to use a small round mirror as a stand. This is a gift for friend. We used to work together on that project, we modeled many characters and I thought it would be a great birthday present if I printed one of the characters he made. This is my first try at printing a full character I'm really happy with the way it came out. I will probably print more. Next one is a dog :)


  • Link to post
    Share on other sites

    Posted · Post your latest print!

    figure

    This was a pretty challenging print. Lots of overhang and very little structural support. She was moving around quite a bit as the Z height increased so I had to slow the print WAY down and use a second fan to cool the layers. Sliced at 0.08mm layer height using Cura 13.06 beta.Total print time was 3:45 and max Z height of 101mm


  • Link to post
    Share on other sites

    Posted · Post your latest print!

    sml_gallery_1494_102_795466.jpg

    Hi All,

    This is a static display model of a Bristol Mercury radial aircraft engine. The model is approximately 28cm in diameter and is built from 427 separate components joined together with No2 self tapping screws.

    A second one is underway and will be the dummy engine for a radio controlled electric powered 22.5% scale model of the Gloster Gladiator bi-plane.

    3D modelled in Autocad and produced on an Ultimaker in PLA - thanks to I Robert I and Daid (way back in November 2012) for producing a sample part before I took the plunge.

    There are a few more photos in the gallery:

    http://umforum.ultimaker.com/index.php?/gallery/album/102-model-aero-engine/

    Regards, Pete (UK).


  • Link to post
    Share on other sites

    Posted · Post your latest print!

    That's an amazing model and cool to see what the whole thing was supposed to be. (now where's my check Ultimaker :p )

  • Link to post
    Share on other sites

    Posted · Post your latest print!

    That engine is super impressive. How large is that thing? and how many pieces?


  • Link to post
    Share on other sites

    Posted · Post your latest print!

    That's awesome. Best print I've seen here. I would be needing to take a rest after all that CAD work :shock:


  • Link to post
    Share on other sites

    Posted · Post your latest print!

    That model is absolutely amazing and another great example of what is possible on an Ultimaker.


  • Link to post
    Share on other sites

    Posted · Post your latest print!

    My pyro is progressing slowly...

    1013886_10151657681663605_1776791242_n.jpg


  • Link to post
    Share on other sites

    Posted · Post your latest print!

    Nice! Team fortress right?

    Is he also going to have his flame thrower or hatchet?

    Very nice details and smooth surface.


  • Link to post
    Share on other sites

    Posted · Post your latest print!

    For me, modelling that engine in AutoCAD is probably just as impressive as the print itself.....

    I would be interested to know how you got the cooling fins to print without spending 1 week removing

    support in between them...or are the cylinders split vertically and glued in two halves ?

    C.


  • Link to post
    Share on other sites

    Posted · Post your latest print!

    simply incredible :-)

    congradulations !!! what more can i say... speechless.... :-)

    Ian


    sml_gallery_1494_102_795466.jpg

    Hi All,

    This is a static display model of a Bristol Mercury radial aircraft engine. The model is approximately 28cm in diameter and is built from 427 separate components joined together with No2 self tapping screws.

    A second one is underway and will be the dummy engine for a radio controlled electric powered 22.5% scale model of the Gloster Gladiator bi-plane.

    3D modelled in Autocad and produced on an Ultimaker in PLA - thanks to I Robert I and Daid (way back in November 2012) for producing a sample part before I took the plunge.

    There are a few more photos in the gallery:

    http://umforum.ultimaker.com/index.php?/gallery/album/102-model-aero-engine/

    Regards, Pete (UK).


  • Link to post
    Share on other sites

    Posted · Post your latest print!

    Hi Snowy,

    Originally designed, the cylinders and their fins were to be printed in quarter segments and glued together but it soon became apparent that due to warping and lack of an effective adhesive this would be difficult, so I re-designed the cylinder assembly as per the drawing. Warping remains a problem but, with help off the forum (and metres of wasted PLA!), I have learnt how to minimise its effect.


    Yes, the CAD work has been at least half of the total effort. All of the components though are basic solids added or subtracted from each other, so nothing too challenging (luckily!) for the Autocad 2007 I am using.


    Many thanks for the nice comments from all the forum members. The Ultimaker is proving to be excellent for my model making and I am finding more and more uses for it.


    Regards,


    Pete.


    gallery_1494_102_32458.jpg


  • Link to post
    Share on other sites

    Posted · Post your latest print!

    I did some architectural prints (more with more explanations here):

    20130624_010.jpg

    img_0788.jpg

    and here is a small playmobil motorcycle tyre. My son chose the color, in white it is definitely more beautiful, and at least now the motorcycle can ride and my son is happy

    20130615_001.jpg

    20130615_004.jpg


  • Link to post
    Share on other sites

    Posted · Post your latest print!

    best dad ever


  • Link to post
    Share on other sites

    Posted · Post your latest print!

    Man, the world kids are growing up in these days... and they don't even know how unthinkable something like this was just a few years ago.


  • Link to post
    Share on other sites

    Posted · Post your latest print!

    Good morning guys.

    So I took a lot of tips I got from Harma in Erfurt and tweaked cleaned and did some magic on my home ultimaker.

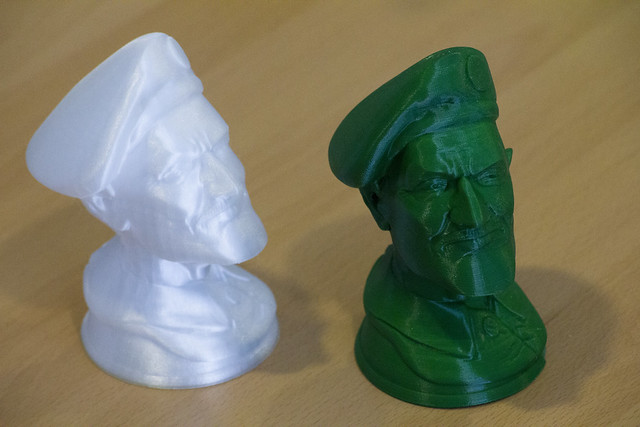
    I also reprinted yesterday this guy. sadly stolen in Erfurt on the ultimaker table but it just gave me a chance to print this guy....EVEN BIGGER and with my rods oiled.... and CLEANED HARMA! :wink: . it came out really nice....

    Ian :smile:

    ps. i printed the owl as a test piece after all my changes to my ultimaker and about 10 seconds after it was finished and showed it to my girlfriend... PUFFFFFF... gone..... that women has serious sticky fingers for ultimaker modelsss.... :wink: lol

    Ian :smile:

    photo1-1.jpg


    You said, rods were oiled. Pls advise what kind of oil did you use?


  • Link to post
    Share on other sites

    Posted · Post your latest print!

    Sewing machine oil is recommendable :)


  • Link to post
    Share on other sites

    Posted · Post your latest print!

    sewing maschine oil, buy it on ebay for 3 euros and you get months out of it...

    i love the smell of it... my girlfriend wont touch me... with the stuff... LOL


    You said, rods were oiled. Pls advise what kind of oil did you use?


  • Link to post
    Share on other sites

    Posted · Post your latest print!

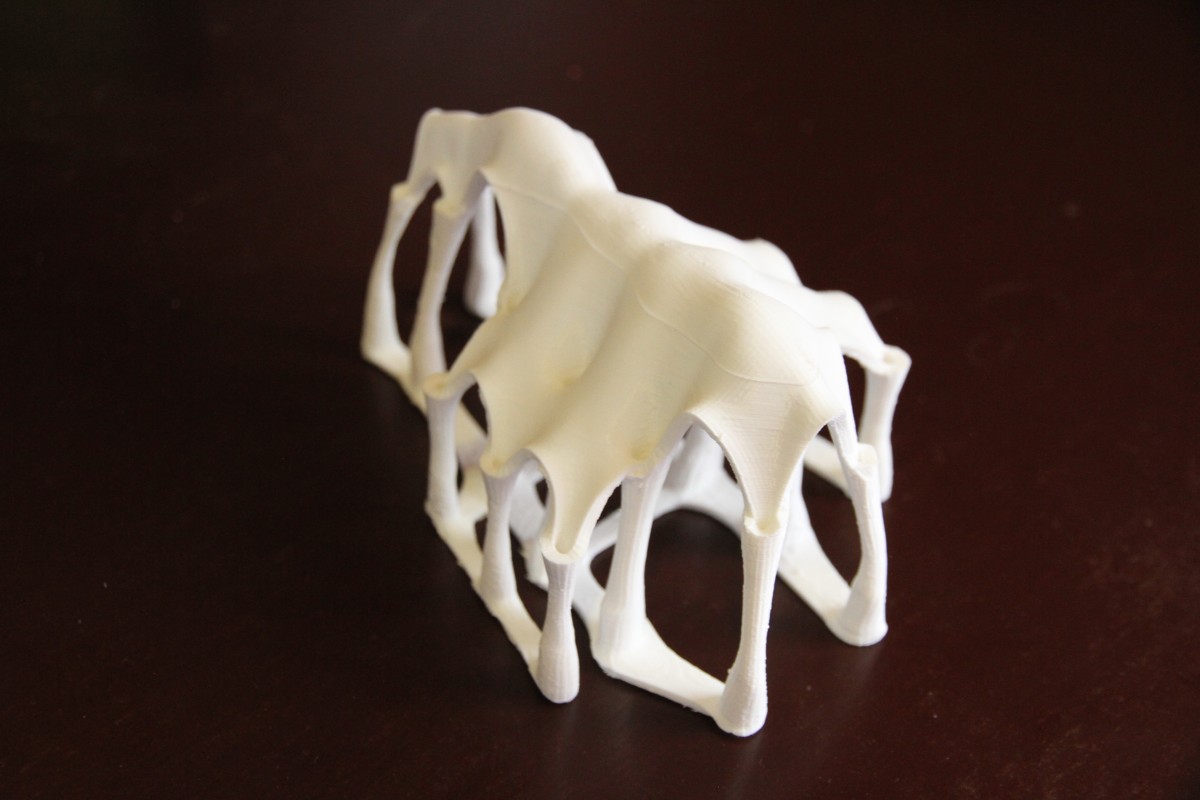
    Here is my latest print: The shape is calculated by softbody simulation in Blender, the printed almost flawlessly (I unplugged the USB cable after 10h of printing... :eek: but could get it back thanks to the help here). More pictures there

    img_0938.jpg


  • Link to post
    Share on other sites

    Posted · Post your latest print!

    thats just modern architecture porn.... love it !

    Ian :-)


  • Link to post
    Share on other sites

    Posted · Post your latest print!

    Printed on an Ultimaker with the bronze PLA from the Ultimaker shop.

    It needed alot of sanding, drilling and gluing, but I managed to get it moving with an arduino controller. Now only to develop some programming skills :-|


    Hand


  • Link to post
    Share on other sites

    Posted · Post your latest print!

    very nice Bob!! Impressive.

    Do you also have a video while the hand is moving?

    What did you use as a connection between all the joints, printed parts or something else?


  • Link to post
    Share on other sites

    Posted · Post your latest print!

    9157337175_10200b03bb_z.jpg

    New model from Ola Sundberg... Yaaay!

    http://www.thingiverse.com/thing:108867


  • Link to post
    Share on other sites

    Create an account or sign in to comment

    You need to be a member in order to leave a comment

    Create an account

    Sign up for a new account in our community. It's easy!

    Register a new account

    Sign in

    Already have an account? Sign in here.

    Sign In Now

    • Our picks

      • UltiMaker Cura 5.7 stable released
        Cura 5.7 is here and it brings a handy new workflow improvement when using Thingiverse and Cura together, as well as additional capabilities for Method series printers, and a powerful way of sharing print settings using new printer-agnostic project files! Read on to find out about all of these improvements and more. 
         
          • Like
        • 18 replies
      • S-Line Firmware 8.3.0 was released Nov. 20th on the "Latest" firmware branch.
        (Sorry, was out of office when this released)

        This update is for...
        All UltiMaker S series  
        New features
         
        Temperature status. During print preparation, the temperatures of the print cores and build plate will be shown on the display. This gives a better indication of the progress and remaining wait time. Save log files in paused state. It is now possible to save the printer's log files to USB if the currently active print job is paused. Previously, the Dump logs to USB option was only enabled if the printer was in idle state. Confirm print removal via Digital Factory. If the printer is connected to the Digital Factory, it is now possible to confirm the removal of a previous print job via the Digital Factory interface. This is useful in situations where the build plate is clear, but the operator forgot to select Confirm removal on the printer’s display. Visit this page for more information about this feature.
          • Like
        • 0 replies
    ×
    ×
    • Create New...