

One might think so yes.. but unfortunately no.
It has been sliced. But all of our printers are occupied at the moment -.-'
I am having a go at this one now: http://www.thingiverse.com/thing:19881

One might think so yes.. but unfortunately no.
It has been sliced. But all of our printers are occupied at the moment -.-'
I am having a go at this one now: http://www.thingiverse.com/thing:19881
The low-poly version of my softbody cathedral, printed at 0.1mm height, 40mm/s, 14hours. A lot of retractation blobs on the pillars, I'll try to improve that later:
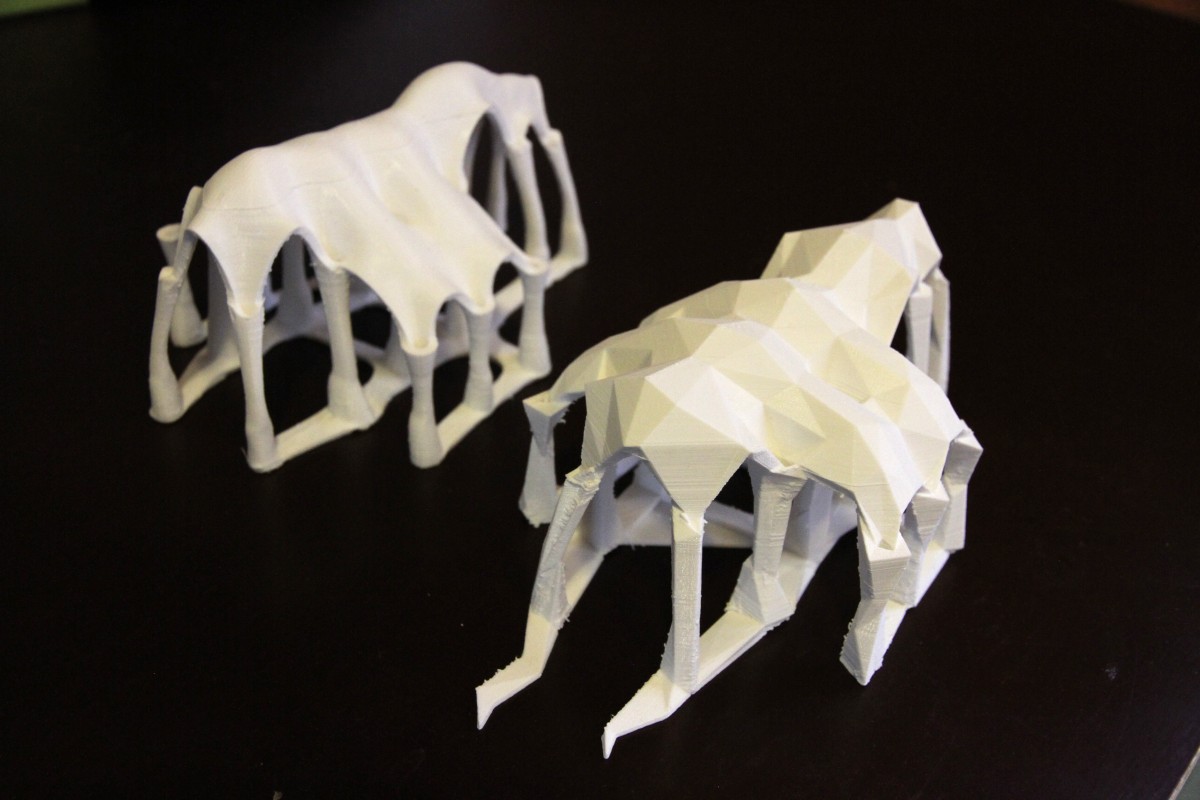
The low-poly version of my softbody cathedral, printed at 0.1mm height, 40mm/s, 14hours. A lot of retractation blobs on the pillars, I'll try to improve that later:
Nice model! Is it possible to keep the pillars as high-poly? and just do the 'canvas' as low-poly? Might look nice too!
Everything is possible with Blender and an Ultimaker :-P
I just have to change the model in Blender. But I would like to try the low poly pilars without retractation problems as I like them in the 3D model.
Hey folks,
Just finished printing and putting together a magnified loupe for a video rig. It uses a pretty high quality 72mm lens and custom fit and mounted for the plate and 5d2 since it connects to the viewfinder for added strength.
Attached to Rig

my Beagle. in focus. 

Custom branding! (a little sloppy but works)

Detached from rig

The finish could be a bit cleaner, but not too concerned for how big the object is. And I didn't want to wait forever for the print. My new fan shround seems to be too direct, and makes the support material show through sometimes.
Nice product and print. I don't think your fan would be that strong. Plus that pattern on the side wouldn't be the fill I don't think. It would be worth showing to Daid if that is Cura to see what he thinks.
The reason why i think it's the fan is because it only happens to one side of the print. The other side is nice and smooth... The side where my fan is.

I see.
beautiful use of your ultimaker 3d printer.... wow :-)
Hey folks,
Just finished printing and putting together a magnified loupe for a video rig. It uses a pretty high quality 72mm lens and custom fit and mounted for the plate and 5d2 since it connects to the viewfinder for added strength.
Attached to Rig
my Beagle. in focus.
Custom branding! (a little sloppy but works)
Detached from rig
The finish could be a bit cleaner, but not too concerned for how big the object is. And I didn't want to wait forever for the print. My new fan shround seems to be too direct, and makes the support material show through sometimes.
I made a small video of it moving :
The joints are made from plain 3mm filament and I melted the tips so they wont slide out of the holes.
very nice Bob!! Impressive.
Do you also have a video while the hand is moving?
What did you use as a connection between all the joints, printed parts or something else?
Your video rig extension is simply awesome! I already thought about printing my own rig but haven't found the time yet. There are already a few video rig systems on Thingiverse to download. Of course not so stiff and rigid as metal ones, but for the first tests - why not! Isn't that cool! Some time ago you had to buy that expensive stuff. Now you can make it at home in a few ours for a fraction of the costs. You just download a file and print it out. 3d printing is just amazing. 
That robot hand is amazing... Please warn us fellow ultimakers before activating skynet.
The video rig itself isn't printed in this case. Most are commercial parts. There seems to be a bunch of DSLR rigs on thingieverse, but not too many loupes. The loupe is based functionally on this:
http://www.cinevate.com/store2/cyclops-viewfinder.html#sthash.qnCSsaSL.uRuYlYBy.dpbs
Uses the same lens, but custom in all other respects. Really amazing what you can do. The accuracy is of the printer superb, the holes are so fine in accuracy that the screws thread without the need for a nut (which is why there's only 2 in the picture not even inserted all the way. The viewfinder is attached by a floating rail 1mm thick. The whole thing basically holds itself together on the lens with friction, and there is zero play. Really solid. A couple of days design, a quick print test, and a day of print and we're off to the races.
part of a building kit i printed last night for a friend of mine..
i totally rebuilt the model into perfect water tight print model parts...thinking of sharing the files.. makes for an interesting print... :-)
Ian
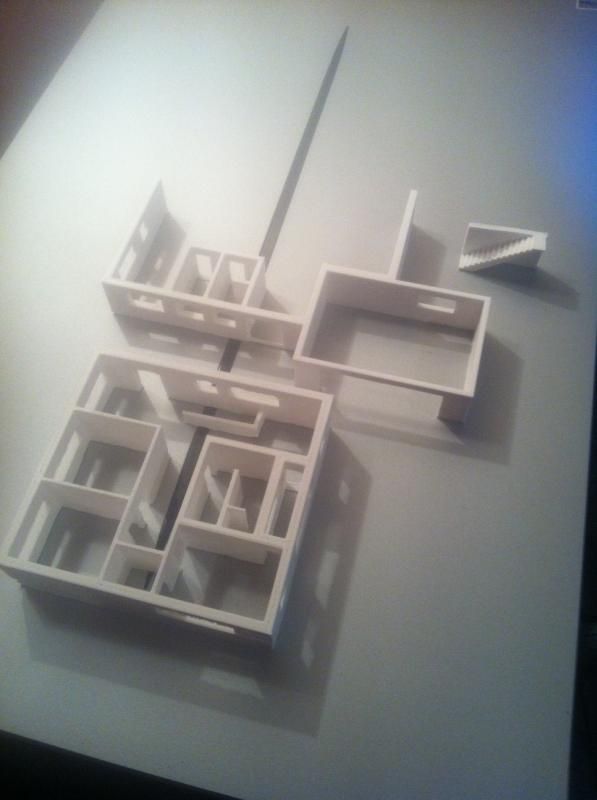
looks very nice. Did you lay down the walls flat on the bed or did you print them vertically like that? if so, then how did you get the windows holes that nice? did you use any support or you are able to print nice long bridges without problem?
Very cool print. Looks clean and nice. I'd be happy if you share the STL.
I thought I might need a rape whistle... Who doesn't..
So I just printed this for 16 minutes.. David new cura is incredible for quality!
Ian :-)
Just finished my birdhouse entry on the thingieverse. Anyone else participating?


Unfortunately, I had nozzle issues for the Middle and Top section which made the quality a bit shoddy.. and didn't Really want to re-print. But you can see the quality difference a new nozzle makes on the base and bridge parts.
Download here if you like: http://www.thingiverse.com/thing:116297
Good thing ultimaker has a pretty big platform.
crazzzzzzyyyy cooooolllll
actually can i ask, what did you use to model this ? also did you create it using seperate parts and use Bolean command to combine all the parts together into one mesh ?
Ian :-)
Yup, modeled in 3ds Max. (3D artist background) STL checked, and booleaned together at the end. I've kinda worked out the workflow now, it's a bit convoluted but works. In addition to all the geometry in the model, you kind of have to model all the negative and additive shapes to make the thing physically work including their tolerances. Also boolean is quite painful in max.
Very nice work and very nice photos too, at first I thought it was a 3d render
Also boolean is quite painful in max.
Not nearly as bad as in Maya, really. I used to go to 3dsmax just for boolean before because it would just not work in maya. The proBoolean in 3dsmax is really not bad at all. Now I have found a decent boolean script for maya which works ok and allows me to keep it all in one program, which is much easier
i have to laugh.... i posted a rape whistle... and you posted a castle... LOLLLL
Ian ;-)
Nice model Valcrow! New print project for next week 

ArunC posted a topic in UltiMaker Cura,

.thumb.jpeg.0b7a05eafc09add17b8338efde5852e9.jpeg)
Dustin posted a topic in Firmware,


Recommended Posts
Top Posters In This Topic
362
282
221
179
Popular Days
Jan 5
30
May 12
26
Jan 13
23
May 1
22
Top Posters In This Topic
ian 362 posts
cloakfiend 282 posts
skint 221 posts
SandervG 179 posts
Popular Days
Jan 5 2014
30 posts
May 12 2014
26 posts
Jan 13 2014
23 posts
May 1 2014
22 posts
Popular Posts
kmanstudios
Took me forever to do this. And it is still rougher than I would have liked. 3D concept rendering: Finished piece:
kmanstudios
I just finished this. It was a multi-part print for ease of painting. Some of it I am not sure what happened...but hey, it is purty....And, I am unanimous in that ? Test Render Parts
gr5
Bath interferometers. I have made about 20 of these for people who use them to test their telescope mirrors. They are amazingly accurate and can do better than a $40,000 Zygo PSI optical tester. Th
Posted Images
colorfabb 3
.... printing by now? Since slicing is superfast with the new Cura!
Link to post
Share on other sites