

My turn to show you the last print made.
4 hours of work ... Wah! :grin:


I'am happy 

Zodiak! I see the filename said "zodiak". That is some kind of rubber boat! I like it.
Yes gr5
I'm glad you enjoy. For me, it was my best childhood holidays
I decided to kick it up a notch and take a go at printing one of the pair of glasses that I designed. They turned out surprisingly well, considering it printed without support. I'm also printing some molds for the custom lens for these, which will allow me to vacuum mold them out of 2mm polycarbonate for a perfect fit. this is the first prototype of 5 versions. I'm loving this printer!
Nice work! I'm curious, how did you orient it for printing?
I decided to kick it up a notch and take a go at printing one of the pair of glasses that I designed. They turned out surprisingly well, considering it printed without support. I'm also printing some molds for the custom lens for these, which will allow me to vacuum mold them out of 2mm polycarbonate for a perfect fit. this is the first prototype of 5 versions. I'm loving this printer!
Printed a bunch of knife handles that I designed to work with my favorite puukko blade:


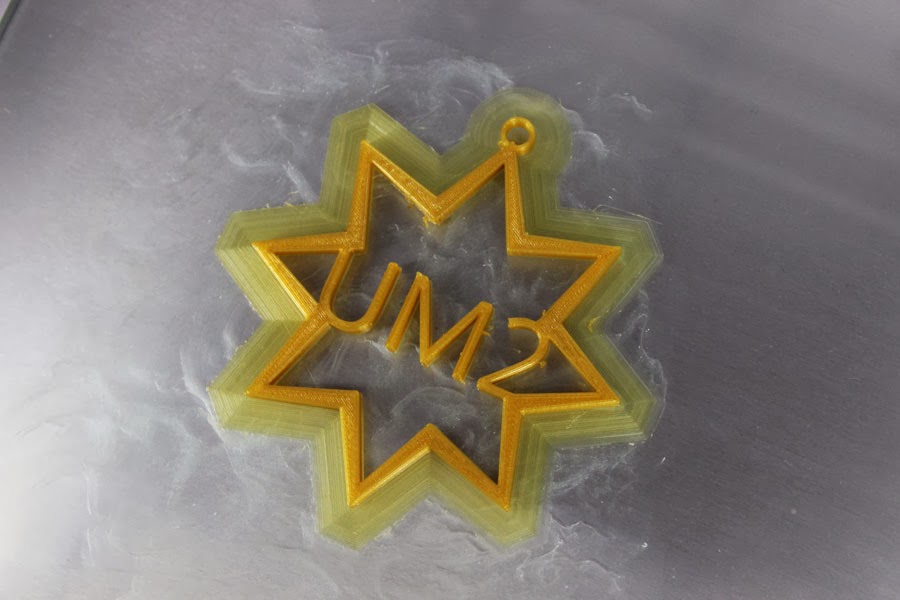
Also some ornaments I designed:

http://www.thingiverse.com/thing:157592
http://www.thingiverse.com/thing:189376
3D Printed Christmas presents for all!
Nice work! I'm curious, how did you orient it for printing?
Here is a pic of the finished print. I literally hit print, adjusted a few settings on the printer during the bottom layers, then went to bed. Woke up in the morning to find this sitting on the buildplate. No Support inside the lens as you can see.
I did clean it up with a dremel and some wet sanding.
how clean was the surface after you removed the support? I'm finding the surface where the supports were are usually pretty awful, but your look pretty good.
Here is a pic of the finished print. I literally hit print, adjusted a few settings on the printer during the bottom layers, then went to bed. Woke up in the morning to find this sitting on the buildplate. No Support inside the lens as you can see.
I did clean it up with a dremel and some wet sanding.
The print came out amazing with very little cleanup from the support, except where the nose piece is. That required needle nose pliers to remove support and heavy Dremel sanding. The arms came out with a minor spur to sand out every 5-8 mm or so.
Awesome! Now it's just a wait till someone prints out a full ironman suit.
The official maker did it though
https://www.dropbox.com/s/jmlfoxoabn5793g/DSC09947.JPG
https://www.dropbox.com/s/3u0um5m2eo9hdyn/DSC09948.JPG
Not my design, but an awesome print nonetheless:
https://www.dropbox.com/s/5lhjrtbejxq593e/2013-12-23%2020.27.11.jpg
https://www.dropbox.com/s/7hckd30duh87h0k/2013-12-24%2018.54.10.jpg
https://www.dropbox.com/s/qq5h5ekwjgknqti/2013-12-24%2018.54.27.jpg
https://www.dropbox.com/s/nlqk1x2tq0p6kq5/2013-12-24%2018.54.41.jpg
Hope the pictures come through, they are from my dropbox.
( Edit: pictures didn't came through. Is there any way i can show the pictures directly from dropbox instead of linking to dropbox?
I did about 3 hours to remove the support and remove almost all of the retraction caused stuff.
Tank print after this one failed horribly though. Meshmixer didn't do it for the 70mb file someone wanted me printed :(
Now printing another tank:
http://www.thingiverse.com/thing:178292/#files
Cheers,
Lennart
Hi guys, here's some work in progress photos, and the final result. I cast the eye lenses in clear resin.


Amazing work!
How did you finish/paint the thing? The finish looks fantastic!
That's a fantastic paint job! I would like to know how you did the finish as well.
Hi,
These were some very nice 3D printing holydays, not only did I print all of my Christmas tree decorations, I also printed some very nice candle stands for Christmas diner
Groet Dree


Aside from the basic robot and Coffins cube on the supplied sd, this is my first attempt at my own print. I scanned the large red dragon toy with a Sense scanner, and loaded the result into Cura with no further adjustments. I think the result was surprisingly good - but the trickiest bit was trimming away the supporting plastic!


Hey guys, I painted the Iron Giant using an Iron based paint, which you can rust using home made concoctions such as vinegar and bleach. I also used a dark brown oil wash, thinned with white spirits and wiped off the access. Finally, I use a product called "rub 'n buff" along the edged and high points to make it look like exposed metal.
Hi Guys!
My turn!
My last Print is...
https://www.dropbox.com/s/gx86uscxmgz14mm/2013-12-28%2022.35.12.jpg'>https://www.dropbox.com/s/gx86uscxmgz14mm/2013-12-28%2022.35.12.jpg'>https://www.dropbox.com/s/gx86uscxmgz14mm/2013-12-28%2022.35.12.jpg'>https://www.dropbox.com/s/gx86uscxmgz14mm/2013-12-28%2022.35.12.jpg
https://www.dropbox.com/s/gx86uscxmgz14mm/2013-12-28%2022.35.12.jpg
https://www.dropbox.com/s/pid8y79rydvxnhw/2013-12-28%2022.35.37.jpg
..Awesome!
The mesh was made with a scanner at a fair in Veldhoven. I had to spend some time making it better, but the result is superb!
(not forget to mention the help from the guys at this forum to tweak the printer, it can be improved, but i really like it already;) )
Cheers,
Lennart
Hey guys, I painted the Iron Giant using an Iron based paint, which you can rust using home made concoctions such as vinegar and bleach. I also used a dark brown oil wash, thinned with white spirits and wiped off the access. Finally, I use a product called "rub 'n buff" along the edged and high points to make it look like exposed metal.
This is very nice info! Thanks for sharing!
Made a simple portable iPad stand, usable with a 8mm rod or a pencil.
printed with a silver PLA, that gives darker and lighter bands during printing, I don't know why, but it looks great
0.2mm height and 25% infill
and my first posting on YouImagine
https://www.youmagine.com/designs/ipad-stand


just opened my new ultimaker 2 tonight and did my first test print YIPPPPEEE
came out really great... stuck to the hot bed like glue... print qualty was super and I was able to print at 150 speed and get my first print off in 22 minutes... very coool... :smile:
Nice start ultimaker 2 !! :wink:
Ian :smile:
here is the model file if anyone wants it :-)
https://www.youmagine.com/designs/ultimaker-2-bling-bling
It looks like it is a 'late' ornament for your Christmas tree, but I wonder how you are going to keep the 'M' in place 
I finally got around to testing the Meshmixer support. I went with the Voronoi D Tower by Dizingof. And after 50253 retractions, 2.1 million lines of Gcode and 10+ hours of print time here's the result.


I have to say I really like this type of support for this type of print. It breaks away MUCH easier than traditional support and doesn't leave much behind. Of course the busy model helps hide the imperfections. The print could've been cleaner if I printed slower and with thinner layers. This was 0.15mm layers @ 50mm/s.

MariMakes posted a topic in UltiMaker Cura,


ArunC posted a topic in UltiMaker 3D printers,


Recommended Posts
Top Posters In This Topic
362
282
221
179
Popular Days
Jan 5
30
May 12
26
Jan 13
23
May 1
22
Top Posters In This Topic
ian 362 posts
cloakfiend 282 posts
skint 221 posts
SandervG 179 posts
Popular Days
Jan 5 2014
30 posts
May 12 2014
26 posts
Jan 13 2014
23 posts
May 1 2014
22 posts
Popular Posts
kmanstudios
Took me forever to do this. And it is still rougher than I would have liked. 3D concept rendering: Finished piece:
kmanstudios
I just finished this. It was a multi-part print for ease of painting. Some of it I am not sure what happened...but hey, it is purty....And, I am unanimous in that ? Test Render Parts
gr5
Bath interferometers. I have made about 20 of these for people who use them to test their telescope mirrors. They are amazingly accurate and can do better than a $40,000 Zygo PSI optical tester. Th
Posted Images
IRobertI 521
Love it. Clean, and minimalistic, just my style.
Link to post
Share on other sites